1
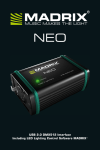
MADRIX® NEO – Quick Start Guide & User Manual 4th Edition, Last Update: March 2011 Thank You for Purchasing MADRIX® NEO Please read this manual carefully and thoroughly before using the MADRIX® NEO. Make sure that you fully understand all information. This MADRIX® NEO quick start guide is available in English. The MADRIX® software and its user manuals are also available in English. Made in Germany Imprint inoage GmbH Fetscherplatz 5 01307 Dresden Germany Managing Directors: Christian Hertel, Sebastian Pinzer, Sebastian Wissmann HR B 29795 http://www.madrix.com [email protected] Phone Fax +49 351 482 056 30 +49 351 482 056 31 Copyright Information And Disclaimer © 2011 inoage GmbH. All Rights Reserved. Information in this manual is subject to change at any time and without prior notice. Reproduction, adaptation, or translation without prior written permission is prohibited. inoage GmbH does not grant guarantee on validity for a particular reason, the marketability, or other properties of the product. There is no way to assert a claim to inoage GmbH, neither in the legal way nor in other ways. inoage GmbH is not responsible for damages, including all disadvantages that are not just limited to the loss of sales, but that are caused due to the use of the product, due to the loss of serviceability of the product, due to misuse, happenings, circumstances, or actions that inoage GmbH does not have influence on, no matter if the damages as well as consequential damages are direct or indirect; whether they are special damages or others, nor if the damage is caused by the owner of the guarantee or third persons. Trademark Credits Microsoft®, Windows® are U.S. registered trademarks of Microsoft Corporation. All other products mentioned herein may be trademarks of their respective companies. MADRIX® is a registered trademark. Package Contents 1x MADRIX® NEO – DMX512 interface 1x USB cable 1x CD-ROM with MADRIX® – software and driver 1x Quick start guide Please check the package contents and the interface after unpacking (Please look for broken pins, cracks in the case, or if you can hear loose parts inside the device, etc.)! Contact your supplier if something is missing or damaged. Do not use the device if it seems to be damaged! Safety Instructions And Warranty Two years of warranty are granted to the purchaser of this product. Warranty applies to constructional fault, material defect, or incorrect assembly the manufacturer has caused or is to be held responsible for. Warranty will be void if the interface is opened, modified, damaged through inappropriate handling and wrong usage, damaged through electric current or damaged through any other cause. Please follow the instructions to avoid mishandling, damage to the device, or personal damage: It is recommended to always use an opto-isolator/opto-coupler splitter. Avoid voltage on the DMX lines/cables at all times. Do not remove any parts from the unit including the plug ground pin or connect to an ungrounded circuit. Beware that the interface works with electrical power. Only use the device in dry environments (indoor use). Do not use the interface in humid environments and avoid contact with water or any other liquids. Turn off the power if you are not using the device for a long time. There are no user serviceable parts inside the interface. Repair service lies only within the responsibilities of the manufacturer. If the interface appears to be defective, please contact your dealer. After expiration of the warranty period, you may contact your supplier or the manufacturer to have the unit repaired against payment of an individual service fee. The interface has two ports. Only connect devices, cables, and connectors to the USB port and XLR plug using connectors of the same type as the port. Do not use inapplicable equipment. This device should be operated by professionals. The device is not designed to be used by non-professionals or children. End-Of-Life This electrical device needs to be disposed of properly. Do not throw the device into normal trash when the end-of-life has been reached. Please recycle packing material whenever possible. CE And RoHS Declaration Of Conformity The device complies with the requirements set forth in the council Directive of the law of the Member States relating to electromagnetic compatibility (2004/108/EC), the Low Voltage Directive (2006/95/EC), and the Directive on restriction of the use of certain hazardous substances in electrical and electronic equipment (2002/95/EC) (RoHS). The compliance with these three Directives has been evaluated in accordance to the following standards: EN 55011 (1998) + A1 (2000) + A2 (2003), EN 55024 (1998) + A1 (2001) + A3 (2003), EN 61000-4-2 (2001), EN 61000-4-3 (2001), EN 61000-4-4 (2001), and EN 61000-4-6 (2001). FCC Declaration Of Conformity The device has passed the following tests of compliance: FCC (2003) - Title 47, Part 15, class A, Radio frequency devices. This device complies with part 15 of the FCC Rules. Operation is subject to the following two conditions: (1) This device may not cause harmful interference, and (2) this device must accept any interference received, including interference that may cause undesired operation. Usage In general, this device is designed to be operated as a hardware control interface to be set up between a computer and various types of controllable lights via DMX512 (USB-to-DMX). Do not use the interface for any other, deviant purpose. The device can be connected to and disconnected from the computer during use and without a reboot (Hot Swapping & Plug and Play). Up to 60 interfaces can be connected to a USB host controller and used at the same time while maintaining a stable and high frame rate (Frame Rate Stability). Active USB 2.0 ports are required in this case. Technical Details Power Supply: USB: DMX512: Plug: Case: Dimensions: Weight: 5V DC, 500mA, Power over USB USB 2.0, type B plug 512 DMX channels input or output 5-pin, female, XLR, NEUTRIK Metal enclosure 78 mm x 59 mm x 35 mm (length by width by height) 100 g PLEASE ALWAYS CONNECT EVERY NEO TO AN ACTIVE USB 2.0 PORT OR USE AN USB 2.0 HUB WITH ITS OWN POWER SUPPLY. System Requirements Dual-core processor with at least 2.0 GHz, 1024 MB RAM, 200 MB free harddisk space, screen resolution of 1024 x 768, and one free USB 2.0 port. A sound card is optional (required for Sound2Light and Music2Light). To access the full range of features, it is recommended to install the MADRIX® software provided with the NEO. Software updates are free of charge for the purchaser of this product for MADRIX 2.x versions. The latest MADRIX® software including drivers and the latest quick start guide are available online at http://www.madrix.com PLEASE INSTALL THE SOFTWARE AND DRIVERS FROM THE CD BEFORE YOU CONNECT THE MADRIX® NEO TO YOUR PC. Supported Operating Systems The MADRIX® NEO comes with software and drivers for the following operating systems. The MADRIX® software is officially compatible with Windows® 7. Windows® XP requires Service Pack 1 (SP1). Microsoft® Windows® XP | Vista | 7 Compatible with 32 bit and 64 bit 1. Installing The Software And Drivers Insert the CD that comes with the MADRIX® NEO into the CD-ROM drive of your operational computer. The MADRIX® software setup will launch automatically. Follow the on-screen installation instructions as described below. DO NOT CONNECT THE MADRIX® NEO TO YOUR COMPUTER BEFORE INSTALLING THE SOFTWARE. Please click 'Next' to start the installation. You may end the process at any time by clicking ‘Cancel’. The 'License Agreement' will appear. It outlines the terms you are agreeing to when you install the software. You must accept these terms in order to continue. Please click 'I Agree'. The next window offers the chance to select which components and which drivers you want to install. A description is given for each item. Please make sure to select ‘MADRIX’ and ‘Interface Driver’, which are the most important components for operating the MADRIX® NEO. Please click 'Next'. The next section called 'Destination Folder' allows you to select the location on your hard drive where the software will be installed. Please choose a location and then click 'Install'. The installation process may take a few minutes. When the 'Complete' window appears, click 'Next'. Afterwards, click 'Finish' to complete the installation process. 2. Connecting The MADRIX® NEO To Your PC Now, please use the provided USB cable to connect the MADRIX® NEO to a free USB 2.0 port of your computer. If the MADRIX® NEO driver has been installed properly, the LED will now fade between red and green. Start the MADRIX® software (if not yet done). You can check your NEO setup within the MADRIX® software. Go to the menu 'Preferences' 'Device Manager' and select the tab 'DMX Devices'. Now, press ‘Rescan For Devices’. The NEO interface will appear ready in the list. Using The MADRIX® NEO As DMX-IN Interface You can use this interface to send or receive DMX data via MADRIX®. If you want to use DMX-IN, please use a Male to Male 3-pin or 5-pin XLR Gender Changer. Then, go to the menu 'Preferences' 'Device Manager' and select the tab 'DMX Devices'. Select your interface and activate ‘Enable’ and ‘Input’ in the ‘Settings’ section. Press ‘Apply’. In the next step, configure your NEO to control MADRIX® remotely under 'Preferences' 'Device Manager' 'DMX Input'. Choose an entry in the list (Universe 1 to 8), select your ‘DMXIN Device’, and activate ‘Remote’. Then, choose one of the input protocols in the section ‘Remote Control’ and press ‘Apply’. Close the window with ‘Ok’. Description Of LED Codes The following table describes the codes of the status LED. COLOR red + blinking green fading between red + green orange red STATUS Sending or receiving DMX data. → The interface works correctly. Connected to USB; Drivers installed correctly. → The interface works. No DMX data is sent. Connected to USB; No drivers installed. → Please reinstall software and drivers or try using a different USB port. Hardware ERROR → Please contact your dealer. 3-Pin Or 5-Pin XLR Connector Layout The images below outline the general pin layout of 5-pin or 3-pin XLR ports. 5-Pin 1 2 3 4 5 Description Shield / Ground DMX – DMX + Spare Spare 3-Pin Support And MADRIX® Help And Manual For more information you can open the MADRIX® Help and Manual (the software user guide) by pressing “F1” on your keyboard while using the MADRIX® software. Separate documentation files are automatically installed with the software as well. In case of further questions concerning handling of the NEO or technical problems, please read the MADRIX® Help and Manual first, contact your dealer, or have a look at the website: http://www.madrix.com You can also contact [email protected] directly. Frequently Asked Questions (FAQs) Do I need a MADRIX® NEO and a MADRIX® KEY? No. The MADRIX® software license for 512 DMX channels data output is already included. The MADRIX® KEY is not necessary for operating the MADRIX® NEO. However, you may connect both to your computer to use their output features together. Is it possible to use more than one MADRIX® NEO? Yes. Up to 60 NEOs can be connected to a USB host controller and used at the same time. Please connect every NEO to an active USB 2.0 port or use an USB 2.0 hub with a power supply. Does the NEO work in stand-alone mode? No. The NEO needs to be connected to a personal computer. Can I use a mobile computer instead of a desktop computer? Yes. Mobile computers, such as laptops/notebooks, may be used to run the MADRIX® software. Please pay attention to the system requirements. Can I use other software apart from MADRIX® to control lights? No. The recommended software is MADRIX®. Can I use this interface to control lasers, moving heads, or scanners? No. The software is not designed for such an application. What does the blinking LED mean? Please read the chapter “Description Of LED Codes” in this quick start guide. Can I repair the MADRIX® NEO myself? No. Do not attempt any repairs. Any attempt will void your warranty! Please contact your dealer if the device seems to be defective. What can I do if my interface does not work anymore during the warranty period? Please contact your dealer.