1
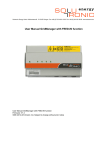
Solutronic Energy GmbH Küferstrasse18 D-73257 Köngen Fon +49 (0) 70 24-9 61 28-0 Fax +49 (0) 24-9 61 28-50 www.solutronic.de
User Manual
DE-ICING BOX
Accessory for SOLPLUS Inverters
User Manual for DE-ICING BOX
Accessory for SOLPLUS Inverters
RS/ 2014-04 Version: A1, Subject to change without prior notice
Contents
Introductory remarks ....................................................................................................................... 4
Symbols used ................................................................................................................................. 4
How it works.................................................................................................................................... 4
3.1 Safety information relating to the DE-ICING BOX...................................................................... 5
4
Design of the DE-ICING BOX......................................................................................................... 7
5
Mounting the DE-ICING BOX ......................................................................................................... 8
6
Electrical Connection of the DE-ICING BOX .................................................................................. 8
6.1 Setup of the data connection...................................................................................................... 8
6.2 Connecting the DC connections between the DE-ICING BOX and inverter .............................. 8
6.3 Connecting the DE-ICING BOX to the power supply ................................................................. 8
7
Setting the De-icing Functions at the Inverter ................................................................................ 8
7.1 Duration of heating period .......................................................................................................... 9
7.2 Setting the heating current ......................................................................................................... 9
7.3 Nominal output of your PV generator ......................................................................................... 9
7.4 Maximum DC heating voltage .................................................................................................... 9
7.5 Heating configuration................................................................................................................ 10
7.6 Explanation of the de-icing function settings............................................................................ 10
8
Option: Connecting Another Source of Mains Current ................................................................. 10
8.1 Configuring option relay 1......................................................................................................... 11
8.2 Configuring option relay 2......................................................................................................... 11
9
Starting the De-icing Function ...................................................................................................... 11
9.1 Switching on the DE-ICING BOX an the I/0 button (main switch)............................................ 11
9.2 Starting the de-icing function.................................................................................................... 11
9.3 Stopping the de-icing function .................................................................................................. 11
9.4 Switching off the DE-ICING BOX an the I/0 button .................................................................. 12
10 Monitoring and Logging the Results ............................................................................................. 12
11 Warranty ....................................................................................................................................... 13
1
2
3
SP25-55_DE-ICING BOX_Manual_A1_EN_2014-04-29.doc
3/13
Introductory remarks
1 Introductory remarks
The DE-ICING BOX is an accessory specifically designed for the SOLPLUS 25 – 55 inverters
manufactured by Solutronic Energy. It is only suitable for use with these inverters. This document is a
supplement to the User Manual for SOLPLUS inverters. Please read and observe the safety
information and danger notices contained in that manual. A complete version of the User Manual for
the inverters can be found on the CD supplied with each inverter. A printed version (hardcopy) of the
complete Installation Instructions is supplied with each SOLPLUS inverter.
Please comply with all instructions and information of relevance to and essential when handling pieces
of technical equipment.
2 Symbols used
Please read and observe the following safety instructions in this manual.
The danger classes describe the risks of non-observance of the safety instructions.
(The safety instructions describe the following danger classes per ANSI.)
Caution!
"Caution!" denotes a warning that, if not observed, can result in personal
injury!
Note
Nützliche Informationen und Hinweise für den optimalen Betrieb des
SOLPLUS Wechselrichters.
Warning!
"Warning!" denotes a warning that, if not observed, can result in death or
serious injury!
3 How it works
The DE-ICING box is suitable for all SOLPLUS 25 - 55 inverters, which have been produced after the
calendar week 20 in 2007. Inverters which have been produced before this date, have to be updated
by Solutronic.
The de-icing function is only suitable for crystalline PV modules whose open-circuit voltage is
less than 750 V at -10°C, because otherwise the full heating performance will not be obtained.
The reason for this is that the maximum possible DC heating voltage is 835 V and the PV modules
require a higher voltage in feedback mode.
SOLPLUS 25, 35, 50 and 55 inverters from Solutronic facilitate a de-icing function in feedback mode
that makes it possible to heat the modules. This enables snow that falls or ice that forms on the
modules to be thawed and to slide off.
Whether this results in complete de-icing of the modules depends not least on the design (e.g.
pitch) of the roof, how the modules are installed, the ambient temperature, etc.
It is expected that the modules can be heated to about 10 ° C.
DE-ICING operation may only be started manually and not automated.
SP25-55_DE-ICING BOX_Manual_A1_EN_2014-04-29.doc
4/13
How it works
Recommendation
Roof pitch: To facilitate effective functioning of the DE-ICING BOX, we recommend a roof pitch of 25
degrees or more.
Roof area: Prerequisite for use of the DE-ICING BOX is that the area below the solar modules is free
of obstructions so that the snow can slide off unhindered.
Safety: Owing to the fact that the DE-ICING BOX, when in use, leads to snow sliding off the PV
modules and the roof, safety is a top priority in the area below the edge of the roof. We recommend
you fence off the danger area in some manner.
Always switch the DE-ICING BOX off when it is not required: Owing to the way it operates, a DEICING BOX that is switched on consumes up to 50 W of power (depending on your PV generator) if
the inverter has not yet been switched to de-icing mode. Its typical power consumption is less than
10 W, and under 0.5 W when switched off.
The de-icing function can only properly fulfil its purpose if its use is carefully thought through and
planned. For this reason, keep a log (especially during the first winter period) of when and how you
use it and the results achieved (see chapter 7).
3.1 Safety information relating to the DE-ICING BOX
Please read the following safety information and instructions before you put the system into operation
for the first time, in order to avoid personal injuries and/or property damage. These instructions must
be complied with at all times.
Do to attempt to install or put this device into service until you have read through all the documentation
supplied thoroughly. Read through these safety instructions and all other user instructions and tips
before you begin work with this device.
If you sell on, hire out or pass on this device to someone else in some other way, make sure that you
give the new user these safety instructions, too.
Intended use: This device must be used only for the purpose described in this User Manual.
All safety regulations must be complied with. All installation work must be carried out precisely as
described in this manual.
No modification of any kind to or in this device or to its external wiring is permitted. Any such
modification could lead to serious safety problems and danger to life and limb.
Caution!
The surface of the device housing may be hot! Risk of injury! Very hot! Do
not touch!
Warning!
High voltage due to incorrect connection! Risk of fatal or bodily injury from
electric shock.
Warning!
Improper use of these devices, non-observance of the warnings given in
this manual and improper tampering with the safety functions can lead to
property damage, personal injury, electric shock and, in extreme cases,
death.
SP25-55_DE-ICING BOX_Manual_A1_EN_2014-04-29.doc
5/13
How it works
General information
Solutronic Energy shall accept no liability for damages resulting from non-observance of the warnings
given in this User Manual.
Read the operating, maintenance and safety instructions before you put the device into operation for
the first time. If you are not able to understand the language used in this documentation sufficiently,
please contact and inform the supplier of the situation.
Trouble-free and safe operation of this device presumes proper, professional and workmanlike
transportation, storage, mounting and installation as well as careful operation and thorough
maintenance.
Always deploy trained and qualified personnel to work with and on electrical equipment.
Only appropriately trained and qualified personnel is allowed to work on this device or in its vicinity.
Such personnel can be deemed appropriately qualified if they are adequately familiar with the
mounting, installation and operation of the product as well as with all warnings and precautionary
measures as stated in this User Manual.
The ambient conditions specified in the product documentation must be complied with.
Please read and observe the following danger notices contained in this manual
SP25-55_DE-ICING BOX_Manual_A1_EN_2014-04-29.doc
6/13
Design of the DE-ICING BOX
4 Design of the DE-ICING BOX
DE-ICING BOX (front view)
Main switch I/0
LED indicator for
"Power On"
LED indicator for
de-icing mode
Start button for
de-icing mode
DE-ICING BOX (rear view)
Power supply connection
with IEC plug
Data connection from
DE-ICING BOX (9-pin)
to inverter (25-pin)
SP25-55_DE-ICING BOX_Manual_A1_EN_2014-04-29.doc
DC connections
7/13
Mounting the DE-ICING BOX
5 Mounting the DE-ICING BOX
All connecting cables between the DE-ICING BOX and the SOLPLUS inverter are approx. 2 m long.
Mounting location:
• Dry location
• Close to the inverter
• Make sure that circulation of air around the device is not impeded.
→ A minimum clearance of 20 cm in all directions (from top, bottom and sides) must be kept
from the inverter
6 Electrical Connection of the DE-ICING BOX
6.1 Setup of the data connection
Use the data cable supplied with the DE-ICING BOX to make a connection between the
SOLPLUS inverter (plug connection X4, 25-pin Sub-D socket on left-hand side) and the DE-ICING
BOX (plug connection X1, 9-pin Sub-D connector).
6.2 Connecting the DC connections between the DE-ICING BOX
and inverter
Preliminary remarks: If there is no DC string available on the inverter for connecting the DE-ICING
BOX, you will have to use standard commercially available Y joints (available for every type of DC plug
connector).
Note: If you cut and terminate the cable yourself, please take great care to ensure the polarity
of the strands is correct. The positive (+) connection of the DE-ICING BOX is at the top right of the
box, above the 9-pin Sub-D socket (see Fig. 2). Connect the positive connection of the DE-ICING BOX
to the positive connection of the inverter. Likewise, connect the negative (-) connection of the DEICING BOX to the negative connection of the inverter.
6.3 Connecting the DE-ICING BOX to the power supply
Now connect the DE-ICING BOX to a power socket with earthing contact using the IEC power cable
supplied with the device.
Finish off by running all cables with care. Do not leave any loose cables hanging down!
7 Setting the De-icing Functions at the Inverter
Note: All functions can be accessed and set with the aid of the final customer password (password
level 1).
Button combination: ▲►▼▲►▼ and complete by pressing [OK].
Further information with regard to controlling the inverter display can be found in the User Manual for
SOLPLUS inverters.
Requirements: Inverter firmware: Version 1.2.25 or higher. If it is not installed, carry out a firmware
update.
You can show the firmware version by pressing any button on the display. The firmware version will be
displayed for a few seconds. (The firmware version can also be found under the main menu item
"Inverter".)
All parameters required for operating the DE-ICING BOX can be found under the main menu item
"Options" (password must be entered first). The following parameters must be set to enable the deicing function to be activated (started) at all:
SP25-55_DE-ICING BOX_Manual_A1_EN_2014-04-29.doc
8/13
Setting the De-icing Functions at the Inverter
7.1 Duration of heating period
Parameter 285:
Heating period time
Menu:
Unit:
Default setting:
Password level:
Options
Minutes
60 minutes
Customer
→ Leave the factory setting unchanged for the first time you use the heating/thawing function.
7.2 Setting the heating current
Parameter 286:
Heating current factor
Menu:
Unit:
Default setting:
Password level:
Options
%
80%
Customer
Leave the factory setting unchanged for the first time you use the heating/thawing function.
7.3 Nominal output of your PV generator
Parameter 272:
Nominal DC generator output
Menu:
Unit:
Default setting:
Password level:
Monitoring
W
0W
Customer
You have to enter the nominal output of the PV generator.
Note
Even if incorrectly programmed, the maximum output of the inverter used is
never exceeded: the output of SOLPLUS 25 inverters in de-icing mode is
limited to 2500 W, that of SOLPLUS 35 inverters to 3500 W, SOLPLUS 50
to 5000 W and SOLPLUS 55 inverters to 5500 W.
Despite this, it is important that the value is correct, because it is used to
calculate the wattage set under parameter 286.
7.4 Maximum DC heating voltage
Parameter 287:
Maximum heating voltage
Menu:
Unit:
Default setting:
Password level:
Options
V
600 V
Customer
Setting: Open circuit voltage (at -10 ° C) of connected modules +10% of this value.
SP25-55_DE-ICING BOX_Manual_A1_EN_2014-04-29.doc
9/13
Option: Connecting Another Source of Mains Current
7.5 Heating configuration
Parameter 288:
Heating configuration
Menu:
Unit:
Default setting:
Password level:
Options
none
0
Customer
This parameter enables the de-icing function to be started. To enable, set to 1.
7.6 Explanation of the de-icing function settings
Duration of heating period
The typical heating/thawing period ranges from around 15 minutes (at mild temperatures, with
wet/sticky snow or when the pitch of the roof is steep and the snow slides off quickly) to 2 hours (when
temperatures are very low, the pitch of the roof relatively flat or the snow coverage thick).
When using the function for the first time, please begin with a heating period of 60 minutes and watch
whether and how quickly the heating/thawing process progresses.
Heating current/nominal output
These two parameters define the actual performance level at which the de-icing function is started.
Example:
SOLPLUS 50 inverter
Nominal generator output: 5500 W
Target: heating/thawing is to be conducted at 75% of this nominal output → nominal output of
4100 W
Configuration required:
Parameter 286 Heating current factor: Setting = 75
Parameter 272 Nominal DC generator output: Setting = 5500
Maximum voltage
Parameter 287 should be set to a value approx. 10% higher than the open-circuit voltage of your PV
generator.
Note: This means the DC voltage supplied by the inverter in de-icing mode will not exceed the value
set here. If during de-icing you find that the level of heating you want is not being achieved, please
check this parameter and increase the setting.
8 Option: Connecting Another Source of Mains Current
The inverter gets the energy required for the de-icing function from the feed point from the PV
modules. For this reason, you must make sure that you install a 2-way meter at the feed point if you
intend installing a DE-ICING BOX.
The inverter can, however, also be supplied with power from another source of mains current during
de-icing. The functions of relay 1 (selector switch) and relay 2 (circuit closer) control connection of this
other source via the contacts of the 8-pin terminal strip (X5).
Please observe the information and instructions in the User Manual on connecting this power
source and contact loading!
SP25-55_DE-ICING BOX_Manual_A1_EN_2014-04-29.doc
10/13
Starting the De-icing Function
8.1 Configuring option relay 1
Parameter 46:
Function of relay 1
Menu:
Unit:
Default setting:
Password level:
Options
1
Customer
Set to 11: relay 1 is tripped during de-icing mode.
8.2 Configuring option relay 2
Parameter 47:
Function of relay 2
Menu:
Unit:
Default setting:
Password level:
Options
0
Customer
Set to 11: relay 2 is tripped during de-icing mode.
9 Starting the De-icing Function
Preliminary remarks: The de-icing function can be started (activated) at any time of the day, day or
night. However, when operating the DE-ICING BOX during the day, you must take into account the
fact that the inverter no longer feeds electricity into the grid while the de-icing function is activated.
This means that the DE-ICING BOX has to be started differently depending on whether it is to operate
during the day or night.
Activation (starting) and deactivation of the de-icing function are both indicated by a short 'beep'.
DE-ICING operation may only be started manually and not automated.
9.1 Switching on the DE-ICING BOX an the I/0 button (main switch)
The DE-ICING BOX is only required to start or stop manual operation of the DE-ICING operation.
It is therefore useful to take the I / 0 button (main switch) only to start or stop manually the DE-ICING
BOX operation.
Press and hold the l/0 button (main switch) for 1 second and then wait 10 seconds until the
"Power" LED lights up.
The "Power" LED must now be on. In the case of night-time use, the inverter's display switches on a
few seconds after you switch on the DE-ICING BOX. The display first shows the Start menu, then the
basic (start) screen.
During grid-feed operation or if UDC is >330 V, there is no change in what is shown on the display.
9.2 Starting the de-icing function
At daytime: 10 – 15 seconds
At night-time: 3 – 6 seconds
"Starting DE-ICING" appears on the inverter's display. The "DE-ICING" LED on the DE-ICING BOX
comes on and you can hear a short 'beep' from the inverter.
Shortly afterwards, the display switches to "DE-ICING", the grid relays close and the DC voltage and
power slowly rise.
The inverter will now heat your PV generator for the length of heating period you have set and switch
itself off again automatically at the end of this period.
9.3 Stopping the de-icing function
To stop (deactivate) the de-icing function manually, press and hold the Start button for 3 seconds.
SP25-55_DE-ICING BOX_Manual_A1_EN_2014-04-29.doc
11/13
Monitoring and Logging the Results
9.4 Switching off the DE-ICING BOX an the I/0 button
The I/0 button (main switch) is only required for switching on the DE-ICING BOX to enable you to start
the de-icing function or to stop the function manually.
10 Monitoring and Logging the Results
Note
The de-icing function can only properly fulfil its purpose if its use is carefully
thought through and planned.
When using the de-icing function for the first time, make sure that the level of heating you want is
achieved. You can use the display on the inverter to monitor this. If you experience problems with this
function, check the "Heating period time", "Heating current factor" and "Maximum heating voltage"
parameters (parameters 285 – 287) in the inverter's "Options" menu (see chapter 5).
Our recommendation as regards usage
We recommend that you use the de-icing function only when a "spell of good weather" is expected
that will enable your PV system to generate electricity and feed it into the grid.
There is no point in using the de-icing function every day, possibly even for hours at a time, during a
spell of bad weather. You could well find that you consume more energy keeping the generator clear
than the snow-free generator is actually able to generate on the next snow-free day.
It goes without saying that it is extremely difficult to make any sort of definitive statement with respect
to the amount of energy used and the potential additional amount gained.
The following parameters are provided to allow you to monitor the energy consumption and "thawing
performance" of the DE-ICING BOX:
Parameter 227:
DE-ICING energy today
Menu:
Unit:
Resolution:
Options
kWh
0.001 kWh
This parameter indicates the amount of energy consumed by the de-icing function during the current
day or night (today).
Note
Parameter 8 "Energy today" (which measures the amount of energy fed into
the grid 'today') and the value provided by the annual energy logger are not
affected by the de-icing function.
Parameter 229:
DE-ICING energy total
Menu:
Unit:
Resolution:
Options
kWh
1 kWh
This parameter indicates the total amount of energy consumed by the de-icing function since start-up.
Note
Parameter 12 "Energy total", which measures the total amount of energy fed
into the grid, is not affected by the de-icing function.
SP25-55_DE-ICING BOX_Manual_A1_EN_2014-04-29.doc
12/13
Warranty
Our tip
During the first winter at least with the DE-ICING BOX, you should keep a precise log of the
circumstances/conditions under which you use the de-icing function and of the amounts of generatorand grid-sourced energy consumed.
If you have 2 or more PV generators and 2 or more inverters connected to your PV installation, we
recommend that you use the de-icing function in conjunction with just one of the inverters, at least
during the "learning phase". This will enable you to use the inverter not used for de-icing as a control.
To help you keep such a log, we have prepared a table you can use. More information can be found
on our website. If you would like even more detailed information and assistance, please talk to our
service team.
We and our dealers would be extremely interested in receiving meaningful, firsthand reports from you,
our users!
11 Warranty
There are absolutely no technical reasons why PV modules should not be used in feedback mode,
because the load to which they are subjected is no different from that that arises during normal
daytime operation when they feed into the grid.
Some manufacturers already permit heating/thawing of their modules in this way without any
restrictions. Other manufacturers have not yet issued such consent because they have not yet got
round to investigating this matter.
If you receive a negative response from the manufacturer of your modules, please ask for the exact
technical reasons. If many cases, manufacturers cite "safety reasons" for why they are not prepared to
give their consent, the real reason, however, being that they have so far never had cause to think
about de-icing modules. In such cases, draw the manufacturer's attention to the existing standard
already in force that stipulates the testing of modules in feedback mode as a binding criterion for
certification.
Note
The de-icing function can not be used with thin-film modules due to the
inadequate amount of heat that would be generated and the large surface
area of the modules (lower efficiency).
Furthermore, the de-icing function can not be used in conjunction with
series diodes.
SOLPLUS 25, SOLPLUS 35, SOLPLUS 50 and SOLPLUS 55 inverters
from Solutronic facilitate a de-icing function in feedback mode that makes it
possible to heat the modules.
Solutronic shall accept no liability for consequential damage to cables,
wiring, buildings, PV modules or their mounting frames that arises from
proper operation or non-operation of the de-icing function.
If you need help do not hesitate to contact us.
Solutronic Energy GmbH
Küferstrasse 18
D-73257 Köngen
Tel.: 07024/96128-0
Fax: 07024/96128-50
[email protected]
www.solutronic.de
SP25-55_DE-ICING BOX_Manual_A1_EN_2014-04-29.doc
13/13