1
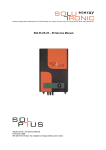
Kurzanleitung SOLPLUS 100/120
Short installation manual SOLPLUS 100/120
Instrucciones de instalación SOLPLUS 100/120
Brevi istruzioni per l’installazione SOLPLUS 100/120
Instructions d’installation série SOLPLUS 100/120
2010-07 A5
Kurzanleitung SP 100/120, Short installation manual SP 100/120,
Instrucciones de instalación SP 100/120, Brevi istruzioni per
Í´installazione SP 100/120, Instructions d´installation sèrie SP 100/120
1/13
1)
Allgemeines
General
Aspectos generales
Generale
Général
Allgemeines
Bei Schäden infolge von Nichtbeachtung der Warnhinweise in dieser Betriebsanleitung übernimmt die
Solutronic GmbH keine Haftung. Vor der Inbetriebnahme sind die Betriebs-, Wartungs- und
Sicherheitshinweise durchzulesen. Wenn die Dokumentation in der vorliegenden Sprache nicht
einwandfrei verstanden wird oder zugänglich ist, fragen Sie bitte bei Ihrem Lieferanten nach und
informieren Sie diesen.
General
Solutronic GmbH assumes no liability for damages caused by failure to observe warnings given in the
operating instructions. Before starting to operate the equipment, the operating instructions, warnings
and safety regulations must be read thoroughly. If the documentation cannot be fully understood or is
not accessible in the present language, please inform the supplier and request further information.
Aspectos generales
En caso de daños a causa de la no observación de las indicaciones de seguridad de este manual de
instrucciones Solutronic GmbH no asume ninguna responsabilidad. Antes de la puesta en
funcionamiento deberán leerse las indicaciones de manejo, mantenimiento y seguridad. Si no
entendiera perfectamente la documentación redactada en este idioma pregunte e informe a su
proveedor.
Generale
Solutronic GmbH non si ritiene responsabile di danni causati dalla mancata osservanza delle regole di
sicurezza date in queste istruzioni operative. Prima di iniziare ad operare con l’apparecchiatura, si
devono leggere per intero le istruzioni operative, gli avvertimenti e le norme di sicurezza. Se la
documentazione nella presente lingua non fosse perfettamente comprensibile, per favore informare il
fornitore e richiedere ulteriori informazioni.
Général
Solutronic GmbH ne prend pas en charge les dommages dus au non-respecte des instructions
décrites dans la documentation. Avant de mettre l’appareil en marche, lire attentivement la
documentation. Au cas où la documentation ne serait pas compréhensible, ou si elle devait manquer,
veuillez contacter votre fournisseur et l’en informer.
Kurzanleitung SP 100/120, Short installation manual SP 100/120,
Instrucciones de instalación SP 100/120, Brevi istruzioni per
Í´installazione SP 100/120, Instructions d´installation sèrie SP 100/120
2/13
Unsachgemäßer Umgang mit diesen Geräten und Nichtbeachten der
angegebenen Warnhinweise sowie unsachgemäße Eingriffe in die
Sicherheitseinrichtung können zu Sachschaden, Körperverletzung,
elektrischem Schlag oder im Extremfall zum Tod führen.
Warnung
Warning
Aviso
Avviso
Attention
Inappropriate treatment of this equipment and failure to observe
given the warnings, as well as appropriate interference with the
safety features, can cause damage to the equipment, bodily injury,
electric shock or in extreme cases lead to death.
Un uso inadecuado de estos aparatos y el no respetar las indicacion
es de aviso aquí dadas así como manipulaciones en el dispositivo
de seguridad pueden causar daños materiales, lesiones, descargas
eléctricas y en caso extremo la muerte
Il trattamento improprio di questa apparecchiatura, la mancata
osservanza degli avvertimenti qui dati, o l’errato abbinamento con i
dispositivi di sicurezza, possono causare danni all’apparecchiatura,
ferite, shock elettrico o in casi estremi la morte.
Un usage non-conforme, ou non-respect des instructions ainsi
qu’une manipulation dans le dispositif de sécurité
peuvent
endommager l’appareil, occasionner des blessures, ou même
engendrer un danger de mort par haute tension.
Hohe elektrische Spannung durch falschen Anschluss! Lebensgefahr oder Körperverletzung durch elektrischen Schlag.
Wrong connection can lead to high voltage! Danger to life and
bodily injury from electric shock.
Warnung
Warning
Aviso
Avviso
¡Alta tensión a causa de una falsa conexión! Peligro de muerte o
lesiones por descarga eléctrica.
L’errata connessione può produrre alta tensione! Pericolo per la vita
o rischio di scossa elettrica!
Une mauvaise connection peut provoquer des hautes tensions
risquede blessures ou danger de mort !
Attention
Heiße Oberfläche auf Gerätegehäuse möglich! Verletzungsgefahr!
Verbrennungsgefahr!
Surface of equipment may become hot. Danger of injury and fire.
Vorsicht
Caution
Precaución
Cautela
¡Posibilidad de superficie caliente en la carcasa del aparato!
¡Peligro de lesión! ¡Peligro de abrasión!
La superficie dell’apparecchiatura può riscaldarsi. Pericolo di
ferimento e incendio!
La surface de l’appareil peut devenir très chaude : risque de
blessure ou de brûlure !
Attention
2010-07 A5
Kurzanleitung SP 100/120, Short installation manual SP 100/120,
Instrucciones de instalación SP 100/120, Brevi istruzioni per
Í´installazione SP 100/120, Instructions d´installation sèrie SP 100/120
3/13
2)
Sicherheitsvorschriften
Safety instructions
Los reglamentos de seguridad
Codice di sicurezza
Instructions de sécurité
2) Sicherheitsvorschriften
Wichtig! Installationsvorschriften in der Gerätedokumentation beachten.
2) Safty instructions
Important! Please follow the installation instructions in the instruction manual
2) Los reglamentos de seguridad
Importante! Observar las instrucciones de instalación en la documentación del
dispositivo
2) Codice di sicurezza
Importante! Attenersi alle prescrizioni per l’installazione contenute nella
documentazione dell’apparecchio
2) Instructions de sécurité
Important! Suivre les prescriptions d’installation sur la documentation de l’appareil
Kurzanleitung SP 100/120, Short installation manual SP 100/120,
Instrucciones de instalación SP 100/120, Brevi istruzioni per
Í´installazione SP 100/120, Instructions d´installation sèrie SP 100/120
4/13
3) Lieferumfang
Scope of delivery
Volumen entrega
Contenuto della confezione
Accessoires livrés
3) Lieferumfang
Installationsanleitung auf CD
SOLPLUS Wechselrichter
AC-Stecker
2 Rändelschrauben
Montagewinkel
3) Scope of delivery
Installation Manual/CD
SOLPLUS Inverter
AC-connector
2 knurled screws
Mounting rack
3) Volumen entrega
Documentación del dispositivo/CD
Inversor SOLPLUS
Connector CA
2 el tornillo moleteado
Bornes de conexión
3) Contenuto della confezione
Documentazione dell’apparecchio/CD
Inverter SOLPLUS Staffa per il montaggio
1 spina AC
2 bullone a testa esagonale
Binario per il montaggio
3) Accessoires livrés
Documentation de l’ appareil/CD
Onduleur SOLPLUS
1 connecteur AC
Deux moletée
Équerre de montage
4) Sie benötigen
You need
Adicionalmente necesitará
Sono necessari
Vous avez besoin en plus
4) Sie benötigen
Bohrmaschine
4 Schrauben
4 Dübel
Erdungskabel
Schraubenzieher
4) you need
Drill
4 screws
4 wall plugs
Earthing cable
Screwdriver
4) adicionalemente necessitara
taladradora
4 tornillos
4 tacos
conector de tierra
el desarmador
4) Sono necessari
Trapano
4 viti con tasselli
4 rondelle
Salva vita
Cacciavite
4) Vous avez besoin en plus
Perceuse
4 vis
4 chevilles
Câble de terre
Tournevis
2010-07 A5
Kurzanleitung SP 100/120, Short installation manual SP 100/120,
Instrucciones de instalación SP 100/120, Brevi istruzioni per
Í´installazione SP 100/120, Instructions d´installation sèrie SP 100/120
5/13
5) Markieren der Bohrlöcher
Mark the drill holes
Marca los taladros
Marcare punti dove trapanare
Marquer l’emplacement des trous
6) Löcher bohren
Drill holes
Taladra los agujeros
Buca alesaggio
Faire les trous
Schritt 5-6
Anzeichnen der 4 Bohrlöcher.
Mit einem Bohrer die Löcher bohren (Bohrdurchmesser sowie Bohrtiefe
entsprechend der Wandverhältnisse und Schrauben wählen).
Step 5-6
Mark the 4 drill holes.
Drill holes. Please use a drill that is suitable for the material (wood, stone, concrete) of the
mounting place of the inverter and has the correct diameter and length.
Paso 5-6
Marcado de los 4 taladros.
Taladra los agujeros (el diámetro de la broca y la profundidad del agujero se ajusta a las
condiciones de la pared tal como a los tornillos que se va a usar).
Passo 5-6
Marcare i 4 punti dove trapanare.
Utilizzare il tipo di punta idonea al materiale da forare (muro, legno, cemento). Utilizzare
una punta di lunghezza e diametro adeguato ai tasselli adoperati.
Pas 5-6
Marquer les 4 trous à percer.
Avec une perceuse faire les trous. (Choisir diamètre et profondeur du trou ainsi que les vis
selon les caractéristiques de la paroi).
Kurzanleitung SP 100/120, Short installation manual SP 100/120,
Instrucciones de instalación SP 100/120, Brevi istruzioni per
Í´installazione SP 100/120, Instructions d´installation sèrie SP 100/120
6/13
7) Dübel einsetzen
Insert the wall plugs
Introducir los tacos
Introdurre tassello
Insérer les chevilles
8) Montagewinkel anschrauben
Fix the mounting rack
Fijar el ángulo de montaje
Fissare alla parete la staffa
Fixer le équerre démontage
Schritt 7-8
Dübel einsetzen.
Den Montagewinkel mit Schrauben an der Wand befestigen.
Step 7-8
Insert the wall plugs.
Attach the mounting rack to the wall using the screws.
Paso 7-8
Introducir los tacos.
Fijar el rail de montaje a la pared con los tornillos
Passo 7-8
Introdurre tassello
Fissare alla parete la staffa per il montaggio servendosi delle viti.
Pas 7-8
Insérer les chevilles
Fixer le équerre démontage sur la paroi à l’aide des vis.
2010-07 A5
Kurzanleitung SP 100/120, Short installation manual SP 100/120,
Instrucciones de instalación SP 100/120, Brevi istruzioni per
Í´installazione SP 100/120, Instructions d´installation sèrie SP 100/120
7/13
9) Aufhängen
Hang-up
Colgar a la pared
Appendere
Accrocher
10) Festschrauben von unten
Fix knurled screws from below
Fijar tornillos deste abajo
Avvitare das basso
Visser en-dessous
Schritt 9-10
Vorsicht: Die Wechselrichter haben ein hohes Eigengewicht (40 kg). Zur Sicherheit benötigen Sie eine
weitere Person beim Auf- und Abhängen des Wechselrichters. Der Montagewinkel wiegt 4 kg. Achten Sie
auf festen Untergrund für die Montage. Hängen Sie den Wechselrichter von oben in den Montagewinkel
ein. An dem Montagewinkel befinden sich Führungslanglöcher, die Ihnen helfen den SOLPLUS 100/120 in
die richtigen Position einzuhängen. Anschließend mit den mitgelieferten Rändelschrauben den SOLPLUS
100/120 durch die entsprechenden Löcher am Montagewinkel von unten fixieren. Überprüfen Sie das
Gerät auf festen Sitz!
Step 9-10
Caution: The inverters have a weight of 40 kg. For your safety you need a second person to mount or
demount the inverters. The mounting rack has a weight of 4 kg. Make sure the background is solid and
able to hold the weight. Insert the inverter into the slot holes of the mounting rack from top. (This helps
proper mounting of the SOLPLUS 100-120.) Afterward fix the SOLPLUS 100-120 with the provided
knurled screws from below. Check for proper and secure fitting.
Paso 9-10
Precaución: Cuelgue el inversor en el soporte de montaje introduciéndolo por arriba. El soporte se
encuentra entonces entre las aletas exteriores del disipador de calor. Los dos tornillos M5x20
suministrados son atornillados para fijar el inversor por debajo a través del disipador de calor en los
agujeros correspondientes del soporte de montaje. Para ello necesita una llave inbus. Es posible que sea
necesario levantar el aparato aprox. 1-2 mm para poder enroscar los tornillos sin esfuerzo. Compruebe
que el aparato esté bien fijado.
Passo9-10
Cautela: Appendere l’inverter dall’alto sul supporto di montaggio. Il supporto si inserirà tra le lamelle più
estreme del dissipatore. Le due viti fornite M5x20, devono essere ora avvitate nei corrispondenti fori del
supporto di montaggio attraverso il dissipatore per fissare l’inverter in posizione. Per fare questo è
necessaria una chiave a brugola. Può essere necessario sollevare l’unità di 1 o 2 mm per poter avvitare le
viti senza resistenza. Controllare che l’apparecchiatura risulti ben fissata al supporto ed alla parete!
Pas 9-10
Attention : L’onduleur pèse 40 kg. Pour votre sécurité vous avez besoin une deuxième personne pour
accrocher ou décrocher l’onduleur. Le rail de montage a un poids de 4 kg. Soyez sûre que la paroi soit
solide et tienne le poids de l’onduleur. Insérer l’onduleur depuis le haut dans les rainures du équerre
démontage. Les rainures vous aident à monter le SOLPLUS 100-120 correctement. Ensuite fixer en
dessous le SOLPLUS 100-120 avec les vis moletées. Contrôler la fixation de l’onduleur.
Kurzanleitung SP 100/120, Short installation manual SP 100/120,
Instrucciones de instalación SP 100/120, Brevi istruzioni per
Í´installazione SP 100/120, Instructions d´installation sèrie SP 100/120
8/13
11) Erdanschluss
Earthing connection
Toma de tierra
Connessione alla terra (Salva vita)
Mise à la terre
12) Befestigungsstelle am Wechselrichter
Connection point the inverter
Punto de connecion al inversor
Punto di fissaggio per I’inverter
Emplacement de la connexion
Schritt 11-12
Erdung (zweiter Schutzleiteranschluss). Die Norm EN 50178 fordert einen zweiten, festen
Schutzleiteranschluss. Führen Sie das Kabel in eine Potentialausgleichsschiene, die mit
dem Schutzleiter verbunden ist. Näheres siehe Installationsanleitung.
Step 11-12
Earthing (second protective earth connection). According to EN 50178 a second, fixed
protective earth connection is required. Connect the earthing cables to a earth circuit
connector. For more information see the installation manual.
Paso 11-12
La puesta a tierra (segundo borne de puesta a tierra). EN 50178 requiere un segundo borne
de puesta a tierra fijo.
Passo 11-12
Massa (secondo motivo del filo di collegamento). La norma EN 50178 richiede un secondo
conduttore di terra fisso di protezione. Il cavo che è collegato alla terra va inserito in un
binario di compensazione. Di seguito vedere le istruzioni d’installazione.
Pas 11-12
La mise à terre (deuxième raccordement du conducteur de protection). EN 50178 exige un
deuxième raccordement. Connecter le câble de mise à terre au circuit de mise à terre. (Pour
les détails voir manuel d’installation)
2010-07 A5
Kurzanleitung SP 100/120, Short installation manual SP 100/120,
Instrucciones de instalación SP 100/120, Brevi istruzioni per
Í´installazione SP 100/120, Instructions d´installation sèrie SP 100/120
9/13
13)
Anschließen des 5-adrigen Netzsteckers
Grid connection with 5 wired
Connectar el enchufe de 5 hilos
Collegamento alla spina a 5 fili
Connecter la fiche de contact de 5 fils
SOLPLUS 100 - 120
=
=
N
~
DC1
L1
=
N
~
L2
DC2
N
~
L3
DC3
PE*
N*
L*
1*
2*
Schritt 13 (AC)
Beschriftung
Netz
N
N
PE
PE
1
L1
2
L2
L
L3
PE
PE
1
L1
2
L2
L
L3
PE
PE
1
L1
2
L2
L
L3
PE
PE
1
L1
2
L2
L
L3
PE
PE
1
L1
2
L2
L
L3
Step 13 (AC)
Labelling
Grid
N
N
Paso 13 (AC)
Rotulación
Red
N
N
Passo 13 (AC)
Dicitura
Rete
N
N
Pas 13 (AC)
Inscription
Réseau
N
N
Kurzanleitung SP 100/120, Short installation manual SP 100/120,
Instrucciones de instalación SP 100/120, Brevi istruzioni per
Í´installazione SP 100/120, Instructions d´installation sèrie SP 100/120
10/13
14)
AC-Netz
AC-Grid
AC-Red eléctrica
AC-Rete
AC-Réseau
Schritt 14
Der Netzanschluss erfolgt 5-adrig. Die Klemmen im AC-Anschluss-Stecker sind mit 1, 2, L,
N, PE beschriftet (siehe Bild Zuordnung AC-Anschluss-Stecker 1, 2, L).
Führen Sie das Netzanschlusskabel durch die Überwurfmutter durch. Schließen Sie das
Netzkabel, wie im Bild beschrieben, an die Anschlussklemme an.
Verwenden Sie am besten ein flexibles Kabel mit 4mm2 Kabelquerschnitt ohne
Adernhülsen oder 2,5mm2 Kabelquerschnitt (mit oder ohne Adernhülsen).
Step 14
The grid connection is 5 wired. The clamps in the AC plug are labeled with 1, 2, L, N, PE
(see image above).
Once you have pulled the grid connection cable through the connecting nut, connect the
grid cable to the connection terminals as shown.
It is most suitable to use a flexible cable with a cross-sectional area of 4mm² without
ferrules or a cable with a cross-sectional area of 2,5mm² (with or without ferrules).
Paso 14
La conexión a la red tiene lugar a través de 5 hilos 1, 2, L, N, PE. Cuando haya metido el
cable de red por la tuerca tapón conecte el cable de red al borne de conexión como se
muestra a continuación.
Lo mejor sería usar un cable flexible con 4mm² de diámetro del cable sin puntillas, o
2,5mm² de diámetro del cable (con o sin puntillas).
Passo 14
Il connettore di alimentazione è di 5 fili. Le spine terminali nel connettore AC sono con 1, 2,
L, N, PE (vedi immagine corrispondente al connettore). Il cavo di alimentazione va
collegato alla spina come descritto nell’immagine.
Pas 14
La connection au réseau est assurée par 5 fils électriques, marqué avec 1, 2, L, N, PE.
Connecter le câble dans la prise (voir image plus haut) dés que le câble électrique est
introduit dans la fixation.
2010-07 A5
Kurzanleitung SP 100/120, Short installation manual SP 100/120,
Instrucciones de instalación SP 100/120, Brevi istruzioni per
Í´installazione SP 100/120, Instructions d´installation sèrie SP 100/120
11/13
15) AC-Anschlüsse
AC connector
Conector AC
AC nella presa
Connecter AC
16) DC-Anschluss
DC connector
Conector DC
DC nella presa
Connecter DC
17) Anschalten
Power on
Encender
Accendere
Enclencher
Schritt 15-17
Stecken Sie den AC-Stecker und die DC-Stecker ein und überprüfen Sie, ob der AC-Stecker und die
DC-Stecker richtig eingerastet sind. Anschließend schalten Sie den Wechselrichter mit dem DCFreischalter ein.
Step 15-17
Engage the AC connector. Engage the DC connectors. Check for proper engagement of the AC and
DC connectors. Power on the inverter with DC interrupter.
Paso 15-17
Enclavamiento del conector AC. Enclavamiento del conector DC. Encender inversor
Passo 15-17
Inserire la spina AC nella presa, Inserire la spina DC nella presa. Accendere l’inverter.
Pas 15-17
Enfiler les connecteurs AC et DC. Contrôler si les connecteurs AC et DC sont correctement
encliqueter. Ensuite enclencher l’onduleur.
Kurzanleitung SP 100/120, Short installation manual SP 100/120,
Instrucciones de instalación SP 100/120, Brevi istruzioni per
Í´installazione SP 100/120, Instructions d´installation sèrie SP 100/120
12/13
Gratulation!
Die Installation ist beendet.
Congratulations!
The installation is complete.
¡Enhorabuena!
La instalación ha concluido.
Congratulazioni!
L’installazione è terminata.
Félicitations!
L’installation est achevée.
Solutronic GmbH
Küferstrasse 18
73257 Köngen
Tel:
+49 (0) 7024/96128-0
Fax:
+49 (0) 7024/96128-50
e-Mail: [email protected]
www.solutronic.de
2010-07 A5
Kurzanleitung SP 100/120, Short installation manual SP 100/120,
Instrucciones de instalación SP 100/120, Brevi istruzioni per
Í´installazione SP 100/120, Instructions d´installation sèrie SP 100/120
13/13