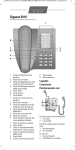
1
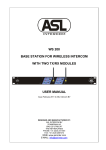
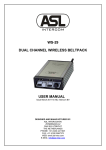
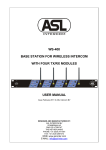
WS-19
SINGLE CHANNEL WIRELESS BELTPACK
USER MANUAL
Issue March 2011 © ASL Intercom BV
DESIGNED AND MANUFACTURED BY:
ASL INTERCOM BV
ZONNEBAAN 42
3542 EG UTRECHT
THE NETHERLANDS
PHONE: +31 (0)30 2411901
FAX: +31 (0)30 2667373
WEB: www.asl-inter.com
E-MAIL: [email protected]
CONTENT OF THIS USER MANUAL
1.0
2.0
3.0
4.0
5.0
6.0
7.0
8.0
9.0
10.0
11.0
12.0
INTRODUCTION .................................................................................. 3
UNPACKING ........................................................................................ 3
INSTALLATION .................................................................................... 3
FRONT PANEL CONTROLS ............................................................... 4
SIDE PANEL TRIMMERS .................................................................... 4
REAR PANEL CONTROLS & CONNECTOR ...................................... 5
INTERIOR ............................................................................................ 5
FREQUENCY BAND & ANTENNA‟S ................................................... 6
SETTING UP CONNECTIONS ............................................................ 6
COMMUNICATION MODES ................................................................ 9
WARRANTY ...................................................................................... 10
TECHNICAL SPECIFICATIONS ........................................................ 10
PAGE 2
User Manual WS 19 / March 2011 © ASL Intercom BV
.
1.0
INTRODUCTION
An ASL wireless intercom system may consist of
1-channel beltpacks (WS-19), 2-channel
beltpacks (WS-29), 2-channel base stations (WS200) and 4-channel base stations (WS-400).
It is a stand-alone system but may also be the
wireless extension of a wired intercom system.
The base stations have a built-in interface to 4wire and to 2-wire (party line) intercom.
The WS-19 is a single channel wireless beltpack,
housed in a strong aluminum case. The unit has
a Volume (listen level) control, a TALK and a
CALL button with LED indicators and one TX/RX
(send/receive) module.
ASL uses the 2.4 GHz frequency band for the
communication between its wireless beltpacks
and base stations.
2.0
The unique ASL Call system provides both a
flashing red LED and a very distinctive and
characteristic sound signal. A momentary push
makes the red LED flash, whilst holding the
button for two seconds it will activate the CALL
sound signal. The volume of the sound signal
(buzzer) can be adjusted at the side panel.
Special attention has been paid to the intelligibility
of speech. By applying low noise/high speed opamps, a speech presence filter and a specially
developed amplifier, communication is very
comfortable even in environments with a very
high background noise level.
UNPACKING
The shipping carton contains the parts listed
below:
The WS-19
User manual
6x NiMh rechargeable batteries
Charger
If any are missing, contact your dealer.
3.0
A maximum of 8 full duplex wireless connections
can be made, simultaneously operated without
any interference.
ASL has taken great care to ensure this product
reaches you in flawless condition.
After unpacking the unit, please inspect for any
physical damage. Retain the shipping carton and
relevant packing materials in case the unit needs
to be returned.
If any damage has occurred, please notify your
dealer immediately so that a written claim can be
initiated. Please also refer to the warranty section
of this manual.
INSTALLATION
The supplied rechargeable batteries are empty,
insert them in the beltpack and charge them
before use. For charging instructions see section
6.0 / #13
The WS-19 is used in an existing or new wireless
intercom system. The necessary DC voltages are
derived from the internal batteries (see section 7.0
/ #16).
Adjust the channel select switch to match the
selected channel on the installed base station (a
WS-200 or a WS-400). After switching on the WS19 with the power switch at the rear panel, the unit
should have contact with the base station.
To check this, push a CALL or TALK button.
The green LED “RX active” and the red LED “1 ch.
Beltpack” of the corresponding TX/RX module in
the base station should now be lit.
See also section 9.0 (Setting up Connections) and
section 10.0 (Communication Modes)
PAGE 3
User Manual WS 19 / March 2011 © ASL Intercom BV
.
4.0
FRONT PANEL CONTROLS
For the TALK button to function, the unit must stay
in reach of the base station. If not, the TALK
button switches off (the Talk LED extinguishes).
As soon as the beltpack is in reach of the base
station again, the Talk functions are restored
automatically.
1
VOLUME control knob
This knob adjusts the listen level for the headset.
2
TALK button
This push button activates the headset
microphone; the green Talk LED indicates the
microphone is switched on. One talks to the wired
and wireless intercom stations which are
connected to this beltpack (see section 9).
5.0
3
CALL button
This push button activates the call system.
A momentary push sends a call signal to all wired/
wireless intercom stations connected to this
beltpack (see section 9) and the Call LED starts
flashing. Pushing the button for 2 seconds
activates the CALL buzzer. After the CALL button
is released the call LED continues to flash for a
further 2 seconds.
To send or receive a CALL signal, the beltpack
must be in reach of the base station.
4
Call LED (red)
5
Talk LED (green)
SIDE PANEL TRIMMERS
7
OWN VOICE trimmer
This trimmer adjusts the level of your own
voice as you hear it in your headset.
Adjusting this signal does not affect the level of
your voice as heard by other wireless or wired
intercom stations (see section 9)
8
BUZZER VOLUME trimmer
This trimmer adjusts the volume of the internal
buzzer. The buzzer is activated by pushing the
CALL button of the WS-19, or the CALL button of
any other wired and/or wireless intercom station
connected to this beltpack (see section 9) for
longer than 2 seconds.
6
TONE VOLUME trimmer
This trimmer adjusts the level of the tones which
the WS-19 generates in case of a low battery
warning and at start up.
9
MIC GAIN trimmer
With this trimmer, the mic gain can be adjusted.
To increase mic gain turn trimmer clockwise.
To decrease mic gain turn trimmer counterclockwise
PAGE 4
User Manual WS 19 / March 2011 © ASL Intercom BV
.
6.0
REAR PANEL CONTROLS & CONNECTOR
13
ASL CHARGER connector
To this connector the ASL charger unit is
connected. On the charger unit two LED‟s
indicate the charging process. The red LED is lit
during charging, the green LED is lit when the
batteries are full.
Before starting the charging process,
make sure that the beltpack is switched
off (see #11) and check whether the
batteries inside the beltpack are indeed
of the rechargeable NiMh type. Trying to
charge non-rechargeable batteries
causes leakage of these batteries,
resulting in serious and in most cases
not repairable damage to the
electronics of the beltpack.
Use only the by ASL supplied battery
charger. Never try to use any other
adapter or charger unit.
10
Antenna
This small antenna is very flexible and nonremovable. For optimum performance keep the
antenna clear from obstacles.
11
POWER on/off switch
With this switch the battery power of the WS-19 is
switched on and off.
12
CHANNEL SELECT switch
With this switch the TX/RX channel (see section 8)
is selected on which the beltpack communicates
with the base station. There is a choice out of 8
TX/RX channels. The selected TX/RX channel
must match the selected TX/RX channel at one of
the TX/RX modules in the base station.
7.0
14
HEADSET connector
To this XLR-4 connector a headset can be
connected. The headset can must have an
impedance of minimum 200 ohms. If there are 2
cans in parallel, each can must have an
impedance of minimum 400 ohms.
The headset mic may be dynamic or electret.
INTERIOR
16
Battery Compartment
This compartment holds 6 penlight batteries of
the AA type. The supplied NiMH batteries are to
be preferred for maximum duration. The WS 19
uses a high discharge current which the batteries
need to sustain over their lifespan. Batteries
which only supply a high current for a short time
will be exhausted very quickly. When the batteries
reach the end of their capacity, the beltpack gives
a warning signal (4 tones). The interval of the
tones shorten when the batteries wear out.
17
A:
B:
C:
D:
Dipswitch, to set function:
Talk function only momentary
Talk function disabled
Buzzer function disabled
Battery save mode
(transmit power decreases)
To turn on a switch, slide towards side panel.
18
Service connector
For factory service only.
PAGE 5
User Manual WS 19 / March 2011 © ASL Intercom BV
.
8.0
8.1
FREQUENCY BAND & ANTENNA’S
o
Frequencies
ASL‟s wireless intercom uses the 2.4 GHz band,
which is freely available for WLAN (Wireless Local
Area Networks).
The ASL system divides the available bandwidth
into 16 overlapping sections, 8 of them being used
as upload frequency (from the beltpack to the
base station) and the other 8 being used as
download frequency (from the base station to the
beltpack).
With the channel select switches on both base
stations and wireless beltpacks one actually
selects an upload/download pair, called a TX/RX
channel.
Each TX/RX channel serves one dedicated
wireless connection between base stations and
wireless beltpacks (in fact between the TX/RX
modules in those units). It is possible to have
several WS 19 beltpacks on the same TX/RX
channel, see section 10.2 “Half Duplex”.
When using the ASL wireless system, the
following should be taken into account:
o The 2,4 GHz frequency is known to have
difficulty in penetrating concrete walls,
steel walls and other obstructions. Behind
obstructions like these an “HF shadow”
may occur where no communication is
possible.
9.0
o
8.2
The antenna‟s of a base station should
have as much as possible a “line of sight”
to the antenna‟s of the beltpack(s). All
objects within that path make the
connection less reliable.
Due to reflections of the HF signal, one
might experience a dropout on a specific
spot in a building; moving a beltpack only a
few inches can be enough to solve the
problem.
Because of the use of the WLAN
frequencies, ASL‟s wireless units might
experience interference from units like
mobile telephones with bluetooth and
computers with bluetooth or WLAN cards.
Try to change TX/RX channels if you
experience problems with these.
Antenna Wiring (Base Stations)
If the antennas of a base station are not supposed
to be directly connected to its front panel, a cable
between base station and antenna is needed
(base stations are equipped with SMA connectors
- female at the base station and male at the
antenna).
The 2.4GHz frequency experiences a big loss in
any cable, e.g. a RG58 cable has a loss of 1 dB
per meter. So make sure that your cable (50
ohms) is suited for 2.4 GHz and that the cable is
as short as possible. Make the cables in lengths of
a multiple of 12, e.g. lengths of 24cm, 48cm,
120cm, 240cm etc.
SETTING UP CONNECTIONS
9.1.
ASL WIRELESS AS A STAND ALONE SYSTEM
9.1.1
Base Station Settings
a. Give each TX/RX module in the base
station its own TX/RX channel by rotating
the „Channel select‟ switch.
Try to avoid TX/RX channels to be
physically next to each other, e.g. when
two WS-400‟s are in your wireless system,
try to set them in this order: TX/RX
channels 2, 4, 6, 8, 1, 3, 5, 7. If one uses a
WS-200 with only two beltpacks, use
TX/RX channels 1 and 6
b. Make sure the interface mode switch at the
rear of the base station is set to “PARTY
LINE”. The internal party line is now linking
the on board TX/RX modules to each
other.
c. Turn down the side tone trimmers at the
TX/RX modules (counter clockwise)
PAGE 6
User Manual WS 19 / March 2011 © ASL Intercom BV
.
9.1.2
Wireless Beltpack Settings
d. With the Channel Select switch at the rear
of the beltpack, select the TX/RX channel
according to the WS-200 or WS 400
setting.
e. Connect a headset to the beltpack and
insert fully charged batteries. When the
beltpack is switched on, a single short tone
should be heard and both LED‟s on the
front panel of the unit flash for half a
second. This indicates that the beltpack is
functioning properly.
f. When one pushes the CALL or the TALK
button, the LED‟s on the front panel are lit
and the green LED of corresponding
TX/RX module in the base station is lit.
It proofs the beltpack has connection with
the base station.
g. Turn down the OWN VOICE Volume
trimmer at the side panel of the beltpack
(counter-clockwise)
h. Set the volume control of the beltpack at
approximately 50%
i. Push the TALK button on the beltpack, talk
into the microphone and listen to your own
voice (you might hear a small delay in the
signal)
j. Adjust the side tone trimmer at the
referring TX/RX module in the base station
so that the level of your own voice is as low
as possible
k. Adjust the OWN VOICE trimmer on the
beltpack so that the level of your own voice
is to your liking.
9.2.
ASL WIRELESS CONNECTED TO A 4-WIRE INTERCOM SYSTEM
9.2.1
Base Station Settings
a. Give each TX/RX module in the base
station its own TX/RX channel by rotating
the „Channel select‟ switch.
Try to avoid TX/RX channels to be
physically next to each other, e.g. when
two WS-400‟s are in your wireless system,
try to set them in this order: TX/RX
channels 2, 4, 6, 8, 1, 3, 5, 7. If one uses a
WS-200 with only two beltpacks, use
TX/RX channels 1 and 6
9.2.2
b. Make sure the interface mode switch at the
rear of the base station is set to “4-WIRE”
c. Connect the 4-wire intercom system via the
XLR-3 connectors at the rear panel of the
base station. Each XLR-3 male connector
(signal out) and female connector (signal
in) connects each TX/RX module to an
input/output of the a 4-wire intercom
system. The internal party line is now
disconnected.
Wireless Beltpack Settings
d. With the Channel Select switch at the rear
of the beltpack, select the TX/RX channel
according to the WS-200 or WS-400
setting.
e. Connect a headset to the beltpack and
insert fully charged batteries. When the
beltpack is switched on, a single short tone
should be heard and both LED‟s on the
front panel of the unit flash for half a
second. This indicates that the beltpack is
functioning properly.
f. When one pushes the CALL or TALK
button, the LED‟s on the front panel are lit
and the green LED of the corresponding
TX/RX module in the base station is lit. It
proofs the beltpack has connection with
the base station.
g. Turn down the OWN VOICE Volume
trimmer at the side panel of the beltpack
(counter-clockwise)
h. Push the TALK button on the beltpack, talk
into the microphone and listen to your own
voice
i. Turn up the volume of your own voice by
adjusting the OWN VOICE trimmer to a
level that you like
PAGE 7
User Manual WS 19 / March 2011 © ASL Intercom BV
.
9.3.
ASL WIRELESS CONNECTED TO A PARTY LINE INTERCOM SYSTEM
9.3.1
Base Station Settings
a. Give each TX/RX module in the base
station its own TX/RX channel by rotating
the „Channel select‟ switch.
Try to avoid TX/RX channels to be
physically next to each other, e.g. when
two WS-400‟s are in your wireless system,
try to set them in this order: TX/RX
channels 2, 4, 6, 8, 1, 3, 5, 7. If one uses a
WS-200 with only two beltpacks, use
TX/RX channels 1 and 6
9.3.2
Wireless Beltpack Settings
e. With the Channel Select switch at the rear
of the beltpack, select the TX/RX channel
according to the WS-200 or WS-400
setting.
f. Connect a headset to the beltpack and
insert fully charged batteries. When the
beltpack is switched on, a single short tone
should be heard and both LED‟s on the
front panel of the unit flash for half a
second. This indicates that the beltpack is
functioning properly.
g. When one pushes the CALL or TALK
button, the LED‟s on the front panel are lit
and the green LED of corresponding
TX/RX module of the base station is lit. It
proofs the beltpack has connection with
the base station.
.
9.3.3
b. Make sure the interface mode switch at the
rear of the base station is set to “PARTY
LINE”.
c. Connect the party line intercom system via
the XLR-3 connectors at the rear panel of
the base station. Each XLR-3 male and
female pair may connect each TX/RX
module to a channel of the party line
intercom system (see also section 9.3.3).
Everywhere this connection is made, the
internal party line is interrupted.
d. Turn down the side tone trimmers (counter
clockwise).
h. Turn down the OWN VOICE Volume
trimmer at the side panel of the beltpack
(counter-clockwise)
i. Set the volume control of the beltpack at
approximately 50%
j. Push the TALK button on the beltpack, talk
into the microphone and listen to your own
voice (you might hear a small delay in the
signal)
k. Adjust the side tone trimmer of the
referring TX/RX module in the base station
so that the level of your own voice is as low
as possible
l. Adjust the OWN VOICE trimmer on the
beltpack so that the level of your own voice
is to your liking
Wiring configurations when connecting to a party line intercom system
Connecting to party lines can be done in many different ways. Below a few examples:
Example 1:
When two WS-400 base stations are installed
and 8x WS-19 beltpacks are available:
The drawing shows how to connect all WS-19
beltpacks to the same party line.
PAGE 8
User Manual WS 19 / March 2011 © ASL Intercom BV
.
Example 2:
When two WS-400 base stations are installed
and 8x WS-19 beltpacks are available:
The drawing shows how to connect WS-19 #1
and #2 to party line 1, WS-19 #3 and #4 to party
line 2 and WS-19 #5, #6, #7 and #8 to party line 3.
Example 3:
When two WS-400 base stations are installed
and 8x WS-29 beltpacks are available:
The drawing shows how to connect the channels A
of WS-29 #1, #2, #3 and #4 to party line 1, the
channels B of WS-29 #1, #2, #3 and #4 to party
line 2, the channels A of WS-29 #5, #6, #7 and
#8 to party line 3 and the channels B of WS-29
#5, #6, #7 and #8 to party line 4.
For more information about the audio routing when WS-29 beltpacks are used,
see the WS-200 or WS-400 user manual, section “Automatic Audio Routing”
10.0
COMMUNICATION MODES
The system is designed to offer a maximum of 8
full duplex wireless connections, simultaneously
operated without any interference. A wireless
beltpack may be the WS-19 or the WS-29, both
containing one TX/RX module. A base station may
be the WS-200 containing two TX/RX modules, or
the WS-400 containing four TX/RX modules.
When in the same space more than one base
station is required, these stations have to be
interconnected by WS Link Cables (an ASL
accessory). A link cable contains all signals which
have to be interchanged between base stations.
See the WS-200 or WS-400 user manual
10.1
Each wireless beltpack needs to be assigned to a
unique TX/RX channel. If another TX/RX module
is set to the same TX/RX channel the
communication is garbled and the connection
does not function properly.
A TX/RX module in a base station automatically
senses whether a WS-19 or a WS-29 beltpack is
assigned and automatically selects the right audio
routing for either beltpack type.
For more information, see section “ Automatic
Audio Routing” in the WS-200 or the WS-400 user
manual.
Full Duplex Mode (for WS-19 and WS-29 beltpacks)
A full duplex wireless connection is accomplished
by using a dedicated TX/RX channel, selected on
the beltpack and on the base station.
Such a TX/RX channel links the TX/RX module in
a wireless beltpack to one of the TX/RX modules
in the base station.
PAGE 9
User Manual WS 19 / March 2011 © ASL Intercom BV
.
10.2
Half Duplex Mode (for WS-19 single channel beltpacks only).
This mode allows more than one WS-19 beltpacks
on the same TX/RX channel. However, only one
of the WS-19 beltpacks can talk at a time and
have a full duplex connection. For as long as one
of the beltpacks has a full duplex connection (talk,
listen and call), the other beltpacks are able to
listen to the signals coming from the base station,
but are not able to call or talk.
In case of half duplex use of WS-19 beltpacks
whilst the corresponding TX/RX module in the
base station is connected to a wired party line
intercom system, the following has to be taken
into account:
11.0
WARRANTY
ASL Intercom warrants this unit to the original
end-user purchaser against defects in workmanship and materials in its manufacture for a
period of two years from date of shipment to the
end-user.
12.0
The side tone prevents (when properly adjusted)
the microphone signal coming from the “talking
beltpack” to return to the beltpacks. The “listening
beltpacks” do not hear the “talking beltpack”.
To solve this, the side tone trimmer of the
concerning TX/RX module should be turned down
(fully counter clockwise). But there is a drawback:
the user of the “talking beltpack” will hear his own
voice with a delay of 24 msec and via the OWN
VOICE link in the beltpack (no delay). The effect
of hearing your own voice twice (with and without
delay) can be diminished by turning down the
OWN VOICE trimmer. The “listening beltpacks”
will not notice the delay.
Faults arising from misuse, unauthorized
modifications or accidents are not covered by this
warranty.
If the unit is faulty, it should be sent in it's original
packing to the supplier or your local ASL dealer,
with shipping prepaid. A note must be included
stating the faults found and a copy of the original
suppliers invoice.
TECHNICAL SPECIFICATIONS
WS-19 Power Consumption
Current (at 9 V DC):
200 mA quiescent
240 mA signaling
260 mA at max. output + signaling
Mic. Pre-amp
mic. impedance: 200 ohms
gain: 40 dB - 70 dB
presence filter: +6 dB at 5 kHz
V electret mic: +4.5V DC
Headphones Driver Amp
max. load: 200 ohms
max. output level: 6.8 Vrms @ 200 Ω
max. output power: 0.23 Wrms @ 200 Ω
Buzzer
max. SPL: 65 dBA
WS-19 Dimensions & Weight
width:
88 mm
height:
49 mm
depth:
141 mm
weight:
650 grams
System Specifications
transceiver frequency: 2400 – 2483.5 MHz
transmit power: 10 mW E.I.R.P.
number of channels: 8
channel separation: 7 MHz
dynamic range: 70 dB
supply voltage: +7.2 V DC (4.2 V to 9 V)
audio freq. response: 200 Hz-12 kHz (-3dB)
0 dBu is defined as 775 mV into open circuit
ASL reserves the right to alter specifications without prior notice.
PAGE 10
User Manual WS 19 / March 2011 © ASL Intercom BV
.