1
HammerSchmidt™ User Manual
English
important
HammerSchmidt™ User Manual
English
FRAME PREPARATION - part ii
The following sections on Frame Preparation call for making permanent and non-reversible modifications to your frame,
requiring advanced mechanical knowledge, skills, and tools. We recommend these procedures only be performed by a
qualified bicycle mechanic. If you choose to perform these procedures yourself you should read and understand these
instructions and have a working knowledge of tools required prior to starting work on your frame. In addition, you should
wear your safety glasses until you have completed all the steps in this manual.
FRAME PREPARATION - part i
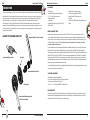
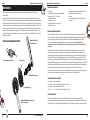
Now that you have determined that the ISCG tabs on your frame are compatible with HammerSchmidt, it is time to make
sure the face of the bottom bracket shell and ISCG mounting surfaces are parallel and uniform. This is a critical process
because one part of the HammerSchmidt mechanism is located off the bottom bracket shell while the other part is located
off the ISCG tabs. When they are mated together, the HammerSchmidt internals need to be aligned so they can engage
and function properly. Let’s get started:
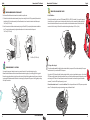
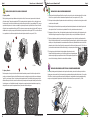
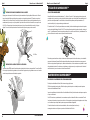
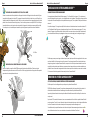
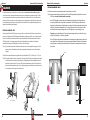
Step 1. Make sure your frame’s bottom bracket shell threads are clean and undamaged; there should be no paint or dirt in
there. For best results, have your bottom bracket shell tapped by a professional bicycle mechanic.
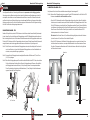
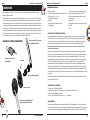
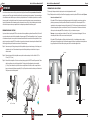
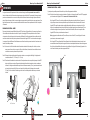
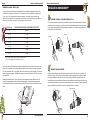
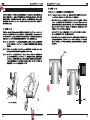
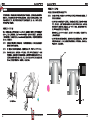
Step 2. Measure your bottom bracket shell width with a pair of digital calipers. The shell width should be either 68, 73 or
83 mm (+0.3 / -0.2 mm).
Ok, are you ready for the final and most critical step in frame preparation?
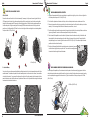
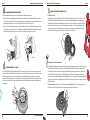
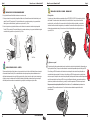
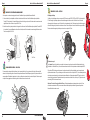
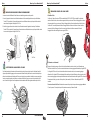
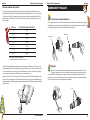
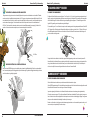
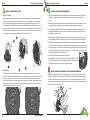
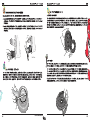
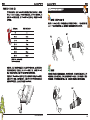
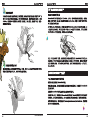
Step 4. Replace the bottom bracket facing cutter on your tool with the Truvativ ISCG tab facing cutter that is appropriate for
your size ISCG tabs and remove all spacers from the cutter.
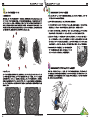
• If your ISCG tabs are flush with the face of the bottom bracket shell (zero offset), you will only be facing the tabs to
ensure they are parallel to the bottom bracket shell face. Face the ISCG tabs using the same method provided by
the manufacturer of your bottom bracket facing tool. If the cutter does not completely face the surface of each tab,
add a 0.5 mm spacer to the cutter tool and face again. When you are finished facing, be sure the ISCG tab surface
is smooth and free from burrs and debris.
Note: if you added a 0.5 mm spacer to the cutter, you now have a 0.5 mm offset to your tabs. Write this number
down, you will need it later.
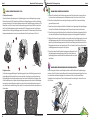
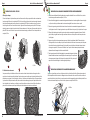
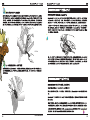
• If your ISCG tabs are offset inboard of the face of the bottom bracket shell, you will need to determine that offset
prior to facing so you can space the cutter tool to match. Use the depth stick on the caliper and measure the depth
at all three tabs. Select the largest of the three numbers and write it down, this is your offset.
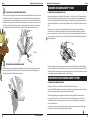
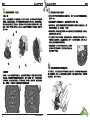
Flush
Step 3. Face the bottom bracket shell. This will create a flat surface for ISCG cutter to bottom out on in the next step. Keep
in mind the tolerances as you face the bottom bracket shell. If the shell width exceeds the maximum tolerance value
(+0.3 mm), you will need to face it within specification. However, do not face shorter than the minimum tolerance
value allows (-0.2 mm). Follow the instructions provided by the manufacturer of your bottom bracket facing tool for
proper operation of the tool.
Offset
68, 73, or 83 mm
4
95-6115-004-000 Rev A
5