1
4. Accessories
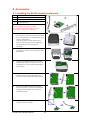
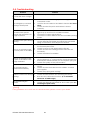
4-1. Installing the RS-232 module (serial port)
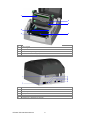
1
Module connection cable
2
RS-232 module (serial port)
3
Fastening screw
4
RS-232 bracket
【Caution】
Please make sure that you take
precautions to prevent electrostatic
discharge during the installation.
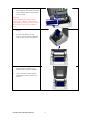
1.
Make sure that the printer is switched
off and the power cord disconnected
from the printer. You should work on a
clean, flat surface.
Turn the printer upside down and
remove the three screws marked in
the illustration from the printer
housing.
2.
Pull the bottom part of the housing
upwards to remove it as shown in the
illustration.
3.
Hold the motherboard by the back
panel and pull it up. Then turn it over
and place it on the print mechanism
face down.
4.
To remove the motherboard back
panel, unscrew the earthing screw
and the back panel fastening screw.
5.
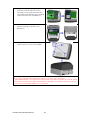
Secure the RS232 bracket supplied
with the printer on the motherboard
using the fastening screw and the
earthing screw.
6.
Plug one end of the connection
cable into the module.
EZ1105 / EZ1305 User Manual
16