1
General
DCLI
Deeter Current-Loop Indicator User Manual.
Packing list
Open the outer carton and check all parts listed below are enclosed and undamaged.
۰
۰
The Indicator Module.
The User Manual.
If any parts are missing or damaged please contact the Deeter Group at:
In Europe
In the USA
Deeter House.
446
Valley Road,
Commerce Street
Hughenden Valley,
Tallmadge
Bucks.
Ohio
HP14 4LW
44278
Tel: +44 (0)1494 566046
Tel: 001 330 630 3510
Fax: +44 (0)1494 563961
Fax: 001 330 630 3512
[email protected]
Email: [email protected]
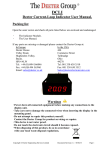
The DCLI (Deeter Current-Loop Indicator) is an easy to mount display
module designed to work with any 4-20mA current loop process sensor.
A 0-20mA option is provided and can be selected during calibration setup.
The integral display consists of four 7-segment LED’s capable of showing
values between -999 and 9999 with a selectable decimal point position.
Any number in this range can represent the minimum current and any other
number, the maximum current, thus the display may represent a wide
variety of measurement units and may also be configured to represent an
inverted 20-4mA current if desired.
The module incorporates two relays with normally-closed contacts which
can be individually configured to open and close at any display threshold.
Separate ON and OFF settings allow the amount of hysteresis to be chosen
and depending on whether the ON setting is higher or lower than the OFF
setting, the relays can be chosen to either open-high/close-low or openlow/close-high. - see diagrams below.
Display Value
Relay ON
threshold
greater than
the OFF
threshold
Relay contacts closed
Relay on
threshold
Hysteresis
Relay off
threshold
Relay contacts as per
last threshold crossed
Relay contacts open
Loop Current
Display Value
Warnings
۰ Power down all connected equipment before making any connections to the
display unit.
۰ Take care not to damage the connected wires when inserting the display in
the mounting panel.
۰ Do not attempt to repair this product yourself.
Contact the Deeter Group for product servicing or repairs.
۰ This device is not water proof.
۰ Do not touch the electronic circuit should it become exposed.
۰ When disposing of this product, do so in accordance
with your local waste disposal regulations.
Copyright © Deeter Engineering Services Limited
Document Revision 1.2 24/02/09
Relay ON
threshold
less than
the OFF
threshold
Relay off
threshold
Relay contacts open
Hysteresis
Relay on
threshold
Relay contacts as per
last threshold crossed
Relay contacts closed
Loop Current
Copyright © Deeter Engineering Services Limited
Document Revision 1.2 24/02/09
Wiring
Calibration
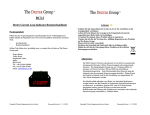
Please refer to the unit label if the screw terminal
layout is different to that shown below.
Power +
Power -
The display module must be powered and connected to a current-loop
source before calibration can begin. The relays do not require connecting
during calibration or relay setup. Calibration and relay settings are
configured using the 2 buttons at the rear of the module.
Settings are saved to a non-volatile memory and are reinstated after powerup. Re-calibration may be required if additional equipment is added to the
current-loop circuit at a later stage.
Relay 2
Relay 2
Left hand button
Right hand button
Power +
Power Relay 1
Relay 1
Current loop +
Current loop The displayed output is assumed to have a linear relationship with the input.
Therefore, calibration requires recording just two input levels and selecting
the desired displayed output for these inputs. Any two inputs could be used,
but for greatest accuracy they should be as far apart as possible. 4mA and
20mA settings are assumed in the following example, but the actual inputs
can differ.
Copyright © Deeter Engineering Services Limited
Document Revision 1.2 24/02/09
Copyright © Deeter Engineering Services Limited
Document Revision 1.2 24/02/09
Relay setup procedure
Display calibration and setup procedure
۰
۰
۰
۰
۰
۰
۰
۰
۰
۰
۰
Press and hold down the right-hand button for 2 seconds. The display will
show ‘CAL1’.
Adjust the loop current to the module to 4mA.
Press and hold the right-hand button for 2 seconds. The display will show
‘0’ to represent the displayed output for the 4mA input.
To increment or decrement the display, press and hold the left-hand
button. Rapid change will start after 2 seconds and gradually increase in
speed if the button is continually held down.
To toggle between increment and decrement, press and release the righthand button.
When the desired display output has been selected for the 4mA loop
current, press and hold the right-hand button for 2 seconds. The display
will show ’CAL2’
Adjust the loop current to the module to 20mA. Press and hold the righthand button for 2 seconds. The display will show ‘0’ to represent the
displayed output for the 20mA input.
Repeat the process for setting the displayed output, as above.
Press and hold the right-hand button for 2 seconds. The display will
show ‘.dp’
Choose the desired decimal point position (or decimal point off) by
pressing the left-hand button.
Press and hold the right-hand button for 2 seconds. The display will show
‘4or0’. Press the left-hand button to toggle the decimal point between 4
and 0. This selects the 4-20mA or 0-20mA operation.
Press and hold the right-hand button for 2 seconds to save and complete
the calibration mode.
Vary the current input to check the display is configured as required
before moving on to setting the relays. The display will show
‘Hi’ or ‘–Lo’ for values outside the display range.
Copyright © Deeter Engineering Services Limited
Document Revision 1.2 24/02/09
۰
۰
۰
۰
۰
۰
۰
۰
The relays are configured to turn on or off at display thresholds,
not the loop current.
Press and hold the left-hand button for 2 seconds to enter the Relay
Setup Mode.
The display will show ‘r1.on’ representing Relay1 ON, for a short
while, then show the present setting..
To increment or decrement the setting, press and hold the left-hand
button. Rapid change will start after 2 seconds and gradually
increase in speed if the button is continually held down.
To toggle between increment and decrement, press and release the
right-hand button.
When the required setting has been selected, press the right-hand
button for 2 seconds to advance to the next stage.
Use the above method to set all 4 relay thresholds; r1.on (Relay1
ON), 1.off (Relay1 OFF), r2.on (Relay2 ON) and 2.off (Relay2
OFF).
When relay setup has been completed the display will show ‘donE’
for 2 seconds and then return to normal operation.
Copyright © Deeter Engineering Services Limited
Document Revision 1.2 24/02/09
Specification
Mounting
The display module is enclosed in a black plastic box with a tough dark red
translucent face plate.
When mounted, only the face plate protrudes above the mounting panel by a
height of 7mm.
A 69.3mm x 29.3mm square aperture should be cut into the mounting panel
with a 4mm clear border around the hole.
The module is designed with 4 flexible retaining arms which will grip when
mounted into a panel thickness of
11 Gauge 2.95mm [0.116”]
14 Gauge 2.03mm [0.080”]
16 Gauge 1.63mm [0.064”]
Once mounted the module can easily be removed by squeezing together the
flexible arms and pushing the module out of the mounting panel.
Supply voltage range
Supply current
Current loop voltage
Current loop range
7 to 26Vdc
<100mA
30Vdc Max
1mA to 21mA.
Current loop resistance
Relay contacts
100Ω
Normally-open (Form A)
48Vac/dc
0.5A
-5° to +60°C
-999 to 9999
±0.1%
IP40. IP55 when fitted to a suitable enclosure
(0mA to 21mA for the 0-20mA option)
Operating temperature
Display range
Display linearity*
Environmental
* To ensure maximum accuracy, calibrate using the full 4mA to 20mA
current-loop range.
* Re-calibrate if additional equipment is added to the current loop.
Display Messages
‘HI’
Display value greater than +9999
‘-LO’
Display value less than -999
‘OPEn’ Loop current less than 1mA (4-20mA option only)
‘OVEr’ Loop current greater than 21mA
‘dxxx’ Start up firmware revision, where xxx=revision number.
Other messages will be displayed during display calibration and relay setup
modes.
Copyright © Deeter Engineering Services Limited
Document Revision 1.2 24/02/09
Copyright © Deeter Engineering Services Limited
Document Revision 1.2 24/02/09