1
Relay setup procedure
Display calibration and setup procedure
۰
۰
۰
۰
۰
۰
۰
۰
۰
۰
۰
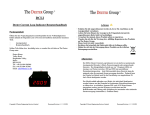
Press and hold down the right-hand button for 2 seconds. The display will
show ‘CAL1’.
Adjust the loop current to the module to 4mA.
Press and hold the right-hand button for 2 seconds. The display will show
‘0’ to represent the displayed output for the 4mA input.
To increment or decrement the display, press and hold the left-hand
button. Rapid change will start after 2 seconds and gradually increase in
speed if the button is continually held down.
To toggle between increment and decrement, press and release the righthand button.
When the desired display output has been selected for the 4mA loop
current, press and hold the right-hand button for 2 seconds. The display
will show ’CAL2’
Adjust the loop current to the module to 20mA. Press and hold the righthand button for 2 seconds. The display will show ‘0’ to represent the
displayed output for the 20mA input.
Repeat the process for setting the displayed output, as above.
Press and hold the right-hand button for 2 seconds. The display will
show ‘.dp’
Choose the desired decimal point position (or decimal point off) by
pressing the left-hand button.
Press and hold the right-hand button for 2 seconds. The display will show
‘4or0’. Press the left-hand button to toggle the decimal point between 4
and 0. This selects the 4-20mA or 0-20mA operation.
Press and hold the right-hand button for 2 seconds to save and complete
the calibration mode.
Vary the current input to check the display is configured as required
before moving on to setting the relays. The display will show
‘Hi’ or ‘–Lo’ for values outside the display range.
Copyright © Deeter Engineering Services Limited
Document Revision 1.2 24/02/09
۰
۰
۰
۰
۰
۰
۰
۰
The relays are configured to turn on or off at display thresholds,
not the loop current.
Press and hold the left-hand button for 2 seconds to enter the Relay
Setup Mode.
The display will show ‘r1.on’ representing Relay1 ON, for a short
while, then show the present setting..
To increment or decrement the setting, press and hold the left-hand
button. Rapid change will start after 2 seconds and gradually
increase in speed if the button is continually held down.
To toggle between increment and decrement, press and release the
right-hand button.
When the required setting has been selected, press the right-hand
button for 2 seconds to advance to the next stage.
Use the above method to set all 4 relay thresholds; r1.on (Relay1
ON), 1.off (Relay1 OFF), r2.on (Relay2 ON) and 2.off (Relay2
OFF).
When relay setup has been completed the display will show ‘donE’
for 2 seconds and then return to normal operation.
Copyright © Deeter Engineering Services Limited
Document Revision 1.2 24/02/09