1
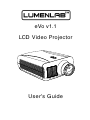
eVo v1.1 LCD Video Projector User's Guide 1 Please read this manual carefully before using your projector. Keep the manual handy for future reference. Serial Number: ....................... Your serial number is located on the rear of your projector. Invoice Number: ....................... Your invoice number was provided with your email receipt. Lumenlab is a registered trademark of DIY for Life, Inc. 2 Contents Safety precautions 4 Features 5 Introduction Included in the box Parts of the projector Buttons on the projector case Remote control Input panel 6 7 8 9 9 Installation 10 Connecting the projector Connecting to a computer Connecting to video devices 11 12 Basic operation Turning the projector on/off Adjusting the focus Correcting distortion Selecting the sources 14 14 15 15 OSD (On Screen Display) operation 16 Replacing the lamp 18 Troubleshooting 22 Projector care 24 Warranty 25 Specifications 26 Contents 3 Safety precautions CAUTION If you will not be using the projector for an extended period of time, turn the power off at the wall outlet.The power outlet should be installed as near to the equipment as possible and should be easily accessible. CAUTION To prevent shock, do not open the case. No userserviceable parts inside. Refer servicing to qualified service personnel. Warnings • The projector is designed to operate on a power supply of 100240VAC, 50Hz/60Hz. • Avoid staring directly into the lens as eye damage may result. • Never expose the projector to rain or moisture. Keep away from sources of liquid such as drinks. • The projector should never be placed near or over a radiator or other hot device. • Handle the power cord carefully. A damaged cord can cause electric shock or fire. • Do not attempt to mount the projector on a ceiling yourself. The projector must be installed by a qualified technician in order to ensure proper operation and reduce the risk of injury. The ceiling must be strong enough to support the projector. • Installation must allow for air flow on all sides. • When the projector is turned off, the cooling fan will continue to operate. During this cooling period, do not turn off the power or remove the plug from the power outlet. • Turn off the projector and disconnect power cord if it is not to be used for an extended period of time. • Clean filters regularly to avoid blockage of air flow. • When replacement parts are required, be sure to purchase them from Lumenlab. Using third party parts will void warranty. 4 Safety precautions Features Thank you for choosing the eVo home theater projector. Your home theater projector has the following features: Wide range of inputs Your projector can be easily connected to your computer, DVD player, VCR, gaming console and other video devices. Clear, vivid images The projector’s high resolution and brightness achieves a perfect display for home cinema and personal game enjoyment. Ease of use Various projector operations can be easily performed using the remote control or keys on the projector case. Your projector can be easily mounted with the Lumenlab ceiling mount (sold separately). Affordable replacement lamps Not only do the lamps have a long life of over 6000 hours but the replacements lamps are provided at a highly competitive cost. Features 5 Introduction Included in the box Projector Remote control User manual Power cord Video cable Lens cleaning paper Replacement fuse Optional accessories • Lamp • Ceiling Mount • Projection Screen You can purchase these parts from the Lumenlab home theater store at: w w w .lumen la b. com / s t ore 6 Introduction Parts of the projector Ventilation (inlet) Key panel Input panel Ventilation (outlet) ( H e a air t e disaexhausted ir is (Heated e x h a from u s t e here.) d from here) IR receiver Keystone corr ection AC input Connect the supplied power cable here. Ventilation (outlet) (Heated air is exhausted from here.) Introduction 7 Buttons on the projector case Power Button Use this button to turn your projector on and off. To turn off the projector, press the “Power” button twice. SOURCE Button Use this button to select the input. Button Use this button to adjust the image mode such as brightness. MENU Button Press this button to activate the On Screen Display (OSD). Buttons Use these buttons to navigate the OSD menu. Indicator 8 Projector mode Color Blink Standby mode red no Turning on yellow no Running green no Shutting down green yes Introduction Remote control Power Button Use this button to turn your projector on and off. To turn off the projector, press the “Power” button twice. MENU Button Press this button to activate the On Screen Display (OSD). V+/V-/P+/P- Buttons Use these buttons to navigate the OSD menu. Input panel VGA - connection to a computer. Pb/Pr/Y - component video connection. VIDEO - composite video connection. S-VIDEO - S-video connection. For LAMP and COOLING status details, see Troubleshooting on page 22. Introduction 9 Installation Be sure to read the Safety Precautions on page 4 before installation. • Place the projector on a level surface. • Install the projector in a dry area free from dust, heat, moisture or smoke. • For better results, project the image onto a flat surface and in a darkened environment. • To avoid image distortion, ensure that the projector is exactly perpendicular to the screen. • Projection size can be focused from 50" to 150" (125-175cm). • Move the projector left or right to center the image horizontally on the screen. • Move the projector forwards or backwards to adjust the image size on the screen. See below for details. Ceiling Mount 10 Installation Front projection Connecting the projector Connecting to a computer 1. Turn off the power for the projector, the computer and video player. Damage may result if you try to make a connection when the power is switched on. 2. Check the connector types. Damage may result if you attempt to insert a connector into the incorrect port. 3. Connect a D-Sub 15 pin VGA cable from the computer's VGA output to the projector's VGA input terminal. 4. Make sure that all the terminals are well connected before turning on the projector and the computer. Note: You may need to change your computer's display preferences to enable VGA output. or desktop computer VGA OUT notebook AUDIO OUT audio cable to speakers VGA cable projector Connecting the projector 11 Connecting to video devices Connecting via composite DVD,V CR 1. Connect a video cable from the video equipment's composite video output to the projector's VIDEO input terminal. VIDEO OUT S-VIDEO OUT AUDIO OUT audioc ablet os peakers video cable 2. Make sure that all the terminals are well connected. projector Connecting via S-video DVD, VCR 1. Connect an S-video cable from the video equipment's S-video output to the projector's S-VIDEO input terminal. 2. Make sure that all the terminals are well connected. VIDEO OUT S-VIDEO OUT AUDIO OUT audio cable to speakers s-video cable projector 12 Connecting the projector Connecting via component 1. Connect a component video cable from the video equipment's component output to the projector's component (Pb/Pr/Y) input terminals. DVD, VCR Component OUT Cb Cr 2. Make sure that all the terminals are well connected. AUDIO OUT Y audio cable to speakers component cable projector Connecting the projector ontents 13 Basic operation Turning on the projector When the projector receives mains power, it will go into standby mode and the indicator light will be red. Press the power ( ) button on the projector case or on the remote control. The fans will start up and the indicator light will be yellow. When the indicator light turns green, the projector is ready for use. Note: When using the remote control, make sure it is directly aimed at the IR on the front of the projector case (see page 7). Turning off the projector Press the power ( ) button once. The indicator light will flash in green. Press the power button again within three seconds to confirm shutdown. The projector will begin shutting down and the fans in the projector will keep running for about three minutes. Finally, turn off the main power switch. Before moving the projector: 1. Unplug the power cable. 2. Disconnect any other cables. 3. Cover the lens with the lens cap. Adjusting the focus Turn the projector lens to the right or left until the image is crisp and in focus. 14 Basic operation Correcting distortion The vertical distortion of a projected image on the screen can be corrected by the keystone correction function. Moving the keystone correction knob on the side of the projector case (see page 7) until the image frame becomes square. Notes: The vertical keystone angle can be corrected between ±15 degrees. The keystone correction function can cause an image to be slightly blurred. You can only correct vertical distortion with this function. Horizontal distortion cannot be corrected. Selecting the sources Note: Turn on the computer, DVD, TV game player or other video device. Press the SOURCE button on the projector case to choose the source: VIDEO S-VIDEO VGA Y/Pb/Pr To select the source using the remote control, use the On Screen Display menu as explained on page 16. Basic operation 15 On Screen Display (OSD) operation Basic operation • Press the MENU button on the remote control or projector case to display the OSD menu. • Select the menu item using the buttons. • Press the button to move to the right-hand submenu. • Use the buttons to navigate the submenu. • Use the buttons to adjust the parameter values. • Press the MENU button to return to the main menu. Press it again to close the OSD menu. Selecting the source Source submenu: Select the input source from VIDEO, S-VIDEO, VGA and Y/Pb/Pr. Adjusting the picture Picture submenu: Allows adjustment of the parameters listed below. Scheme Brightness Contrast Hue Saturation Sharpness Color Temp 16 OSD operation Select the mode from Vivid, Sport, Movie and Nature. Adjust the brightness level. Adjust the contrast ratio. Adjust the skin color, valid in NTSC system. Adjust the color saturation. Adjust the sharpness of the video image. Adjust the color temperature to Cold, Warm or Standard User preferences Function submenu: Allows adjustment of the parameters listed below. OSD Language OSD Position OSD Timer DcDi Scaling Turn Over Factory Reset Select the menu's display language from English, Chinese, Italian, German, French, Portuguese, Spanish and Russian. Adjust the position of the menu on the screen. Set the time in seconds before the OSD menu times out. Adjust the image profile. Select the display mode between 16:9 and 4:3. Flip the projected image vertically. Reset to the factory default preferences. VGA specific options PC submenu: When VGA is selected as the source, the PC submenu will be available with options as listed below. Auto Adjustment Automatically calculates the optimum values for the parameters listed below. H Position V Position Phase and Clock Adjusts the horizontal position of the projected image. Adjusts the vertical position of the projected image. When the image is displayed abnormally, adjust these items. Automatically calculates the optimum color settings. Auto Color When the VGA input resolution changes, the system will inspect and adjust the corresponding display values. OSD operation 17 Replacing the lamp After your lamp has been operating for 6000~9000 hours, the brightness will become weak and the image quality will deteriorate. At this point you should replace the lamp to maintain optimal performance. Note: Do not touch the lamp immediately after it has been used. It will be extremely hot. Turn the projector off, turn off the main power switch and then disconnect the power cable. Allow at least one hour for the lamp to cool before handling. To replace the lamp: 1. Place the projector on a soft cloth and turn it upside down. Use a Philips head screwdriver to release the screw securing the lamp cover. (See figure1.1) Push up and remove the lamp cover. (See figures 1.2 and 1.3) Figure 1.1 18 Replacing the lamp Figure 1.2 Figure 1.3 2. In the center white square block, loosen the two screws on the right until the Philips screwdriver goes into a freewheeling condition. Do not remove these screws. Figure 2 Loosen these two screws. Do not loosen or remove the center screw 3. Pull out the two white wires on the right. (See figure 3 below.) Figure 3 Pull these two wires out. 4. Remove the four screws, two at each end of the lamp bracket. The four screws securing the lamp bracket. Figure 4 Replacing the lamp 19 5. Take out the lamp bracket by holding it as shown below. Lamp bracket Figure 5.2 Figure 5.1 6. Put the new lamp bracket into the projector case. (See figure 6.1) Secure it in place with the four screws . (See figure 6.2) The four screws securing the lamp bracket. Replacing the Lamp Figure 6.1 20 Replacing the lamp Figure 6.2 7. Connect the right two white wires and tighten the two screws on the right. Figure 7.1 8. Figure 7.2 Reattach the lamp cover. Slip the lamp cover back till it snaps into place, and then tighten the screw. (See figures 8.1 and 8.2) Figure 8.1 Figure 8.2 Replacing the lamp 21 Troubleshooting Status indicators There are two LED lights on the input panel, called Lamp and Cooling. Below is a table showing the possible color combinations of these lights and the indicated error message. Lamp Cooling Error indicated off off no error green red fan 1 fault green orange fan 2 fault red green lamp couldn't be started orange green lamp needs replacing red red overheating orange orange wrong operation or ballast error Projector won't turn on • Is it plugged in and is the mains power switched on? • Have you tried pushing the power button on the projector (not remote)? • Have you waited 30 minutes since the projector was last turned off? Projection is black • Is the projector on (refer to above questions)? • Is the lens cap off? • Is the brightness turned up? • Is contrast in the middle? • Is the projector hooked up to a video source? • Have you confirmed that the video source is working? Remote control doesn't work • Does the remote have new batteries? • Are the batteries installed properly? Parts rattling around inside the projector • Are you sure the noise is not coming from the washers on the feet? 22 Troubleshooting Picture Quality Issues Picture is dim • Have you adjusted the brightness and contrast? • Is the projector within 12' (4m) of the screen? (see page 10) • Is the screen surface white? • Is the room darkened enough? Picture is distorted • Is the projector exactly perpendicular to the screen? (see page 10) • Have you adjusted the keystone setting? (see page 15) • Is the screen or projection surface flat? • Is the correct aspect ratio being used? (see Scaling on page 17) Dark areas in the projection • Have you cleaned the lens with the cleaning paper provided? Image is out of focus • Have you adjusted the lens? (see page 14) • Are you using the correct input resolution? For VGA input, the projector should be run at 640x480 or 800x480. Image contains interference • Are you using a high quality shielded video cable? This is recommended especially at longer cable lengths. Image appears to be tinted red, green or blue • Are you using the correct image settings? (see page 16) • Does the lamp need replacing? The lamp color may deteriorate after about 6000 hours. If you are still having issues after reviewing the troubleshooting checklist, please contact Lumenlab support at the following address: www.lumenlab.com/support Please include a detailed description of the problem and any troubleshooting steps you have tried. Troubleshooting 23 Projector care Be sure to read the important safety instructions before proceding. Cleaning You should clean the projector if it becomes dirty or if the projected image starts to deteriorate. Cleaning the projector case 1. Turn off the projector before cleaning. 2. Clean the projector case by wiping it gently with a soft cloth. 3. If the projector is particularly dirty, moisten the cloth with water containing a small amount of mild detergent then firmly wring the cloth dry before using it to clean the projector case. After you have done this, wipe the projector again with a soft dry cloth. Note: Do not use volatile substances such as wax, alcohol or thinner to clean the projector case. These can cause the case to warp and make the surface coating peel off. Cleaning the lens 1. Turn off the projector before cleaning. 2. Use the included lens cleaning paper to gently wipe the lens. Be careful not to scratch the lens. Note: As the lens can be easily damaged, do not rub the lens with harsh materials or subject the lens to shocks. Cleaning the air filter The air filter keeps dust and dirt from getting inside the projector and should be cleaned after a period of time (more often in dusty conditions). If the filter is dirty or clogged, your projector may overheat. Cautions: 1. Turn off the projector, turn off the mains power switch and unplug the projector before cleaning the filter. 2. Only clean the outside of the filter cover with a vacuum cleaner. 3. Do not attempt to operate the projector without the filter cover. 4. If the air filter is difficult to clean or if it is broken, it should be replaced. 24 Projector care Warranty Lumenlab, Inc. (“Lumenlab”) stands behind the quality of its products. Subject to the terms and conditions set forth below, Lumenlab warrants its products to be free from defects in material and workmanship during the warranty period in the continental United States, Hawaii, Alaska and Canada. If a product proves to be defective in material or workmanship during the warranty period, Lumenlab will, at its sole option, repair or replace the product with a similar or functionally equivalent product. Replacement product or parts may include remanufactured or refurbished parts or components. The replacement unit will be covered by the balance of the time remaining on the customer's original limited warranty. Lumenlab Standard Limited Warranty: 1. One (1) year from the purchase date by the original retail purchaser (the “Customer”) (except for lamps as specified below), parts and labor only (No advance replacement). 2. Return Merchandise Authorization Shipping: The Customer will pay shipping freight to Lumenlab and Lumenlab will pay shipping freight to the Customer during the warranty period. 3. Shipping Damages: All shipping damages, including DOA (Dead On Arrival), must be reported within seven (7) business days upon receipt of the product. Lumenlab is not responsible for the shipping damages reported after such period. 4. Repaired or Replaced Parts and Products: All repaired or replaced parts or products shall be warranted only for the remainder of the original warranty period specified above. Additional Warranty Details for Lumenlab Projectors 1. Lamp Warranty: Lamp is guaranteed 1 year or 6000 hours from the purchase date by the Customer, whichever comes first. 2. Dead Pixels: In order to declare the product's LCD screen "defective" and eligible for replacement or refund through any applicable Lumenlab Return Policy, there must be a minimum of six (6) dead LCD pixels. Exclusion of damages: LUMENLAB'S LIABILITY IS LIMITED TO THE COST OF REPAIR OR REPLACEMENT OF THE PRODUCT. LUMENLAB SHALL NOT BE LIABLE FOR: 1. DAMAGE TO OTHER PROPERTY CAUSED BY ANY DEFECTS IN THE PRODUCT, DAMAGES BASED UPON INCONVENIENCE, LOSS OF USE OF THE PRODUCT, LOSS OF TIME, LOSS OF PROFITS, LOSS OF BUSINESS OPPORTUNITY, LOSS OF GOODWILL, INTERFERENCE WITH BUSINESS RELATIONSHIPS, OR OTHER COMMERCIAL LOSS, EVEN IF ADVISED OF THE POSSIBILITY OF SUCH DAMAGES. 2. ANY OTHER DAMAGES, WHETHER INCIDENTAL, CONSEQUENTIAL OR OTHERWISE. 3. ANY CLAIM AGAINST THE CUSTOMER BY ANY OTHER PARTY. The warranty details provided on this pageare an abbreviated version provided for your convenience only. Please visit the Lumenlab website to view the full warranty statement at: www.lumenlab.com/support Warranty 25 Specifications Projection system Projection methods Single LCD technology Front/Ceiling mount/Rear LCD & PICTURE Size Driving method Pixel number Native resolution Aspect ratio Brightness 7.0" Poly-silicon TFT Matrix 800x480 LCD WVGA (supports SVGA) 16:9 (supports 4:3) 600/800 ANSI Lumens PROJECTION LENS Material Type F Focal length All glass Manual 3.0 f=200mm LAMP Type Life Other 150W HID >6000H User replaceable POWER Power supply Power consumption 100~240V, 50/60 Hz AC 200W DIMENSIONS & WEIGHT Dimensions Pakage dimensions Net weight 335(L)x260(W)x125(H)mm 470(L)x365(W)x220(H)mm 5.8kg TERMINAL Component-video Composite-video S-video RGB Y/Pb/Pr (PAL,NTSC,SECAM,HDTV) RCA (PAL,NTSC,SECAM,HDTV) S-Video Mini 15 pin D-SUB OTHER FEATURES Keystone correction Body color Vertical ±15 degrees White WARRANTY One-year limited warranty (lamp included) 26 Specifications 27 www.lumenlab.com 28