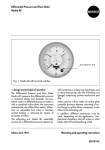
1
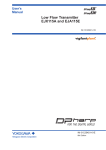
Differential Pressure and Flow Meter
Media 05
Fig. 1 · Media 05, indicating unit with differential pressure cell,
with valve block and pressure gauge (right)
Mounting and
Operating Instructions
EB 9520 EN
Edition November 2010
Contents
Contents
1
Design and principle of operation. . . . . . . . . . . . . . . . . . . . . . . . . 5
2
2.1
2.2
2.3
2.4
2.5
Installation . . . . . . . . . . . . . . . . . . . . . . .
Arrangement of instruments for liquid level measurement .
Arrangement of instruments for flow rate measurement . .
Media 05 indicating unit . . . . . . . . . . . . . . . .
Differential pressure lines . . . . . . . . . . . . . . . .
Orifice plate assembly . . . . . . . . . . . . . . . . .
.
.
.
.
.
.
.
.
.
.
.
.
.
.
.
.
.
.
.
.
.
.
.
.
.
.
.
.
.
.
.
.
.
.
.
.
.
.
.
.
.
.
.
.
.
.
.
.
.
.
.
.
.
.
.
.
.
.
.
.
.
.
.
.
.
.
.
.
.
.
.
.
.
.
.
.
.
.
3
3.1
3.2
3.3
3.4
Accessories. . . . . . . . . .
Valve block . . . . . . . . . .
Shut-off and equalizing valves .
Equalizing tanks. . . . . . . .
Accessories for connection . . .
.
.
.
.
.
.
.
.
.
.
.
.
.
.
.
.
.
.
.
.
.
.
.
.
.
.
.
.
.
.
.
.
.
.
.
.
.
.
.
.
.
.
.
.
.
.
.
.
.
.
.
.
.
.
.
.
.
.
.
.
.9
.9
10
10
10
4
4.1
4.2
Start-up . . . . . . . . . . . . . . . . . . . . . . . . . . . . . . . . . . . . . 10
Flow rate measurement . . . . . . . . . . . . . . . . . . . . . . . . . . . . . 10
Liquid level measurement . . . . . . . . . . . . . . . . . . . . . . . . . . . . 11
5
5.1
5.2
5.3
Operation. . . . . . . . . . . . . . . . . .
Zero adjustment . . . . . . . . . . . . . . .
Draining . . . . . . . . . . . . . . . . . .
Adjusting and modifying the measuring range
.
.
.
.
.
.
.
.
.
.
.
.
.
.
.
.
.
.
.
.
.
.
.
.
.
.
.
.
.
.
.
.
.
.
.
.
.
.
.
.
.
.
.
.
.
.
.
.
.
.
.
.
.
.
.
.
.
.
.
.
.
.
.
.
.
.
.
.
.
.
.
.
11
11
12
12
6
6.1
6.2
6.3
Version with limit switches . . . . .
Electrical connection . . . . . . . . .
Adjusting the alarm contacts . . . . .
Retrofitting/replacing the contact unit.
.
.
.
.
.
.
.
.
.
.
.
.
.
.
.
.
.
.
.
.
.
.
.
.
.
.
.
.
.
.
.
.
.
.
.
.
.
.
.
.
.
.
.
.
.
.
.
.
.
.
.
.
.
.
.
.
.
.
.
.
.
.
.
.
.
.
.
.
.
.
.
.
14
14
14
16
7
Dimensions in mm . . . . . . . . . . . . . . . . . . . . . . . . . . . . . . . 18
.
.
.
.
.
.
.
.
.
.
.
.
.
.
.
.
.
.
.
.
.
.
.
.
.
.
.
.
.
.
.
.
.
.
.
.
.
.
.
.
.
.
.
.
.
.
.
.
.
.
.
.
.
.
.
.
.
.
.
.
.
.
.
.
.
.
.
.
.
.
.
.
.
.
.
.
.
.
.
.
.
6
6
6
6
8
8
WARNING!
Devices intended to measure gaseous oxygen are labeled
Oxygen! Keep free of oil and grease!
The manufacturer has cleaned and assembled all devices for oxygen service under special conditions. When replacing parts that come into contact with gaseous oxygen, e.g. range springs,
wear appropriate gloves. When returning devices for oxygen service for repair, the sender assumes full responsibility that the devices are handled to meet all requirements stipulated by German specification BVG 7 or similar regulations until they are handed over to the manufacturer.
Otherwise, SAMSON AG does not accept any responsibility.
2
EB 9520 EN
Safety instructions
General safety instructions
4 The device must be installed, started up and serviced by fully trained and
qualified personnel only, observing the accepted industry codes and practices.
Make sure employees or third persons are not exposed to any danger.
All safety instructions and warnings in these mounting and operating instructions, particularly those concerning installation, start-up and maintenance,
must be observed.
4 Any hazards that could be caused at the instrument by the medium and the
operating pressure in the instrument are to be prevented by appropriate
measures. Make sure that the instrument is only used where temperatures
and operating pressure do not exceed the sizing data specified in the order.
4 When mounted on vessels in which hazardous area conditions of Zone 0 are
to be expected, the Media 05 Differential Pressure and Flow Meter without
limit switches may be used to measure flammable gases and liquids provided
that the operator observes the relevant regulations on the measurement of
flammable gases and liquids of Zone 0. This means measuring instruments
suitable for connection to Zone 0 may be installed provided that:
1) The pipes connecting the instruments have been sized and installed
according to the German Technical Regulations for Flammable Liquids
TRbF 50 or
2) Flame arresters or endurance burning flame arresters have been
installed in the two measuring lines.
Whether you have to install flame arresters or endurance burning flame arresters depends on the conditions on site. It is, however, preferable to install
endurance burning flame arresters. You are required to contact the appropriate regulatory authority to agree on the necessary measures. Note that it is
the operator's responsibility to meet the requirements specified in 1) and 2)
and that SAMSON AG does not assume any responsibility if the operator
fails to do so.
4 Proper shipping and appropriate storage are assumed.
4 Note: Devices with the CE mark meet the requirements specified in the
Directive 94/9/EC and the Directive 89/336/EEC.
The Declaration of Conformity is available on request.
EB 9520 EN
3
Technical data
Media 05 Differential Pressure Meter
Measuring range
Measuring span mbar
mbar 0 to 60
0 to
100
min. 40 to
60
60 to
100
max.
0 to
160
0 to
250
0 to
400
0 to
600
0 to
1000
0 to
1600
0 to
2500
0 to
3600
100 to 160 to 250 to 400 to 600 to
160
250
400
600
1000
1000
to
1600
1600
to
2500
2500
to
3600
PN 50, overloadable on one side up to 50 bar
Nominal pressure
Indicator
Scale 250°, scale length approx. 162 mm, division of scale 0 to 100 %
linear or squared, for any linear measured quantities,
for measured quantities acc. to equation, curve or table
Performance
Characteristic linear to differential pressure, scale linear to tank contents
< ± 2.5 %
Conforming error
Sensitivity
Effect of static pressure
< 0.5 %
1)
(including hysteresis)
< 0.25 %
< 0.03 % / 1 bar
Limit switches
2 inductive alarm contacts A1 and A2 acc. to EN 60947-5-6
Control circuit
Values corresponding to connected isolating switch amplifier e.g. KFA6-SR2-Ex2.W
Proximity switch
SJ2-SN, when used for hazardous areas corresponding to
PTB 00 ATEX 2049 X
Switching accuracy
<± 2 %
Range of inversion, approx.
< 0.6 %
Perm. ambient temperature
–40 to +80 °C · With oxygen –40 to +60 °C
Perm. storage temperature
–40 to +100 °C
Use with gaseous oxygen as the
operating medium
Degree of protection
Weight
Max. temperature: +60 °C · Max. oxygen pressure: 30 bar
IP 54 acc. to EN 60529
Without SAMSON valve block: Approx. 2.6 kg
With SAMSON valve block: Approx. 4.6 kg
Materials
Version
Standard version
Housing
Brass (CW617N) or CrNi steel
Measuring diaphragm and seals
Range springs, diaphragm
plates, functional parts, lever
Indicating unit
ECO 2)
CrNi steel
Polycarbonate
1) Based on the upper measuring range value · 2) Other on request
NOTE: All pressures specified as gauge pressures. All errors and deviations in % of the adjusted measuring span.
4
EB 9520 EN
Design and principle of operation
1
Design and
operation
principle
of
The switching function is activated when the
tag moves either into or out of the proximity
switch depending on the contact setting.
The Media 05 Differential Pressure and Flow
Meter serves to measure and indicate the differential pressure or variables derived from
the differential pressure of gases or liquids.
For example, it is used for measuring the liquid level in pressure vessels, the differential
pressure between flow and return flow, the
pressure drops across valves and filters as
well as the flow rate according to the differential pressure method.
The device consists of a differential pressure
cell with a measuring diaphragm and range
springs and an indicating unit including a
pointer mechanism and a scale.
The differential pressure Dp = p1 – p2 produced by the orifice plate creates a force acting on the measuring diaphragm (1.5) proportionally to the differential pressure. This
force is balanced by the range springs (1.4)
and results in a deflection of the lever (1.8).
The movement of the lever in the high-pressure chamber is transmitted to the pointer
mechanism (2.2) located in the indicating unit
by a flexible disc (1.9).
The scale is linear for the differential pressure
and squared for the flow rate.
Version with limit switches
The gear segment (2.1) carries the tags (3.1)
and actuates the alarm contacts by moving
the tags into the adjustable proximity switches
(3.2).
When the tag enters the pick-up field of the
associated proximity switch, the switch becomes highly resistive (contact open). When
the tag leaves the field, the proximity switch
becomes low resistive (contact closed).
Differential pressure cell
Indicating unit
1.1
1.2
1.3
1.4
1.5
1.6
1.7
1.8
1.9
2.1 Gear segment
2.2 Pointer mechanism
2.3 Scale
dp cell
High pressure chamber
Low pressure chamber
Range springs
Measuring diaphragm
Diaphragm plates
Diaphragm shaft
Lever
Flexible disk
Limit switch (optional)
3.1 Metal tags
3.2 Proximity switches
for alarm contacts
A1 and A2
Fig. 2 · Version with two alarm contacts
EB 9520 EN
5
Installation
2
Installation
2.3
2.1
Arrangement of instruments
for liquid level measurement
Make sure that the high-pressure (plus) line is
connected to the high-pressure connection
and the low-pressure (minus) line to the
low-pressure connection of the instrument.
The center schematic (top row) illustrated on
the following page shows the additional
height z that is included in the measurement.
Therefore, z should be kept as small as possible.
You can select the compensation height K (see
schematic on the top right of the following
page) as large as required by the installation
conditions on site.
2.2
Arrangement of instruments
for flow rate measurement
The decision whether you have to attach the
instrument above or below the point of measurement or whether you must install equalizing tanks or not depends on the type of process fluid and the conditions on site.
The installation schematics illustrated at the
bottom of the following page show standard
and reverse installation. Standard installation
is always to be preferred. Choose reverse installation only if there is no alternative which
often occurs especially when measuring
steam.
For further details on reverse installation, we
recommend that you refer to VDE/VDI 3512
Part 1.
6
EB 9520 EN
Media 05 indicating unit
Note: You need screw joints to connect the
differential pressure lines. In addition, the unused instrument connections must be fitted
with plugs or vent plugs depending on how
the instruments are arranged (see also section 3.4).
Carefully clean the connections prior to connecting the differential pressure lines to the instrument. Do not purge the instrument with
compressed air or pressurized water.
At the place of installation, attach the instrument to the pipe, wall or mounting plate free
of vibrations.
For attachment to vertical or horizontal pipes,
use a mounting part with a clamp. For wall
mounting, use a mounting part without a
clamp.
For panel mounting, a mounting bracket is required (see dimensional drawing in section 7).
Installation
H
h
z
K
Measuring range
Measured height
Additional height
Compensation height
Measurement in cryogenic
plants (liquefied gases)
Liquid level measurement
Shown with SAMSON valve block
Measurement on pressure
vessels with condensing or
non-condensing cushion
Measurement on open vessels with
low-lying meter
Flow rate measurement
Measuring liquids
Installation:
Standard
Measuring gases
Measuring steam
Orifice plate assembly
Equalizing tank
Separation chamber
Reverse
Standard
Standard
Reverse
1) SAMSON valve blocks can be installed upside down with the dp cell on top to match connections (+) to (+)
and (–) to (–). Refer to section 3.1 for more details.
Fig. 3 · Arrangement of devices
EB 9520 EN
7
Installation
2.4
Differential pressure lines
Select differential pressure lines with an external diameter of 12 mm and install them according to Fig. 3. Make sure the correct arrangement is chosen.
The use of screw joints ensures tight sealing of
the lines.
Lines which would normally be routed horizontally must be installed with a continuous
slope of min. 1:20, sloping downward from
the orifice plate or the point that enables
venting. The smallest bending radius must not
be below 50 mm.
Purge the differential pressure lines thoroughly prior to connecting them to the instrument.
2.5
Orifice plate assembly
With the orifice tubes supplied by SAMSON,
these pipe lengths are ensured by the
welded-on calibrated pipes. With orifice
flanges, the straight length of pipe which must
precede the orifice plate is specified in the order confirmation.
The orifice plate assembly and the seals must
not be eccentrically displaced to the pipeline.
Do not install control valves, e.g manually operated valves or temperature regulators, that
continuously vary the operating state of the
process medium upstream of the orifice plate
assembly as the operating state is expected to
correspond to the calculated state as much as
possible.
Regulators, however, which do not vary the
operating state (e.g. pressure regulators)
prove to be advantageous upstream of the
measuring instrument.
The process medium flows in the direction indicated by the arrow. An undisturbed,
straight length of pipe is required at the inlet
and outlet sides of the orifice plate assembly.
Type 90 Orifice
Flange
Type 91
Orifice Tube
Attachment of differential pressure lines on orifice plate assembly
For gas
For steam
For liquids
Inlet 20 to 50 x d
Outlet 5 x d
Fig. 4 · Orifice plate assembly
8
EB 9520 EN
Accessories
3
Accessories
We recommend that you install both a
shut-off valve and, additionally, an equalizing valve in the differential pressure lines.
They are used to shut off the two differential
pressure lines and to provide a short circuit at
the indicating unit for checking zero.
3.1
Valve block
On measuring the flow rate of liquids and
gases, the SAMSON valve block can also be
mounted upside down to allow the connections to be assigned properly, i.e. (+) to (+)
and (–) to (–). However, the pressure gauge
connection can no longer be used due to the
reversed mounting and it must be sealed using an O-ring and screw cap G ½ - LH (see
dimensional diagram in section 7).
A valve block (Fig. 5) with three combined
valves is available (accessories). The valve
block is directly flanged to the bottom side of
the dp cell.
Liquid level measurement
Flow rate measurement
From the measuring point
Media 05
Test connection
Equalizing valve
Bores for sealing wires
to the indicating unit
Shut-off valves (–)
Pressure gauge
connection
Shut-off valve (+)
1
Shut-off valves
2
Equalizing valve
dp line connection
Fig. 5 · SAMSON valve block
Fig. 6 · Shut-off and equalizing valves, separate
or combined as a block
EB 9520 EN
9
Start-up
3.2
Shut-off and equalizing
valves
As an alternative to the SAMSON valve
block, you can also install the two shut-off
valves as well as the bypass valve/equalizing
valve according to Fig. 6.
3.3
Equalizing tanks
Equalizing tanks for maintaining a constant
liquid column are required when measuring
steam. When measuring liquids, these tanks
are only needed if the indicating unit is located above the point of measurement.
When measuring gas, equalizing tanks functioning as separation chambers are required
for draining the condensate if the indicating
unit is located below the point of measurement.
3.4
Accessories for connection
The instruments are supplied without screw
joints (versions for oxygen are protected from
contamination by four NBR blanking plugs).
Required screw joints, drain or vent plugs as
well as screw joints with orifice plates to
dampen the vibrations caused by the measured medium (especially gas) must be ordered separately.
Note:
The screw joints as well as SAMSON valve
blocks including order numbers are listed in
the Data Sheet T 9555 EN.
10
WARNING!
Oxygen service
When the device is used for oxygen service,
make sure that the dp cell and any SAMSON
accessories (e.g. valve block) only come into
contact with gaseous oxygen.
EB 9520 EN
4
Start-up
See Fig. 6 for start-up.
4.1
Flow rate measurement
For steam measurement
The steam should never have direct contact
with the measuring diaphragm of the instrument. For this reason, unscrew the differential
pressure lines located below the shut-off
valves or the valve block and fill the instrument with water.
As an alternative method, wait approximately
20 minutes after start-up (steam switched on)
with closed shut-off and equalizing valves or
closed valve block until condensate in the differential pressure lines rises above the valve
up to the orifice plate.
1. Open the high-pressure (plus) line.
2. Close the equalizing valve, i.e. the by-
pass of the valve block.
3. Open the low-pressure (minus) line.
4. Wait a moment before unscrewing both
vent plugs of the dp cell one after the
other until condensate escapes free of
bubbles. Retighten vent plugs.
Operation
In the same manner, vent the equalizing
tanks. Lightly tap on the housing of the indicating unit or the equalizing tanks to
promote the escape of air.
5. Check zero as described in section 5.1
and put the instrument back into service.
Note:
In case of reverse installation (measuring instrument located above the point of measurement), the differential pressure lines could become partially drained if the plant is relieved
of pressure. When starting up again, the
measuring arrangement must be vented so
that it can refill with condensate.
For liquid measurement
1. Open the high-pressure (plus) line by
gradually turning.
2. Close the equalizing valve or the bypass
4. Unscrew one vent plug of the dp cell until
the air has escaped and retighten.
5. Check zero as described in section 5.1
and put the instrument back into service.
4.2
Liquid level measurement
See Fig. 5 for start-up.
Proceed as described in steps 1, 2, 3 and 5
for the flow rate measurement.
Note:
During measurement, make sure that the
equalizing valve is closed and that the shut-off
valves are open.
NOTICE
For cryogenic applications, an open equalizing valve during measurement causes the medium to circulate and, as a result, the valve
block to freeze up.
of the valve block.
3. Open the low-pressure (minus) line.
Scale screws
5
Operation
5.1
Zero adjustment
If the differential pressure lines are fitted with
shut-off and equalizing valves, zero can be
checked even when the plant is in operation.
1.
Close the shut-off valve on the high-pressure side.
2.
Open the equalizing valve.
3.
Close the shut-off valve on the low-pressure side so that a balance of pressure is
achieved in the dp cell.
The pointer must indicate zero.
Fig. 7 · Zero correction by turning the scale
EB 9520 EN
11
Operation
If it does not read zero, unfasten the scale
screws and turn the dial plate (adjustable by
±4°).
Checking the measuring range:
In case of larger deviations, remove the
pointer using an appropriate tool. Align the
dial plate in the middle position. Then reattach the pointer in zero position on the axis.
2. Make sure that the low-pressure (minus)
For start-up:
1. Open the low-pressure line.
2. Close the equalizing valve.
3. Slowly but gradually open the high-pres-
sure line all the way.
The instrument is in operation again.
For applications with installed valve block,
proceed as described above.
5.2
Draining
When gases are measured, the condensate
must be drained from the draining tanks from
time to time. Close the valves in the differential
pressure lines (valve block) prior to opening
the drain plugs.
5.3
Adjusting and modifying the
measuring range
The measuring range of the differential pressure and flow meter is determined by the installed range springs. The instrument is calibrated at the factory to the range specified in
the order. Subsequently, it can only be modified infinitely variably up to approx. 60 % of
the max. measuring span (for technical data,
refer to page 4).
For best results, adjust on the test bench
(Fig. 8).
4
1. Adjust zero in the depressurized dp cell
as described in section 5.1.
line is open and apply pressure to the
high-pressure (plus) chamber until the
pointer indicates 100 %.
Read the pressure gauge and check if the
adjusted pressure value corresponds to
the current upper range value.
3. Depressurize again.
Correcting and modifying the measuring
range:
1. Undo the screws (1) and remove the
cover plate (2).
2. Undo the mounting screw (3) so that the
unit frame (4) can be moved easily.
3. Place the tip of an appropriate screw-
driver into the 7 mm notch for moving the
unit frame upward or downward.
If you want to increase the measuring
range, turn the screwdriver counterclockwise.
If you want to decrease the measuring
range, turn the screwdriver clockwise.
Retighten the mounting screw (3).
4. Correct zero according to section 5.1.
5. Pressurize the dp cell again until the
pointer indicates the full-scale value.
6. Check the upper measuring range value,
reading the pressure gauge.
Should it not correspond with the desired
measuring range, repeat the adjustment
procedure until zero and upper range
value are properly adjusted.
7. Reattach the cover plate (2) and fasten
the screws (1).
12
EB 9520 EN
Operation
Groove for screwdriver
WARNING!
For devices in oxygen service, make absolutely sure that the test medium is free of oil and grease.
1
2
3
4
5
Screw
Cover plate
Mounting screw
Unit frame
Scale screws
Use oil-free air or other gases, e.g. N2.
Gaseous oxygen as the process medium
Max. temperature: +60 °C, max. oxygen pressure: 30 bar
When the device is used for oxygen service, make sure that the dp cell
and any SAMSON accessories only come into contact with gaseous
oxygen.
Test pressure
Supply pressure reducing station
with oil filter and test pressure
gauge
Precision regulator with Class 0.1 pressure gauge
Fig. 8 · Test arrangement and modifying the measuring range
EB 9520 EN
13
Version with limit switches
6
Version with limit switches
One or two proximity switches can be installed as alarm contacts (A1 and A2) as follows:
Contact
made with
Fig.
Min – A1 as main contact
Bottom
10.2
Min – A1 as main contact
Bottom
Min – A2 as initial contact
Top
Min – A1 as main contact
Bottom
Max – A2 as main contact
Top
Contact and function
10.2
10.3
The maximum contact can also be used as a
second minimum contact, i.e. as an initial
contact. In this case, however, there must be a
minimum difference of 15 % between the
switching point of the initial contact and that
of the main contact A1.
6.1
Electrical connection
This procedure involves connecting the alarm
contacts A1 and A2 of the indicating unit to a
switching amplifier or an alarm system according to Fig. 9.
The listed maximum specifications in the table
below apply for the connection of proximity
switches to certified intrinsically safe circuits
in the type of protection EEx ia IIC T6 (PTB 00
ATEX 2049 X):
Type 1
Type 2
Ui
16 V
16 V
Ii
25 mA
25 mA
64 mW
Pi
34 mW
Ci
30 nF
30 nF
Li
100 m H
100 m H
T
T6
73 °C
6.2
T5
T4
T6
88 °C 100 °C 66 °C
T5
T4
81 °C 100 °C
Adjusting the alarm contacts
The minimum contacts A1and A2 as well as
the contacts in the combination with minimum
contact A1 and maximum contact A2 can be
shifted in the range of 0 to 100 % of the adjusted measuring span. Minimum and maximum contacts have different designs.
Contact is made when the tag moves approximately 6 mm into the proximity switch.
Minimum contacts:
Always adjust the switching points according
to the decreasing characteristic. The bottom
edge of the tag causes the contact to be
made.
Switching amplifier
acc. to EN 60947-5-6
Fig. 9 · Terminal assignment
14
EB 9520 EN
Maximum contacts:
Always adjust the switching points according
to the increasing characteristic. The top edge
of the contact causes the contact to be made.
Version with limit switches
Adjustment with pressure specifications
4
Connect the device to a switching amplifier as described in section 6.1.
4 Apply a pressure to the high-pressure
connection of the dp cell which corresponds to the desired switching point.
NOTICE The low-pressure connection of
the dp cell must be open for this purpose.
Loosen the clamping screw of the proximity
switch bracket according to Fig. 10 and
manually move the contact into the desired
switching position (note that the middle of the
bracket indicates the position).
Minimum contact:
From the left, move the proximity switch onto
the left side of the tag until contact is made.
Maximum contact:
From the right, move the proximity switch
onto the right side of the tag until contact is
made.
4 Slightly tighten the clamping screw.
4 Check the switching point and repeat
adjustment, if necessary.
Adjustment without pressure specifications
e.g. on site
4 Connect the instrument to a switching
amplifier as described in section 6.1.
Adjustment range A2
Max. contact
Min. contact A2
Min. contact A1
Adjustment range A1
Min. contact
Fig. 10.2
Clamping screw
M3 (SW 5.5)
Max. contact A2
Adjustment range A1
Min. contact
Fig. 10.1
Min. contact A1
Fig. 10 · Alarm contacts
Fig. 10.3
EB 9520 EN
15
Retrofitting/replacing the contact unit
Adjust the tag by carefully moving the
pointer manually.
6.3
NOTICE
Do not move the pointer past the currently indicated position on the dial. You may move
the pointer below the indicated position.
The contacts can only be retrofitted or replaced as complete units.
When the tank is full with 100 % reading, the
above action can always be performed, however, when the tank is empty and the dial indicates 0 %, this is not possible.
Retrofitting/replacing the
contact unit
Contact module
Order no.
1 Min. contact
A1
1400-7570
2 Min. contacts
A1 and A2 1400-7571
1 Min. contact
A1 and
1 Max. contact
A2
1400-7720
1. Unscrew the case cover.
2. Undo the screws (1, Fig. 8) and remove
the cover plate (2, Fig. 8).
3. Undo the two scale screws (5, Fig. 8), lift
the dial forward toward the pointer and
then remove it upward.
4. Slide the contact unit (2) onto the unit
frame plate from the right so that the
metal tags reach into the proximity
switches without touching the contacts.
5. Secure the contact unit (2) to the unit
frame using two slotted head screws (5).
6. Establish the connecting line (4.1) for the
alarm contact A1 below the unit frame
and the connecting line (4.2) for the
alarm contact A2 above the unit frame.
Ensure that the lines do not prevent the
tags from moving into and out of the
proximity switches. Moreover, make sure
that the lines are not damaged when
tightening the case cover later on.
16
EB 9520 EN
Retrofitting/replacing the contact unit
7. Insert the printed circuit board (1) into the
10. Reposition the dial from the top and se-
positioning notch from the left and
tighten it using a Philips screw (6).
cure it to the unit frame using the scale
screws (2, Fig. 8) assuring the right zero
position according to section 5.1.
8. Replace
the blanking plug of the
indicating unit with a cable gland (8)
M12x1.5.
Protect the cable gland against water entering until the signal line has been established.
11. Attach the case cover and screw tight
preventing the connecting lines of the
proximity switches from being damaged.
9. Establish the electrical connection as de-
scribed in section 6.1.
Positioning notch
Fig. 11 · Retrofitting the alarm contacts
1
2
3
4.1
4.2
5
6
8
Printed circuit board
Contact module
Unit frame
Connecting line A1
Connecting line A2
Slotted head screws
Philips screw
Cable gland
EB 9520 EN
17
Dimensions in mm
7
Dimensions in mm
Hole pattern for wall/panel mounting
Center of the indicator unit
8.6
Two holes Æ 8.5 mm
for attachment to rear of
measuring chamber
(M8 screws)
30
25
(52)
30
117
158.5
35
15
6.4
Valve block
when mounted upside
down
17.5
Two holes Æ 8.5 mm
for attachment to valve block (M8 screws)
Pipe mounting
129.5
80
(200)
SW14, G¼
25
Ø64
117
212.5
83
Ø103
Ø110
_
31
60
+
Fig.12 · Dimensional drawing
18
EB 9520 EN
Pressure gauge connection
G ½-LH with
coupling sleeve G ½ for pressure
gauge NG 100 and O-ring
26
12x2 as well as for G ¼ for
26
pressure gauge NG 63 with
43
G ¼ seal
36
58
NG63
EB 9520 EN
19
EB 9520 EN
S/Z 2011-03
SAMSON AG · MESS- UND REGELTECHNIK
Weismüllerstraße 3 · 60314 Frankfurt · Germany
Phone: +49 69 4009-0 · Fax: +49 69 4009-1507
Internet: http://www.samson.de