1
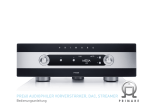
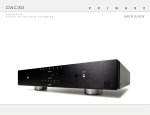
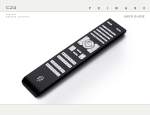
NP30 audiophile network player user guide N P 3 0 USER GUIDE Welcome! Welcome to the Primare NP30! Your NP30 is a fully balanced audiophile network player which will extend any high-quality music system for streaming, internet radio, gapless audio playback, and digital-analogue conversion. It works with any UPnP device such as a PC, Mac, NAS, iPod, iPad, iPhone, or USB drive. Infra-red in/out Balanced analogue outputs Unbalanced analogue outputs Digital output Coax/optical digital inputs Trigger in/out USB-B input RS232 connector USB-A input Wi-fi antenna LAN connector Power On/off N P 3 0 USER GUIDE Getting Started Set up your NP30 in six simple steps. We recommend using the LAN connection for best audio and network performance; wi-fi may cause problems when streaming high-resolution files: 1 Unp a c k t h e N P 3 0 3 C o nn e c t I N P UTS Your NP30 is supplied with the following components: Wireless antenna. You can connect up to three optical digital inputs and one coax digital input to the NP30. In addition, the USB B input allows you to use the NP30 as a digital audio output device for a computer. C24 remote control. Digital optical inputs • • • • Mains cable. Two button cells for the remote control. • Connect the inputs IN 1 to IN 3 to digital sources with optical outputs, using TOSlink digital cables. If any of these items are missing please contact your supplier. We recommend you retain the packaging in case you need to transport the unit at a later date. Digital coax input 2 C o nn e c t t o a preamplifier USB input The NP30 is designed to be connected to an analogue preamplifier or integrated amplifier with either balanced or unbalanced inputs. Balanced outputs • If your preamplifier provides balanced inputs, for best results connect the balanced XLR outputs OUT 1 from the NP30 to the preamplifier using high quality XLR cables. Unbalanced outputs • Otherwise connect the unbalanced outputs OUT 2 to the preamplifier using high quality RCA cables. • • Connect input IN 4 to a digital source using a digital coax cable. Connect a Windows PC or Macintosh USB port to USB B on the NP30 using a USB A to USB B cable. PC: Windows XP/SP2 or later is required. You need to install the Primare xmos audio driver, available on www.primare.net. Mac: OSX 10.4 or later is recommended. No driver is required. The NP30 will then appear as a sound output device called XMOS USB Audio 2.0 in the Sound control panel (PC) or Sound system preferences panel (Mac). 4 C o nn e c t a n i p o d , i p h o n e , i P AD , o r u s b drive • To play files from network-attached storage (NAS), stream audio, or access internet radio stations you need to connect the NP30 to a network using either of the following methods. Wired connection Connect the LAN socket on the NP30 to your internet hub using an RJ45 cable. If your network includes DHCP the NP30 will be configured automatically; otherwise see Configuring the Network, page 7, for information about how to configure it manually. Wireless connection • • Connect the iPod, iPhone, iPad, USB drive, disk drive, or other UPnP device to the USB A port. 5 C o nn e c t t o a network • 6 C o nn e c t p o w e r Attach the supplied antenna to the Wi-Fi connector on the NP30. For Wi-Fi setup see Configuring the network, page 7. Plug one end of the mains cable supplied with the NP30 into the power connector on the back panel, and connect the other end to a wall socket. If this cable is not suitable for your power outlets please contact your supplier for an alternative cable. Note: See Phase, page 8, for information about getting the best sound from your NP30. • WARNING: Always disconnect the NP30 from the mains power before connecting or disconnecting any cables. Switch on the NP30, using the switch on the back panel. The standby indicator will light up on the front panel. To switch on from standby • Press O on the front panel or remote control. The indicators on the front panel will show the currently selected digital input and signal information. Press O again to switch to standby. N P 3 0 USER GUIDE Using the NP30 This page explains how to operate your NP30, using the functions available from the front panel or C24 remote control. Front panel controls Standby O Switches the NP30 to standby, or switches it on from standby. Selector Selecting a source The NP30 provides a choice of six sources: IN1 to IN4, PC (USB B), and MEDIA (USB A). To select a source LOCK: Active digital signal LAN: Connected to a network Controlling the NP30 The NP30 allows you to vary the volume from 0 (silence) to 79 (maximum volume). To configure the network, browse music, and control playback from an internet radio station, iPod, iPhone, iPad, or other UPnP device connected to the NP30, you need to use the Primare App, which is available for free download for Android and iOS devices. • Press the SELECTOR button on the front panel until the source is indicated on the front panel display. To change the volume • Alternatively, press the A or V buttons on the remote control to step between sources, or press one of the buttons 1 to 6 on the remote control to select the corresponding source directly. Alternatively you can change the volume using Primare App. Steps between the inputs. Indicators Changing the volume • Press the < or > buttons on the remote control. The NP30 provides an audiophile relay-controlled mute circuit to avoid clicks when changing source. N P 3 0 USER GUIDE Using the remote control Switch on/off This page explains how to use the C24 remote control to operate the NP30, and how to fit the batteries into the remote control. Select a source F i t t i n g t h e b at t e r i e s Before using the remote control you need to insert the two button cells supplied with the C24. • Open the cover on the back of the remote control by pressing the tab gently: Select next source or configuration option Decrease the volume (NP30) Select NP30/DAC30 mode • Insert the two batteries, positive side uppermost: Increase the volume (NP30) Select previous source or configuration option Increase volume of amplifier Decrease volume of amplifier + CR2 02 M BATT5 ERY 3V • Configuration options (NP30) +2025TTERY LITHIU CR BA M HIU 3V LIT Replace the cover and push until it clips into place. Configuration options (NP30) Note: Replace only with 3V button cells type CR2025 or equivalent. When disposing of old batteries please be considerate to the environment. N P 3 0 USER GUIDE Configuring the NP30 ConfiguRing the NP30 To enter configure mode • Hold down the SELECTOR button on the front panel for three seconds, or press the MENU button on the remote control. The 1 indicator will flash. Alternatively, hold down the SELECTOR button on the front panel or press the MENU button on the remote control to exit without changing the setting. Summary of configuration options Option 1 Store Settings To choose a configuration option • Press the SELECTOR button on the front panel or the A or V buttons on the remote control to step between configuration options, or press one of the buttons 1 to 6 on the remote control to select the corresponding configuration option directly. 2 IR Source 3 TRIG In 4 Load Network Settings The currently highlighted option is shown by the flashing indicator. • Press the O button on the front panel or the SELECT button on the remote control to select the highlighted option. The indicator corresponding to the selected option will be lit steadily, and one or more other indicators will flash to show the option’s current setting; see table in the next column. To change a configuration setting • Press the SELECTOR button on the front panel or the A or V buttons on the remote control to step between configuration settings, or press one of the buttons 1 to 6 on the remote control to select the corresponding configuration setting directly. • Press the O button on the front panel or the SELECT button on the remote control to select the highlighted setting and return to normal operation. PC Factory reset MEDIA Firmware Upgrade Settings 2 Successful 3 Unsuccessful 3 Front 4 Back 1 Enabled 2 Disabled 1 Loading settings... 2 Settings loaded 3 Error, no USB PC Error, incorrect format 1 Reset underway 1 Server 2 USB C o n f i g u r at i o n options The following sections describe how to use each configuration option in greater detail. 1 - Store Settings The Store Settings option will save the current volume setting, IR source, TRIG in, and RS232 verbose in memory. These are restored each time the NP30 is switched on. For example, to set the NP30 to fixed maximum volume: • • Increase the volume level to maximum. Press the MENU button on the remote control. The 1 indicator will flash. • Press the SELECT button on the remote control to confirm. The 1 indicator will go on steadily and the 2 indicator will flash. • Press the SELECT button on the remote control again to return to normal operation. 2 - IR Source This configuration option allows you to choose whether the NP30 uses the front panel or the IR IN socket on the back panel as the IR source. 3 - TRIG In This configuration option allows you to choose whether the TRIG IN input is enabled. If TRIG IN is enabled, the NP30 can be powered on or off using the TRIG connector on the back panel. 4 - Load Network Settings When this configuration option is selected the NP30 will attempt to configure the LAN or Wi-Fi network using settings loaded from a USB flash drive connected to the USB A input. For more information see Configuring the network, page page 7. PC - Factory Reset Selecting this configuration option will restore the NP30 to the factory settings. Note that the network module must have powered up for the factory reset procedure to affect network settings. The network module is active when the LAN indicator stops blinking. MEDIA - Firmware Upgrade This configuration option will upgrade the NP30 firmware from either a Primare server (option 1) or a USB flash drive (option 2). • Select the appropriate option to start the firmware upgrade procedure. The status of the upgrade will then be shown by the flashing indicator: Indicator 1 Server (Lit steadily) 2 USB (Lit steadily) 3 (Flashing) 4 (Flashing) PC (Flashing) MEDIA (Lit steadily) LOCK (Flashing) Description Upgrading from server. Upgrading from USB. Looking for upgrades. Upgrade in progress. Reset underway. Upgrade selected. An error has occurred. Note that the firmware upgrade procedure can take up to 3 minutes to complete, and it’s important that the NP30 is not switched off during this time. N P 3 0 USER GUIDE Configuring the network The easiest way to configure the Wi-Fi settings is to make a temporary LAN connection, and then use the Primare App for Wi-Fi setup. To configure the LAN settings In the Primare App choose: To configure the Wi-Fi settings • • • Settings Device settings Network Configuring the network from a USB drive You can configure the network from a USB drive as follows: • Download the NetworkSettingsGenerator Java file from the download section of: http://www.primare.net/product.asp?ProductID=58 • • Copy it to a USB drive. Run the Java application and fill in the required information: LA N s e t t i n g s Wi-Fi settings DHCP Device name Complete the fields in the bottom half of the dialog box; see Wi-Fi settings opposite. Enables or disables DHCP for the device. If DHCP is enabled, IP, Gateway, IP mask, DNS 1 and DNS2 will be managed automatically by the network protocol, and you can leave these fields blank. Specify the name you want your NP30 to have on the network. To save the settings IP • The IP address of the NP30. Complete the fields in the top half of the dialog box; see LAN settings opposite. Click Save. The settings will be saved as a text file on the USB drive. • • • The static default gateway address. Connect the USB drive to the NP30. IP mask Wait until the LAN indicator has stopped flashing. DNS 1 Choose the Load Network Settings configuration option; see 4 - Load Network Settings, page 6. If configuration is successful the 1 indicator will flash, followed by the 2 indicator. If there is an error the 3 or PC indicators will flash. IMPORTANT After you have established the internet connection please install the latest firmware. In the Primare App choose: • • • Gateway Settings Device settings Firmware Alternatively you can use the Firmware Upgrade configuration option; see MEDIA - Firmware Upgrade, page 6. The IP Subnet Mask. The static primary DNS server (Domain Name Server). DNS 2 The static secondary DNS server. Proxy Enables or disables use of a proxy server for the NP30. Proxy server The proxy server name or IP address. Proxy port The proxy server port number. SSID The name of your wireless network. Security The type of wireless encryption used by the system. The options are: None, WEP, WPA or WPAPSK, and WPA2 or WPA2PSK. IBSS Enables or disables ad-hoc mode. If set to true, Independent Basic Service Set (ad-hoc) mode is enabled, otherwise BSS (infrastructure) mode is enabled. WEP authentication The type of WEP authentication that is used. Only used in combination with security setting WEP. The options are Open or Shared. WEP key The WEP key value to use. Only used in combination with security setting WEP. WPA cipher The type of WPA encryption that is used. Only used in combination with security settings WPA or WPA2. Options are TKIP or AES. WPA passphrase The WPA passphrase that is used. Only used in combination with security settings WPA or WPA2. N P 3 0 USER GUIDE Technical specification Additional information The NP30 is a genuine 24/192 DAC incorporating an asynchronous master clock for low jitter, and balanced XLR outputs for connection to a high quality music system. These instructions help you get the best possible sound from your NP30. Inp u t s a n d o u t p u t s Performance Phase Burn-in Outputs Frequency response 1 XLR 1 RCA 1 RCA SP/DIF (192 kHz) 32 – 192kHz The phase of the AC supply can make a significant difference to the sound. Your Primare will start to sound best after an initial burn-in of approximately 24 hours. Ensure that the live pin of the AC power cable is connected to the left-hand pin of the power connector, viewed from the back panel: You will notice a further smaller improvement in sound quality for at least another 3 days’ playing. Inputs 3 TOS-Link 1 RCA SP/DIF 1 USB-A 1 USB-B 1 Wi-Fi 1 LAN Network Signal to Noise 120dB Output impedance RCA 100Ω; XLR 110Ω XLR/RCA output: Both 2.2V General To take advantage of the highest 24 bit/192kHz setting offered by the NP30 you may need to select an appropriate output setting on your computer. Weight 8.5 kg Wi-Fi b, g, n mode: WEP (64 and 128Bit), WPA &WPA2 (TKIP & AES) Dimensions Audio formats Power consumption WAV, AIFF, FLAC, MP3, AAC, WMA, OGG, ALAC Max: 20W Standby: 0.5W Control Live USB S a m p l e r a t e 430 x 370 x 95 mm IR in and out, Trigger in and out RS232 for connecting to control systems N P 3 0 USER GUIDE Copyright and acknowledgments Copyright © 2013 Primare AB. All rights reserved. Primare AB Limstensgatan 7 21616 Limhamn Sweden http://www.primare.net Issue: NP30/1 The information in this guide is believed to be correct as of the date of publication. However, our policy is one of continuous development and so the information is subject to change without notice, and does not represent a commitment on the part of Primare AB. Primare is a trademark of Primare AB. This guide was produced by Human-Computer Interface Ltd. http://www.interface.co.uk Safety compliance This product has been designed to meet the IEC 60065 international electrical safety standard. CAUTION RISK OF ELECTRIC SHOCK DO NOT OPEN ATTENTION RISQUE DE CHOC ELECTRIQUE NE PAS OUVRIR CAUTION: To reduce the risk of electrical shock do not remove cover (or back). No user serviceable parts inside. Refer servicing to qualified service personnel. WARNING: To reduce the risk of fire or electrical shock, do not expose this apparatus to rain or moisture. CAUTION: In Canada and the USA, to prevent electric shock, match the wide blade of the plug to the wide slot in the socket and insert the plug fully into the socket. This product is designed and manufactured to meet strict quality and safety standards. However, you should be aware of the following installation and operation precautions. 1. Take heed of warnings & instructions You should read all the safety and operating instructions before operating this appliance. Retain this handbook for future reference and adhere to all warnings in the handbook or on the appliance. 2. Water and moisture The presence of electricity near water can be dangerous. Do not use the appliance near water – for example next to a bathtub, washbowl, kitchen sink, in a wet basement or near a swimming pool, etc. 3. Object or liquid entry Take care that objects do not fall and liquids are not spilled into the enclosure through any openings. Liquid-filled objects such as vases should not be placed on the equipment. 4.Ventilation Do not place the equipment on a bed, sofa, rug or similar soft surface, or in an enclosed bookcase or cabinet, since ventilation may be impeded. We recommend a minimum distance of 50mm around the sides and top of the appliance to provide adequate ventilation. The lightning flash with an arrowhead symbol within an equilateral triangle, is intended to alert the user to the presence of uninsulated 'dangerous voltage' within the product's enclosure that may be of sufficient magnitude to constitute a risk of electric shock to persons. The exclamation point within an equilateral triangle is intended to alert the user to the presence of important operating and maintenance (servicing) instructions in the literature accompanying the product. 5. Heat Locate the appliance away from naked flames or heat producing equipment such as radiators, stoves or other appliances (including other amplifiers) that produce heat. 6. Climate The appliance has been designed for use in moderate climates. 7. Racks and stands Only use a rack or stand that is recommended for use with audio equipment. If the equipment is on a portable rack it should be moved with great care, to avoid overturning the combination. 8. Cleaning Unplug the unit from the mains supply before cleaning. The case should normally only require a wipe with a soft, damp, lint-free cloth. Do not use paint thinners or other chemical solvents for cleaning. We do not advise the use of furniture cleaning sprays or polishes as they can cause indelible white marks if the unit is subsequently wiped with a damp cloth. 9. Power sources This appliance must be connected to a mains socket outlet using the supplied power cord. To disconnect this apparatus from power, you must disconnect the power cord. Make sure the power cord is always easily accessible. Only connect the appliance to a power supply of the type described in the operating instructions or as marked on the appliance. This is a Class 1 device and must be earthed. The power switch is a single-pole switch. When the switch is in the “Off ” position, the appliance is not completely disconnected from the main power. 10. Power-cord protection Power supply cords should be routed so that they are not likely to be walked on or pinched by items placed upon or against them, paying particular attention to cords and plugs, and the point where they exit from the appliance. 11. Grounding Ensure that the grounding means of the appliance is not defeated. 12. Power lines Locate any outdoor antenna/aerial away from power lines. 13. Non-use periods If the unit has a stand-by function, a small amount of current will continue to flow into the equipment in this mode. Unplug the power cord of the appliance from the outlet if left unused for a long period of time. 14. Abnormal smell If an abnormal smell or smoke is detected from the appliance, turn the power off immediately and unplug the unit from the wall outlet. Contact your dealer immediately. 15. Servicing You should not attempt to service the appliance beyond that described in this handbook. All other servicing should be referred to qualified service personnel. 16. Damage requiring service The appliance should be serviced by qualified service personnel when: A. the power-supply cord or the plug has been damaged, or B. objects have fallen, or liquid has spilled into the appliance, or C. the appliance has been exposed to rain, or D. the appliance does not appear to operate normally or exhibits a marked change in performance, or E. the appliance has been dropped or the enclosure damaged. the sound and vision of scandinavia p l e a s e v i s i t primare.net f o r m o r e information about our products p r i m a r e ab limstensgatan 7 21616 limhamn sweden primare.net