Download Installation and Operating Instructions for R+W
Transcript
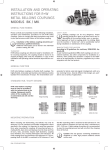
Installation and Operating
Instructions for R+W Torque
Limiting Couplings: Series SL
Safety alert
Please carefully and completely read the following installation, operation and maintenance procedures for the R+W torque limiters. Failure
to comply with these procedures may result in poor performance and/
or failure of the torque limiter.
Rotating couplings can be very dangerous. Proper guarding should be in place at all times and is the responsibility
of the machine builder, user, or operator. Do not approach
or touch a coupling while it is rotating. Make sure the machine is „locked out“ and be accidentally started during
installation or maintenance of the coupling.
Installation of the torque limiters should be performed by a qualified technician.
Transport
Manufacturer‘s declaration
R+W torque limiters are delivered ready for installation. After incoming
inspection, the coupling should be stored in its original packaging until
ready for installation. A copy of this installation and operating manual
should be kept with the coupling.
General function of the torque limiter
According to EG guidelines for machinery 2006/42/EG, Appendix IIB
As per machinery guidelines (MR), shaft couplings are not considered machines, but rather components for installation in a machine. Their putting
into operation is subject to the fulfillment of all requirements of machinery
regulations by or after integration into the final product.
Single / Multi-Position Automatic Re-engagement
Torque is transmitted through hardened ball bearings (4) arranged
around the coupling‘s circumference and loaded into conical detents (5).
■ The ball bearings are loaded into the detents by an actuation ring (3)
which, in turn, is held in place by disc springs (2).
■ The disengagement torque is continuously adjustable through rotation
of the adjustment nut (1).
■ In the event of an overload, the actuation ring (3) moves toward the
disc springs (2) which are pushed over center by the force from the
balls (4) exiting their detents. This completely separates the driving
and driven sides of the coupling.
■ As a consequence of the actuation ring‘s (3) axial movement, the
mechanical limit switch or proximity sensor (6) is activated, signaling
the drive to be shut down.
In its disengaged state, this design forces the disc springs into a shape
where the residual force drops off to a very small value. The residual force
of the springs is insufficient to re-engage the coupling.
■
Coupling re-engagement can only occur at a slow rotational
speed.
Positive stop
Actuation path
(see table 5)
engaged
disengaged
Adjustment nut
Detent balls
Positive stop
Belleville springs
Conical detent
Bore for
spanner wrench
Actuation ring
Proximity sensor
Integral ball
bearings
Disengagement torque setting
(see table 5)
Adjustment
range inscription
R+W 66/5
max.
Marking
Adjustment range
Clamping screw R
Adjustment nut
with inscription
Spring force
min.
max.
Marking
Adjustment range
Actuation path N
TKN max
(see
table 5)
TKN min
min.
ISO 4762
(see table 5)
30 Nm 50 Nm 80 Nm
Clamping screw R+W spanner wrench
R+W torque limiters are preset and marked with the desired disengagement
torque setting at the factory. The min. and max. of the torque adjustment
range (10) are also marked on the adjustment nut (1). The disengagement
torque is continuously adjustable within the prest range (10) by turning the
adjustment nut, increasing or descreasing the tension on the disc springs (2).
Caution: R+W torque limiters
have disc springs with a special characteristic. The torque
adjustment range lies within
a specific range of positions
for the disc spring, outside of
which the torque limiter can
not function. It is important to
always stay within the min.max. of the specified torque
adjustment range.
Spring path
Caution! The torque limiter should not be adjusted outside of the
preset torque adjustment range. After loosening the clamping screw
(11) (max. 1/2 turn), the adjustment nut can be rotated with an appropriate
tool (e.g. R+W spanner wrench). After adjustment, tighten the clamping
screw. The torque limiter can now be used.
R+W
Anl_SL_E_2011.indd 1
1
25.10.11 15:46
Mounting preparation
All mounting surfaces including shafts, bores, keys, and keyways must be clean and free of burrs, nicks, or dents. Inspect shaft diameters, coupling bore
diameters, and dimensions and tolerances of keys and keyways prior to installation. All R+W coupling bores are machined to ISO tolerance H7. The overall
clearance between shaft and hub should be between 0.01 abd 0.04 mm. A light coating of machine oil is recommended to ease the mounting process and
will not affect the clapming force of the hub.
Caution!
Oils and greases containing molybdenum disulphide or other high pressure additives should not be used.
Mounting instructions SLN / SLP
SLN (with clamping hub) SLP (with keyway connection)
The models SLN / SLP have integral bearings (1) for support of the attached
component (e.g. timing belt pulley, sprocket, etc.).
S
Additional bearing
Integral
bearings
The max. radial load capacity (2) must not be exceeded. See table below.
Distance
from-to
When dimension (S) is maintained, the load is centered between the two
bearing races. In this case, an additional beainrg is not required. An offset
mounting configuration requires additional bearing support. This is recommended when the diameter is small or the attached component is very wide.
Depending on the application, ball bearings, needle bearings or plain bearings can be used.
Series
Radial load capacity (max.) (N)
Distance (S) from - to
(mm)
30
1800
60
2300
150
3000
300
4500
4-14
5-18
6-20
6-23
Timing belt
Timing belt
(1 N = 0.2248 lbs)
Clamping hub
SLN
Shaft end
Fastening screw I
Table 5 / Page 4
Mounting:
Slide the complete coupling onto the shaft and place
it in the corret axial position. Tighten the fastening
screw to its specified torque value acoording to the
information in table 5 (page 4).
Dismounting:
To remove the R+W torque limiter, simply loosen the clamping
screw and slide the coupling off
the shaft.
Mounting:
Using the appropriate tools, slide the complete coupling onto the shaft end. The final position must be
secured axially, e.g. with a washer (12).
Dismounting:
Remove the axial fastening
mechanism and slide the coupling off the shaft with the
appropriate tools.
Clamping screw R
Table 5 / Page 4
SLP
Key
Shaft end
Washer
Clamping screw R
Table 5 / Page 4
Function of metal bellows
R+W metal bellows couplings are flexible shaft couplings.
The highly flexible, torsionally rigid stainless steel bellows provides backlash free transmission of torque. The metal bellows compensates
for lateral, axial and angular misalignment, with very low restoring forces.
Mounting instructions SL2 (with integral bellows coupling)
Fastening screw I
Table 5 / Page 4
Spindle shaft
Motor
Clamping screw R
Table 5 / Page 4
Mounting:
Slide the torque limiter end onto the spindle shaft.
When the correct axial position has been reached,
tighten the fastening screw with a torque wrench to
the torque specified in table 5 (page 4). Slide the coupling end onto the motor shaft and at the correct axial
position, with no axial force on the bellows, tighten
the fastening screw on the second clamping hub as
described above.
Dismounting:
To remove the R+W torque limiter, simply loosen the clamping
screws and slide the coupling
off the shaft.
Proximity sensor
2
Anl_SL_E_2011.indd 2
R+W
25.10.11 15:46
Function of elastomer insert
The elastomer insert is the compensating element in an SLE coupling. It transmits torque without backlash and damps shock and vibration. The SLE coupling‘s elastomer insert determines the hysteresis characteristics of the entire
rotational axis, and is available in two different designs.
Elastomer insert
Clearance for axial
offset
approx. 2 mm
Hub
When the coupling hubs are pushed together during installation, axial force is
required to overcome the elastomer insert‘s preload tension. The amount of
force required can be reduced by cleaning the elastomer insert and then applying a coat of light oil to its contact surfaces.
Type / Shore Color Material Temperature
Hardness
range
Properties
Mounting force
A / 98 Sh A
red
TPU
-30°C - +100°C
high damping
B / 64 Sh D
green
TPU
-30°C - +120°C high torsional stiffness
Contact surfaces
Hub
Table 2
Installation Instructions SLE (with elastomer insert)
1-2 mm
Mounting:
Slide the torque limiter onto the spindle shaft. When the correct axial
position has been reached, tighten the fastening screw, with a torque
wrench, to the torque specified in table 5 (page 4). Insert the motor
shaft, and at the correct axial position, tighten the fastening screw as
described above.
Clearance for axial offset
Motor
Spindle shaft
Dismounting:
To remove the R+W torque limiter, simply loosen the clamping screws
and slide the coupling off the shaft.
Fastening screw I
Table 5 / Page 4
Clamping screw R
Table 5 / Page 4
Proximity sensor
Maximum shaft misalignment
Caution! Precise alignment of the R+W torque limiters greatly
increases their service life.
Maximum misalignment values can be found in tables 3 and 4.
Reducing or eliminating lateral misalignment lessens the radial loading of adjacent bearings, increasing the performance of the drive train.
For high speed drive systems, precise alignmnet with a dial indicator is
recommended.
Maximum misalignment with bellows coupling
Maximum misalignment with elastomer coupling
Angular misalignment
Angular misalignment
Axial misalignment
Axial misalignment
Lateral misalignment
Lateral misalignment
Series
Lateral misalignment
30
0.2
60
0.2
150
0.2
300
0.25
Series
Type (Elastomer insert)
30
A
60
B
A
150
B
A
Angular misalignment
± 1º
Lateral misalignment
Axial misalignment
± 2 mm
Angular misalignment
± 1º
Axial misalignment
± 2 mm
Table 3
300
B
A
B
0.12 0.1 0.15 0.12 0.18 0.14 0.2 0.18
Table 4
R+W
Anl_SL_E_2011.indd 3
3
25.10.11 15:46
Tightening torque values / Actuation path distance
Series
Screw ISO 4762
Fastening screw
30
I
N
R
Actuation path
Clamping screw ISO 4762
Adjustment nut
R+W spanner wrench for torque
adjustment. Order No.:
60
150
Caution!
It is imperative to follow the tightening torque specifications in order
to ensure proper performance of the
torque limiter.
300
(Nm)
M6 /15Nm
M8 /15Nm M10 /75Nm M12 /130Nm
(mm)
1.3
1.5
1.8
2
(Nm)
M3 /2Nm
M3 /2Nm
M2 /2Nm
M4 /4.5Nm
55/4
66/5
82/5
100/6
Table 5
Mechanical limit switch
Order No.: 618.6740.644
Technical Data
Max. voltage:
Max. constant
current:
Protective system:
Contact system:
Temperature range:
Actuation:
PG 11
10
20
62
16
22
8
Ø 4.2
The plunger should be placed as close as
possible to the actuation ring of the torque
limiter (approx. 0.1 - 0.2 mm).
Order No.: 619.4711.650
Proximity sensor
LED
Technical Data
max. 2
LED
SW 17
10 Nm
45
50
IP 65
Open (forced separating)
- 30 - +80 ˚C
Plunger (metal)
Distance
approx. 0.1-0.2
Ø 7.5
Caution:
After installation, it is necessary to fully test the
functionality of the mechanical limit switch.
10 A
Switch diagram:
30.6
4
31
500 V AC
M12 x 1
Caution:
After installation, it is necessary to fully test the
functionality of the proximity sensor.
Voltage range:
10 to 30 V DC
Max. output current:
200 mA
Max. frequency:
≤ 3 KHz
Temperature range:
-25°C to +70°C
Protective system:
IP 67
Switch type:
PNP, NO
Max. detection gap:
max. 2 mm
Switch diagram:
Actuation path
Additional information
Rotational speed:
The service life of the torque
limiters depends on the
rotational speed at which
the torque limiter disengages, as well as the frequency
and duration of disengagement events.
Maintenance:
Since the torque limiters are not
subject to wear while engaged,
there is no required maintenance. The positive locking connections are backlash free and
the unit is lubricated for life.
R+W Antriebselemente GmbH
Alexander-Wiegand-Str. 8 · 63911 Klingenberg
Phone +49 (0) 93 72 - 98 64-0 · Fax +49 (0) 93 72 - 98 64 20
[email protected] · www.rw-kupplungen.de
4
Anl_SL_E_2011.indd 4
Selection:
Torque limiters are typically selected based on
the required disengagement torque value. This
value must be greater than the required torque
for normal acceleration and deceleration of the
machine.
The torque limiter´s disengagement torque is
typically determined by the data from the drive,
motor, and/or gearbox.
The above mentioned information is based on our present knowledge and experience and does not free the user from regular inspection. A legally binding
guarantee, in regards to third party protection rights, is not given.
597/10/11/2.000
Wear:
No wear occurs while the coupling is engaged. In the event of
an overload, the drive must be
shut down immediately through
the use of a mechanical limit
switch or proximity sensor.
R+W
25.10.11 15:46


