1
Betriebsanleitung
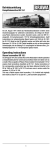
Dampflokomotive G 4/5
1894 ging die bayerische Staatsbahn von der dreifach gekuppelten
Güterzuglok zum Vierkuppler mit vorderer Laufachse über. In dieser
Bauart entstand die Lokomotivklasse E 1 in verschiedenen Bauformen, danach ab 1905 die Klasse G 4/5 N; ab 1915 entstand bei
Maffei die Klasse G 4/5 H. Mit dieser letzten Version der bayerischen
4/5 gekuppelten Loks entstand die größte, stärkste und modernste
deutsche Lokomotive dieser Achsfolge.
Die G 4/5 H entsprach den Maffeischen Konstruktionsprinzipien. Ein
schräg geneigtes Vierzylinder-Triebwerk war mit einem filigranen
Barrenrahmen kombiniert.
Der Kessel, bei dem das damals recht neue Heißdampfverfahren
nach Schmitt Verwendung fand, war sehr leistungsfähig. Dank des
ausgeglichenen Vierzylinder-Triebwerkes war trotz der nur 1270 mm
großen Treibräder die Höchstgeschwindigkeit von 60 km/h problemlos
ausfahrbar. Die Lok hatte große Zugkraft, sie zog 1000t auf einer
11% Rampe mit 18 km/h.
Die im Frühjahr 1914 bestellten 35 Loks der ersten Serie wurden im
ersten Weltkrieg dringend benötigt; weitere Maschinen kamen hinzu.
Nach Kriegsende gingen 61 Loks an die Siegermächte, 169 kamen
als 56 801 bis 56 1125 (mit Lücken) zur Deutschen Reichsbahn und
wurden ab 1933 ausgemustert. 1939 existierten noch 5 Lokomotiven.
Den Zweiten Weltkrieg überlebten nur 2 Maschinen, die 1947 ausgemustert wurden.
Operating Instructions
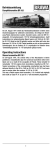
Steam engine G 4/5
In 1894, the Bavarian National Railway Company switched over from
freight locomotives with triple-couplings to locomotives with four
couplings and front axles. E1 class locomotives were produced in
different designs according to this construction principle, followed by
the G 4/5 N class after 1905 and, from 1915 onwards, Maffei started
manufacturing G 4/5 H class locomotives. This final version of the
Bavarian 4/5 coupling locomotives was the largest, most powerful
and most modern German locomotive with this wheel arrangement.
The G 4/5 H corresponded to the Maffei construction principles.
It had a slanting four-cylinder engine com-bined with a filigree
underframe. The boiler, which operated on the basis of the relatively
new super-heated steam process that was developed by Schmitt,
was extremely efficient. Thanks to the balanced four-cylinder engine,
a maximum speed of 60 km/h could easily be attained despite the
compact 1,270 mm size of the driver wheels. The locomotive had
considerable tractive power and was able to pull 1,000 tonnes on an
11% incline at 18 km/h.
The 35 first series locomotives that were ordered in spring 1914 were
urgently needed in the first world war, and further locomotives
followed. At the end of the war, 61 locomotives went to the allied
powers and 169 went as 56 801 to 56 1125 (with gaps) to the
Deutsche Reichs-bahn until they were taken out of service in 1933.
In 1939, 5 locomotives were still in existence. Only 2 of them survived
the second world war, and they were taken out of service in 1947.
1
Inhaltsverzeichnis
Contents
Benennung
Seite
Allgemeine Montage- und Sicherheitshinweise ................................... 2
Arbeiten vor der Inbetriebnahme
• Entnahme der Lok aus der Verpackung ......................................... 4
• Zusatzbauteile montieren ............................................................... 4
• Spezialwerkzeug ............................................................................. 5
Wartungsarbeiten
Lokomotive
• 1. Ölen .......................................................................................... 5
• 2. Gehäuse demontieren .............................................................. 6
• 3. Motor tauschen ........................................................................ 6
• 4. Beleuchtungseinrichtung ......................................................... 6
• 5. Wartungsarbeiten an Radsätze, Getriebe,
und Kuppelgestänge ................................................................ 6
• 6. Kupplungsnormschacht tauschen ........................................... 6
• 7. Haftreifen tauschen ................................................................. 6
Tender
• 8. Gehäuse demontieren .............................................................. 8
• 9. Tender von Lok trennen ........................................................... 8
• 10. Platine erneuern/ausbauen ...................................................... 8
• 11. Kabelbaumkupplung demontieren ........................................... 8
• 12 Wartungsarbeiten an Radsätze ................................................ 8
• 13. Kupplungsnormschacht tauschen ........................................... 8
• 14. Schleiferwechsel bei Wechselstromausführung ...................... 6
• 15. Premium-Digitaldecoder tauschen .......................................... 8
• 16. Digitalbetrieb ............................................................................ 8
Ersatzteilliste ..................................................................................... 14
Bestellhinweis
• Bestellbeispiel ............................................................................... 22
Allgemeine Montage- und Sicherheitshinweise
• Diese Bedienungsanleitung beschreibt sämtliche Arbeitsvorgänge die
zur Wartung und Instandhaltung notwendig sind. Bitte lesen Sie
diese Bedienungsanleitung bevor Sie mit den Arbeiten beginnen.
• Bei unsachgemäßem Umgang mit elektrischen Bauteilen können diese zerstört werden. Für entsprechende Arbeiten (z.B. Platinenwechsel) können Sie sich an Ihren Fachhändler oder den Hersteller
wenden.
• Bei den folgenden Wartungsarbeiten ist die jeweilige Demontage
beschrieben, der Zusammenbau ist in umgekehrter Reihenfolge
auszuführen.
• Die folgenden Wartungsarbeiten sind bei Gleich- und
Wechselstrom-Ausführungen fast identisch. Im Ausnahmefall wird
im entsprechenden Textabschnitt Bezug genommen.
• Achten Sie beim Zerlegen der Lokomotive auf die Einbaulage der
entsprechenden Bauteile. Wird ein Bauteil falsch eingebaut kann
dieses zerstört werden oder es kommt zu Funktionsstörungen im
Betrieb.
• Jegliche Kabel oder Verbindungsdrähte die in diesem Produkt
verbaut sind dürfen nicht in eine Netzsteckdose eingeführt werden.
Lebensgefahr!
2
Description
Page
General assembly and safty information .............................................. 3
Work to be performed before starting up
• Removing the locomotive from the packaging ................................. 4
• Fitting additional parts .................................................................... 4
• Special tool ..................................................................................... 5
Maintenance work
Locomotive
• 1. Lubricating ............................................................................. 10
• 2. Dismantling housing ............................................................... 10
• 3. Exchanging the engine .......................................................... 10
• 4. Light fittings ........................................................................... 10
• 5. Maintenance work on wheelsets, gears,
and coupling rods .................................................................. 10
• 6. Exchanging the coupler pocket ............................................. 10
• 7. Exchanging the traction tires ................................................. 10
Tender
• 8. Dismantling housing ............................................................... 12
• 9. Disconnect the tender from the locomotive .......................... 12
• 10. Replace/exchanging the circuit board ................................... 12
• 11. Dismantle the cable harness coupling ................................... 12
• 12. Maintenance work on wheelsets ........................................... 12
• 13. Exchanging the coupler pocket ............................................. 12
• 14. Exchanging the sliding contact of the AC version ................. 10
• 15. Exchanging the premium digital decoder .............................. 12
• 16. Digital operation ..................................................................... 12
Spare parts list .................................................................................. 14
Order notice
• Order example .............................................................................. 22
General assembly and safety information
• These operating instructions describe all work steps necessary for
maintenance and repair. Please read these operating instructions
carefully before you start with your work.
• In the case of incorrect handling of electrical components, they may
be destroyed. Please ask your specialist dealer to help with the
necessary work (e.g. changing circuit boards).
• In the case of maintenance work, the disassembly is described
below, to re-assemble the tractor reverse the work steps.
• The maintenance work described below is virtually identical
for direct current and alternating current models. If there are
any differences these will be pointed out specifically.
• When dismantling the locomotive make a note of the mounted
position of the individual parts. An incorrectly mounted part can
be destroyed or operation can be disrupted.
• All cables and connection wires installed in this product may not be
inserted in a mains socket. Danger!
3
Arbeiten vor der Inbetriebnahme
Work to be performed before starting up
Entnahme der Lok aus der Verpackung (Fig. 1)
Deckel der Verpackung öffnen. Kunststoff-Schutzverpackung
mit Lok entnehmen und auf einen Tisch oder ähnliches abstellen.
Lasche (1) lösen, Deckel und Seitenteile der Schutzverpackung
wegklappen, Lok entnehmen.
Withdrawal of Engine from Packaging (Fig. 1)
Open package lid. Take out plastics protecting package with
engine and put it down on a table or similar item.
Loosen latch (1), fold away lid and side parts of protecting package,
take out engine and take out engine.
Fig. 1
1
Zusatzbauteile montieren (Fig. 2)
In der Verpackung sind zusätzliche Bauteile lose beigelegt. Siehe
Seite 22, Pos. 236.
• 3 = 2 x Bügelkupplung
Werden die Bauteile aus dem Zurüstbeutel für Vitrinenmodelle
montiert, ist die Lok nicht mehr für den Fahrbetrieb geeignet.
• 1 = 4 x Bremsschlauch, Knorr
• 2 = 4 x Bremsschlauch, Westinghouse
• 4 = 2 x Kupplungsimitat
• 5 = 2 x Haken
• 6 = 2 x Trittstufen
• 7 = 2 x Zylinderentwässerung
• 8 = 2 x Kolbenstangenschutzrohr
• 9 = 1 x Leitung für Luftkessel
• 10 = 1 x Schürhaken, gerade
• 11 = 1 x Schürhaken, gebogen
• 12 = 1 x Handrad
Fitting additional parts (Fig. 2)
Accessory parts have been loosely enclosed in the packaging. See
page 22, position 236.
• 3 = 2 x Bow coupling
If the components from the add-on bag for display models are
mounted, then the engine will no longer be suitable for operation.
• 1 = 4 x Brake hose, Knorr
• 2 = 4 x Brake hose, Westinghouse
• 4 = 2 x Imitation coupling
• 5 = 2 x Hook
• 6 = 2 x Step
• 7 = 2 x Cylinder drainage
• 8 = 2 x Piston rod protection tube
• 9 = 1 x Tube for airtank
• 10 = 1 x Poker, straight
• 11 = 1 x Poker, arcuat
• 12 = 1 x Handwheel
4
Wartungsarbeiten
Maintenance works
Fig. 2
Spezialwerkzeug (Fig. 3)
Mit dem Schraubedreher (1) können die Schrauben (2) der
Kuppelstangen gelöst und wieder befestigt werden.
Special tool (Fig. 3)
With the screwdriver (1) you can dismantle and fasten the screws (2)
of the coupling rods.
Fig. 3
2
1
1. Ölen (Fig. 4)
Der Motor und die Lagerstellen der Radsätze können an den
gekennzeichneten Punkten sparsam mit Öl der Modellbaubranche
geölt werden. Zum Ölen des Motors ist das Gehäuse abzunehmen,
siehe Seite 6, Punkt 2.
1. Lubricating (Fig. 4)
The engine and the wheelset bearings may be sparingly lubricated at
the marked places with oil used for model making purposes.
In order to lubricate the engine, remove the housing, compare page
6, item 2.
Fig. 4
Motor
Engine
Räder
Wheels
5
Wartungsarbeiten an der Lok
2. Gehäuse demontieren (Fig. 5)
An der Gehäuseunterseite 4 Schrauben (73, 74) herausdrehen und
Gehäuse (14) nach oben abnehmen.
3. Motor tauschen (Fig. 5)
Gehäuse (14) demontieren, siehe Punkt 2. An der Gehäuseunterseite
2 Schrauben (90) herausdrehen und Motor (115) nach oben
herausziehen. Verkabelung am Motor ablöten.
Achtung: Beim Ausbau des Motors muss auf die Verkabelung geachtet
werden – sonst falsche Fahrtrichtung.
4. Beleuchtungseinrichtung (Fig. 5)
Diese Lokomotive ist, bis auf die Füherhausbeleuchtung, mit
wartungsfreien Leuchtdioden ausgestattet. Bei einem eventuellen
Defekt der Leuchtdioden wenden Sie sich bitte an Ihren Fachhändler
oder den Hersteller.
Glühbirne Führerhaus: Befestigungsschraube (184) herausdrehen.
Platine (79) abnehmen und das Kabel entfernen. Befestigungsschraube (67) herausdrehen und Führerhaus (01) nach oben
abnehmen. Abdeckung (69) abziehen und Glühbirne (70) mit Kabel
aus dem Gehäuse herausziehen.
Hinweis: Die Innenbeleuchtung kann im Digitalbetrieb schaltbar
gemacht werden. Dazu den Schiebeschalter im Tender umschalten.
Jetzt kann mit F2 die Innenbeleuchtung geschaltet werden.
5. Wartungsarbeiten an Radsätze, Getriebe und
Kuppelgestänge (Fig. 5)
Bei Wartungsarbeiten an den Radsätzen (138 bis 141) oder dem
unteren Getriebe muss das Bremsgestänge (130) abgenommen
werden. Die Schrauben (73, 74) herausdrehen und die Getriebeabdeckung (72) abnehmen.
Für Wartungsarbeiten am oberen Getriebe muss das Gehäuse (14)
abgenommen werden, siehe Punkt 2. Die Getriebeabdeckung (75)
ausklipsen und Schneckenrad (76) mit Kreuzgelenk (77) entnehmen.
Zum lösen des entsprechenden Radsatzes vom Kuppelgestänge
verwenden Sie bitte den mitgelieferten Schraubendreher, siehe
Seite 5 Spezialwerkzeug.
Der Radsatz (142) kann ohne Demontage des Vorläufers (118)
ausgeklipst werden.
Die Demontage der Steuerung (154, 156) wird nicht empfohlen, da
es sich hier um eine konstruktiv komplexe Mechanik handelt. Falls
Sie dennoch das Kuppelgestänge demontieren, bitten wir Sie genau
darauf zu achten, wo und wie jedes Einzelteil montiert war. Die
Einbaulage können Sie auch aus der Ersatzteilgrafik auf Seite 16
entnehmen.
6. Kupplungsnormschacht tauschen (Fig. 5)
Befestigungsschraube (116) herausdrehen und Vorläufer (118)
abnehmen. Befestigungsschrauben (119) herausdrehen und Lager für
Vorläufer (120) abnehmen. Bügelkupplung (174) aus Kupplungsnormschacht (96) ausklipsen.
7. Haftreifen tauschen (Fig. 5)
Schraube (147) mit Spezialwerkzeug, siehe Seite 5, herausdrehen.
Kuppelstange (143 bzw. 230) zur Seite schieben und Haftreifen (231)
wechseln.
6
Fig. 5
7
Wartungsarbeiten am Tender
8. Gehäuse demontieren (Fig. 6)
Die Schrauben (186, 206) herausdrehen und Gehäuse (222) nach
oben abnehmen.
9. Tender von Lok trennen (Fig. 6)
Soll der Tender von der Lok getrennt werden, muss die Platine (212)
und die Kabelbaumkupplung (90 bis 94) demontiert werden, siehe
Punkt 10 und 11.
10. Platine erneuern/ausbauen (Fig. 6)
Gehäuse demontieren, siehe Punkt 8. Befestigungsschrauben (181)
herausdrehen und Platine (212) nach oben abnehmen. Sämtliche
Kabel durch Abziehen der Kabelhalter (211) entfernen. Bitte
kennzeichnen Sie sich wo die einzelnen Kabel befestigt waren.
Achtung: Wird die Platine zum Trennen von Tender und Lok ausgebaut,
müssen nur die Kabel an der Platine entfernt werden, die am
Tender angeschlossen sind.
11. Kabelbaumkupplung demontieren (Fig. 6)
Gehäuse demontieren, siehe Punkt 8. Schraube (206) herausdrehen
und den Tender von der Kabelbaumkupplung (90 bis 94) trennen.
Schrauben (90) herausdrehen und Abdeckung (91) nach oben
abnehmen. Die Feder (93) aushängen und Unterteil (92) abnehmen.
12. Wartungsarbeiten an Radsätze (Fig. 6)
Werkzeugkasten (208, 209) nach unten abnehmen. Die Abdeckungen (189, 190) und Federimitationen (201, 202) abnehmen.
Entsprechende Lagerimitationen (194 bis 197) mit dazugehörigen
Radsatz (199, 200) nach unten herausziehen.
13. Kupplungsnormschacht tauschen (Fig. 6)
Hintersten Radsatz (199) demontieren, siehe Punkt 12. Bremse (192)
abnehmen. Befestigungsschrauben (188) herausdrehen und
Abdeckung (189) abnehmen. Kupplungsnormschacht (175)
abnehmen und Bügelkupplung (174) ausklipsen.
14. Schleiferwechsel bei Wechselstromausführung
(Fig. 5)
Befestigungsschraube (233) des Schleifers (232) herausdrehen,
Kabel am Schleifer ablöten und Schleifer abnehmen.
15. Premium-Digitaldecoder tauschen (Fig. 6)
Gehäuse demontieren, siehe Punkt 9. Premium-Digitaldecoder (21)
abziehen und neuen einstecken.
16. Digitalbetrieb (Fig. 6)
Wechselstrom-Ausführung
Lokomotiven in Wechselstrom-Ausführung AC werden serienmäßig mit
Premium-Digitaldecoder (213) ausgeliefert. Der Decoder erkennt die
Betriebsart (analog/digital) selbstständig. Soll der Decoder umprogrammiert werden, liegt die Einbau- und Betriebsanleitung PremiumDigitaldecoder bei.
Der Decoder ist werkseitig auf Adresse 03 eingestellt.
Gleichstrom-Ausführung
Gehäuse demontieren, siehe Punkt 8. Blindstecker (234) abziehen
und Digitaldecoder einstecken. Den richtigen Einbau des Digitaldecoders, dessen Einsteckrichtung und Programmierung entnehmen
Sie der Betriebsanleitung des Decoderherstellers. Nach Einstecken
des Digitaldecoders ist die Funktion des Lichtes zu prüfen. Wenn
keine Lichtfunktion – Stecker um 180° drehen.
8
Fig. 6
9
Maintenance works on the loco
2. Dismantle housing (Fig. 5)
Unscrew the 4 screws (73, 74) on the underside of the housing and
remove the housing (14) from the top.
3. Replace engine (Fig. 5)
Dismantle the housing (14), see item 2. Unscrew the 2 screws (90)
on the underside of the housing and pull out the engine (11) from the
top. Unsolder the wiring on the engine.
Attention: When dismantling the engine, note the wiring layout otherwise incorrect direction of travel.
4. Light fittings (Fig. 5)
Apart from the driver's cab lighting, this locomotive is fitted with
maintenance-free light-emitting diodes. If a defect occurs in the
light-emitting diodes, please contact your specialist dealer or the
manufacturer.
Driver's cab bulb: Unscrew the fixing screw (184).
Remove the printed circuit board (79) and remove the cable.
Unscrew the fixing screw (67) and remove the driver's cab (01) from
the top. Pull off the cover (69) and pull the bulb and cable out of the
housing.
Note: The interior lightning may be switchable by digital operating.
Switch the sliding switch at the tender. With F2 the interior lightning
can switched.
5. Maintenance work on wheelsets, gears and
coupling rods (Fig. 5)
The brake rigging (130) must be removed for maintenance work on
the wheelsets (138 up to 141) or the lower gears. Undo the screws
(73, 74) and remove the gears cover (72).
For maintenance work on the upper gears, the housing (14) must be
removed, see item 2. Unclip the gears cover (75) and remove the
worm gear (76) with universal joint (77).
To unscrew the wheelsets from the coupling rods, please use the
special tool, see page 5.
The wheelset (142) can also be unclipped without dismantling the
bogie (118).
Dismantling the coupling rod (154, 156) is not recommended, as the
mechanics are complex. However, if you do dismantle the coupling
rods, please precisely note where and how each individual part was
fitted.
The installation position is also given in the spare parts diagram on
page 16.
6. Replace the standard coupling shaft (Fig. 5)
Dismantle the front bogie (32), see item 5. Undo the fixing screws
(36) and remove the retaining plate (37).
Unclip the stirrup coupling (38) from the standard coupling shaft (39).
7. Replace the traction tyres (Fig. 5)
Unscrew the screw (147) with the special tool, see page 5. Push the
coupling rod (143 or 230) to the side and replace the traction tyres
(231).
10
Fig. 5
11
Maintenance works on the tender
8. Dismantle housing (Fig. 6)
Undo the screws (186, 206) and take out the housing (222) from the
top.
9. Disconnect the tender from the locomotive (Fig. 6)
If the tender is to be disconnected from the locomotive, the printed
circuit board (212) and the cable harness coupling (90 to 94) must
be dismantled, see item 10 and 11.
10. Renew/remove printed circuit board (Fig. 6)
Dismantle the housing, see item 8. Undo the fixing screws (181) and
take out the printed circuit board (212) from the top. Remove all
cables by pulling off the cable support (211). Please mark where the
individual cables were fixed.
Attention: If the printed circuit board is dismantled to disconnect the
tender and locomotive, only the cables at the printed circuit board
which are connected to the tender have to be removed.
11. Dismantle cable harness coupling (Fig. 6)
Dismantle housing, see item 8. Undo screw (206) and disconnect the
tender from the cable harness coupling (90 to 94). Take off the cover
(91) from above. Unhook the springs (93) and remove the lower
section (92).
12. Maintenance work on wheelsets (Fig. 6)
Remove the toolbox (208, 209). Remove the covers (189, 190) and
the spring imitation (201, 202). Pull out the spring imitation (194 up
to 197) with the appendant wheelset (199, 200).
13. Replace standard coupling shaft (Fig. 6)
Dismantle the rear bogie (199), see item 12. Remove the brake
(192). Undo the fixing screws (188) and remove the cover (189).
Take off the standard coupling shaft (175) and unclip the stirrup
coupling (174).
14. Replace slider in alternating current version
(Fig. 5)
Undo the fixing screw (233) of the slider (232), unsolder the cable on
the slider and remove the slider.
15. Replace the premium digital decoder (Fig. 6)
Dismantle the housing, see item 9. Pull off the premium digital
decoder (21) and plug in the new one.
16. Digital operation (Fig. 6)
Alternating current version
Locomotives of the alternative current version AC are supplied with a
premium digital decoder (213) as a standard. The decoder
recognises the type of operation (analog/digital) independently. If the
decoder re reprogrammed, refer to the installation and operating
instructions for the premium digital decoder.
The decoder is set to address 03 in the factory.
Direct current version
Dismantle the housing, see item 8. Pull off the dummy plug (234)
and plug in the digital decoder. Correct installation of the digital
decoder, its plug-in direction and programming are given in the
digital decoder manufacturer’s operating instructions. After plugging
in the digital decoder, check that the light functions. If the light does
not function, rotate the connector by 180°.
12
Fig. 6
13
Ersatzteilliste Dampflokomotive G 4/5
Spare Parts List Steam engine G 4/5
Gleichstrom / Wechselstrom
Lokomotive / Locomotive
D.C. current / A.C. current
14
Gleichstrom / Wechselstrom
Lokomotive / Locomotive
D.C. current / A.C. current
15
Ersatzteilliste Dampflokomotive G 4/5
Spare Parts List Steam engine G 4/5
Gleichstrom / Wechselstrom
Lokomotive / Locomotive
D.C. current / A.C. current
16
Gleichstrom / Wechselstrom
Tender / Tender
D.C. current / A.C. current
17
Ersatzteilliste Dampflokomotive G 4/5
Spare Parts List Steam engine G 4/5
Pos. Bestell Nr.
Order no.
1
40100.50.01
40104.50.01
2
40100.50.02
40104.50.02
3
40100.50.03
40104.50.03
4
40100.50.04
40104.50.04
5
40100.50.05
6
40100.50.06
7
40100.50.07
40104.50.07
8
40100.50.08
9
40100.50.09
40104.50.09
10 40100.50.10
11 40100.50.11
12 40100.50.12
13 40100.50.13
14 40100.50.14
40104.50.15
15 40100.50.16
40104.50.16
16 40100.50.17
17 40100.50.18
18 40100.50.19
19 40100.50.20
40104.50.20
20 40100.50.21
40104.50.21
21 40100.50.22
40104.50.22
22 40100.50.23
23 40100.50.24
24 40100.50.25
25 40100.50.26
26 40100.50.27
27 40100.50.28
28 40100.50.29
29 40100.50.30
30 40100.50.31
31 40100.50.32
32 40100.50.33
33 40100..50.34
34 40100.50.35
35 40100.50.36
36 40100.50.37
37 40100.50.38
38 40100.50.39
39 40100.50.40
40 40100.50.41
40104.50.41
41 40100.50.42
42 40100.50.43
43 40100.50.44
44 40100.50.45
40104.50.45
45 40100.50.46
46 40100.50.47
47 40100.50.48
48 40100.50.49
49 40100.50.50
50 40100.50.51
51 40100.50.52
52 40100.50.53
53 40100.50.54
40104.50.54
54 40100.50.55
55 40100.50.56
40104.50.56
56 40100.50.57
Benennung
Description
Führerhaus für 40100
Führerhaus für 40104
Türe re. kpl. für 40100
Türe re. kpl. für 40104
Halter für Türe 40100
Halter für Türe 40104
Türe li. kpl. für 40100
Türe li. kpl. für 40104
Fenstereinsatz
Windabweiser
Griffstange links
Griffstange links für 40104
Hebel f. Sicherheitsventil
Abdeckung
Abdeckung für 40104
Pfeife
Sicherheitsventil
Schraube
Regler
Kessel
Kessel für 40104
Halter für Kessel
Halter für Kessel 40104
Leitung
Sandfallrohr
Lokschild
Stufe 1
Stufe 1 für 40104
Stufe 2
Stufe 2 für 40104
Stufe 3
Stufe 3 für 40104
Aggregat 1
Hebel für Schmierpumpe
Leitung
Leitung
Aggregat 2
Luftkessel
Griffstange Kessel
Leitung
Vorheizungsbehälter
Wasserpumpe
Luftpumpe
Leitung
Leitung
Leitung
Leitung Luftpumpe
Leiter
Kesselstütze links
Kesselstütze rechts
Kesseltür
Kesseltür
Handgriff Kesseltür
Halter für Stirnlampe
Stirnlampe
Federnachbildung links
Federnachbildung li. f. 40104
Sandfallrohr
Griffstange Kessel
Hebel
Leitung
Leitung
Griffstange
Luftventil
Schraube
Sanddom
Sanddom für 40104
Handgriff
Deckel Sanddom
Deckel Sanddom
Leitung
Drivers cabin for 40100
Drivers cabin for 40104
Door right for 40100
Door right for 40104
Holder for door 40100
Holder for door 40104
Door left for 40100
Door left for 40104
Window
Wind shield
Handrail left
Handrail left for 40104
Lever
Cover
Cover for 40104
Pipe
Safety valve
Screw
Controller
Boiler
Boiler for 40104
Holder for boiler
Holder for boiler 40104
Line
Sand pipe
Number plate
Step 1
Step 1 for 40104
Step 2
Step 2 for 40104
Step 3
Step 3 for 40104
Unit 1
Lever for lubrication pump
Line
Line
Unit 2
Airtank
Handrail boiler
Line
Preheater pipe
Water pump
Air pump
Line
Line
Line
Line air pump
Leader .
Rod beside boiler left
Rod beside boiler right
Boiler door
Boiler door
Handrail boiler door
Holder for top light
Top light
Spring imitation left
Spring imitation left for 40104
Sand pipe
Handrail boiler
Lever
Line
Line
Handrail
Airvalve
Screw
Sand dome
Sand dome for 40104
Handrail
Cover sand dome
Cover sand dome
Line
18
Pos. Bestell Nr.
Order no.
57 40100.50.58
58 40100.50.59
59 40100.50.60
60 40100.50.61
61 40100.50.62
40104.50.62
62 40100.50.63
63 40100.50.64
64 40100.50.65
65 40100.50.66
66 40100.50.67
67 40100.50.68
68 40100.50.69
69 40100.50.70
70 3268.99.00
71 40100.50.71
72 40100.50.72
73 40100.50.73
74 40100.50.74
75 40100.50.75
76 40100.50.76
77 40100.50.77
78 40100.50.78
79 40100.50.79
80 40100.50.80
81 40100.50.81
82 40100.50.82
83 40100.50.83
40104.50.83
84 40100.50.84
40104.50.84
85 40100.50.85
40104.50.85
86 40100.50.86
87 40100.50.87
40104.50.87
88 40100.50.88
89 40100.50.89
40104.50.89
90 40100.50.90
91 40100.50.91
92 40100.50.92
93 40100.50.93
94 40100.50.94
95 40100.50.95
96 40100.50.96
97 40100.50.97
98 40100.50.98
99 40100.50.99
40104.50.99
100 40100.50.100
101 40100.50.101
102 40100.50.102
40104.50.102
103 40100.50.103
40104.50.103
104 40100.50.104
40104.50.104
105 40100.50.105
106 40100.50.106
40104.50.106
107 40100.50.107
40104.50.107
108 40100.50.108
109 40100.50.109
110 40100.50.110
111 40100.50.111
112 40100.50.112
113 40100.50.113
114 9750.52.01
115 40100.50.114
Benennung
Description
Leitung
Leitung
Leitung
Geschwindigkeitsmesser
Bremse
Bremse für 41104
Leitung
Leitung
Leitung
Leitung
Frontfenster
Schraube
Lüfterklappe
Lampenabdeckkung
Kabelbirne
Griffstange rechts
Getriebabdeckung kpl.
Schraube
Schraube
Halter für Schnecke
Schnecke
Kupplung
Motorhalter
Kontaktplatine
Umlauf rechts
Schmierpumpe
Schmierpumpe
Umlauf links
Umlauf links für 40104
Luftkessel
Luftkessel für 40104
Abdeckung
Abdeckung für 40104
Trittstufe rechts
Fahrgestell
Fahrgestell für 40104
Trittstufe links
Federnachbildung rechts
Federnachbildung re. f. 40104
Schraube
Abdeckung
Kinematik
Feder
Deichsel
Schraube
Normschacht
Schraube
Lichtleiter links
Trittstufe
Trittstufe für 40104
Handgriff vorne
Lichtleiter rechts
Puffer links
Puffer links für 40104
Puffer rechts
Puffer rechts für 40104
Abdeckung
Abdeckung für 40104
Lampen
Kesselstütze links
Kesselstütze links für 40104
Kesselstütze rechts
Kesselstütze rechts für 40104
Lichtleiter oben
Platine kpl.
Schraube
Schraube
Halter für Raucheinsatz
Hülse
Raucheinsatz
Motor kpl.
Line
Line
Line
Speedometer
Brake
Brake for 41104
Line
Line
Line
Line
Front window
Screw
Ventilation
Lamp cover
Bulb
Handrail right
Gear cover cpl.
Screw
Screw
Holder for worm
Worm
Clutch
Holder motor
PCB
Walkway right
Lubricating pump
Lubricating pump
Walkway left
Walkway left for 40104
Airtank
Airtank for 40104
Cover
Cover for 40104
Step right
Chassis
Chassis for 40104
Step left
Spring imitation right
Spring imitation ri. f. 40104
Screw
Cover
Kinematik
Spring
Pole
Screw
Coupler pocket
Screw
Light bar left
Step
Step for 40104
Front handle
Light bar right
Buffer left
Buffer left for 40104
Buffer right
Buffer right for 40104
Cover
Cover for 40104
Lamps
Holder for boiler left
Holder left for boiler for 40104
Holder for boiler right
Holder for boiler right for 40104
Light bar top
PCB cpl.
Screw
Screw
Holder for smoke
Case
Smoke unit
Motor cpl.
19
Ersatzteilliste Dampflokomotive G 4/5
Spare Parts List Steam engine G 4/5
Pos. Bestell Nr.
Order no.
116 40100.50.115
117 40100.50.116
118 40100.50.117
40104.50.117
119 40100.50.118
120 40100.50.119
40104.50.119
121 40100.50.120
122 40100.50.121
123 40100.50.122
124 40100.50.123
125 40100.50.124
126 40100.50.125
127 40100.50.126
128 40100.50.127
129 40100.50.128
130 40100.50.129
40104.50.129
131 40100.50.130
40104.50.130
132 40100.50.131
40104.50.131
133 40100.50.132
40104.50.132
134 40100.50.133
135 40100.50.134
136 40100.50.135
137 40100.50.136
138 40100.50.137
40101.50.137
139 40100.50.138
40101.50.138
140 40100.50.139
40101.50.139
141 40100.50.140
40101.50.140
142 40100.50.141
40101.50.141
143 40100.50.142
146 40100.50.145
147 40100.50.146
148 40100.50.147
149 40100.50.148
150 40100.50.149
151 40100.50.150
152 40100.50.151
153 40100.50.152
154 40100.50.153
155 40100.50.154
156 40100.50.155
157 40100.50.156
158 40100.50.157
159 40100.50.158
160 40100.50.159
161 40100.50.160
162 40100.50.161
163 40100.50.162
164 40100.50.163
165 40100.50.164
166 40100.50.165
167 40100.50.166
168 40100.50.167
169 40100.50.168
170 40100.50.169
171 40100.50.170
172 40100.50.171
173 40100.50.172
174 9952.50.03
175 40100.50.173
176 40100.50.174
177 40100.50.175
Benennung
Description
Schraube
Scheibe
Vorläufer
Vorläufer für 40104
Schraube
Lager für Vorläufer
Lager für Vorläufer 40104
Feder
Unteres Rohr rechts
Leitung
Zylinder rechts
Abdeckung
Zylinder links
Zylinderentwässerung
Leitung
Unteres Rohr links
Bremsgestänge kpl.
Bremsgestänge kpl. für 40104
Bremszylinder links
Bremszylinder links für 40104
Bremsklotz
Bremsklotz für 40104
Bremsklotz
Bremsklotz für 40104
Steuerung
Zahnrad 1
Zahnrad 2
Zahnrad 3
Radsatz mit Haftreifen DC
Radsatz mit Haftreifen AC
Radsatz DC
Radsatz AC
Radsatz DC
Radsatz AC
Radsatz DC
Radsatz AC
Radsatz Vorläufer DC
Radsatz Vorläufer AC
Kuppelstange links
Kuppelstange
Schraube
Niet
Distanzscheibe
Kurpelzapfen links
Stift
Hebel
Schwinge links
Steuerung kpl. links
Innentriebwerk
Steuerung kpl. rechts
Abdeckung Innentriebwerk
Abdeckung
Kohleeinsatz
Handgriff
Seilführung
Lichtleiter
Deckel rechts
Deckel mitte
Deckel links
Lampe kpl.
Lampenhalter
Deckel unten
Puffergriff
Werkzeug
Werkzeugkasten links
Leiter rechts
Leiter links
Standardkupplung
Kupplungsschacht
Feder
Schraube
Screw
Washer
Bogie
Bogie for 40104
Screw
Bearing for bogie
Bearing for bogie 40104
Spring
Lower pipe right
Line
Cylinder right
Cover
Cylinder left
Cylinder drainage
Line
Lower pipe left
Brake unit
Brake unit for 40104
Brake cylinder left
Brake cylinder left for 40104
Brake shoe
Brake shoe for 40104
Brake shoe
Brake shoe for 40104
Reversing rod
Gear wheel 1
Gear wheel 2
Gear wheel 3
Wheelset with traction tire DC
Wheelset with traction tire AC
Wheelset DC
Wheelset AC
Wheelset DC
Wheelset AC
Wheelset DC
Wheelset AC
Wheelset DC
Wheelset AC
Coupler rod left
Coupler rod
Screw
Pin
Washer
Crank pin left
Pin
Lever
Left side expansion link
Rods left cpl.
Interior engine
Rods right cpl.
Cover
Cover
Coal imitation
Handrail
Caple guide
Light bar
Cover right
Cover
Cover left
Lamp cpl.
Holder for lamp
Cover
Handrail buffer
Firemans tools
Toolbox left
Leader right
Leader left
Standard coupler
Couplerpocket
Spring
Screw
20
Pos. Bestell Nr.
Order no.
178 40100.50.176
181 40100.50.179
182 40100.50.180
183 40100.50.181
184 40100.50.182
185 40100.50.183
40104.50.184
186 40100.50.184
187 40100.50.185
40104.50.186
188 40100.50.186
189 40100.50.187
40104.50.187
190 40100.50.188
40104.50.188
191 40100.50.189
40104.50.189
192 40100.50.190
193 40100.50.191
194 40100.50.192
40104.50.192
195 40100.50.193
40104.50.194
196 40100.50.194
40104.50.195
197 40100.50.195
40104.50.195
198 40100.50.196
199 40100.50.197
40101.50.197
200 40100.50.198
40101.50.198
201 40100.50.199
40104.50.199
202 40100.50.200
40104.50.200
206 40100.50.204
207 40100.50.205
40104.50.205
208 40100.50.206
40104.50.206
209 40100.50.207
40104.50.207
210 40100.50.208
40104.50.208
211 40100.50.209
212 40100.50.210
213 9750.55.00
214 40100.50.212
215 40100.50.213
216 40100.50.214
217 40100.50.215
218 40100.50.216
219 40100.50.217
220 40100.50.218
221 40100.50.219
222 40100.50.220
40104.50.220
223 40100.50.221
224 40100.50.222
225 40100.50.223
226 40100.50.224
227 40100.50.225
40104.50.225
228 40100.50.226
40104.50.226
229 40100.50.227
230 40100.50.228
231 40100.50.229
232 2225
233 0231.50.30
Benennung
Description
Halter für Lautsprecher
Schraube
Platine mit LED
Schraube
Schraube
Fahrgestell Tender
Fahrgestell Tender für 40104
Schraube
Abdeckung
Abdeckung für 40104
Schraube
Abdeckung
Abdeckung für 40104
Abdeckung
Abdeckung für 40104
Leitung links
Leitung links für 40104
Bremse
Bremse
Lagerimitation links
Lagerimitation links für 40104
Lagerimitation mitte links
Lagerimitation mitte li. f. 40104
Lagerimitation rechts
Lagermitation rechts für 40104
Lagermitation mitte rechts
Lagerimitation mi. re. f. 40104
Lagerblech
Radsatz DC Tender
Radsatz AC Tender
Radsatz DC Tender
Radsatz AC Tender
Federimitation
Federmitation für 40104
Federimitation
Federimitation für 40104
Schraube
Hebewinde
Hebewinde 40104
Werkzeugkasten links
Werkzeugkasten li. f. 40104
Werkzeugkasten rechts
Werkzeugkasten re. f. 40104
Leitung rechts
Leitung rechts für 40104
Kabelschuh
Platine
Digital-Premiumdecoder
Werkzeugkasten vorn
Griffstange Tender links
Abdeckung links
Deckel
Kasten
Werkzeugkasten rechts
Griffstange Tender rechts
Abdeckung rechts
Gehäuse Tender
Gehäuse Tender
Handbremse
Hebel rechts
Hebel links
Zurüstbeutel
Bremsklotz
Bremsklotz für 40104
Bremsklotz
Bremsklotz für 40104
Feder
Kuppelstange rechts
Haftreifen
Schleifer
Schraube für Schleifer
Holder for speaker
Screw
PCB with LED
Screw
Screw
Chassis tender
Chassis tender for 40104
Screw
Cover
Cover for 40104
Screw
Cover
Cover for 40104
Cover
Cover for 40104
Line left
Line left for 40104
Brake
Brake
Bearing imitation left
Bearing imitation left for 40104
Bearing imitation mi. left
Bearing imitation mi. le. f. 40104
Bearing imitation right
Bearingimitation right 40104
Bearing imitation middle right
Bearing imitation mi. ri. f. 40104
Bearing plate
Wheelset DC tender
Wheelset AC tender
Wheelset DC tender
Wheelset AC tender
Spring imitation
Spring imitation for 40104
Spring imitation
Spring imitation for 40104
Screw
Hoist
Hoist for 40104
Toolbox left
Toolbox left for 40104
Tollbox right
Toolbox right 40104
Line right
Line right for 40104
Cable lug
PCB
Premium digital decoder
Toolbox front
Handrail tender left
Cover left
Cover
Box
Toolbox right
Handrail tender right
Cover right
Body tender
Body tender
Hand brake
Lever right
Lever left
Add on parts
Brake shoe
Brake shoe for 40104
Brake shoe
Brake shoe for 40104
Spring
Coupler rod right
Traction tyre
Pic up shoe
Screw for pic up shoe
21
Pos. Bestell Nr.
Order no.
234 0530.99.34
235 40100.50.230
236 40100.50.231
Benennung
Description
Blindstecker
Sockel
Zurüstbeutel
Blind plug
Socket
Add on bag
Bestellhinweis
Bei der Bestellung von Ersatzteilen muss die Ersatzteil Bestell-Nr. und die Benennung
angegeben werden. Ist dies nicht der Fall, kann die Bestellung nicht bearbeitet
werden.
Order notice
When ordering spare parts you must always state the order number and give the
description. If you do not do this, the order cannot be processed.
Bestellbeispiel:
Position (115), Motor = 40100.50.114, Motor
Order example:
Position (115), Motor = 40100.50.114, Motor
Nicht bestimmt für Kinder unter 3 Jahren. Verschluckbare
Kleinteile. Betriebsanleitung aufbewahren!
Not recommended for children under 3 years of age. Small
parts may be swallowed. Retain the operating instructions!
Zum Betrieb des vorliegenden Produkts darf als Spannungsquelle nur ein nach VDE 0551/EN 60742 gefertigter
Spielzeug-Transformator verwendet werden.
Only a toy transformer produced compliant with VDE 0551/
EN 60742 may be used as a voltage source to operate this
product.
Dieses Produkt entspricht den grundlegenden Sicherheitsund Gesundheitsanforderungen der Europäischen Richtlinie
für Spielzeuge (88/378/EWG) unter Beachtung der
Europäischen Sicherheitsnorm EN 71.
This product conforms to the fundamental health and safety
requirements of the European Directive for Toys (88/378/
EEC) with due regard to the European Safety Standard EN
71.
Elektro- und Elektronikaltgeräte dürfen nicht in den
Hausmüll gelangen. Sie müssen entsprechend der jeweils
gültigen Länderrichtlinien fachgerecht entsorgt werden.
Electrical equipment may not reach to domestic waste.
According to the current terms of the country reference the
electrical eqipment must professional disposed.
22
Notizen
Notes
23
40100.50.237 / 10 06 – WAN
Brawa Artur Braun Modellspielwarenfabrik GmbH & Co.
Uferstraße 26-28 · D-73630 Remshalden
Telefon +49 (0) 7151 - 97 93 50
Telefax +49 (0) 7151 - 7 46 62
www.brawa.de