1
Operating instructions
Configuration tool CAD data
These operating instructions are structured in such a way that they present the complete process step
by step.
On the right side you will see the respective screen shot and on the left each explanation of the
corresponding window and its functions.
We wish you a lot of success during configuration.
In case of problems Mr. Füllbrandt can be reached at [email protected] or 07825-847-0.
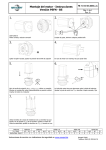
At www.neugart.de
in the Service section,
click on Downloads and
then in the Products on
the link for Partserver
You can select the
language here.
These are the system
requirements that must
be available.
You need to acknowledge
the terms of use here.
Four steps need to be taken to send data.
You can view the status in this area:
The 4 steps are:
- Enter personal data/CAD format
- Select part/Shopping cart
- Prepare part for cost-free data transmission
- Send
These steps can be repeated at any time by
clicking on the respective step.
1st step: Enter personal data/CAD format
Please enter you personal data.
This is important for sending the
data later.
1st step: Enter personal data/CAD format
This is an example
1st step: Enter personal data/CAD format
Now select the data
format ...
(several formats can
be selected)
1st step: Enter personal data/CAD format
... or select the CAD software
(several formats can be selected)
Confirm everything with OK.
This profile is now saved. At a repeated
invoking of the Neugart Partserver you
do not need to carry out the registration
again.
This data can be modified at any
time in the Setup.
CAUTION !!!
The data is saved in a cookie. Should you
delete your cookies at some time you
would need to register anew.
2nd step: Select part/Shopping cart
Start the NEUGART
configuration assistant.
A new window opens.
2nd step: Select part/Shopping cart
Select a gearbox.
2nd step: Select part/Shopping cart
Configure the
model size
Configure the
transmission ratio
Configure the
drive options
Configure the
output options
Configure further
options
2nd step: Select part/Shopping cart
Click on the shopping cart
button once the configuration
has been completed. The part
is now in the shopping cart.
You can put up to three parts
into the shopping cart per data
transmission.
Back to the assistant
With the “Update” button
you can update the 3D
and 2D illustrations.
The list of all dimensions
is displayed here.
Right top - always 3D model
Right bottom - always 2D
drawing
3rd step: Prepare part for cost-free data transmission
After you have placed the part into the
shopping cart, please switch to the
window displayed.
Prepare the part for cost-free data
transmission by activating the check
box.
4th step: Send
Further information on sending
the data is displayed now.
Send off the part by activating
the check box as shown.
Done
Done !!!
You should now receive the
data in the form of a ZIP file
at the e-mail address you
provided within 1-2 minutes.