1
13
13
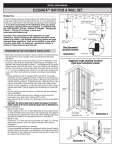
Adjust expanders until there is
no gap between the expanders
and wall. Secure with self-drilling screw to header.
Ajuste los expansores hasta que
no haya ningún espacio entre los
expansores y la pared. Asegurar
al cabezal con tornillos
autorenroscantes.
1
14
14
11
16
16
18
Slip pin (e), plate (f), gasket (d)
and bushing (a) over screw (h).
Insert screw through glass door
(bushing (a) fits in hole of glass)
and slip remaining gasket (d)
and plate (f) over screw. Position inside handle (c) over screw.
Thread screws into handle. Position back handle (b) over heads
of screws and secure with set
screws (g).
Coloque la clavija (e), arandela (f),
junta (d) y separador (a) sobre el
tornillo (h). Inserte el tornillo por
la puerta de vidrio (el separador
(a) entra en el orificio del vidrio)
y coloque la otra empaquetadura
(d) y arandela (f) sobre el tornillo.
Coloque la manija interior (c) en
el tornillo. Ajuste los tornillos
en la manija. Coloque la manija
interior (b) sobre las cabezas de los
tornillos y ajústela con los tornillos
prisioneros (g).
15
15
Install bottom pivot bracket onto
door glass as shown.
Instale el soporte inferior del
pivote en el vidrio de la puerta
como se indica.
Pivot bracket back
Soporte trasero del pivote
8
9g
Install door by first putting bottom pivot bracket into the bottom
bushing. Then, put top front pivot
with two gaskets into top pivot
bushing. Angle door onto top
pivot bracket and attach gaskets
and pivot bracket back with
screw.
Instale la puerta colocando primero el pivote inferior dentro del
cojinete correspondiente. Luego
coloque el pivote superior frontal
con dos empaquetaduras dentro
del cojinete superior. Incline
la puerta contra el soporte del
pivote superior y coloque las
empaquetaduras y la parte posterior del soporte con el tornillo.
18
9f
9b
Pivot gasket
empaquetadura
del pivote
Pivot bracket front
Soporte frontal del
pivote
9c
9h
9e
9a
9d
17
17
Measure and cut two pieces out of
sweep gasket (20). Slide onto the bottom of the door. Notch to clear door
frame when closed.
Mida y corte el sello inferior (20) al
tamaño adecuado y deslícela en el
borde inferior de la hoja de la puerta.
Hágale una muesca para que la puerta
pase del marco cuando se cierre.
18
Caulk outside edges of
shower as shown.
18
Calafatee los bordes
exteriores del gabinete
como se muestra.
View from inside shower
Vista desde adentro del gabinete
20
Notch
Muesca
© 2006 American Shower & Bath Corporation
11