1
INSTALLATION INSTRUCTIONS
For Model # 27010 (REV.10/23/2003)
WARNING!
S H U T P O W E R O F F AT F U S E O R C I R C U I T B R E A K E R .
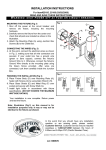
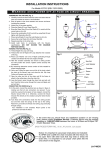
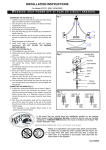
ASSEMBLING THE FIXTURE (Fig. 1)
Fig. 1
1. Shut off power at the circuit breaker and remove old fixture from
ceiling, including the crossbar.
2. Carefully unpack your new fixture and lay out all the parts on a
clear area. Take care not to lose any small parts necessary for
installation.
3. Determine desired distance from ceiling to hang the fixture, and if
necessary, cut cord to length plus five inches. Run the Wired
Cord (A) through the Cap Nut (G), Canopy (F), and Nipple. Then
feed several inches of the cord end through the middle hole in the
Crossbar (C).
4. Install the Stain Relief Bushing (B) by unscrewing the Screw (E)
and pushing the cord through the center of both parts until about
5” of cord is exposed. Tighten screw from the Strain Relief
Bushing (B). (You may need someone to hold the fixture while
installing the Strain Relief Bushing.) The fixture can no hang from
the Strain Relief Bushing (B).
5. Carefully cut and remove approximately 4” of the outer sheathing
from cord and strip 1/2” of the wire ends bare to expose the
copper strands.
CONNECTING THE WIRES (Fig. 2)
6. Attach the Crossbar (C) to the Outlet box in the ceiling with two
screws (D). The side of the Crossbar with “GND” marked on it
and two convex points must face out.
7. At this point, Connect the electrical wires as shown in Fig. 2,
making sure that all wire connectors are secured. If your outlet
has a ground wire (green or bare copper), connect the fixture’s
Ground Wire to it. Otherwise, connect the fixture’s Ground Wire
directly to the crossbar using the Green Screw provided.
8. Slip the Canopy (F) and Cap Nut (G) up to the ceiling and lock in
place by threading the Cap Nut onto the Nipple.
9. Place Glass Shade (I) up to the Socket Cup (H) and secure with
Screw Shell (J).
10. Install Light bulbs in accordance with the fixture’s specifications.
Fig. 2
FIXTURE
WIRES
Black or
Smooth
FIXTURE
WIRES
White or
Ribbed
FIXTURE
WIRES
Bare
Copper or
Green
(Ground)
(DO NOT EXCEED THE MAXIMUM WATTAGE RATING).
Your installation is now complete. Return power to the outlet box and
test fixture.
HOUSE
WIRES
Black
(Hot)
HOUSE
WIRES
White
(Neutral)
HOUSE
WIRES
Green
(Ground)
In the event that you should have any
installation question or are missing parts, please
contact Customer Service. Customer service
may be reached weekdays a 1-800-527-0998
between the hours of 8:00am and 5:00pm PST
(Pacific Standard Time).
LA-743E/S
INSTRUCCIONES PARA LA INSTALACION
Para Modelo # 27010 (REV.10/22/2003)
ADVERTENCIA! CORTE LA CORRIENTE DESDE EL FUSIBLE O EL INTERRUPTOR CENTRAL
Fig. 1
ENSAMBLAJE DE LA LAMPARA (Fig. 1)
1.
Corte la corriente en el circuito principal y saque la lampara vieja
incluyendo la barra transversal.
2.
Desempaque cuidadosamente su nueva lampara y coloque todas
las partes en una superfice despejada. Tenga cuidado de no
CAJA DE UNION
perder las partes pequeñas que son necesarias para la
(TECHO)
instalacion.
3.
Determine la distancia apropiada, para colgar la lampara corte el
cordon electrico mas 5” pulgadas si es necesario. Pase los
Alambres (A) dentro de la Boquilla de Seguridad (G), la Cubierta
(F), y seguida por el Tubo. Meta algunas pulgadas de Cordon
dentro del abujero de la Bara Transversal (C).
4.
Ensamble la Boquilla de Seguridad (B) quitando el Tornillo (E) y
metiendo el Cordon dentro el centro de las dos partes expuestas.
Apriete el tornillo de la Boquilla de Seguridad (B). (Quizas
assistencia necesaria de otra persona para detener la lampara
mientras se ensambla la Boquilla de Seguridad.) La lampara no
puede colgarse de la Boquilla de Seguridad solamente (B).
5.
Cuidadosamente corte approximadamente 4” de la parte exterior
del enfundador del cordon. Pele los alambres ½” y que las puntas
de cobre esten expuestas.
CONECTANDO LOS ALAMBRES (Fig.2)
6.
Tome el asemblaje de la barraTransversal (C) y montelo a la caja
de union del techo use los tornillos (D) de la caja de Union, apriete
bien los Tornillos. El lado marcado “GND” y las puntas Convexas
deben quedar hacia afuera.
7.
Conecte el alambrado electrico como se muestra en la (Fig.2),
use un conector de plastico para asegurar la conexion. Si su caja
de union tiene un alambre de tierra (verde o de cobre), conectelo
al alambre de tierra de la lampara. Si no tiene, entonces conecte
el alambre de tierra de la lampara directamente a la barra
transversal usando el tornillo verde incluido.
8.
Levante la Cubierta (F) y la
Boquilla de Seguridad (G) sobre el
techo y asegure la Cubierta (F) con la Boquilla de Seguridad al
Tubo.
9.
Ponga la pantalla de Vidrio (I) sobre el Socket (H)
asegurelo con
el Anillo del socket (J).
10. Instale los focos de acuerdo a las especificaciones. NO EXCEDA
MAS DE LOS VATIOS ESPECIFICADOS!!
Su instalacion a terminado, conecte la corriente electrica y pruebe
la lampara.
Fig. 2
ALAMBRES
DE LA
LAMPARA
VERDE O DE
COBRE
(A TIERRA)
ALAMBRES
DE LA
LAMPARA
BLANCO O
CON MARCA
ALAMBRES
DE LA
LAMPARA
NEGRO O
SIN MARCA
ALAMBRES
DE LA
CASA
NEGROS
(CON CORRIENTE)
ALAMBRES
DE LA
CASA
BLANCO
(NEUTRAL)
VERDE O DE COBRE
(A TIERRA)
En caso de preguntas sobre la instalacion o le
faltaron partes, porfavor hablar al departamento de
Servicio al Cliente al 1-800-527-0998 de Lunes a
Viernes de 8:00 a.m. a 5:00 p.m. PST (Tiempo del
Pacifico).
LA-743E/S
ALAMBRES
DE LA
CASA