1
INSTALLATION
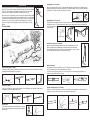
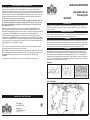
Begin your installation at the water source by attaching the backflow preventer to your faucet, then
attach the 25 PSI preset pressure regulator to the backflow preventer. Connect the hose adapter to
your pressure regulator and insert the drip tubing to the adapter. If you wish to automate the
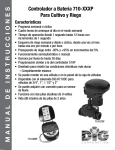
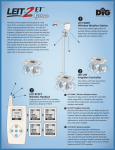
system, you can use a DIG battery operated controller available in a store near you.
Next, lay down your 1/2" drip tubing. If you plan to leave it above the ground, allow the drip tubing
to sit in the sun before installation, making it easier to work with. Use stake to secure drip tubing to
the ground. If you are burying the drip tubing, dig a trench about 6" from the roots of your plants. A
shallow trench, 5-8" deep is all that is needed to keep the drip tubing safe from cultivation
practices. Do not bury the end of the drip tubing, allow it to remain on the surface for periodic
flushing.
TYPICAL INSTALLATION
c
d
Installing drippers to 1/2" drip hose:
Drippers are installed by punching a hole in 1/2" drip tubing and snapping the larger barbed side in. If your tubing is buried,
the drippers should always be located above the ground. This is achieved by inserting a 1/4" barb or tee into the drip tubing
and running 1/4" microtube to the surface where the dripper is installed.
b
Installing drippers to 1/4" micro tube:
For plants far from the drip tubing, first insert a 1/4" barb or tee into one end of the 1/4" microtube, then insert the barb into
the punched hole in the 1/2" poly tubing and run the microtube to the plant. Next insert the barbed inlet of the dripper into
the end of the microtube and
secure with a stake.
Installing micro sprayer to 1/2" drip tubing:
Install micro sprayer to drip tubing the same method as used for installing dripper on 1/2" drip
tubing. First install the spike assembly with the microtube, flush the line before threading the
spray head with the pattern that you selected. We recommend installing micro sprayer a minimum
of 6" above the surface and around 5' to 6' spacing for best coverage.
1&
Connecting and installing 1/2" fittings:
To install your 1/2" fittings, cut the poly tubing with a hand pruner, being careful to keep dirt from entering the line. Push the
poly tubing into the fitting by wiggling it as you apply force
Connecting 1/4" fittings:
To install your 1/4" barbs, tees or elbows, push the microtube over each of the barbed ends. Soaking the microtube in warm
water will make it softer and the fittings easier to install.
Using the punch:
To insert drippers, microsprinklers and 1/4" fittings into 1/2" line, hold
the line in one hand and apply just enough pressure with the punch to
puncture tubing.
Initial System Start-Up
Before turning the system on for the first time, leave all 1/2" tubing ends open and turn your water on and allow it to run
freely for a few minutes. This will flush out any dirt that may be in the line.
Close the end of the line by using a "figure 8" hose end or end cap. Check to see that drippers and microsprinklers are
operating correctly and that no leakage is occurring.
Repairing or Plugging a Hole on 1/2" Poly Tube:
If leakage occurs on 1/2" tubing at the base of a dripper or microsprinkler, remove that dripper/microsprinkler and insert a
goof plug to close the hole and reinsert the dripper or microsprinkler in a different place.