Transcript
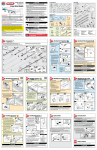
P/N 37067501312
ASSEMBLY/INSTALLATION
FPO
POSTER
A
B
READ AND FOLLOW ALL SAFETY, INSTALLATION AND OPERATION INSTRUCTIONS. If you have
any questions or do not understand an instruction, call The Genie® Company or your local
Genie® Factory Authorized Dealer.
• DO NOT install operator on an improperly balanced door. An improperly balanced door
could cause severe injury. Repairs and adjustments to cables, spring assembly, and other
hardware must be made by a trained service person using proper tools and instructions.
• Remove all ropes, and disable all locks connected to the door before installing operator.
• Install door operator 7 feet or more above the floor. Mount the emergency release knob
6 feet above the floor.
• DO NOT connect the operator to the source of power until instructed to do so.
• Locate the wall console button: A) Within sight of door. B) At a minimum height of 5 feet
so small children cannot reach it. C) Away from all moving parts of the door.
• Install the entrapment WARNING label next to the wall button or console. Install the
emergency release tag on, or next to, the emergency release handle.
• The operator must reverse when the door contacts a 1-1/2 inch high object on the floor
at the center of the doorway. This is about the size of a 2" x 4" board laid flat.
C
Potential Hazards
WARNING
9/16"
6' or 7'
Belt drive models
1/2"
G
7/16"
3/8"
12'
H
I
1/4"
Chain drive models
Hardware Bags
Cotter pin (x2)
• Keep people clear of opening while door is moving.
• DO NOT allow children to play with the door operator.
• DO NOT operate a door that jams or one that has a broken spring.
Warning: indicates a potentially hazardous situation which, if not avoided, could result in death or serious injury.
Caution: indicates a potentially hazardous situation which, if not avoided, may result in injury or property damage.
Clevis pin (x2)
x2
G
x2
J
This opener includes parts and supplies needed for installation in MOST garages and on MOST garage doors. There are
many variations of garages and garage doors. A few additional parts and supplies may be needed for installation in YOUR
garage and to YOUR garage door. While going over these instructions, please note the additional items you may need.
For help finding a local Genie® Professional Dealer, call 1-800-OK-GENIE or Customer Service at 1-800-35-GENIE.
There are a few specific areas of interest which might require extra materials. They are: 1) The header above the garage
door where torsion springs are used–does it extend far enough above the spring(s) to allow mounting of the header
bracket. If not, or if you can’t tell–you will probably need a piece of 2" x 6" lumber to span across wall studs. 2) The area
overhead where the powerhead will be mounted–if you have a finished ceiling, you will need a piece of angle iron which
can span across beams of trusses. 3) Is there wood along the door tracks near the floor where the Safe-T-Beam® can be
most easily mounted, or will you need fasteners for mounting to the track itself or some other material? 4) Measure the
height of your door. If it is taller than 7', you will need a Rail Extension Kit.
Will you need extension brackets or wooden blocks to extend the Safe-T-Beam far enough off the wall to see past any door
hardware?
Is there an electrical outlet within approximately 3' of the point where the powerhead will be? If not, you need to contact a
licensed electrician.
Check condition of the door and all its associated hardware: Tracks, springs, hinges, rollers. Is anything loose or appear
worn? If so, call a trained professional for an evaluation and repairs, if needed. DO NOT ATTEMPT TO ADJUST SPRINGS OR
THEIR ATTACHED PARTS!
Operate the door manually. Does it move freely and smoothly? Check the balance of the door by lifting it by hand
approximately halfway open and let go. It should stay put or move very slowly. If not, call a trained professional for repairs.
Remove all ropes and remove or disable all locks connected to the garage door. It is also recommended that T-handles be
removed. Closed loop lifting handles with no protruding parts can remain.
A
An Electrical Shock could result in serious injury or death.
• Turn off power before removing operator cover.
• When replacing cover, make sure wires are not pinched or near moving parts.
• Operator must be properly grounded.
WARNING–HIGH SPRING TENSION
•DO NOT try to remove, repair or adjust springs or anything to which door
spring parts are fastened, such as wood block, steel brackets, cables or other
like items.
•Repairs and adjustments must be made by a trained door system technician
using proper tools and instructions.
Need help or have questions? DO NOT RETURN to the store.
Call us: 800-354-3643
1. Check door height, 8' doors require a Rail Extension Kit (available at leading retail stores)
2. Fully read instructions and warnings before proceeding
1a. Slide the opener end rail section (A) to correct position.
1b. Slide the door end rail section (C) to correct position.
1c. Lift opener rail section (A) slightly and slide rail connector (J) onto middle rail section (B).
1d. Lower opener rail end section (A) and slide into rail connector (J) until it locks.
#8 x 3/4"
Self-tapping screw
Drive gear
assembly*
2
C
1
Slots
A
B
O
5/16" x 1-3/4"
Lag screw (x2)
Door bracket
Release handle
1/4"-20 x 3/4"
Self-drilling screw (x3)
Push nut
N
B
C
M
L
Clear Bag
Rubber plugs (x2)
Parts List
Yellow Bag
#8 x 3/4"
Self-tapping
screw (x2)
1/4"x 3/4"
Insulated staple (x30)*
5/16"-18 Lock nut,
serrated (x2)
5/16"-18 x 3/4"
Bolt (x2)
2
1e. Lift door end rail section (C) slightly and slide rail connector (J) onto middle rail section (B).
1f. Lower door rail end section (C) and slide into rail connector (J) until it locks.
1g.Slide gear assembly to front end of opener end rail section (A). Turn rail assembly over and
place drive gear assembly in slots. Insert two screws to fasten assembly to the rail.
1g
A
Clevis pin, long
5/16" x 1-3/4"
Lag screw (x2)
Wire clip (x4)
Green Bag
WARNING
K
3/8" Lock nut (x2)
Orange Bag
WARNING
Pre-Installation Considerations
3/8"-16 x 7/8"
Bolt (x2)
Header bracket
1/4"-14 x 3/4"
Tapered flange screw (x6)
Note is used to indicate important steps to be followed or important considerations.
(green bag hardware)
D
1/8"
A moving door could result in serious injury or death.
Danger: indicates an imminently hazardous situation which, if not avoided, will result in death or serious injury.
1
F
E
1/16"
Blue Bag
Overhead doors are large, heavy objects that move with the help of springs under high tension and electric motors. Since
moving objects, springs under tension, and electric motors can cause injuries, your safety and the safety of others depends
on you reading the information in this installation poster. If you have questions or do not understand the information
presented, call The Genie Company or your local Genie Factory Authorized Dealer. In this section, and those that follow,
the words Danger, Warning and Caution are used to emphasize important safety information.
Rail Assembly
Parts Included
TO REDUCE THE RISK OF SEVERE INJURY OR DEATH
Chain/Belt Drive Models
05-11
01-11
Recommended Tools
WARNING
1/4" x 1-1/4" Safe-T-Beam®
Lag screw (x4)
sensor
Safe-T-Beam®
source
4
Adjusting Rail Tension
2a.The chain/belt needs to be tightened
inside the rail.
2b.Make sure carriage and bullet are
not engaged. To disengage the
carriage pull the red cord.
2c.Prior to tightening, check to make
certain the tension bracket is hooked
into the rail as shown in illustration 2c.
Tighten tension nut
2c
until chain/belt is
C
approximately 1/8"
above bottom edge
of rail. Measure at
midpoint of rail.
(A) Opener end rail section
(B) Middle rail section
(C) Door end rail section
(D)Door arm, curved
(E) Powerhead lens
(F) Powerhead
2b
(G) Powerhead bracket
(H) Mounting straps
(I)
Powerhead bracket,
belt drive
(J) Rail connector
(K) Emergency release cord
(L)Safe-T-Beam/wall
console wire
(M)Remote
(N)Wall console
(O)Wireless keypad
(Optional on some models)
Mounting Rail Bracket on Header
(orange bag hardware)
4a.Center header bracket above door, mark holes.
4b.Drill two–5/32" pilot holes in header board or 2" x 6" board connected to wall studs.
4c.Secure bracket with lag screws.
Bullet
Carriage
Typical Installation
B
A
4c
Highest Point of Door Travel
5/16" x 1-3/4" Lag screw
Door centerline
4c
Highest Point Of Travel
Header
Header bracket
Header
Track
1/8”
Sectional
Door
*The drive gear assembly is loose and must be pulled towards the
FROM HERE
TO FLOOR
Highest point of door travel
(as door is opening) plus**
slots and fastened. Be certain the tension bracket is hooked into the
rail as shown in illustration 2c.
C
1a.
C
1b.
3
1
1
2
J
2
J
C
2
1
1c.
5
B
2
A
1d.
A
1
1e.
1f.
6
Attaching Rail to Bracket
(orange bag hardware)
5a.Elevate opener assembly and position
door end rail section (C) inside bracket.
5a
J
7
Mounting Powerhead
to Ceiling (green bag hardware)
6a
er)
n
ope
Header
bracket
To
" r of
line
115cente
(
ter
n
e
e
c
c
pie
or
ss
Do
cro
Cross piece
location
"
115
Protective
foam cushion
Door centerline
F
5b.Align holes in rail with holes in bracket. 5c
5c.Slide clevis pin through holes in rail
and bracket and secure with push nut
by pressing the push nut ends together.
5d.Insert rubber plugs into powerhead
accessory holes if present.
6b. Attach mounting straps (G) to joists or
cross piece with (2) lag screws (5/16" x
1-3/4") provided in green bag.
6c.While supporting opener unit, open door
and raise opener unit to clear door so it
passes the rail clearly.
6d.Secure opener unit (in position) to
mounting straps with nuts and bolts.
Push nut
6b
Lag screw
Cross piece
(not included)
Door springs are under high tension. If spring or shaft is in the way, measure above
spring or shaft on the garage door centerline and mark as location for header bracket.
DO NOT ATTEMPT TO MOVE, ADJUST, OR REMOVE DOOR SPRING!
Slot
CAUTION
Protective
foam cushion
7a
Top Roller
Door centerline
Att
er
roll
a
h
er t
w
o lo
n
ach
p
n to
Hidden joists
7d (alt)
Lag screw
Attaching Door Arm to Door
Bracket and Shuttle (blue bag hardware)
8a. Secure emergency release handle to
cord (K) and attach emergency release
cord to carriage in rail.
8b. Using the emergency release cord,
disengage the shuttle/carriage.
8c.Sectional Doors typically accept
curved door arm (D). In some cases,
straight door arm (F) may be used if
the door bracket is mounted on the
top edge of door.
8d.With the door closed, the angle from
door arm (D) to header is 30˚ max.
K
G
Release handle
Orange Bag
Note: One-Piece Door (Top Edge/Face Mount) instructions are in the Operation and
Maintenance Manual provided.
8c
7d (alt)
Door centerline
Door centerline
Header Bracket must be fastened to garage framing. DO NOT fasten to drywall, particle
board, plaster, or other such materials.
8
(orange bag hardware)
7d
**Highest point of door travel plus: Sectional door = Highest point plus 2.5"
One-piece door = Highest point plus 6"
WARNING
Attaching Door Bracket to Door
Sectional Door (Typical):
7a.Center bracket on door, higher than the
top set of door rollers.
7b.Using bracket, mark holes on door or
frame.
7c. Drill 1/8" holes.
7d.Secure with 1/4"–20 x 3/4"
self-drilling screws.
7e.Some garage door manufacturers
provide door brackets that CAN be
used with your Genie Door Arms.
To determine “highest point of door travel”:
1. Get on a ladder to the side of your garage door.
2. Have someone lift the door open slowly.
3. As the door is raised, note the point and amount it extends above the door tracks
with tape measure—that is the highest point of door travel.
4. Measured from floor to door or from door to ceiling
I
Sectional Door (Wooden):
7a.Center bracket on door, higher than the top set of door rollers.
7b.Using bracket, mark holes on door or frame.
7c.Drill 1/8" holes completely through door.
7d. Fasten bracket with 5/16" x 2"carriage bolts and nuts (not furnished).
Note: Support opener and have a second
person assist during this step.
5c
1/4"-14 x 3/4"
Tapered flange
screw (x4)
I
Note: To prevent damage to motion sensor (not on all models)
DO NOT remove foam cushion from underside of powerhead.
6a.Find and mark ceiling at center line of door. For finished ceilings, attach cross piece
(not supplied) to joists.
C
(Blue bag hardware)
3a.Turn the rail with open side toward
3b
the powerhead. Lower drive gear over
G
spline shaft on top of opener with the
lights facing away from the door..
3b. Place rail mounting bracket(s) (G) over
A
rail and align with holes in opener.
3c. On Belt drive models, align belt
3a
guide bracket (I) tongue with slot
and align holes in opener.
On Chain drive models, utilize a
second mounting bracket (G) and
align with holes in opener.
3d.Fully tighten 1/4" x-14 x 3/4"
screws. Do not over tighten.
B
J
Attaching Rail to Powerhead
8c (alt)
Clevis pin
D
Clevis pin
D
Door centerline
G
Cotter pin
Cotter pin
Push nut
Door bracket
Door bracket
Clevis pin, long
Note: Rail should be level to floor. For tall garage ceilings additional hanging angle
and hardware may be required and is available at leading retail stores.
Open Beam Ceiling
6d
5d
Finished Ceiling
6d
Lag screws
Attach
to joists
10
Installing Safe-T-Beam®
(Yellow bag hardware)
9a.Position Safe-T-Beam source and sensor on
9a Wall mount
Sensor
each side garage door 5"– 6" above floor.
9b.Mark bracket mounting holes and secure with (4)
ax
1/4" x 1-1/4" lag screws provided into wood. If
" m in
6
m
mounting into concrete or block, other fasteners are
5" floor
e
v
required and are available at leading retail stores.
o
ab
9c.Use garage pre-wiring when available or route two
lengths of two conductor wires from powerhead,
Floor mount option
through 4 wire clips and fixed to top of rail, across
header, on both left and right of door
9c
down to the source and sensor.
9d.Secure wire to rail with wire clips
spaced evenly along rail, and wire
to header and wall with insulated
Powerhead
staples. Insert wires from above
through control wire tube. Cut off
excess wire.
M
9e.Attach wire to terminals on each
Safe-T-Beam. At powerhead, twist (2)
Sensor
striped wires together and insert into
Source
terminal 1 then twist (2) white wires
together and insert into terminal 2. Tape excess wire to powerhead away from lights.
9f. At powerhead, press IN the orange tabs above the terminal to insert the wires with a
flat head screw driver.
9e
To powerhead
Sensor/Source
9f
Control wire tube
I
To sensors
Lag screws
5/16" x 18 x 3/4"
Bolt (not included)
When using insulated staples, make only snug enough to hold wire in place. Staples too
tight can cause damage to wire and cause Safe-T-Beam® System to malfunction.
F
D
CAUTION
Doors made of masonite, lightweight wood, fiberglass, and sheet metal must be properly
braced before mounting door opener. Contact door manufacturer or distributor for any
questions or concerns. The Genie® Company is not responsible for any damage caused
due to an improperly braced door.
11
(clear bag hardware)
O
11a
I
Each light bulb must be 100 W or less*
WARNING
Compact CFL bulbs can be used.
B/W
W
F
Motor Cover
*Note: DO NOT exceed maximum wattage. Each light bulb should be no more than 100W.
(Model 2562 requires light bulbs of no more than 60 watts.)
Striped
To wall
console
White
To wall
console
Connecting Power
For Grounded Outlet connection:
12a.Plug in the power cord. Coil excess cord and tape or twist tie it to top of
powerhead. (DO NOT PLACE ABOVE LIGHT BULBS.)
10d
Control wire tube
3/8"-16 x 7/8"
Bolt &
3/8" Lock nut
Door
12
Light Assembly
11a.Install light bulbs into powehead (F).
To powerhead
WARNING
11b.Insert powerhead lens hinge (E) into slots in motor cover on powerhead (F).
11c.Swing lens (E) up into place. (It may be necessary to squeeze lens slightly to align
tabs with slots at top of motor cover).
11b
F
10e. Mount wall console with #6 screws
10f.Post “ENTRAPMENT warning label” (included in
Manual) next to the Wall Console.
Note: Some homes are pre-wired for Safe-T-Beam devices.
Complete the connection and apply power. If the sensor
or wall console LEDs come ON, wire routing is correct.
You may need to wire one sensor at a time to confirm
wire routing in some cases.
WARNING
CAUTION
30° max
Note: One-Piece Door (Top Edge/Face Mount) instructions are in the Operation
and Maintenance Manual provided.
Installing Wall Console
10a.Route wire from powerhead to
10c
desired location for wall console.
Some homes are pre-wired and
they may not be color-coded.
10b.Secure wire with insulating staples
and cut off excess wire.
10c.Attach wires to wall console as
shown.
10d.From above, insert opposite end of
wire through control wire tube on
powerhead and attach as shown.
Door end rail section
Header
5/16" x 18
Nut
5/16" x
18 x 3/4"
Bolt
Rubber plugs
9
8d
Use of any other wall control can cause unexpected operation of the door and loss of
lighting feature. Locate wall console within sight of door and far enough from door to
prevent contacting it while operating the console. Control must be at least 5 feet above
floor to prevent small children from operating it.
Opener is equipped with grounded electrical plug for your protection, and only fits
grounded electrical outlets. DO NOT alter plug in any way! If you have no grounded
outlets, have one installed by a licensed electrician. Opener must be properly grounded
to prevent personal injury and equipment damage. NEVER USE AN EXTENSION
CORD! Check local building codes for any requirement that you must have a
permanent hard-wired connection. NEVER REMOVE MOTOR COVER. All work inside
cover must be performed by a licensed electrician using proper tools and instructions.
12b
For Permanent Wiring by an Electrician:
12a. Cut existing wires OUTSIDE CHASSIS.
12b.The wire connections must be made INSIDE
CHASSIS and there must be at least 6" of
new power supply line wire INSIDE CHASSIS.
(Conduit is optional. Conduit, strain relief, and
wire nuts are not provided.)
11c
Toroid
Ground
Tab
Hot
Wire nuts
E
13
OR
Ground
Hot
Wire nuts
Neutral
Ready to Program
Refer to Operation and Maintenance Manual for programming instructions.
CAUTION
DO NOT run opener until travel limits have been set to avoid damage to unit.
Neutral