1
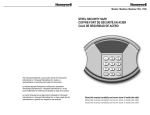
www.LockState.com
OPERATING INSTRUCTION for LockState Safe LS-19EPL
CAUTION: Do not keep the keys in the safe.
Thank you for purchasing the Lockstate LS-19EPL hospital safe. This safe will install easily
on floors, walls, or in closets. This easy quick-start quide will help you through the installation
and programming process.
1. OPENING THE SAFE THE FIRST TIME
Use a screw driver to pry off the round plastic cover situated to the right of the keypad (see
“A” in diagram 1), exposing the keyhole underneath. Insert the key into the keyhole and turn
it clockwise to retract the bolts and open the safe door. You can follow these steps to
manually open your safe anytime. Note that the motor will NOT work when the override key
is in the keyhole and the safe is in the UNLOCKED status. In this case, the LED display will
read ‘Error’. To remove the override key, with the door open turn the key counter-clockwise
and take it out.
2. INSTALLING THE BATTERIES
The safe requires 4× size “AA” (1.5V) batteries. To install the batteries, open the safe,
remove the battery cover plate on the back of the door (“A” in Diagram 2) and install the
batteries. Make sure the batteries are inserted with the correct corresponding polarity. Use
of alkaline batteries is recommended.
3. PROGRAMMING THE CODE
All safes are supplied with the factory preset master code ‘888888’. After inserting the
batteries, you can open the safe with this master code by entering ‘888888’ and then
pressing the ‘E’ key. The door will automatically open.
Programming a new master code
A. With the door either open or closed, press the ‘0’ key 2 times then press the ’E’ key. The
display will read ‘SELECT’.
B. Now press the ‘1’ key and the display will read ‘OLD’
C. Enter the master code that was previously programmed (for new safes this code is
‘888888’) and press the ‘E’ key. The display will read ‘SET’.
D. Enter a new Master code (a minimum of 3 digits and maximum of 6 digits) and press the
“E” key. The display will read ‘REPEAT’.
E. Again enter the new master code and press the ‘E’ key. The display will read ‘DONE’
and your new master code is set.
Programming the user code/Locking the door
A. With the door open, enter a user code (a minimum of 3 digits and maximum of 6 digits).
B. Now push the door shut (locking bolts are still unlocked) and hold the door closed while
pressing the ‘E’ key. You will hear the locking bolts lock the door automatically indicating
that your new user code has been programmed.
NOTE: While the master code remains set until it is changed using the master code change
procedure, the user code will automatically be deleted if the safe is opened even one time
with the user code.
4. OPENING THE SAFE
Enter either the user code or the master code and press the ‘E’ key. The door will be
automatically open.
NOTE: If 3 attempts are made to open the safe with incorrect codes, the keyboard will be
disabled for 5 minutes and the display will read ‘ERROR 1/2/3’ and then ‘HOLD05’. In this
case, it is still possible to open the door with the emergency override key and doing so will
nullify the 5 minute waiting period and reset the safe to immediately accept keypad codes.
5. CODE DISPLAY AND BUZZER CONTROL
Display control: By pressing the 'C' key and the '3' key at the same time, you can set the
LCD display to either show the code as it is entered or not show the code as it is entered.
When display reads ‘dP----‘ the codes will not display when entered. When the display reads
‘dPCodE’ codes will display when entered
.
Buzzer sound control: By pressing the 'C' key and the '6' key at the same time, you can turn
on or off the the buzzer sound when the safe is opened. When the display reads ‘bUZZEr’
the buzzer will sound. When the display reads ‘SILENT’ the buzzer will not sound.
6. BATTERY REPLACEMENT WARNING
To test the batteries press the ‘E’ key. If the batteries are good the display will show ‘HIBAT’. If the batteries are low the display will show ‘LO-BAT’ and you should replace the
batteries.
NOTE: When the batteries are low, each time the safe is opened the display will read
‘OPEN ‘ and ‘Lo-bAT’ alternating. Also, when the batteries are low, each time the safe is
closed the display will read ‘CLOSE’ and ‘Lo-bAT’ alternating.
7. REPLACING THE BATTERIES
The safe requires 4× size ‘AA’ batteries. To replace the batteries, open the safe, remove the
battery cover on the back of the door, and replace the old batteries. Make sure the batteries
are inserted with the correct corresponding polarity. After changing the batteries, the user
code of the system will revert back to the factory preset user code ‘000000’. However, the
current master code will remain in memory. Use of alkaline batteries is recommended.
8. OVERRIDE INSTRUCTION TO OPEN THE SAFE MANUALLY
For your convenience, this safe has a manual override system in case you forget your
combination or the batteries die. To open the safe manually, use a screw driver to pry off the
round plastic cover situated to the right of the keypad (see “A” in diagram 1), exposing the
keyhole underneath. Insert the key into the keyhole and turn it clockwise to retract the bolts
and open the safe door.
Note that the motor will NOT work when the override key is in the keyhole and the safe is in
the UNLOCKED status. In this case, the LED display will read ‘Error’. To remove the
override key, with the door open turn the key counter-clockwise and take it out.
9. INSTALLING THE SAFE
This safe can be secured to the floor, on a wall or in a closet. There are pre-drilled holes in
both the bottom and the back of the safe for mounting. To secure the safe, with the safe
door open, hold the safe over the exact spot where it will be mounted and use a pencil to
trace the pre-drilled holes on the floor or the wall. Remove the safe and drill a hole in each
marked spot and insert the anchors into the drilled holes. Now, again place the safe where it
will be mounted (door open) and screw in the mounting bolts into the anchors in the drilled
holes from the inside of the safe.
Diagram 1
Diagram 2