Transcript
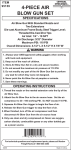
25862
DIGITAL AIR
REGULATOR
INSTRUCTIONS AND PRECAUTIONS
SAVE THESE INSTRUCTIONS. READ ALL
PRECAUTIONS AND INSTRUCTIONS.
SPECIFICATIONS
Measurement Range
4-160 PSI
Accuracy
± 1.0 PSI at 3.5 - 100 PSI
± 1.5 PSI at 100 -160 PSI
Outlet
Male 1/4”-18 NPT
Female 1/4”-18 NPSH
Ambient Temperature
Range
-50°–113° F (Operating)
-68°–158° F (Storage)
Unit
PSI • BAR • KG/CM² • kPa
Inlet
IMPORTANT SAFETY INFORMATION
1.
Never connect to an air source that
is capable of exceeding 160 PSI.
Over pressurizing the regulator may
cause bursting, abnormal operation, breakage of the regulator or serious injury to
persons. Use only clean, dry, regulated
compressed air within the rated pressure
range. Always verify prior to connecting the
regulator that the air source has been
adjusted to within the rated air-pressure
range.
2. Never use combustible gas or bottled gas as
an air source.
3. Wear ANSI-approved safety goggles and
heavy-duty work gloves during assembly.
4. This product is not a toy. Do not allow children to play with or near this item.
5. Use for intended purpose(s) only.
6. Inspect before every use; do not use if parts
loose or damaged.
7. Maintain product labels and nameplates.
These carry important safety information.
If unreadable or missing, contact Harbor
Freight Tools for a replacement.
8. This regulator is sealed. Do not open housing.
9. WARNING: The brass components of this
product contain lead, a chemical known to
the State of California to cause birth defects
(or other reproductive harm).
SERVICE INSTRUCTIONS
ASSEMBLY INSTRUCTIONS
Read the ENTIRE IMPORTANT
SAFETY INFORMATION section at the
beginning of this document including
all text under subheadings therein
before set up or use of this product.
1. Calibrate air regulator before connecting to
air supply by:
Press and release the button on the regulator to turn it on.
2. Wrap the blue inlet connection with PTFE
thread seal tape. Attach the blue inlet
connection to the air supply hose.
WARNING! To prevent serious injury; do
not attach the regulator to an air supply
capable of exceeding 160 PSI.
The air supply must also include a moisture
filter and must not be lubricated.
3. Wrap the air inlet of the air tool with PTFE
thread seal tape. Thread the steel swivel
outlet connector securely onto the air tool’s
inlet.
4. Pressurize the assembly and check for
leaks with soapy water. Tighten any leaking
connections.
OPERATION INSTRUCTIONS
1.
Press the button to see the current regulator
pressure reading.
2.
Turn the dial on the side of the regulator to
change the regulator pressure setting.
3.
Press the button again to turn the display off.
4.
If left on, the display will turn itself off
automatically after about 60 seconds to
increase battery lifespan.
1.
Clean off with dry cloth periodically.
2.
Do not open housing. Internal battery is not
replaceable.
LIMITED 90 DAY WARRANTY
For 90 days from the date of purchase of this
OEM® product you find any defect in material or
workmanship, through normal usage and not
including standard wear, either return it to the
place of purchase, or send it to OEM® for repair
or replacement at our discretion. In order to obtain
this service send your tool and proof of purchase,
transportation pre-paid, to OEM® Q.A. Dept, 3580
E. Raines Rd. #3, Memphis, TN 38118. This
warranty gives you specific legal rights, and you
may also have other rights, which vary from state
to state.
Please see our website for full warranty
information.