Transcript
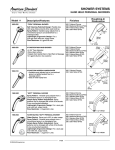
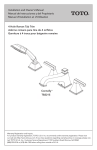
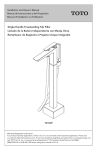
HB9937P-xx - ROMAN TUB FILLER WITH HANDSHOWER
Faucet installation
Tools You Will Need
Adjustable Wrench
1 Begin installing valve and transfer valve assemblies:
First make sure that the bottom lock
nut and washer are installed on to the
valve. Next, from underneath the
deck surface slide valve hot side
valve assembly up through left hole in
counter. Next screw the handle base
flange onto the top of the valve. The
height of the valve can be adjusted by
tightening and loosening the bottom
and top lock nuts. Once the valve is
installed repeat the same installation
process for the cold side valve.
Pipe Tape
SI
LI
CO
NE
Silicone Caulking
2 Install spout.
First install the spout shank through the center hole
and secure from the bottom with the lock nut and
washer. Once the spout shank is installed install the
spout onto the quick connect nipple of the spout
shank. Ensure the gasket under rim of spout is firmly
seated in groove.
Groove joint plier
Hot
Cold
Allen Wrench
Hot
Hot
Cold
Cold
Spout
Cold
Hand
Thank you for using
Huntington Brass products
show
er
3 Connecting supply lines:
Finally, connect the braided supply lines to
the side outlets of each valve body and then
to the connections on the T-connector.
Tighten all hose connections by hand
tightening and then adding an additional half
turn with a wrench. Check for leaks and
adjust after installation is completed.
4 Flush system:
Turn main water supply on. Open other faucets
around the house to minimize water hammer.
Remove the aerator piece from the spout. Turn on
both faucet handles and let run for two minutes to
clear any debris. Replace aerator. Check for leaks
while faucet is running. If you experience and
difficulties during installation contact a plumber or
call Huntington Brass technical assistance.