1
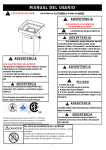
INSTRUCTION MANUAL
PLEASE READ CAREFULLY AND SAVE THESE INSTRUCTION.
SAFETY WARNING
z BE SURE THE ELECTRICITY TO THE WIRES YOU ARE WORKING WITH IS SHUT
OFF; EITHER BY TURNING OFF THE CIRCUIT BREAKER OR BY REMOVING THE
APPROPRIATE FUSE.
z BE CAREFUL NOT TO DAMAGE OR CUT THE WIRE INSULATION (COVERING)
DURING FIXTURE INSTALLATION.
TOOLS YOU MAY NEED
Flathead Screwdriver
Phillips Screwdriver
Electrical Tape
Step Ladder
RE A D & SAV E
INSTA LL ATION & OPERATIO N INSTRUCTIONS
z
z
z
z
z
TOOLS & M AT ERI A LS RE QUIRED
Flathead Screwdriver
Phillips Screwdriver
Electrical Tape
Step Ladder
Wiring Supplies as required by Electrical Code
C A UTION
Before assembling your Lighting fixture, refer to the
section titled “E L E C TRIC A L C O N N E C TIO NS”. If
you feel you do not have electrical wiring experience,
refer to a do-it-yourself wiring hand-book or have
your fixture installed by a qualified licensed
electrician.
GENERA L
To ensure the success of the installation, be sure
to read these instructions and review the
diagrams thoroughly before beginning.
2. A ll electrical connections must be in accordance
with local codes, ordinances, or the National
Electric Code. If you are unfamiliar with
methods of installing electrical wiring, secure the
services of a qualified licensed electrician.
3. These fixtures are intended to be mounted to a
U L Listed metal or plastic round box. The box
must be directly supported by the building
structure.
4. Before starting the installation, disconnect the
power by turning off the circuit breaker or by
removing the appropriate fuse at the fuse box.
Turning the power off using the light switch is
not sufficient to prevent electrical shock.
NOTE: The important safeguards and instructions
appearing in this manual are not meant to cover all
possible conditions and situations that may occur. It
must be understood that common sense, caution, and
care are factors which cannot be built into any
product. These factors must be supplied by the
person(s) caring for and operating the fixture.
1.
UNPA C K THE FI X TURE
Check the contents of the box. You should receive:
z Mounting Hardware Package
z Assembled Fixture
Mounting hardware included:
z
z
z
z
3
2
1
1
Connectors
Outlet Box Screws
Plastic Finial
Washer
PREPARE THE FI X TURE
NOTE: First turn off electricity
1. If you are replacing an existing fixture,
disconnect and remove the old fixture. Expose
the supply wiring from the outlet box.
2. Snap socket spring into canopy.
3. A ttach the grounding wire (green or bare copper)
from the supply circuit to the canopy with
connector provided. Some models have a
grounding wire attached to the fixture. For
models that employ a green or bare copper
grounding wire. It will be necessary to connect
the green or bare grounding wire to the
grounding conductor of the supply circuit.
4. Make electrical connections.
ELECTRIC A L CONNECTIONS
Connect the white wire(s) from the fixture to the
white wire of the supply circuit. Connect the black
wire(s) from the fixture to the black wire of the
supply circuit. Connect the green (or bare copper)
colored wire to the grounding conductor of the supply
circuit. Use U.L. Listed wire connectors suitable for
the size, type and number of conductors. N O loose
strands or loose wires should be present. Secure wire
connectors with U.L. Listed electrical tape.
1.
2.
3.
4.
5.
FIN A L ASSEMBLY
Spread the electrical splices so that the black
wires are on one side of the outlet box and the
white wires are on the other side.
A fter wires are connected, tuck them carefully
inside outlet box. Raise canopy allowing for
these wires through hole on canopy, and secure
canopy onto outlet box with two outlet box
screw.
Place the washer, glass over the nipple in order
and secure the plastic finial into nipple.
Install light bulbs (not provided) to the socket.
C A U TIO N: Refer to the re-lamping label
located near the lamp holder for recommended
maximum wattage-do not exceed recommended
wattage.
Restore electricity and check the operation of
your new lighting fixture.
M A NU A L DE INSTRUCCIONES
L E A D E T E NID A M E N T E ESTAS INSTRU C CIO N ES Y G U Á RD E L AS.
Advertencia de seguridad
z
ASE G ÚRESE D E Q U E L A E L E C TRICID A D A L OS C A B L ES C O N L OS Q U E EST Á
TR A B AJA N D O EST É D ESC O N E C TA D A; YA SE A APA G A N D O E L DISY U N TOR O
E X TR AY E N D O E L F USIB L E C ORRESPO N DIE N T E.
z PRO C URE N O D A Ñ A R O C ORTA R E L A ISL A MIE N TO D E L C A B L E A D O (C U BIERTA)
D UR A N T E L A INSTA L A CIÓ N D E L DISPOSITI V O.
HERRA MIE NTAS QUE PUEDE NECESITAR
Destornillador de cabeza plana
Destornillador Phillips
Cinta aislante
Escalera de tijera
LE A Y GU ARDE
INSTRUCCIONES DE INSTA L A CIÓN Y OPERA CIÓ N
HERRA MIENTAS Y M ATERI A LES REQUERIDOS
z
z
z
z
z
Destornillador de cabeza plana
Destornillador Phillips
Cinta aislante
Escalera de tijera
Suministros de cableado según lo requerido por el
Código Eléctrico
PREC A UCIÓN
PREPARE EL DISPOSITI V O
NOTA: Primero, desconecte la electricidad
1.
2.
3.
Antes de montar el dispositivo de Iluminación, consulte la
sección titulada “C O N E X IO N ES E L É C TRIC AS”. Si cree
que no tiene experiencia en el cableado eléctrico, consulte
un manual de cableado “hágalo usted mismo” o solicite a un
electricista certificado que instale el dispositivo
mencionado.
GENERA L
1.
Para garantizar el éxito de la instalación, asegúrese de
leer estas instrucciones y revisar los diagramas
minuciosamente antes de comenzar.
2.
Todas las conexiones eléctricas deben realizarse de
conformidad con los códigos o las ordenanzas locales
o el Código Eléctrico Nacional. Si no está
familiarizado con los métodos de instalación de
cableado eléctrico, obtenga los servicios de un
electricista certificado.
3.
Estos dispositivos están destinados para ser montados
en una caja circular de plástico o de metal enumerada
por U L. La caja debe estar sostenida directamente por
la estructura funcional.
4.
Antes de comenzar con la instalación, desconecte la
energía apagando el disyuntor o extrayendo el fusible
correspondiente de la caja de fusibles. Desconectar la
energía utilizando el interruptor de luz no es suficiente
para evitar una descarga eléctrica.
NOTA: Las medidas de seguridad y las instrucciones
importantes que aparecen en este manual no tienen por
objeto cubrir todas las condiciones y situaciones posibles
que puedan ocurrir. Debe comprenderse que el sentido
común, la precaución y el cuidado son factores que no
pueden incorporarse en ningún producto. Estos factores
deben ser provistos por las personas que se encargan del
cuidado y la operación del dispositivo.
4.
C O N E XIONES E L É CTRIC AS
Conecte el/los cable/s blanco/s del dispositivo al cable
blanco del circuito de alimentación. Conecte el/los cable/s
negro/s del dispositivo al cable negro del circuito de
alimentación. Conecte el cable de color verde (o de cobre
desnudo) al conductor de conexión a tierra del circuito de
alimentación. Utilice los conectores de cables enumerados
por U.L. adecuados para el tamaño, el tipo y la cantidad de
conductores. N O debe haber cables trenzados o sueltos.
Sujete los conectores de cables con la cinta aislante
enumerada por U.L.
1.
2.
3.
4.
DESEMPA QUE DEL DISPOSITIV O
Verifique el contenido de la caja. Debe recibir:
z Paquete de equipo de montaje
z Dispositivo ensamblado
5.
Equipo de montaje incluido:
z
z
z
z
3 Conectores
2 × Tornillos de caja de salida
1 × Adorno terminal de plástico
1 × Arandela de bloqueo
Si está reemplazando un dispositivo existente,
desconecte y extraiga el dispositivo anterior.
Exponga el cableado de alimentación de la caja de
salida.
Encaje el resorte del soporte en la cubierta.
Sujete el cable de conexión a tierra (verde o cobre
desnudo) del circuito de alimentación en la cubierta
con el conectores provisto. A lgunos modelos tienen
un cable de conexión a tierra junto con el dispositivo.
Para los modelos que emplean un cable de conexión a
tierra verde o de cobre desnudo. Será necesario
conectar el cable de conexión a tierra verde o desnudo
al conductor de conexión a tierra del circuito de
alimentación.
Realice las conexiones eléctricas.
MONTAJE FIN A L
Extienda los empalmes eléctricos para que los cables
negros se encuentren a un lado de la caja de salida y
los cables blancos se encuentren al otro lado.
Luego de que se conecten los cables, introdúzcalos
cuidadosamente dentro de la caja de salida. Eleve la
cubierta de manera que estos cables pasen por el
orificio de la cubierta, y sujete la cubierta en la caja de
salida con dos tornillos de caja de salida.
Coloque la arandela de bloqueo, el vidrio sobre la
boquilla, según lo indicado, y sujete el adorno
terminal de plástico en dicha boquilla.
Instale las bombillas (las bombillas no están incluidas)
en el soporte.
PRE C A U CIÓ N: Vea la etiqueta de colocación de la
lámpara ubicada cerca del portalámparas para
conocer la potencia máxima recomendada; no
supere dicha potencia recomendada.
Reestablezca la electricidad y verifique la
operación del nuevo dispositivo de iluminación.