1
For Lighted Baluster Models 171-Series
Deck Impressions
Lighted Baluster Installation Instructions
Parts Diagram
For Use With Landscape Lighting Systems Only
Read and Save These Instructions
Outdoor Use Only
Parts List:
T1 - top rail connector
T2 - screw cover
T3 - pierce connector
T4 - threaded collar
B1 - bottom rail connector
B2 - bottom sleeve
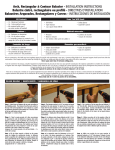
Step 1: Measure rails from post to post. Fig. 1
Step 2: Cut top and bottom rails to length, allowing for rail mounts of
fit and size. Place rails face to face. Starting from the center of the
rails, mark 4 1/8" on center. Fig. 2
Fig. 2
Fig. 1
Step 3: For lighted balusters, unscrew the rail connector sleeve
from the top rail connector and remove top rail connector
from baluster (Fig. 3A). Using one of the provided
mounting screws, push the pointed end of the screw
through the hole in the back side of the rail connector to
pop out the plastic screw head cover (Fig. 3B). The
bottom rail connector can be removed from the opposite
end of the lighted baluster by sliding the connector sleeve
up the baluster (Fig. 3C). Attach baluster rail connectors
to the top and bottom rails using the screws provided. For
non-lighted balusters, use accessory Deck Impressions
mounting hardware 171-7620 (sold separately). Fig. 3
Fig. 3
Fig. 3A
Fig. 3B
Fig. 3C
Step 4: Attach top and bottom rails to deck posts (Fig. 4) and drill 1/4" hole in deck posts for wire (Fig. 5).
Fig. 4
Fig. 5
Fig. 6
Step 5: Reinstall screw covers previously removed in Step 3 above and feed wire through post and across top rail connectors. Fig. 6
Important - Screw Cover Installation The T2 screw cover must be properly installed for the system to work.
Improper installation of the screw cover will prevent the pierce connectors
from making electrical contact with the wire. Elimination of this critical part
from the assembly could result in an electrical short should the pierce
connectors contact the metal head of the screw. The T2 screw cover is
intended to be installed with the hollow center facing the screw head (see
Ill. A). The opposite side of the cover forms the seat for the pierce
connectors to contact the wire (see Ill. B). The side that faces the baluster
has a raised center and raised outer edge, forming a channel between the
inside and outside edge. The T2 screw cover fits snugly when aligned and
pressed into place. Access to the mounting screw for replacement of
damaged rails or balusters will require the removal of the T2 screw cover.
Ill. A (Covers screw head)
Ill. B (Faces wire)
Step 6: Align pierce connectors with 16 AWG SPT-2W landscape wire. Press firmly to pierce wire. Fig. 7. For installation of non-lighted
balusters, follow instructions included with accessory hardware pack 171-7620 (sold separately).
Step 7: Secure pierce connector end of baluster to rail connector by
sliding connector sleeve up to mate with threaded end of rail connector.
Fig. 8.
Fig. 8
Fig. 7
Step 8: Insert opposite end of baluster into slotted opening
of rail connector and slide connector. Slide
connector sleeve to cover rail connector. Note: The
connector sleeve has a thicker side that should mate
with the slotted opening of the rail connector. Turn
the sleeve until the thicker side of the sleeve aligns
with the opening of the rail connector. Push onto rail
connector and twist to lock. Fig. 9.
Fig. 9
Step 9: (Optional - requires accessory part # 171-7626, Sold Separately)
Cover exposed wire with Deck Impressions wire covers. Fig. 10.
Step 10: Complete the installation by connecting one end of the 16
AWG SPT-2W landscape wire (available at retailers carrying Deck
Impressions lighted balusters) to a 12 volt landscape transformer
following the instructions supplied with the transformer.
Mixing Lighted and Non-Lighted Balusters?
Standard 1/2" diameter aluminum balusters can be mixed with Deck
Impressions lighted balusters. For installation of standard 1/2" diameter
aluminum balusters, you will need Deck Impressions accessory part #
171-7620 (Sold Separately).
Fig. 10
Tip: When using pressure-treated lumber, avoid the use of wet lumber.
Wet lumber may twist or warp, causing damage to the assembled
system.
WARNING - RISK OF ELECTRIC SHOCK. INSTALL ALL LUMINARES 10 FEET
(3.05m) OR MORE FROM A POOL, SPA, OR FOUNTAIN.
THE MAIN LOW VOLTAGE CABLE IS INTENDED FOR SHALLOW BURIAL - LESS THAN 6 INCHES (152 MM)
THIS DEVICE IS ACCEPTED AS A COMPONENT OF A LANDSCAPE LIGHTING SYSTEM WHERE THE SUITABILITY OF
THE COMBINATION SHALL BE DETERMINED BY CSA OR LOCAL INSPECTION AUTHORITIES HAVING JURISDICTION.
Limited 5 Year Warranty: Creative Industries warrants the lighted balusters to be free from defects in material and workmanship for a period of five
(5) years from the date of purchase. This warranty applies only to the original consumer purchaser and only to products used in normal use and
service. If this product is found to be defective, Creative Industries' only obligation and your exclusive remedy, is the repair or replacement of the
product at Creative's discretion, provided that the product has not been damaged through misuse, abuse, accident, modifications, alterations, neglect
or mishandling. This warranty shall not apply to any product that is found to have been improperly installed, set-up, or used in a way not in
accordance with the instructions supplied with the product. This warranty shall not apply to a failure of the product as a result of an accident, misuse,
abuse, negligence, alteration, or faulty installation, or any other failure not relating to faulty material or workmanship. This warranty shall not apply to
the finish on any portion of the product, such as surface and/or weathering, as this is considered normal wear and tear. Creative does not warrant and
specially disclaims any warranty, whether express or implied, of fitness for a particular purpose, other than the warranty contained herein. Creative
Industries specifically disclaims any liability and shall not be liable for any consequential or incidental loss or damage, including but not limited to any
labor expense costs involved in the replacement or repair of said product. Some states do not allow the exclusion or limitation of incidental
consequential damages, so the limitations and exclusions above may not apply to you. This warranty is in lieu of all other express or implied
warranties. All implied warranties, including the warranty of merchantability and the warranty of fitness for a particular purpose are hereby modified to
exist only as contained in this limited warranty and shall be of the same duration as the warranty period stated above. Somme states do not allow
limitations on the duration of an implied warranty, so the above limitation may not apply to you.
Para los modelos de barandilla iluminada 171-Serie
INSTRUCCIONES DE INSTALACIÓN DE BALAUSTRES ILUMINADOS
SÓLO PARA USO CON SISTEMAS DE ILUMINACIÓN DE PAISAJE
LEA Y GUARDE ESTAS INSTRUCCIONES
SÓLO PARA USO AL AIRE LIBRE
Lista de piezas:
T1 - conector superior de ferrocarril
T2 - cubierta del tornillo
T3 - conector de Pierce
T4 -cuello roscado
B1 - conector inferior de ferrocarril
B2 - manga de inferior
Paso 1: Medir los carriles de puesto a puesto. Figura. 1
tornillo (Véase Ill. A). El lado opuesto de la cubierta forma el asiento
Paso 2: Cortar los carriles superiores e inferiores a la longitud que
para los conectores de ponerse en contacto con el alambre (Véase
permite los montes de carril de tamaño adecuado. Colocar los
Ill. B). El lado que da a la barandilla tiene un centro elevado y se crió
carriles cara a cara. Comenzando por el centro de los carriles,
borde exterior, formando un canal entre el borde interior y exterior.
marca de 4 "en el centro. Figura. 2
La cubierta del tornillo T2 encaja cómodamente cuando alineados y
Paso 3: Para los barrotes iluminados, desenrosca la manga de
apretó en lugar. El acceso al tornillo de montaje para el reemplazo
conector de ferrocarril en el conector superior de ferrocarril y elimina
de los rieles dañados o balaustres requerirá la eliminación de la
el conector superior de conector en balaustre (Figura. 3A).
cubierta de tornillo T2.
Utilizando uno de los tornillos de montaje, empuje el extremo
Paso 6: Alinea los conectores con los cables de paisaje 16 AWG
puntiagudo de los tornillos a través del agujero en la parte posterior
SPT-2W. Presione firmemente para perforar alambre. Fig. 7. Para la
del conector de ferrocarril para extraer la cubierta de plástico del
instalación de barrotes no iluminados, siga las instrucciones
tornillo (Figura. 3B). El conector inferior se puede quitar desde el
incluidas con el paquete de accesorios de hardware 171-7620 (se
extremo opuesto de la barandilla iluminada por deslizamiento de la
vende por separado).
manga del conector (Figura. 3C). Conecte los conectores de
Paso 7: Asegura extremo del conector de balaustre al conector de
ferrocarril a las barandas superiores e inferiores utilizando los
ferrocarril deslizando la manga de conector hasta el mate con
tornillos suministrados. Para los barrotes no iluminados, utilice el
extremo roscado del conector de ferrocarril. Figura. 8.
hardware 171-7620 de montaje de Deck Impressions (se vende por
Paso 8: Inserta extremo opuesto de balaustre en la apertura de
separado). Figura. 3
ranuras de conexión ferroviaria y deslice el conector. Deslice la
Paso 4: Fije los rieles superiores e inferiores a los puestos de la
manga de conector para cubrir el conector de ferrocarril. Nota: La
cubierta (Fig. 4) y perfora el agujero 1/4" en los puestos de cubierta
manga de conector tiene un lado más grueso que debe acoplarse
de alambre (Fig. 5).
con la apertura de ranuras del conector de ferrocarril. Gire la manga
Paso 5: Vuelva a instalar las cubiertas de tornillo eliminadas
hasta la parte más gruesa de la manga se alinea con la apertura del
previamente en el paso 3 y alimenta por cable a través de correos y
conector de ferrocarril. Empuje el conector y gira a la cerradura.
conectores barandales superiores. Fig. 6
Figura. 9.
Importante- Instalación de Cubierta de Tornillo
Paso 9: (Opcional - requiere de accesorios # 171-7626, se vende
La cubierta del tornillo T2 debe ser debidamente instalada para que
por separado) Cubra el cable expuesto con cubiertas de alambre
el sistema de trabajo. La instalación incorrecta de la tapa de rosca
Deck Impressions. Figura. 10
evita los conectores de hacer contacto eléctrico con el alambre. La
Paso 10: Completa la instalación mediante la conexión de un
eliminación de esta parte crítica de la asamblea podría dar lugar a
extremo del alambre de paisaje 16 AWG SPT-2W (disponible en las
un cortocircuito eléctrico que atraviesan los conectores de metal en
tiendas llevando balaustres iluminados Deck Impressions) a un
contacto con la cabeza del tornillo. La cubierta del tornillo T2 está
transformador del paisaje de 12 voltios siguiendo las instrucciones
destinada a ser instalado con el centro hueco frente a la cabeza del
suministradas con el transformador.
Mezcla balaustres iluminados y no iluminados?
Barrotes de aluminio de diámetro 1/2" puede ser mezclados con balaustres iluminados de Deck Impressions. Para la instalación de barrotes de
aluminio de diámetro 1/2", tendrá accesorio # 171-7620 de Deck Impressions (se vende por separado).
Sugerencia:
Cuando se utiliza madera tratada a presión, evita el uso de la madera húmeda. La madera húmeda puede torcerse o deformarse, y causar
daños en el sistema montado.
ADVERTENCIA - RIESGO DE DESCARGA ELÉCTRICA. SE INSTALEN TODAS LAS LUMINARIAS DE
10 PIES (3,05 M) O MÁS DE UNA PISCINA, SPA, O FUENTE.
SE DESTINA AL ENTIERRO POCO PROFUNDO EL PRINCIPAL CABLE DE BAJA TENSIÓN - MENOS DE 6 PULGADAS (152 MM).
EL DISPOSITIVO ES ACEPTADO COMO UN COMPONENTE DE UN SISTEMA DE ILUMINACIÓN DEL PAISAJE QUE LA
IDONEIDAD DE LA COMBINACIÓN SE DETERMINARÁ POR LA CSA O DE LAS AUTORIDADES LOCALES DE INSPECCIÓN.
Pour les modèles de balustre allumé 171- Série
INSTRUCTIONS D'INSTALLATION DE BALUSTRE ALLUME
POUR L'UTILISATION EXCLUSIVEMENT AVEC LES SYSTEMES D'ECLAIRAGE DE FORMAT A L'ITALIENNE
LISEZ ET CONSERVEZ CES INSTRUCTIONS
UTILISATION EXTERNE EXCLUSIVE
Liste des pièces:
T1 - connecteur rail supérieur
T4 - Collier filetée
T2 - vis de couverture
T3 - Pierce connecteur
B1 - connecteur rail inférieur
B2 –manches inférieur
Etape 1: Mesurez des rails du poste au poste. Fig. 1
faisant face à la tête de vis (voir III. A). Le côté opposé du couvercle
Etape 2: Coupez les rails supérieurs et inférieurs à la longueur pour
sert d'un siège pour les connecteurs pénétrables à contacter le câble
l’assemblage en fonction du bon montage et de la taille correcte.
(voir III. B). Le côté qui fait face au balustre a un centre soulevé et un
Mettez les rails face à face. A partir du centre des rails, marquez 4"
bord extérieur soulevé, formant un canal entre le bord intérieur et
au centre. Fig. 2
celui extérieur. Le couvercle de vis T2 se loge parfaitement lorsqu’il
Etape 3: Pour les balustres éclairés, dévissez le manchon de
est aligné et fixé sur place. L'accès à la vis de montage pour le
connecteur rail du connecteur rail supérieur et retirez le connecteur
remplacement des rails ou des balustres endommagés nécessite
rail supérieur du balustre (Fig. 3A). En utilisant l'une des vis de
l’enlèvement du couvercle de vis T2.
montage fournies, poussez le bout pointu de la vis par le trou dans le
Etape 6: Alignez les connecteurs pénétrables avec les fils paysage
côté arrière du connecteur rail afin de faire sortir le couvercle de la
16 AWG SPT-2W. Appuyez fermement pour percer le fil. Fig. 7.
tête de vis en plastique (Fig. 3B). Le connecteur rail inférieur peut
Pour l'installation de balustres non éclairés, suivez les instructions
être retiré du bout opposé de balustre éclairé en faisant coulisser le
incluses avec le pack matériel accessoire 171-7620 (vendu
manchon de connecteur jusqu'au balustre (Fig. 3C). Fixez les
séparément).
connecteurs rail du balustre aux rails supérieurs et inférieurs en
Etape 7: Fixez les bouts du connecteur pénétrable du balustre sur le
utilisant les vis fournies. Pour les balustres non éclairés, utilisez le
connecteur rail en faisant glisser le manchon du connecteur pour
matériel de montage accessoire Deck Impressions 171-7620 (vendu
s'accoupler avec le bout fileté du connecteur rail. Fig. 8
séparément). Fig. 3
Etape 8: Insérez le bout opposé de balustre dans l’ouverture
Etape 4: Fixez les rails supérieurs et inférieurs à des postes de
entaillée de connecteur rail et faites glisser le connecteur. Faites
platine (Fig. 4) et percez un trou à ¼" de diamètre dans les postes de
glisser le manchon de connecteur pour couvrir le connecteur rail.
platine pour le fil (Fig. 5).
Remarque: Le manchon connecteur a un côté plus épais qui devrait
Etape 5: Réinstallez les couvercles de vis précédemment retirés à
s'accoupler avec l'ouverture entaillée du connecteur rail. Tournez le
l'étape 3 ci-dessus et enfilez les postes et les connecteurs rail
manchon jusqu’à ce que le côté plus épais du manchon aligne avec
supérieurs. Fig. 6
l'ouverture du connecteur rail. Poussez-le vers le connecteur rail et
Important - Installation Couvercle de Vis –
faites tourner pour le verrouiller. Fig. 9
Le couvercle de vis T2 doit être correctement installé afin que le
Etape 9: (facultatif - pièce accessoire # 171-7626 nécessaire, Vendu
système fonctionne. Une mauvaise installation du couvercle de vis
séparément) Couvrez le fil exposé avec les caches du fil de Deck
empêchera les connecteurs pénétrables de réaliser un contact
Impressions. Fig. 10.
électrique avec le fil. L'élimination de cette partie essentielle du
Etape 10: Terminez l'installation en reliant un bout du fil paysage 16
montage pourrait conduire à un court-circuit électrique si les
AWG SPT-2W (disponible chez les détaillants transportant des
connecteurs pénétrables touchent la tête en métal de la vis. Le
balustres éclairés Deck Impressions) à un transformateur paysage 12
couvercle de vis T2 est destiné à être installé avec le centre creux
volts en suivant les instructions fournies avec le transformateur.
Mélangez des Balustres Eclairés et non éclairés?
Des balustres en aluminium standard à 1/2" de diamètre peuvent être mélangés avec des balustres éclairés Deck Impressions. Pour l'installation des
balustres en aluminium standard à 1/2" de diamètre, vous aurez besoin de pièce accessoire # 171-7620 Deck Impressions (Vendu séparément).
Conseil:
Lors de l'utilisation du bois traité sous pression, évitez l'utilisation de bois humide.
Le bois humide peut se tordre ou déformer, ce qui
provoquera des dommages au système assemblé.
AVERTISSEMENT-RISQUE DE CHOC ÉLECTRIQUE. INSTALLEZ TOUT LUMINAIRE DE 10 PIEDS
(3,05 M) OU PLUS D'UNE PISCINE, D’UN SPA OU D'UNE FONTAINE.
LE CABLE PRINCIPAL DE TENSION BASSE EST POUR SHALLOW BURIAL-MOINS DE 6 POUCES (152MM).
L'APPAREIL EST ACCEPTE COMME UN COMPOSANT D'UN SYSTEME D'ECLAIRAGE DE FORMAT A L'ITALIENNE
OU LA COMPATIBILITE DE LA COMBINAISON DOIT ETRE DETERMINEE PAR CSA OU LES AUTORITES
D'INSPECTION LOCALES AYANT LA JURIDICTION.