Transcript
A
○
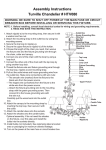
ASSEMBLY INSTRUCTION
SKU#512-882
Note: Please consult a qualified electrician if you are not certain of the installation.
CAUTION: Before starting the installation, disconnect the power by turning off the circuit breaker or by
removing the fuse at the fuse box.
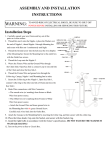
1. Pull the supply wires and house ground wires out from the outlet box and fastens the mounting strap onto
outlet box using 2 outlet box screws.
2. Screw off ring from screw collar loop and thread the screw collar loop to the nipple on the mounting strap.
3. Fasten the loop to the top nipple on the fixture as shown. Screw the bushing to the bottom nipple of the
fixture.
4. Using two pliers, twist open one link at the end of the chain. Hook it to the top loop and close the link.
Weave the fixture wires and ground wires up through the chain links, through the ring and through canopy.
Position both the outlet box supply wires and the fixture wires outside of the outlet box to facilitate
connection. After connection is completed, carefully position wires inside outlet box. Using two pliers, twist
one the link at the other end of the chain. Hook the whole fixture to the screw collar loop on the ceiling and
close the link.
5. Connect the wire with writing on it from the fixture to the black wire form the supply circuit. Connect the
wire without writing on it (with raised ribs) from the fixture to the white wire from the supply circuit. Cover
the connections using the wire connectors provided. Tie the ground wires from outlet box and fixture to the
ground wire screw on the mounting strap.
6. Place the canopy over the nipple all the way to the ceiling and tighten the ring onto screw collar loop until
the canopy is firmly held against the ceiling.
7. Place glass shade over the socket and fasten the socket ring to the socket all the way until the glass hold
firmly to the fixture.
8. Install the bulbs ( bulbs included)