1
Manufactured and Distributed by
Scenery Solutions, Inc., 222 Grace Church Street, Suite 302
Port Chester, NY 10573
Questions call: 800-914-9835
[email protected]
©2009 Frameitall All rights reserved
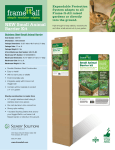
Versailles
Sunburst
The Versailles Sunburst kit contains:
• 16 Curved Timbers
• 8 Stacking Joints (2 pack)
Introducing the ‘Frame-It-All’ Versailles Sunburst
For general assembly you can find the instructions in the 2 Pack of Frame-it-all joints.
ECO-friendly
The framework utilizes our Curved Composite Plastic Timbers. Manufactured from 40% wood fiber and 60% recycled polyethylene, the Eco-friendly durable composite wood grain plastic timbers never rot, warp or splinter. The cut-to-size Timbers connect
to brackets with our patented Stacking Joints stakes.
Dimensions
Your Versailles Sunburst garden fits in a 10.5’ X 10.5’ area.
Installation Notes:
Before starting to assemble the Versailles Sunburst Garden, refer to the parts diagram to understand how to screw the brackets
onto the timbers. Remove the Stacking joints from the plastic bags and lay out the parts. Each of the joints comprises a stake
and two brackets plus screws needed.
Tools Needed:
•Phillips head screwdriver
(electrical or battery operated preferred)
•Hammer
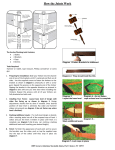
Parts Identification
Parallel bracketed
Curved timber
How the Joints Work
Stacking Joint
Use a Finishing
Cap to complete
the top level.
When creating a
multi-level frame
use a Stacking
Joint.
Use an Anchor
or Stacking Joint
for ground level
frames or borders.
Use only Stacking
Joints when
creating additional
levels.
Screw bracket onto
composite timber
Two screws are
required per bracket
(1 on each side).
Stacking Joints fit into
the tops of Anchor
Joints and other
Stacking
Joints
Special Installations:
Connect brackets parallel (as
shown in Parts Identification)
to 14 of the 16 curved timbers leaving 2 curved timbers
and 1 stacking joint (2 pack)
for last part of installation.
Level one (Diagrams 1 & 2)
Materials: 8 curved timbers, 8 stacking joints
Create a circle by connecting all of the
bracketed timbers with the stakes upside
down (A) so the timbers can be angled
easily (Diagram 1).
Diagram 1
A
Diagram 2
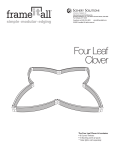
Next, push in every other timber to form a four leaf clover
shape (Diagram 2).
Note: Do not secure stakes in ground just yet.
Level two (Diagram 3)
Materials: 4 curved timbers, 4 stacking joints
Before flipping the stake around and hammering into the ground to
permanently pin the first level, line up the second level to make sure
the bottom level is positioned properly. Once the second level is lined
up, temporarily remove the second level pieces and hammer stakes
through brackets to secure first level.
Diagram 3
Once first level is secured, re-install second level, making sure
the curve of the timber is facing outward (Diagram 3).
Level three (Diagram 4)
Because of the tight inward bends of the third level, it’s important to first place two bracketed timbers (A) across from each other.
Then place the brackets (not already installed on timbers) over the stakes (B) on the final two side pieces. Next, slide the final
timber (C) into the brackets (it will be a tight fit). Once in place, screw the brackets to timbers to secure.
C
B
A
Diagram 4
Completed assemby