1
Bay Windows Hard Top gazebo
Parts List
Screen 1
A
4
Screen 2
B1
2
Screen 3
B2
2
Middle beam connector
C1
4
Connector 1
C2
4
Connector 2
C3
4
Short netting pipe
D1
2
Long netting pipe
D2
4
Big top frame 1
E1
2
Big top frame 2
E2
2
Cant beam 1
F1
4
Cant beam 2
F2
4
Middle beam
F3
4
Small top beam
G
4
Small top connector
H
1
hook
I
1
Small top cover
J
1
finial
K
1
“F”block 1
L1
2
“F”block 2
L2
2
Long slot 1
M1
2
Long slot 2
M2
2
Short slot 1
N1
2
Short slot 2
N2
2
Parts List
slot
O
4
“F” block 3
P1
2
“F” block 4
P2
2
“F” block 5
Q1
2
“F” block 6
Q2
2
“F” block 7
R
4
Below block 1
S1
12
Below block 2
S2
4
Long Pc board 1
T1
2
Long Pc board 2
T2
2
Long Pc board 3
T3
2
Long Pc board 4
T4
2
short Pc board 1
U1
2
short Pc board 2
U2
2
short Pc board 3
U3
2
short Pc board 4
U4
2
Pc board 1
V1
4
Pc board 2
V2
4
Mosquito netting
W
1
Small top pc board 1
X1
2
Small top pc board 2
X2
2
Hardware Pack 1
AA
Bolt M6X25
16 PCS
BB
Flat washer M6
52 PCS
CC
Bolt M6X15
36 PCS
W
Wrench M6
2 PCS
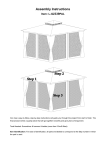
Fig.1: Open the screen 1(A). Fig.2: Attach the screen 2(B1) to the
screen 1(A) with bolt (AA) and flat
washer (BB).Attach the screen 3(B2) to
the screen 1(A)in the same way.
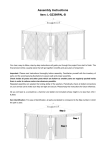
Fig.4: Attach the connector 1(C2)and the Fig.5: Attach the long
connector 2(C3) to the screen 1(A).
mosquito net pipe(D2) to the
screen1(A)and the screen
2(B1)with bolt (CC) and flat
washer (BB).
Fig.3: Attach the middle
beam connector (C1)to the
screen
2(B1)and
screen
3(B2).
Fig.6: Attach the short
mosquito net pipe(D1)to the
screen 1(A) with bolt(CC)
and flat washer (BB).
Hardware Pack 2
BB
Flat washer M6
52 PCS
DD
Bolt M6X15
52 PCS
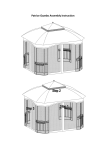
Fig.7: Insert the Big top frame
2 (E2)into the Big top frame 1
(E1)by using bolt(DD)and flat
washer(BB).
Fig.10: Attach the middle
beam (F3) to the big top frame
2(E2) with bolt (DD) and flat
washer(BB).
Fig.8: Attach the cant beam 1(F1)
and the cant beam 2(F2)to the big top
frame 1(E1)with bolt(DD) and flat
washer(BB).
Fig.11: Attach the middle
beam (F3) to middle beam
connector (C1) with bolt
(DD) and flat washer (BB).
Fig.9: Attach the cant beam 1(F1)
and the cant beam 2(F2)to the
connectors(C2,C3)with
bolt(DD)and flat washer(BB).
Fig.12:
Attach
the
small top beam(G) to the
big top frame 1(E1) with
bolt (DD) and flat
washer(BB).
Hardware Pack 3
BB
Flat washer M6
16 PCS
EE
M6X15 screw
16 PCS
Fig.13: Attach the small
top beam(G)to the small
top connector(H) with
bolt (DD) and flat
washer(BB).
Fig.14: Insert small top pc board 2(X2) and Fig.15: Insert the“F”block 1 (L1)and the “F”block
small top pc board 1(X1) into the small top 2(L2)into pc board and small top beam,attach the Below
block 1(S1)to the bottom of the small top beam with
beam(G).
bolt(C)and flat washer(BB).
Fig.16: Put the small
top cover (J) onto the
small top, insert the
finial (K) into the
hook(I).
Fig.17: Insert Long Pc board
1(T1) into the cant beam
2(F2)and middle beam(F3),
insert Long slot 1(M1)into
Cant beam 2(F2)and middle
beam(F3), then insert Long
Pc board 3(T3)into Cant beam
2(F2)and
middle
beam(F3),the same way to
other pc boards.
Fig.18:
Fig.18:
Insert “F” block 3
(P1)and “F” block
7 (R)into pc board
and
cant
beam
2(F2),attach
the
below block 2(S1)to
the bottom of cant
beam with bolt (EE)
and
flat
washer
(BB).
Hardware Pack 4
FF
Ring
52 PCS
GG
Ground stakeΦ8X180
12 PCS
Fig.19: Insert “F”
block 3(P1)and “F”
block 4(P2)into pc
board and middle
beam (F3),attach the
below block 2(S2)to
the bottom of cant
beam.
Fig.20:
Hang
the
mosquito netting (W) on
the long mosquito net
pipe (D2) and the short
mosquito net pipe (D1)
with the ring (FF).
Fig.21: Secure the assembled gazebo to the lawn with ground
stake (GG).