1
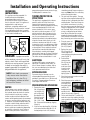
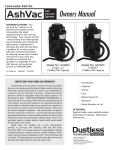
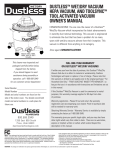
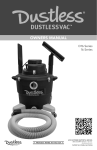
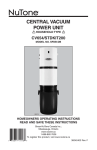
Dustless® HEPA Pack
Vacuum Owners Manual
CONGRATULATIONS: You are now the owner of a DustlessTM HEPA Pack
Vacuum which incorporates the latest advancements in wet/dry dust
removal technology. This vacuum is engineered to eliminate the dust that
has been a problem for so many years with wet/dry vacuums almost from
their inception. This vacuum is different from anything in its category.
Once again CONGRATULATIONS
This cleaner was inspected and
packaged carefully before being
shipped from the factory.
If you should happen to need
assistance during assembly or
operation, call 1-800-568-3949
for our customer service department.
Serial Number __________________________
Model Number _________________________
Model and serial numbers are found on the side of
the motor cover. You should record both model and
serial numbers in a safe place for future use.
FULL ONE-YEAR WARRANTY
ON DUSTLESSTM WET/DRY VACUUMS
If within one year from the date of purchase, this DustlessTM HEPA
Pack Vacuum fails due to a defect in material or workmanship, Dustless
Technologies will repair or replace it, free of charge. Please note that
this warranty is limited to and applies only to the original purchaser “
For Household Use Only,” “POUR USAGE ME’ NAGER TYPE MENAGER”,
so long as that use is in accordance with instructions and limitations
set out in this manual.
If this DustlessTM HEPA Pack Vacuum is used for commercial or rental
purposes, this warranty coverage applies for 90 days from date
of purchase.
Warranty registration - Please fill out and return the warranty
registration card accompanying your cleaner. Proof of purchase date
will be needed for warranty work.
Obtaining Warranty Service - Warranty Service is available by simply
contacting the factory at 1-800-568-3949.
800.568.3949
1285 East 650 South
Price, Utah 84501
dustlesstechnologies.com
This warranty gives you specific legal rights, and you may also have
other rights which vary from state to state. There are no warranties,
express or implied, written or verbal, which extend beyond the
description in this manual.
HEPA Pack is a commercial and household dry pick up vacuum cleaner
Super 120-1200/AI-10Q
Read the owner’s manual carefully before using
IMPORTANT SAFETY INSTRUCTIONS
IMPORTANTES MESURES DE SECURITE
IMPORTANTE PARA SU SEGURIDAD
SAVE THESE INSTRUCTIONS
CONSERVER CES INSTRUCTIONS
GUARDAR ESTA INSTRUCTIONES
• Read the Owner’s Manual completely before attempting
to operate this unit.
• Always check the filters before each use.
• Connect to a properly grounded outlet. See grounding instructions.
•D
on’t change filters, clean the unit, or empty the canister until
the plug has been disconnected from the electrical outlet.
Always unplug unit when not in use and before servicing.
Parts List
35.3
1
35.2
2
35.1
34
4
33
5
32
14.1
31
28.1
36 36.1
30
29
7
28.1 28.1 28.1
28
not use out doors or on wet surfaces.
27
Avertissement – Pour reduire les risques
29.5 28.6 29.1
18
de choc electrique, ne pas utiliser a l’exterieur et ne pas
aspirer de matieres humides.
25
19
Advertencia – Para reducir el riesgo de un
24
electrochoque, no usarlo afuerra o mojado.
23
WARNING – To reduce the risk of burns, fire,
22
• Do not leave appliance unattended when plugged in. Unplug
from outlet when not in use and before servicing.
• Do not use outdoors or on wet surfaces.
• Do not try to recover any liquid with this vacuum. This vacuum
is for DRY Recovery only.
• Do not allow to be used as a toy. Close attention is necessary
when used by or near children.
• Use only as described in this manual. Use only manufacturer’s
recommended attachments.
• Do not use with damaged cord or plug. If appliance is not working as it should, has been dropped, damaged, left outdoors or
dropped into water, return it to a service center.
• Do not pull or carry by cord, use cord as a handle, close a door
on cord, or pull cord around sharp edges or corners. Do not run
appliance over cord. Keep cord away from heated surfaces.
• Do not unplug by pulling on cord. To unplug, grasp the plug, not
the cord.
• Do not handle plug or appliance with wet hands.
• Do not put any object into openings. Do not use with any
blocked opening. Keep free of dust, lint, hair, or any thing that
may reduce air flow.
• Keep hair, loose clothing, fingers and all parts of body away
from openings and moving parts.
• Turn off all controls before unplugging.
• Use extra care when cleaning on stairs.
• Do not use to pick up flammable or combustible liquids, such as
gasoline or use in areas where they may be present.
• Connect to a properly grounded outlet only. See grounding
instructions.
• Do not pick up any objects that are burning or smoking, such as
cigarettes, matches or hot ashes.
• Do not use without a dust bag and / or filters in place.
• Do not operate with wet hands.
2
37
7.1
WARNING – To avoid risk of electrical shock, do
electric shock, or personal injury:
38
3
8
9
10
11
12
20
13
17 16 15 14
21
6
39
KeyQty Description
1
1
Filter assembly
2
1
Filter assembly
3
1
Filter assembly
4 1Motor
5 1Thermo-protector
6
1
Extension cord
7
1
Cover latch
7.1 Screws
8 1Switch
9
25
Screws (M3*25)
10
15
Screws (M3*15)
11
1
Upper part of switch box
12
1
Connector terminal & insulator
13
1
Power supply cords & cord sets
14
1
Wire connector & soldering log
14.1 1
Wire connector soldering log
15
1
Lower part of switch box
16
1
Connection cord
17
1
Cord protector assembly
18
1
Cord protector assembly
19
12
Screws (M3.5*12)
20
1
Cord protector assembly
21
1
Round rubber support
22
1
Sound muffler (foam filter)
23
10
Screws (M5*10)
24
1
Plastic air diffuser
KeyQty Description
25
15
Screws (M5*15)
27
15
Screws (M5/16*15)
28
1
10Q canister body
28.1 1
Grounding wire
28.2 1
Harness hanger 1
28.3 1
Aluminum rivit (4.2*12)
28.41 Washer
28.5 1
20 foot gasket
28.6 10
Screw (M5*10)
28.7 1
Fastening nut M5
29
1
Big washer
30
1
Motor depression ring
31
1
10Q cloth dust bag
32
1
10Q dust bag
33
1
Cover seal ring
341 Cover
35.1 1
Hose inlet tube
35.2 1
Screw for hose
35.3 1
Screw cuff
36
2
Grounding wire
36.1 5
Wire connector
371 Handle
381 Hose
391 Harness
40
1
Rating label
41
1
Warning Label
Installation and Operating Instructions
GROUNDING
INSTRUCTIONS:
This appliance must be grounded. If it
should malfunction or breakdown,
grounding provides a path of least
resistance for electric current to reduce
the risk of electric shock. This appliance is
equipped with a cord having an
equipment - grounding conductor and
grounding plug. The plug must be inserted
into an appropriate outlet that is properly
installed and grounded in accordance with
all local codes and ordinances.
Grounded
Outlet
Grounding Pin
DANGER - Improper connection
of the conductor can result in a risk of
electric shock. Check with a qualified
electrician or service person if you are
in doubt as to whether the outlet is
properly grounded. Do not modify the
plug provided with the appliance.
NOTE: Static shocks are common
in dry areas or when the relative
humidity of the air is low. This is
only temporary and does not affect
the use of the Vacuum.
Motor
Vacuum motors must never be used in application in which wet or moist conditions
are involved, where dry chemicals or other
volatile materials are present, or where
airflow may be restricted or blocked. Such
motors are designed to permit the vacuumed
air to pass over the electrical wiring to cool
it. Therefore, any liquid (including water), dry
chemical or other foreign substance which
could come in contact with electrical conductors could cause combustion (depending
on volatility) or electrical shock. Failure to
observe these precautions could result in
property damage and severe personal injury,
including death in extreme cases.
Thermo-protector instructions
This appliance is equipped with a thermoprotector, which will cut off the circuit
automatically to prevent the motor from
overheating. Sufficiently plugging the airway
for an extended period will result in the
vacuum shutting off. If this occurs, press
the switch to turn the vacuum to its “OFF”
position and wait about 5 minutes for the
motor to cool to a safe operating temperature. Be sure to determine the cause of
overheating and rectify the problem before
using the vacuum cleaner again, or it will
continue to overheat and shut off. In some
instance the circuit is cut off because of high
motor temperature caused by dust bag clog
or airway block. Please unplug the vacuum
and check the inner dust bag and airway.
If the dust bag is too dirty and clogged,
replace with a new one. If airway is blocked,
please get rid of the blockage before reuse.
The motor can be restarted when it is cool.
Electrical
Excluding 220V motors, vacuum motors
operate on a standard 120 volt, 60Hz, AC
circuit. Severe changes in voltage, high or
low, can cause damage to the motor and
cause premature motor failure.
Extension Cord
To prevent electrical damage, use the
recommended 16 gauge extension cord
provided. If you need to use a 100 foot cord,
it must be 14 gauge or better. Do not use
cords longer than 100 feet.
Preparation for Operation
1.Remove the cover
(No. 34) and cover
seal ring (No. 33),
pull out the cloth
dust bag (No. 31).
Check to see that
Figure A
the filter guards
(No. 1, No. 2 and
No. 3) have not shifted during shipping
(Figure A).
2.Install an inner dust bag (No. 32) inside
of the outer cloth dust bag (No. 31). At
the beginning of each shift, the bags
should be checked. Empty or replace as
necessary. Note: Never use a dust bag
without the cloth dust bag.
3.This unit had 2 filter options. The open
top filter can be emptied and reused. The
closed top filter is designed to be filled
and disposed of. There fore if there are
any harmful contaminants in the filter
bag, they wont escape the filter bag. The
vacuum is equipped with a filter agitator
rod. The knob, which can be seen from
on top, can be pulled up and shaken
from side to side when the vacuum is
turned off to knock the debris off the
filter and back to the bottom of the filter
bag, increasing your suction once more.
4.Place the cover seal
ring (No. 33) on the
dust bags’ opening
(No. 32). (Figure B)
5.Replace the cover
(No. 34) and clip the
Figure B
sunken edge of the
cover tight by pushing downward the
cover clip (No. 7).
6.Push the bent
Figure C
connector tube
(No. 35) into the
cover (No. 34),
make sure that it
inserts into the
cover (No. 34)
completely and
tightly (Figure C).
7.Check the hose ends to make sure that
they are tightly fixed.
8.Check the wear on the cord by the
vacuum body ad
at the plug. Pass Figure E
the power supply
cord (No. 13)
through the strip
outside the left
side of the waist belt. (Figure E).
9.Fix the switch box (No. 11 and No. 15)
under the sewn strap and knot the other
strap around the switch box. (Figure F &
Figure G).
Figure F
Figure G
3
10.Loosen the waist
Figure D
belt latch and
chest belt latch.
In an open area,
lift the vacuum by
one shoulder strap
and slide your free
arm into the other
strap. (Figure D)
11.Adjust the shoulder straps to allow
the waist belt to be buckled around
your waist.
12.Fasten the waist belt and chest belt
snugly and
make sure the
weight is resting
comfortably on
your hips. NOTE:
The back-plate
is adjustable
up or down by
removing the
Figure H
four screws (No.
27) that attach to
the vacuum’s body. (Figure H)
13.Attach tools to the handle and make sure
the two ends are tightly connected.
Proper Vacuuming Motion for
Large Area with Direct Suction
Tools
1.
Begin with the wand parallel to
your body.
2.Draw the top of the wand in towards
your waist and twist at the waist
walking back and forward (a side-toside motion).
3.The motion is similar to mopping
and keeps the upper body and arms
from tiring.
Maintenance Instruction
Warning - The following
information is for use by qualified
service personnel only and is to provide
guidance for troubleshooting and
maintenance.
• U
nplug the vacuum when working on
the motor or any electrical part.
•Check the condition of all electrical
cords before each use.
•Do Not lubricate the motor; it is
equipped with sealed bearings.
Manual110810
4
•The appliance has NO user serviceable
parts.
Proper Storage
When the vacuum is not in use, it should
be stored in a dry place.
Electrical Cord Care
NEVER stretch the cord tightly between
the vacuum and the outlet. A cord that is
stretched or pulled will not function properly and creates a danger. After vacuuming,
unplug the cord and wind it up loosely.
DO NOT wind the cord up by wrapping it
around our hand and elbow.
Caring for your
Vacuum
1.Every time you finish vacuuming, shake
out the cloth and dust bags (No. 31 and
No. 32).
2.Each week, rinse, dry and return the
foam (No. 21) at the bottom of the appliance below the motor.
3.After each shift, wipe the inside and
outside of the vacuum with a household
cleaning agent.
Filter Maintenance
1.Check the dust bag (No. 32) each
time you start and finish vacuuming.
A clogged and dirty dust bag restricts
airflow and results in reduced suction
and overheating.
2.While vacuum- Figure J
ing throughout
a building, stop
every two hours
or as needed to
shake out the
dust bag (No.
32). Replace the
dust bag when
necessary. (Figure J). NOTE: Lift both
dust bag and cloth bag out at the same
time to avoid ripping the dust bag,
especially when it is full.
3.Once a month (or more often if necessary) hand or machine wash the cloth
dust bag (No. 31) and let it LINE DRY.
(Do not put it in the dryer)
4.Once a month
Figure K if
(or more often
necessary)
clean the
filter (No. 2)
between the
motor guards,
located inside the vacuum under the
paper and cloth dust bag. (Figure K)
a.Pull the top piece of the motor guard
(No. 1) off and remove the foam
media (No. 2). Shake it out, rinse it
and let it air dry thoroughly.
b.Before the next use, return the foam
media (No. 2) to its place. Replace
with new foam media if necessary.
c.Firmly snap the top piece of the motor guard (No. 1) into place.
5.Each week rinse, air dry, and return the
foam filter (No. 22) at the bottom of the
appliance below the motor.
a.Pull out the round rubber support
(No. 21) and take foam filter (No.
22) out, rinse it and let it air dry
thoroughly.
b.Before the next use, return the foam
filter (No. 22) to its place.
c.Put the round rubber support (No.
22) into the canister to support the
foam filter from falling down.
1285 East 650 South, Price, Utah 84501
p 435.637.5885 f 435.637.5895
www.dustlesstools.com