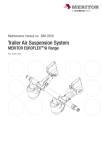
1
350 S. St. Charles St. Jasper, In. 47546
Ph. 812.482.2932 Fax 812.634.6632
www.ridetech.com
Part # 11380299
99-06 Silverado Level 2 Complete Air Suspension System
Front Components:
1
11383001
Master Series Single Adjustable Front Shockwaves
1
11382899
Front Lower StrongArms
1
11383699
Front Upper StrongArms
Rear Components:
1
11386799
Rear AirBar – Bolt-on 4 Link
1
11380801
Rear Master Series Single Adjustable Shockwaves
Compressor System:
1
30334100
5 gallon RidePro Digital Compressor Kit
350 S. St. Charles St. Jasper, In. 47546
Ph. 812.482.2932 Fax 812.634.6632
www.ridetech.com
Part # 11383001
99-06 GM Silverado Front Master Series SA Shockwaves
For Use w/ StrongArms
ShockWave Assembly:
2
24090199
Master Series double convoluted assembly -255 type
2
24139999
3.5” stoke Master Series single adjustable shock
2
70008913
Locking ring
4
90001994
.625” I.D. bearing
8
90001995
Bearing snap ring
2
90002024
1.7” Adjustable eyelet
Components:
4
90002043
Aluminum Spacer ½” ID
2
90000097
Upper Shockwave Mount
2
90000359
Upper Stepped Washer
2
31954201
¼”npt x ¼” tube swivel elbows
Hardware:
2
99501018
½”- 13 x 1 ½” Carriage Bolt
Upper Shockwave Mount to frame
2
99502001
½”- 13 Nylok
Upper Shockwave Mount to frame
4
99503001
½” SAE Flatwasher
Upper Shockwave Mount to frame
2
99501010
½” – 20 x 2 ¼” Hex Head Bolt
Upper Shockwave to bracket
2
99502003
½” – 20 Jam Nylok
Upper Shockwave to bracket
Installation Instructions
1. Raise and support truck at a safe, comfortable working height. Let the front suspension hang
freely.
2. Remove the coil spring, shock absorber, bump stop, upper control arm, and lower control arm.
Refer to factory service manual for proper disassembly procedure.
3. Apply thread sealant to an elbow air
fitting and screw it into the top of the air
spring.
4. Insert the carriage bolt through the
square hole in the upper mount.
5. Bolt the top of the ShockWave to the
upper mount using a 1/2" x 2 ¼” bolt and
Nylok jam nut. Two 1/2" washers must
be installed on each side of the bearing.
6. Raise the Shockwave up to the coil
spring mount with the carriage bolt
sticking through the factory shock hole.
The hole is the frame is larger than the
bolt, so a step washer is supplied. This
should be installed on top of the frame,
followed by a ½” Nylok nut.
Note: The kidney bean shaped cutout in
the upper bracket will match a protrusion
in the coil spring pocket. This will clock
the Shockwave so that when the
suspension moves the bearing will rotate
on the bolt. If this is not installed
properly it will damage the
Shockwave.
8. Attach the Shockwave to the lower
arm using a ½” x 3” bolt and Nylok nut.
An aluminum spacer must be installed
on each side of the bearing.
The care and feeding of your new ShockWaves
1. Although the ShockWave has an internal bumpstop, DO NOT DRIVE THE VEHICLE
DEFLATED RESTING ON THIS BUMPSTOP. DAMAGE WILL RESULT. The internal
bumpstop will be damaged, the shock bushings will be damaged, and the vehicle shock
mounting points may be damaged to the point of failure. This is a non warrantable situation.
2. Do not drive the vehicle overinflated or “topped out”. Over a period of time the shock valving
will be damaged, possibly to the point of failure. This is a non warrantable situation! If you
need to raise your vehicle higher that the ShockWave allows, you will need a longer unit.
3. The ShockWave is designed to give a great ride quality and to raise and lower the vehicle. IT
IS NOT MADE TO HOP OR JUMP! If you want to hop or jump, hydraulics are a better choice.
This abuse will result in bent piston rods, broken shock mounts, and destroyed bushings. This
is a non warrantable situation.
4. Do not let the ShockWave bellows rub on anything. Failure will result. This is a non
warrantable situation.
5. The ShockWave product has been field tested on numerous vehicles as well as subjected to
many different stress tests to ensure that there are no leakage or durability problems. Failures
have been nearly nonexistent unless abused as described above. If the Shockwave units are
installed properly and are not abused, they will last many, many years. ShockWave units
that are returned with broken mounts, bent piston rods, destroyed bumpstops or
bushings, or abrasions on the bellows will not be warrantied.
350 S. St. Charles St. Jasper, In. 47546
Ph. 812.482.2932 Fax 812.634.6632
www.ridetech.com
Part # 11382899
99-06 Silverado Front Lower StrongArms
For Use w/ Shockwave or CoilOver
Components:
1
90000106
Driver side lower arm
1
90000107
Passenger side lower arm
2
90000901
Lower ball joint (includes boot, grease fitting, castle nut & cotter pin)
2
90000198
3” inner bushing sleeve
2
90000199
3.5” inner bushing sleeve
8
90001085
Poly bushing half
2
90000921
90 degree 12mm PosiLink
2
90000922
Straight 12mm PosiLink
2
90000095
PosiLink T Bushing
2
90000096
PosiLink Spacer
4
90002062
Aluminum shock spacer
4
99250001
¼”-28 grease fitting – Use Lithium grease on frame bushings
Hardware Kit:
2
99122003
12mm x 1.75 x 60mm stud
PosiLink (Use Loctite)
4
99122001
12mm x 1.5 Nylok nut
PosiLink
6
99433002
7/16” SAE Gr.8 flat washer
PosiLink
2
99501024
½”-13 x 3” Gr. 5 bolt
Shock to lower arm
2
99502001
½”-13 Nylok nut
Shock to lower arm
Installation Instructions
1. After removing the factory lower
control arm, clean the bushing mounting
surfaces on the frame and lubricate with
Lithium grease.
2. Fasten the lower arm to the frame
using the factory hardware.
3. Slide the ball joint boot over the stud,
then push the stud down through the
spindle. Secure w/ the new castle nut
and cotter pin supplied.
4. Attach to the shock to the lower arm
using the ½” x 3” bolt and aluminum
spacers supplied.
5. Screw the Zerk fitting into the ball joint
and grease.
Sway bar
Control Arm Tab
99-06 Silverado CoolRide Driver Side StrongArm
Item #
1.
2.
3.
4.
5.
6.
7.
8.
9.
10.
11.
12.
13.
14.
15.
Description
Driver side arm
Inner bushing sleeve – 3”
Inner bushing sleeve – 3.5”
Poly bushing half
Aluminum shock spacer
½”-13 Nylok nut
½”-13 x 3” Gr. 5 bolt
Ball joint
90 degree 12mm PosiLink
Straight 12mm PosiLink
PosiLink T Bushing
PosiLink Spacer
12mm x 1.75 x 60mm stud
7/16” SAE Gr.8 flat washer
12mm x 1.5 Nylok nut
Qty.
1
1
1
4
2
1
1
1
1
1
1
1
1
3
1
350 S. St. Charles St. Jasper, In. 47546
Ph. 812.482.2932 Fax 812.634.6632
www.ridetech.com
Part # 11163699
67-69 GM “F” Body & 68-74 GM “X” Body Upper StrongArms
Components:
1
90000619
Driver side upper arm
1
90000620
Passenger side upper arm
2
90000908
Ball joint
2
90000919
Upper cross shaft
4
90000618
Cross shaft spacer
2
90001083
Medium bump stop w/ hardware
4
90000907
Control Arm Bushing
350 S. St. Charles St. Jasper, In. 47546
Ph. 812.482.2932 Fax 812.634.6632
www.ridetech.com
Part # 11383699
99-06 Silverado Upper Strong Arms
Components:
2
90000630
Upper StrongArm
2
90000902
Ball joint (includes boot, grease fitting, castle nut & cotter pin)
8
90001086
Poly bushing half
4
90001097
Inner bushing sleeve
4
99250001
¼”-28 grease fitting – Use Lithium grease on frame bushings
1. After removing the factory upper
control arm, clean the bushing mounting
surfaces on the frame and lubricate with
lithium grease.
2. Drop ball joint down through upper
arm. Install boot and fasten w/ the
hardware supplied.
3. Bolt the arm to the frame using the
factory camber bolts.
Note: The truck must be realigned before
driving.
TOP
4. Push the stud through the spindle,
secure w/ the new castle nut and cotter pin.
A
DRILL OUT HOLE
WITH 1/2" DRILL BIT
SILVERADO
SPINDLE
5. Secure the brake line and ABS harness
to the upper control arm. Allow enough
slack for full suspension travel.
6. Screw Zerk fitting into ball joint and
grease.
7. Lubricate the frame bushings w/
Lithium grease.
.477
.500
DETAIL A
SHADED AREA REMOVED BY DRILLING
BOTTOM OF H0LE WITH 1/2" DRILL BIT.
Item #
1.
1.
2.
3.
4.
5.
6.
7.
Description
Passenger side arm
Driver side arm
Ball Joint
Poly bushing half
Inner bushing sleeve
5/16"-24 x 1” hex bolt
5/16"-24 nut
5/16” lock washer
Qty.
1
1
2
8
4
8
8
8
350 S. St. Charles St. Jasper, In. 47546
Ph. 812.482.2932 Fax 812.634.6632
www.ridetech.com
Part # 11386799
99-06 Silverado Rear AirBar
Components:
2
90009000
1
90000304
1
90000307
2
90000311
1
90000209
1
90000310
2
90000070
2
90000042
1
90000308
1
90000207
1
90000208
1
90000305
1
90000306
2
90001038
2
90000987
1
90000971
2
90000198
4
90001085
3
90001584
8
90001942
2
90001082
2
90001617
1
99010008
Tapered sleeve air spring
Lower bridge assembly
Upper bridge assembly
C-notch spacer for 2000 & older trucks
Carrier bearing bracket
¼” transmission spacer
Air spring roll plate
Upper axle bracket
Panhard bar axle bracket
Driver side c-notch frame section w/ shock mount
Passenger side c-notch frame section w/ shock mount
Driver side upper frame bracket
Passenger side upper frame bracket
Lower bar – WW 33.250”
Upper bar - TW 23.625” (C-C 25.375”)
Panhard bar - TW 20.500” (C-C 22.250”)
Inner bushing sleeve - 3/4" O.D. x 5/8 I.D. (installed in lower bar)
Poly bushing half - (installed in lower bar)
Threaded rod end - 5/8” x 3/4" (w/ rubber bushing pressed in)
Rubber bushing - Pressed into bars & rod ends
Short bump stop
.625” shock stud
Hardware kit
350 S. St. Charles St. Jasper, In. 47546
Ph. 812.482.2932 Fax 812.634.6632
www.ridetech.com
Hardware Kit – Part # 99010008
4
6
6
4
10
6
12
6
46
92
48
2
1
8
7
8
8
16
5
5
5
5
3/8 x 3/4 uss bolts
upper air spring mounting
3/8 lock washer
air spring mounting
3/8 x 1 uss bolt
air spring mounting & carrier bearing plate
3/8 nyloc nuts
carrier bearing plate
3/8 sae flat washers
carrier bearing plate & air spring mounting
7/16 x 1 1/4 uss bolt
upper frame bar mount
7/16 uss flat washer
upper frame bar mount
7/16 uss nyloc nuts
upper frame bar mount
1/2 x 1 1/2 uss bolts
C-notch to frame & upper bridge
1/2 sae flat washers
C-notch to frame & upper bridge
1/2 uss nyloc nuts
C-notch to frame, upper bridge & shocks
1/2 x 2 1/2 uss bolts
lower shock mounting
5/8 lock washer (gr. 8)
Heim end to axle cover brk.
5/8 x 2 3/4 sae bolts (gr. 8)
rod ends to brackets & panhard bar axle bracket
5/8 sae nyloc jam nuts (gr. 8)
rod ends to brackets
5/8 x 6 sae bolts (gr. 8)
bridge to axle
5/8 sae nyloc nuts (gr. 8)
bridge to axle
5/8 sae flat washers (gr. 8)
bridge to axle
3/4 sae jam nuts
lock nuts for rod ends
m8x40mm bolts
panhard bar mount to axle cover
m8 flat washers
panhard bar mount to axle cover
m8 lock washers
panhard bar mount to axle cover
NOTE: oem spring hanger bolt is used for lower front bar to spring hanger!
99-01GM Sierra / Silverado rear AirBar installation
1. Raise truck to a comfortable working height and support safely with jackstands under the frame.
Place these stands ahead of the leafspring mount and at the rear of the frame to support it when the
C notch is installed.
2. The C notch frame section
will be installed first. Note that
the front edge of the C notch
is butted up to the round tube
crossmember. Place the C
notch against the framerail to
scribe the outline for cutting
the framerail. Be sure to
“round” the corners of the cut
to avoid any stress points.
This is the layout for cutting the frame
for the C notch. Using a 1/2” drill to
make the corners produces a rounded
corner which is much less susceptible
to a stress crack.
3. Using a saw or a cutoff wheel, trim
the framerail on the marked lines.
4. Install the c notch onto the framerail. The
C notch fits between the tube style
crossmembers located in front of and behind
the axle, so there is only one way they will fit.
[NOTE: on 1999 and 2000 model trucks the
framerail is approx. ¼” shorter in height than
the later models. A spacer plate is provided
to adapt our notches to these applications. It
is installed between the bottom of the frame
and the C notch.] Using the holes in the C
notch as a template, drill through the
framerail and attach using the included
hardware.
6. After the C notches are installed, the jackstands placed at the rear of the truck can now be moved
to support the axle housing. When this is done the leafsprings can be removed.
7. After the leafsprings are removed the
lower axle bracket bridge can be
installed. This will require an assistant
to hold the assembly while the fasteners
are installed. This piece has “ears” that
will locate into the bottom of the oem
leafspring pad on the axle tube. The
axle brackets are contoured to fit
around the axle tube very snugly. An
excess of powdercoating or dirt on the
axle tube may require cleaning or filing
for best fit. The lower bridge assembly
is combined with the upper axle
brackets to “sandwich” the axle tube for
maximum strength. Be sure to use the
supplied grade 8 axle bolts. washers,
and nyloc nuts.
8. After the axle bridge assembly is
installed, the upper bar frame brackets
can be installed. These brackets will use 2
of the leafspring hangar rivit holes and
one additional drilled hole for attachment.
Grind the heads off of two of the
leafspring hangar rivets and punch them
out. You may have to run a drill through
the rivets holes to clean them up. Use the
bracket as a guide to drill the additional
attachment hole.
9. The bottom 4 link bar [longer] is installed into the oem leafpring hangar. NOTE: This system is
designed to use the OEM leafspring hangar. DO NOT use an aftermarket “dropped” leafspring
hangar. It will affect the position of the lower bar resulting in poor bar angle, pinion angle and
vibration.
The shorter bars are installed into the upper frame and axle bar brackets. Be sure to use the supplied
grease to lubricate these bushings during assembly.
10. Install the panhard bar axle bracket as
shown. You MUST use the fasteners that are
supplied with the system. The original bolts are
too short and are not strong enough.
11. The upper airspring
crossmember can now be installed.
It is bolted into the top flange of the
C notch assemblies with the
panhard bar bracket on the drivers
side. This will position the airspring
mounts behind the crossmember.
The brakeline junction box may
need to be relocated slightly. The
panhard bar can now be installed.
12. Install the airsprings into the mounts. Be
sure to use the round roll down plate provided
between the airspring and the lower bridge
mount to avoid damage to the airspring when
deflated.
13. The shocks are installed as shown
to the left. [your upper shock mount
may appear slightly different] Note the
routing of the parking brake cable.
14. This photo shows how the bed brace and the
exhaust heat shield are trimmed for clearance. The
bed will need to be reinstalled to mark the exact
location of the cut.
15. The bed brace will also need to be trimmed
for clearance of the C notch reinforcement. A
cutoff wheel does a good job here.
20. The driveshaft carrier bearing will need to be relocated to optimize driveline angles at your new
lower ride height. The oem carrier bearing bracket is sectioned as shown in the picture to the left. The
new carrier bearing bracket is then bolted onto the remaining tabs. The carrier bearing mount is
rotated 180 degrees and attached to the supplied bracket as shown in the picture on the right.
350 S. St. Charles St. Jasper, In. 47546
Ph. 812.482.2932 Fax 812.634.6632
www.ridetech.com
Your AirBar installation is now basically complete. Recheck all fasteners for proper tightness and
check the airsprings for abrasion throughout the full range of suspension travel. NOTE: If you are
using an aftermarket wheel and tire combination, the overall height of your tires MUST be at least 28”.
Shorter tires will allow the chassis to touch the ground at full deflation. This IS NOT an acceptable
condition and MUST be resolved by either using taller tires or a taller bumpstop. Taller tires are
recommended.
IT IS THE FINAL RESPONSIBILITY OF THE INSTALLER/CUSTOMER TO ENSURE THAT THE
AIRSPRING DOES NOT RUB ON ANYTHING AT ANYTIME AND TO ENSURE THAT PROPER
GROUND CLEARANCE IS MAINTAINED AT ALL TIMES!
350 S. St. Charles St. Jasper, In. 47546
Ph. 812.482.2932 Fax 812.634.6632
www.ridetech.com
Part # 11380801
99-06 Silverado Rear Master Series SA Shock Kit
For Use w/ AirBar
Components:
2
24169999
6” stoke Master Series single adjustable shock
2
90002024
1.7” eyelet – with adjustment knob
4
90001994
.625” I.D. bearing
8
90001995
Bearing snap ring
4
90002043
Aluminum bearing spacers - .500” I.D.
4
90002067
Aluminum bearing spacers - .625” I.D.