1
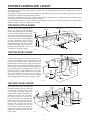
ASSEMBLING THE TUBING SYSTEM
Once you have installed all your inlets, you can complete the
network of tubing that connects your inlets to the power unit.
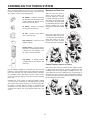
This network consists of the following parts:
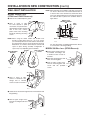
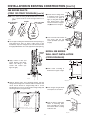
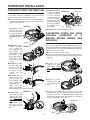
BEGINNING THE TRUNK LINE
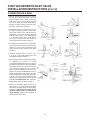
Start the inlet line which is
farthest from the power unit.
Place 90° elbow onto a section
of tubing and align it with the
inlet tubing at the height it will
run across the attic joists. Mark
the inlet tubing where the elbow
will join, allowing 5/8˝ for the
tubing that inserts into the fitting
collar.
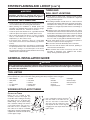
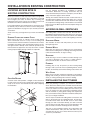
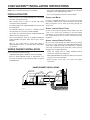
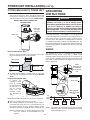
90° Elbows – Used for connecting
the inlet lines to the branch lines. Also
used for making smooth 90° turns in
branch lines or trunk lines.
45° Elbows – Used for a 45° tubing
turn in branch or trunk lines.
90° Tees – Used to connect branch
lines to the trunk lines.
AO0049
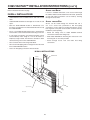
Now, cut the inlet tubing at the
marked line. Make sure the cut
is straight and even. Attach the
elbow and check its fit. Then,
insert the first section of tubing
into the other end of the elbow.
Stop Couplings – Used to join two
lengths of tubing.
AO0050
Flexible Tubing – Used to bypass
obstacles or to make difficult S-turns
in branch lines. This tubing is is not
the same as the inlet flex tube.
PVC Tubing – 8’ straight sections
of tubing used for inlet, branch and
trunk lines.
AO0051
AO0052
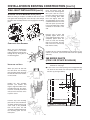
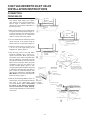
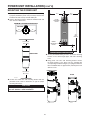
JOINING STRAIGHT LENGTHS OF TUBING
AA0012
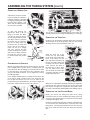
Both branch lines and the trunk lines may require lengths
of tubing longer than those 8´ sections supplied. Use stop
couplings to join two straight lengths of tubing. Insert one end
of the tubing into the stop coupling; join the second length of
tubing into the other end of the stop coupling. Stop couplings
are also used to join long vertical branches which run from one
level to another level of a house.
Use the tubing and fittings to run branch lines from the inlet
tubing to a main trunk line. Begin at the farthest inlet from the
power unit and work your way toward the power unit. When
you assemble sections with elbows and tees, make sure the
curve in the fitting is aligned so that the air flows toward the
power unit.
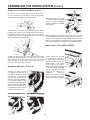
Assemble the entire network of tubing and fittings, making
sure every joint is accurately cut and aligned. Then, go back
and cement all the joints. You may run the wiring and make
the wiring connections after the network is assembled and
cemented, or you may make the wiring connections as you
assemble the network. Use the method that best suits your
needs.
AO0053
24
AO0054