1
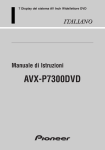
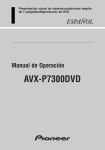
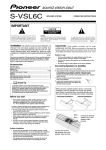
7 Inch Wide AV System Display
ENGLISH
Operation Manual
AVX-7300
Selecting fine audio equipment such as the unit you’ve just purchased is only the start of your
musical enjoyment. Now it’s time to consider how you can maximize the fun and excitement
your equipment offers. This manufacturer and the Electronic Industries Association’s Consumer
Electronics Group want you to get the most out of your equipment by playing it at a safe level.
One that lets the sound come through loud and clear without annoying blaring or distortion—
and, most importantly, without affecting your sensitive hearing.
Sound can be deceiving. Over time your hearing “comfort level” adapts to higher volumes of
sound. So what sounds “normal” can actually be loud and harmful to your hearing. Guard against
this by setting your equipment at a safe level BEFORE your hearing adapts.
To establish a safe level:
• Start your volume control at a low setting.
• Slowly increase the sound until you can hear it comfortably and clearly, and without distortion.
Once you have established a comfortable sound level:
• Set the dial and leave it there.
Taking a minute to do this now will help to prevent hearing damage or loss in the future. After all,
we want you listening for a lifetime.
We Want You Listening For A Lifetime
Used wisely, your new sound equipment will provide a lifetime of fun and enjoyment. Since
hearing damage from loud noise is often undetectable until it is too late, this manufacturer and the
Electronic Industries Association’s Consumer Electronics Group recommend you avoid prolonged
exposure to excessive noise. This list of sound levels is included for your protection.
Decibel
Level
30
40
50
60
70
80
Example
Quiet library, soft whispers
Living room, refrigerator, bedroom away from traffic
Light traffic, normal conversation, quiet office
Air conditioner at 20 feet, sewing machine
Vacuum cleaner, hair dryer, noisy restaurant
Average city traffic, garbage disposals, alarm clock at two feet.
THE FOLLOWING NOISES CAN BE DANGEROUS UNDER CONSTANT EXPOSURE
90
Subway, motorcycle, truck traffic, lawn mower
100
Garbage truck, chain saw, pneumatic drill
120
Rock band concert in front of speakers, thunderclap
140
Gunshot blast, jet plane
180
Rocket launching pad
Information courtesy of the Deafness Research Foundation.
i
For U.S. and Canadian Models
About This Product
Video System of a Connected Component
This product is compatible with the NTSC system. When connecting other components
to this product, be sure components are compatible with the same video systems. If it is
not, images will not be correctly reproduced.
Precaution:
• This product is incompatible with the PAL system. Refer to “Video System of a Connected
Component” on page 2 for explanation of other area models video system.
Important
The serial number of this device is located on the bottom of this product. For your own security and convenience, be sure to record this number on the enclosed warranty card.
Precaution
After-sales Service for Pioneer Products
Please contact the dealer or distributor from where you purchased the product for its
after-sales service (including warranty conditions) or any other information. In case the
necessary information is not available, please contact the companies listed below:
Please do not ship your product to the companies at the addresses listed below for
repair without advance contact.
7 U.S.A.
Pioneer Electronics Service, Inc.
CUSTOMER SERVICE
DEPARTMENT
P.O. Box 1760
Long Beach, CA 90801
800-421-1404
7 CANADA
Pioneer Electronics of Canada, Inc.
CUSTOMER SATISFACTION
DEPARTMENT
300 Allstate Parkway
Markham, Ontario L3R OP2
(905) 479-4411
1-877-283-5901
For warranty information please see the Limited Warranty sheet included with your product.
ii
Before Using
IMPORTANT SAFEGUARDS
PLEASE READ ALL OF THESE INSTRUCTIONS REGARDING YOUR DISPLAY
AND RETAIN THEM FOR FUTURE REFERENCE
1. Read this manual fully and carefully before operating your display.
2. Keep this manual handy for future reference.
3. Pay close attention to all warnings in this manual and follow the instructions
carefully.
4. Do not allow other persons to use this system until they have read and understood the operating instructions.
5. Do not install the display where it may (i) obstruct the driver’s vision, (ii)
impair the performance of any of the vehicle’s operating systems or safety
features, including air bags, or (iii) impair the driver’s ability to safely operate the vehicle.
6. As with any accessory in your vehicle’s interior, the display should not divert
your attention from the safe operation of your vehicle. If you experience difficulty in operating the system or reading the display, please park safely
before making adjustments.
7. Do not attempt to install or service your display by yourself. Installation or
servicing of the display by persons without training and experience in electronic equipment and automotive accessories may be dangerous and could
expose you to the risk of electric shock or other hazards.
8. Please remember to wear your seat belt at all times while operating your
vehicle. If you are ever in an accident, your injuries can be considerably
more severe if your seat belt is not properly buckled.
iii
Before Using
5
Contents
Dear Customer .............................................. i
For U.S. and Canadian Models .................... ii
- About This Product
- Important
- Precaution
IMPORTANT SAFEGUARDS ........................ iii
- PLEASE READ ALL OF THESE
INSTRUCTIONS REGARDING
YOUR DISPLAY AND RETAIN
THEM FOR FUTURE REFERENCE
Before Using .......................................... 2
Before Using This Product .......................... 2
- About This Product
- How to Use This Manual
- To Ensure Safe Driving
- Precaution
- Be Sure to Adjust Picture
Brightness
- In Case of Trouble
- Preventing the Battery from
Becoming Exhausted
- Resetting the Microprocessor
Detaching and Replacing the Front Panel .... 5
- Theft Protection
Key Finder .................................................... 6
Operation of the Display ...................... 7
Deploying the Display .................................. 7
Screen Angle Adjustment .............................. 8
Closing the Display........................................ 9
Changing the Wide Mode ............................ 10
Switching the Illumination
Color (For European models) .............. 11
Switching the Video Source ........................ 12
Setting the Display .............................. 13
Operating the Setting Menu ........................ 13
- Entering the Display Setting Menu
- Switching the Video Select Setting
- Setting the Automatic Open Mode
- Adjusting the Bright
- Adjusting the Color
- Adjusting the Hue
- Adjusting the Dimmer
Others .................................................... 17
Using the Display Correctly ...................... 17
- Handling the Display
- About the Liquid Crystal (LCD) Screen
- Keeping the Display in Good Condition
- About the Small Fluorescent Tube
Appendix .............................................. 19
Specifications .............................................. 19
1
Before Using
Before Using This Product
About This Product
[For European models]
• This product complies with the EMC Directives (89/336/EEC, 92/31/EEC) and CE Marking
Directive (93/68/EEC).
Video System of a Connected Component [For models except U.S. and Canadian models]
Before Using
This product is NTSC/PAL system compatible. When connecting other components to
this product, be sure components are compatible with the same video systems. If it is not,
images will not be correctly reproduced.
How to Use This Manual
This manual is divided into the sections shown below.
Before Using:
Explanations of operations you should perform before
using this product.
Operation of the Display:
Explanations of how to use the display.
Settings the Display:
Explanations of how to use the display’s setting menu.
There is an index at the edge of each page in this manual.
2
Before Using
To Ensure Safe Driving
WARNING
• To avoid the risk of accident and the potential violation of applicable laws, this
product is not for use with a video screen that is visible to the driver.
• In some countries or states the viewing of images on a display inside a vehicle
even by persons other than the driver may be illegal. Where such regulations apply,
they must be obeyed.
To ensure safe vehicle operation, complicated functions are not operable during driving. If
any of these complicated functions are selected while driving, “YOU CANNOT USE THIS
FUNCTION WHILE DRIVING” is temporarily displayed on the display. To use these functions, please stop your vehicle and engage the parking brake.
Precaution
• Keep this manual handy as a reference for operating procedures and precautions.
• Always keep the volume low enough for outside sounds to be audible.
• Protect the product from moisture.
Be Sure to Adjust Picture Brightness
Although the angle at which the LCD can be positioned and viewed clearly is limited
because of its design, visibility can be improved by adjusting the pictures brightness.
When first using the display, adjust the picture to a brightness that allows clear visibility
at the angle of use. (Refer to page 15.)
3
In Case of Trouble
Should this product fail to operate properly, contact your dealer or nearest authorized Pioneer
Service Station.
Preventing the Battery from Becoming Exhausted
When using this product, be sure your car engine is running. If you use this product when
your engine is not running, the battery will become exhausted.
Resetting the Microprocessor
Before Using
The microprocessor must be reset under the following conditions:
When using this product for the first time after installation.
When the machine fails to operate properly.
When strange (incorrect) messages appear on the display.
Resetting
Press the RESET button.
Use a pen tip or other pointed instrument.
4
Before Using
Detaching and Replacing the Front Panel
Theft Protection
The front panel of this product is detachable to discourage theft.
When the front panel is detached, this product will not be operable as the front panel
contains the Signal receptor and OPEN/CLOSE button that are necessary for operation.
Detaching the Front Panel
• Eject the front panel.
The LED indicator will flash while the front panel is being detached.
Note:
• Take care not to grip it too tightly or drop it.
Replacing the Front Panel
• Replace the front panel by clipping it into place.
Align the groove on the bottom of the front panel with the guide on the main body,
and clip in.
Precaution:
• When replacing the front panel, avoid pressing any of the buttons.
• Avoid subjecting the front panel to excessive shocks.
• Keep the front panel out of direct sunlight and high temperatures.
5
Key Finder
The following diagram shows the display when it is deployed.
OPEN/CLOSE
button
Before Using
Display
RESET button
V.SOURCE button
ANGLE buttons
RGB button
WIDE button
6
Operation of the Display
Operation of the Display
Deploying the Display
• Turn your vehicle’s engine ON.
The display will be automatically deployed by the automatic close/open mode.
If the display is not automatically deployed, press the OPEN/CLOSE button.
Note:
• The automatic close/open mode will operate the display as follows.
* When the ignition switch is turned OFF while the display is deployed, the display will be
closed after approximately 6 seconds.
When the ignition switch is turned ON again (or turned to ACC), the display will be
deployed automatically.
* When using an AUDIO VISUAL MASTER UNIT, turning the power of either of these on
will deploy the display automatically.
* Installing the front panel will automatically deploy the display. (Refer to page 5.)
• The automatic close/open mode can be switched ON/OFF. (Refer to page 14.)
• When the ignition switch is turned OFF after the display has been closed, turning the ignition
switch ON again (or turning it to ACC) will not deploy the display. In this case, press the
OPEN/CLOSE button to deploy the display.
7
Screen Angle Adjustment
The angle of this product’s screen continues changing as long as you keep pressing the
ANGLE button.
• Adjust the screen to an easily viewable angle.
Operation of the Display
Precaution:
• If you can hear the display knocking against your vehicle’s console or dashboard, press the
ANGLE button on the (–) side to move the screen a little forward.
Note:
• When adjusting the angle, be sure to press the ANGLE button. Forcible adjusting of the display by hand may damage it.
• The adjusted angle of the display will be memorized and automatically returned to the next
time the display is deployed.
8
Operation of the Display
Closing the Display
• Turn the vehicle’s engine OFF.
The display will be automatically closed by the automatic close/open mode. If the
display does not close automatically, press the OPEN/CLOSE button.
Note:
• When closing the display, check to make sure that it has closed completely. If the display has
stopped halfway, leaving it like this could result in damage to it.
• The automatic close/open mode will operate the display as follows.
* When the ignition switch is turned OFF while the display is deployed, the display will be
closed after approximately 6 seconds.
When the ignition switch is turned ON again (or turned to ACC), the display will be
deployed automatically.
* Removing the front panel will close the display. (Refer to page 5.)
• The automatic close/open mode can be switched ON/OFF. (Refer to page 14.)
• When the ignition switch is turned OFF after the display has been closed, turning the ignition
switch ON again (or turning it to ACC) will not deploy the display. In this case, press the
OPEN/CLOSE button to deploy the display.
9
Changing the Wide Mode
You can select a desired mode for enlarging a 4:3 picture to a 16:9 one.
• Select the desired mode in the following order:
Full (FULL)
A 4:3 picture is enlarged in the horizontal direction only, enabling you to enjoy a 4:3
TV picture (normal picture) without any omissions.
Just (JUST)
The picture is enlarged slightly at the center and the amount of enlargement increases
horizontally to the ends, enabling you to enjoy a 4:3 picture without sensing any disparity even on a wide screen.
Cinema (CINEMA)
Operation of the Display
Full (FULL) = Just (JUST) = Cinema (CINEMA) = Zoom (ZOOM) = Normal
(NORMAL)
A picture is enlarged by the same proportion as FULL or ZOOM in the horizontal
direction and by an intermediate proportion between FULL and ZOOM in the vertical direction; ideal for a cinema-sized picture (wide-screen picture) where captions
lie outside.
Zoom (ZOOM)
A 4:3 picture is enlarged in the same proportion both vertically and horizontally;
ideal for a cinema-sized picture (wide-screen picture).
Normal (NORMAL)
A 4:3 picture is displayed as it is, giving you no sense of disparity since its proportions are the same as that of the normal picture.
Note:
• Different settings can be memorized for the AV, VTR and RGB video. In addition, different settings can also be memorized for a component (AV) connected to the AV-BUS input.
• The Wide Mode used for menu setting is switched to Full (FULL). The Wide Mode will return
when the menu setting is deleted.
• When video is viewed in a wide mode that dose not match its original aspect ratio, it may
appear differently.
• Remember that using the wide mode feature of this system for commercial or public viewing
purpose may constitute an infringement on the author’s rights protected by the Copyright Law.
• Video will appear roughened when viewed in CINEMA or ZOOM mode.
10
Operation of the Display
Switching the Illumination Color (For European models)
This product is equipped with two illumination colors, green and red. You can select the
desired illumination color.
• Switch to the desired illumination color.
Hold for 2 seconds
Repeat the preceding operation to switch to the previous color.
11
Switching the Video Source
7 Switching to RGB
You can watch videos from a component connected to this produt’s RGB input.
• Switch to RGB.
Note:
• If you select the “AVM” video select setting in the display setting menu, video is locked to
RGB. (See page 14.)
7 Switching to AV and VTR
You can switch between video from a component connected to this product’s video
input (VTR) and video from a component connected to the AV-BUS input (AV) .
Note:
• When switched to AV, you can watch video from the AV-BUS component selected with the
Head Unit’s source select.
Operation of the Display
Repeat the preceding operation to switch to the previous video source.
• Select the desired video source in following order:
AV = VTR
Note:
• If you select the “AVM” video select setting in the display setting menu, video is locked to
RGB. (See page 14.)
12
Setting the Display
Setting the Display
Operating the Setting Menu
Entering the Display Setting Menu
Perform display and picture setting with this menu.
1
Enter the Display Setting Menu.
Hold for 2 seconds
2
Select the desired mode in the following order:
Each press changes
the Mode ...
VSEL SET = AUTO OPEN = BRIGHT = COLOR* = HUE* = DIMMER
To cancel the Display Setting Menu, press the WIDE button again for 2 seconds.
Note:
• After entering the Display Setting Menu, if you do not perfome an operation within about 30
seconds, the Display Setting Menu is automatically canceled.
• When the video source is RGB, you can not switch the “COLOR” and “HUE”.
13
Switching the Video Select Setting
You can change the video select setting.
the WIDE button and select the video select mode (VSEL SET) in
1 Press
the Display Setting Menu.
2
Switch to the desired video select setting in the following order:
AUTO = MANUAL = AVM
When the Head Unit source is switched to a component (e.g. SDV-P7) connected to
the AV-BUS, output automatically switches to video from that component.
Note:
• If an SDV-P7 is connected, you can use this function when using the SDV-P7 with the IPBUS mode.
7 MANUAL
You can switch between VTR and AV with the V.SOURCE button. (Refer to
page 12.)
Setting the Display
7 AUTO
7 AVM
This prevents switching from video from a component connected to the RGB input.
Setting the Automatic Open Mode
To prevent the display from hitting the shift lever of an automatic vehicle when it is in the
“P” (park) position, or when you do not wish opening/closing of the display to be carried out
automatically, you can switch this function ON/OFF.
1
Press the WIDE button and select the automatic open mode (AUTO
OPEN) in the Display Setting Menu.
2
Switch the automatic open ON/OFF.
14
Setting the Display
Adjusting the Bright
You can adjust the bright of the picture.
1
Press the WIDE button and select the Bright mode (BRIGHT) in the
Display Setting Menu.
2
Adjust the Bright.
Note:
• The density of the display black can be adjusted within the range of “–24” to “+24.”
• The adjustment values are recorded separately for the AV, VTR and RGB video. The adjustment values of a component (AV) connected to the AV-BUS input are also recorded separately. Adjustment values are recorded when the vehicle lights are off (bright daylight) or on
(dark night) respectively.
Adjusting the Color
You can adjust the color of the picture.
1
Press the WIDE button and select the Color mode (COLOR) in the Display
Setting Menu.
2
Adjust the Color.
Note:
• “–24” to “+24” is displayed as it shifts from light color to dark color.
• The adjustment values are recorded separately for the AV, VTR and RGB video. The adjustment values of a component (AV) connected to the AV-BUS input are also recorded separately. Adjustment values are recorded when the vehicle lights are off (bright daylight) or on
(dark night) respectively.
15
Adjusting the Hue
You can adjust the hue of the picture.
1
Press the WIDE button and select the Hue mode (HUE) in the Display
Setting Menu.
2
Adjust the Hue.
Note:
Adjusting the Dimmer
The brightness of the LCD screen can be adjusted automatically to the brightness you set to
match the ambient brightness. Separate adjustment values can be recorded for bright conditions (yellow) as well as dark conditions (blue).
The brightness of the LCD screen will be adjusted automatically in accordance with the
ambient brightness based on the setting values.
The adjusted value is memorized when the setting screen disappears.
1
Press the WIDE button and select the Dimmer mode (DIMMER) in the
Display Setting Menu.
2
Adjust the Dimmer.
Setting the Display
• The display changes within a range from “–24” to “+24” as the distinction of the picture
changes from reddish to greenish.
• The adjustment values are recorded separately for the AV, VTR and RGB video. The adjustment values of a component (AV) connected to the AV-BUS input are also recorded separately. Adjustment values are recorded when the vehicle lights are off (bright daylight) or on
(dark night) respectively.
16
Others
Others
Using the Display Correctly
CAUTION
• If moisture or foreign matter should get inside the product, turn OFF
the power immediately and consult your dealer or the nearest authorized PIONEER Service Station. Using the product in this condition
may result in a fire or electric shock, or other failure.
• If you notice smoke, a strange noise or smell, or any other abnormal
signs from the display, turn OFF the power immediately and consult
your dealer or the nearest authorized PIONEER Service Station. Using
the product in this condition may result in failure of the system.
• Do not remove the rear cover of the display, as there are high-voltage
components inside which may cause an electric shock. Be sure to consult
your dealer or the nearest authorized PIONEER Service Station for
internal inspection, adjustments or repairs.
Handling the Display
• When the display is subjected to direct sunlight for a long period of time, it will
become very hot resulting in possible damage to the LCD screen. When not using
this product, close the display and avoid exposing it to direct sunlight as much as
possible.
• The display should be used within the temperature ranges shown below.
Operating temperature range: –20 to +60° C
Storage temperature range:
–40 to +85° C
At temperatures higher or lower than the operating temperature range the display
may not operate normally.
• The LCD screen of this product is exposed in order to increase its visibility within
the vehicle. Please do not press strongly on it as this may damage it.
• Do not place anything on the display when it is deployed. Also, do not attempt to
carry out angle adjustment, or opening/closing of the display by hand. Applying
strong force to the display may damage it.
• Do not touch the LCD screen as this may scratch it or dirty it.
• Be careful not to place anything between the display and the main body when the
display is opening or closing. If an object gets between the display and main body,
the display may stop working.
17
About the Liquid Crystal Display (LCD) Screen
• If the display is near the vent of an air conditioner when it is deployed, make sure
that air from the air conditioner is not blowing on it. Heat from the heater may
break the LCD screen, and cool air from the cooler may cause moisture to form
inside the display resulting in possible damage. Also, if the display is cooled down
by the cooler, the screen may become dark, or the life span of the small fluorescent
tube used inside the display may be shortened.
• Small black dots or white dots (bright dots) may appear on the LCD screen. These
are due to the characteristics of the LCD screen and do not indicate a problem with
the display.
• At low temperatures, the LCD screen may be dark for a while after the power is
turned ON.
• The LCD screen will be difficult to see if it is exposed to direct sunlight.
Keeping the Display in Good Condition
• When removing dust from the screen or cleaning the display, first turn the system
power OFF, then wipe with a soft dry cloth.
• When wiping the screen, take care not to scratch the surface. Do not use harsh or
abrasive chemical cleaners.
• A small fluorescent tube is used inside the display to illuminate the LCD screen.
* The fluorescent tube should last for approximately 10,000 hours, depending on
operating conditions. (Using the display at low temperatures reduces the service
life of the fluorescent tube.)
* When the fluorescent tube reaches the end of its useful life, the screen will be
dark and the image will no longer be projected. If this happens, consult your
dealer or the nearest authorized PIONEER Service Station.
Others
About the Small Fluorescent Tube
18
Appendix
Appendix
Specifications
General
Display
Power source .... 14.4 V DC (10.8 – 15.1 V allowable)
Grounding system .................................. Negative type
Max. current consumption ...................................... 4 A
Dimensions
(DIN)
(chassis) ...... 180 (W) × 50 (H) × 160 (D) mm
[7-1/8 (W) × 2 (H) × 6-1/4 (D) in]
(nose) ............ 188 (W) × 58 (H) × 31 (D) mm
[7-3/8 (W) × 2-1/4 (H) × 1-1/4 (D) in]
(D)
(chassis) ...... 178 (W) × 50 (H) × 165 (D) mm
[7 (W) × 2 (H) × 6-1/2 (D) in]
(nose) ............ 170 (W) × 46 (H) × 26 (D) mm
[6-3/4 (W) × 1-3/4 (H) × 1 (D) in]
(display) .......... 169 (W) × 125 (H) × 16 (D) mm
[6-5/8 (W) × 4-7/8 (H) × 5/8 (D) in]
Weight .................................................. 1.5 kg (3.3 lbs)
Screen size/Aspect ratio .................... 7 inch wide/16:9
(effective display area: 154 × 87 mm)
Pixels ........................................ 336,960 (1,440 × 234)
Type .................... TFT active matrix, transmissive type
Color system [For U.S. and Canadian models]
.................................................. NTSC Compatible
Color system [Other area models]
.......................................... NTSC/PAL Compatible
Operating temperature range .................. –20 to +60° C
Storage temperature range .................... –40 to +85° C
Angle Adjustment ........................................ 55 — 110°
Initial setting angle: 100°
Note:
• Specifications and the design are subject to
possible modification without notice due to
improvements.
19
Appendix
20
PIONEER CORPORATION
4-1, MEGURO 1-CHOME, MEGURO-KU, TOKYO 153-8654, JAPAN
PIONEER ELECTRONICS (USA) INC.
P.O. Box 1760, Long Beach, California 90801, U.S.A.
TEL: (800) 421-1404
PIONEER EUROPE NV
Haven 1087, Keetberglaan 1, B-9120 Melsele, Belgium
TEL: (0) 3/570.05.11
PIONEER ELECTRONICS AUSTRALIA PTY. LTD.
178-184 Boundary Road, Braeside, Victoria 3195, Australia
TEL: (03) 9586-6300
PIONEER ELECTRONICS OF CANADA, INC.
300 Allstate Parkway, Markham, Ontario L3R OP2, Canada
TEL: (905) 479-4411
PIONEER ELECTRONICS DE MEXICO, S.A. de C.V.
San Lorenzo 1009 3er. Piso Desp. 302
Col. Del Valle Mexico, D.F. C.P. 03100
TEL: 5-688-52-90
<KNKFF/01D00000>
Published by Pioneer Corporation.
Copyright © 2001 by Pioneer Corporation.
All rights reserved.
Publication de Pioneer Corporation.
Copyright © 2001 Pioneer Corporation.
Tous droits de reproduction et de traduction réservés.
Printed in Japan
Imprimé au Japon
<CRB1741-A> EW, UC, ES