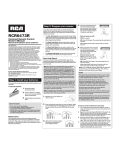
1
Rejuvenating
Oxygen Bar
With Turbo Air Flow
21% Oxygen in
Air at sea level
O x yge
nE
brane
mem
g
n
i
ch
nri
Model: OXY02
Owner’s Manual
Increases Oxygen to
30% concentrated
Increased Oxygen
Concentration
Improves:
•
•
•
•
•
Alertness
Energy
Stamina
Focus
Relaxation
Introduction
Rejuvenating Oxygen Bar
With Turbo Air Flow
Rejuvenating
Oxygen Bar
21% Oxygen in
Air at sea level
With Turbo Air Flow
21% Oxygen in
Air at sea level
n
O x yge
E
c
n ri
O x y ge
Model: OXY02
embrane
gm
n
i
h
n
brane
mem
g
n
hi
ric
En
Increases Oxygen to
30% concentrated
Increases Oxygen to
30% concentrated
Table of Contents
Table
of Contents
Brief
Introduction
Product and accessories illustration
Introduction
Precautions
Benefits of the Oxygen Bar
Operation
Diagram of Oxygen Bar & Control Panel
Maintenance
Product Information
Troubleshooting
Safety Information
Specifications
Operation
Maintenance
Troubleshooting
Specifications
2
3
4
53
63
94
5
11
5
11
6
9
11
11
Modeled after oxygen bars found in resorts and spas, Zadro’s Rejuvenating Oxygen Bar with
Turbo air flow increases the concentration of oxygen you breathe from 21% in the air* to about
30%** or about a 43% increase in oxygen levels.
• There are many benefits to increasing the amount of oxygen you breathe as oxygen is vital
to our well-being
and helps to heighten concentration, alertness and memory, improving
Product
Function
energy and stamina levels.
A•compressor
throughtothe
Enriching
Nano Membrane
Increasing theforces
supplyair
of oxygen
the Oxygen
lungs increases
the availability
of oxygenFilter.
to theThe
cells
filter
blocks
out
largeris the
air key
molecules
as Nitrogen
in our
bodies.
Oxygen
nutrient forsuch
the brain
and body. allowing for a higher
concentration
of oxygen.
It body
increases
the 21%
oxygen
levels
infacilitate
the air relaxation.
at sea level
• Oxygen is important
for the
to improve
general
well-being
and
of oxygen
in lower
energy
production
by the cells, making
feel sluggish
to• Low
30%levels
or about
43%result
more
Oxygen.
After
vapor condensation
and us
filtration,
the
and drained
of energy.
Environmental
stress,the
fatigue,
and lack
exercise At
arethe
key
increased
oxygen
is given
out to thepollution,
user through
Oxygen
Bar ofheadset.
factors
our oxygen
supply.
end
of thewhich
cycledeplete
the Tranquil
Sounds
Oxygen Bar will start the cleaning and purging
Introduction
cycle, clearing it and readying it for the next use.
Rejuvenating Oxygen Bar with Turbo Air Flow Operation:
• The Oxygen Bar works by drawing ambient air into the compressor which forces air
through the Oxygen Enriching Nano Membrane Filter, blocking out larger air molecules
such as nitrogen allowing for a higher concentration of oxygen.
• Physics
Principle
: Oxygen
is generated
naturally
filtering.
• Concentrated
oxygen
is then pumped
into themechanically
headset--wornand
either
over theby
head
or
around the
neck--where
it exits
through
flexible arm
of the headset
positioned near the
• Prompt
Oxygen
Supply
: Oxygen
isthe
generated
instantly
when the
nose or mouth,
allowing
machine
is turned
on. you to relax comfortably as you inhale.
• The Oxygen
Bar is
designed
with
your comfort
in mind
and provides
• High
efficiency
and
energy
saving
: Supplying
oxygen
at lowgentle
cost. air flow from the
headset to avoid drying and discomfort within the nose while still delivering a concentrated
• Time Setting : Time setting can be from 15, 30, 45, & 60 minutes.
30% oxygen level. Harsh air flow can cause drying of the nasal membranes, therefore,
• Relaxing Music : Listen to your own media player while you relax or listen to
concentrated oxygen is delivered for your comfort with a soft, gentle airflow.
soundsallows
provided
help release
tension.
• Nature
Turbo function
you totoreceive
accelerated
air flow. Air flow will be strengthened from
• Filters
: Filtration
keeps
out larger dust and impurities.
2.5 liters/min.
to 3.0
liters/min.
• Moderate
Flowthe
: Moderate
and
airtoflow
avoids
within
• After each Air
session,
Oxygen Bar
willmild
cycle
purge
excessdiscomfort
water vapor
and the nose.
• Headset
Headset
is designed
use.
impurities: from
the filter
so there isfor
nocomfortable
need to replace
filters. ENJOY!
Product Information
Sea level
• Vapor*AtPurging
: Design of the exhaust blower helps avoid residue vapor effect and
** Exact concentration of Oxygen produced depends on the location of use and the local Oxygen concentration
cleans the filter membranes.
Benefits of the Oxygen Bar
Safety Information
Oxygen creates life by converting fuel (carbohydrates, fats and proteins) into energy during aerobic
Caution : Advice on how to get the best performance from the machine.
respiration. Low levels of oxygen result in lower energy production making us feel sluggish and
drained of energy. Additional oxygen can benefit people from every walk of life in virtually all that we
Warning : Important safety information for hazards that might cause serious
do. Studies have shown that there are multiple benefits to using concentrated oxygen. When adding
injury
or machine
breakdown.
concentrated oxygen
to your
weekly routine,
various improvements can result. Some of the benefits
Danger
Danger : Urgent safety information for hazards that will cause serious injury or death.
include:
• Oxygen
improves
general well-being
*7
When the power cord is found
Check
the electrical
rating on the
• Oxygen
alertness
and memory
*2
damaged
or broken, send it to your
unitheightens
label andconcentration,
wall outlet before
Danger
dealer
or authorized
service
• Oxygen
gives youthe
energy!
of our energy comes from
oxygen,
and only 10%
fromcenter
food and
connecting
power90%
cord.
for examination or repair.
water *Check
4
When the power cord is found
the electrical rating on the
• Oxygen
helps
keep
levels
which allows longer exercise
sessions,
which
helps
weight
damaged
or broken,
send
it to
your
unit
label
andenergy
wall outlet
before
Do
not attempt
to open
cabinet.
If
Infant,
child,
or
disabled
people
dealer
or authorized
service
center
loss *1connecting the power cord.
service
is
required,
return
unit
to
a
should
use
under
the
watch
of
other
forand
examination
or repair.
• Oxygen is vital to your immune system, memory, thinking
sight
*
3
qualified dealer or an authorized
adult to avoid accidental injury.
• Oxygen promotes healing and counters aging *6
service center. Opening or
Doattacks
not attempt
to open
cabinet.
Infant,
child, oryour
disabled
tampering
the
unit will
void If
• Oxygen
strengthens
heart, people
reducing the risk of heart
*with
2
service is required, return unit to a
should
of other
warranty.
• Oxygen
calmsuse
yourunder
mind the
andwatch
stabilizes
your nervous system
*
3
qualified dealer or an authorized
adult to avoid accidental injury.
• Oxygen speeds up the body's recovery after physical exertion
service*5center. Opening or
tampering
with the unit
• Oxygen provides a natural remedy for headaches, migraines
and hangovers
*2 will void
warranty.
• Oxygen relieves temporary altitude discomfort *6
• Oxygen improves digestion and cell metabolism *4
• Oxygen relieves muscle stiffness, supports pre-athletic performance *1
3
• Oxygen lessens chronic fatigue syndrome and gives you better sleep patterns *6
Please remove the plug from
electric outlet when not in use.
brane
mem
Diagram of Oxygen
[ Control panel ]
ing
ch
i
r
n
Bar
and
n E Control
O x y ge
Music Indicator (x4) Time Indicator (x4)
Audio
Jack
Volume
Indicator
4
60
3
45
2
30
1
15
Product Information
Panel
Purge Indicator
Increases
Oxygen
to
Turbo
Indicator
30% concentrated
Operation
Indicator
Table of Contents
Do not and
reachnaturally
for the unitby
in the
event
• Physics Principle
Oxygen
is generated
mechanically
filtering.
Do not use: while
bathing
or
the unit falls into water. Unplug the
• Prompt Oxygen
when the
with wetSupply
hands. : Oxygen is generated instantly
unit immediately,
then send it to your
dealer or authorized service center
machine is turned on.
for examination or repair.
• High efficiency and energy saving : Supplying oxygen
at low cost.
• Time Setting : Time setting can be from 15, 30, 45, & 60 minutes.
• Relaxing Music : Listen to your own media player while you relax or listen to
Nature sounds provided to help release tension.
Warning
• Filters : Filtration keeps out larger dust and impurities.
• Moderate Air Flow : Moderate and mild air flow avoids discomfort within the nose.
DO NOT use the machine when there are any hazardous vapors or
• Headset : Headset is
designed for comfortable use.
pesticide spray in the room.
• Vapor Purging : Design
the
exhaust
helps
and
Do notof
use
while
bathingblower
or in other
wet avoid
locationresidue
to avoid vapor
the risk effect
of
cleans the filter membranes.
serious or fatal injury from electrical shock.
Do not leave the machine near heated areas. High heat will cause
VOLUME
the plastic case to deform.
Safety Information
Disconnect the power cord from the electrical outlet if not in use.
TURBO
Volume
Introduction
Control
3
Benefits of the Oxygen Bar
Diagram of Oxygen Bar & Control Panel
Music Selection Button
Product Information
Safety Information
[ Main body ]
Operation
Front of machine
Maintenance
Troubleshooting
Control Panel
Specifications
Start Timer Button
3
4
5
5
6
unit to
onget
a stable,
flat surface
during operation.
A tilted
or
Caution : Advice Place
on how
the best
performance
from the
machine.
unstable placement will result in shifting of internal parts thereby
On/Off Button
TURBO Button
Back of machine
causing
larger
vibration and
Warning : Important
safety
information
fornoise.
hazards that might cause serious
During operation, do not press hard upon the external plastic tube as
injury or machine breakdown.
this will result in air flow restriction and damage to unit.
Danger : Urgent safety information for hazards that will cause serious injury or death.
Safety Information – (Continued)
Danger
Dangerous
Caution
When
the unit
power
is found
Check the electrical rating on the
Keep the
andcord
all electrical
Please
remove
the plug
from
damaged
orfrom
broken,
send
it to your
unit label
and
wall outlet
before
cordsUSE.
away
heated
surfaces
THIS
MACHINE
IS
NOT
FOR
MEDICAL
It
is
designed
for
dealer
or authorized
service
connecting
power
electric the
outlet
whencord.
not in use.
or appliances.
The oxygen
willcenter
health maintenance.
for
examination
orflammable.
repair.
make
the material
9
11
Handle
Oxygen
Outlet
11
Do not block the ventilation port located on the back of unit.
Do not
not attempt
reach for to
theopen
unit incabinet.
the eventIf
Do
Infant,
orDo
disabled
people
Dochild,
not use
while
oron carpet or other soft
notbathing
set base
This
cause
air
thesurface.
unit is
falls
into could
water.
Unplug
theto a
service
required,
return
unit
should
watch of
flowthe
restriction
andother
damage to unit. qualified
withuse
wetunder
hands.
unit
immediately,
then
send
it
to
your
dealer
or
an
authorized
adult to avoid accidental
injury.
For best performance, regularly clean
the Intake
Filter
and
panel
dealer
orcenter.
authorized
service
service
Opening
orcenter
for examination
repair.
located in the back of the machine. tampering
with or
the
unit will void
Do not use the machine more than 60
minutes per session.
warranty.
Intake
Filter Panel
Exhaust Vent
Adjust operating time if necessary.
Fold-Out
Headset
Rack
4
Power Switch
Air Intake
4
Keep the unit and all electrical
cords away from heated surfaces
or appliances. The oxygen will
make the material flammable.
Heat
Dispelling
Vent
Power Cord
Warning
DO NOT use the machine when there are any hazardous vapors or
pesticide spray in the room.
Do not use while bathing or in other wet location to avoid the risk of
serious or fatal injury from electrical shock.
Do not leave the machine near heated areas. High heat will cause
the plastic case to deform.
Disconnect the power cord from the electrical outlet if not in use.
Place unit on a stable, flat surface during operation. A tilted or
unstable placement will result in shifting of internal parts thereby
causing larger vibration and noise.
During operation, do not press hard upon the external plastic tube as
this will result in air flow restriction and damage to unit.
Caution
5
Bar with Turbo Air Flow, check the contents and
make sure the following components are enclosed:
*
Oxygen concentrator unit
Headset and hose (including optional condensation
*In areas of high
Danger
humidity, use the
chamber and Ear buds)
condensation chamber to
Owner’s
Manual
collect
excess water
When
the
power
cord
is
found
[ Headset
]
Check the electrical rating on the
condensate from the unit.
2 If there
unit are
labelmissing
and wallitems,
outlet before
please contact the damaged or broken, send it to your
center
Headset
Note: Using
the
connecting
the
power
cord. your Rejuvenatingdealer or authorized service
dealer
where you
purchased
for examination or repair.condensation chamber
will reduce airflow. Use
Oxygen Bar with Turbo Air Flow.
only if necessary.
3 Read Owner’s Manual carefully.
Do not attempt to open cabinet. If
Infant, child, or disabled people
Ear
Buds
required,
return
unit to
a
4 Connect
shouldthe
use
under
the watch
other
hose
provided
toofthe
oxygen outletservice
on theisside
of the
Oxygen
Bar.
Diagram - Headset
Safety Information – (Continued)
qualified dealer or an authorized
service center.Adjusting
Opening Knob
or
for
tampering with
the unit
will void
Oxygen
Outlet
Postion
Dangerous
1 Place unit on a stable, flat surface which is clean warranty.
and
adult to avoid accidental injury.
Headset Flexible Arm
Operating
Procedure
free of dust. Do not set base on carpet or other soft
Headset
Tube
Keep the unit
and all
electrical
Please
thecause
plug from
surface
as remove
this could
air flow restriction andcords away from heated surfaces
electric
outlet
or appliances. The oxygen will
Oxygen
Outlet
damage
to
unit. when not in use.
2 Check to see that the power switch is in the " " make the material flammable.
(OFF) position. Plug power cord into electrical outlet.
Do not reach for the unit in the event
Do not use while bathing or
with wet hands.
the unit falls into water. Unplug the
unit immediately, then send it to your
dealer or authorized service center
for examination or repair.
Operation
Getting started
( Less air flow )
( More air flow )
Operation
A Time Setting
3 Press
the power switch to " " (ON) position. The power switch is located at
1 Press
the “Power” button on the control panel to start the machine.
the back of the machine in the lower bottom corner. When the power switch is
The music does not operate unless turned on.
turned
on it is in “stand by” status and there is no indication light.
2 Set the
running time by pressing the Start Timer Button as follows :
4 Position the headset over your ears and adjust the position of the flexible arm
Press
Button
one time
and the
will run 15 minutes, and the 15
so that thethe
oxygen
outlet
is below
the unit
nose.
minute indicator window will light.
Positioning
Press theheadset:
Button two times and the unit will run 30 minutes and the 30
minute indicator
window
will light.
Over Ear
Placement
Around Neck Placement
Press
the Button
three
times and
unitIndicator
will run 45
the 45
Indicator
(x4)the
Time
(x4)minutes
[ Control
panel
] Music
Purgeand
Indicator
minutes indicator window will light.
theIndicator
60
Turbo
Audio Press the Button four times and the unit will run 60 minutes and
Jack minutes indicator window will light.
60
4
Time
Press
the Setting
Button one time again and the45unit running time will be reset
to
Operation
Time
Setting
3
Indicator
15
minutes.
Volume
30
2
8 When the set time is counting down,
the
Indicator
When the
the set
set time
time is
is counting
counting down,
down,
the15time
time indicator
indicator
83 When
the
time
indicator
1
will
change
indicating
the
time
remaining.
will change
change indicating
indicating the
the time
time remaining.
remaining.
will
Diagram of Oxygen Bar and Control Panel
Operation
Operation
A
A
Selection
Adjust
Air Flow
B Music
VOLUME
Oxygen Outlet
TURBO
Volume
Ear
buds
can in
becan
used
listenon
to when
you own
selection
plugging them
Relaxing
music
beto
turned
the music
Oxygen
Bar is inbyoperation.
11 Move
the arm
an
Control
Warning
1 Open the box containing your Rejuvenating Oxygen
Bar with Turbo DO
Air Flow,
check
contents
and
NOT use
the the
machine
when
there are any hazardous vapors or
make sure the pesticide
followingspray
components
are enclosed:
in the room.
*
Oxygen concentrator
unit
Do not use
while bathing or in other wet location to avoid the risk of
or fatal injury
from condensation
electrical shock.
Headset and serious
hose (including
optional
*In areas of high
notbuds)
leave the machine near heated areas. High heat will cause
humidity, use the
chamber andDo
Ear
condensation chamber to
the plastic case to deform.
Owner’s Manual
collect excess water
Disconnect
the
power
cord
from
the
electrical
outlet
if
not
in
use.
condensate from the unit.
2 If there are missing items, please contact the
Place unit on a stable, flat surface during operation. A tilted or
Note: Using the
dealer where you
purchased
your
unstable
placement
willRejuvenating
result in shifting of internal parts thereby
condensation chamber
will reduce airflow. Use
Oxygen Bar with
Turbo
Air
Flow.
causing larger vibration and noise.
only if necessary.
3 Read Owner’sDuring
Manual
carefully.
operation,
do not press hard upon the external plastic tube as
4 Connect the hose
provided
oxygen
outlet
the side
of the Oxygen Bar.
this will
result intoairthe
flow
restriction
andon
damage
to unit.
Operating Procedure
1 Place unit on a stable, flat surface which is clean and
free of dust. Do not set base on carpet or other soft
Caution
surface as this could cause air flow restriction and
damage to unit.
THIS
IS NOT
USE. It is designed for
2 Check to see that
theMACHINE
power switch
is inFOR
the MEDICAL
" "
health maintenance.
(OFF) position. Plug power cord into electrical outlet.
Operation
Do not block the ventilation port located on the back of unit.
3 Press the power switch to "
" (ON) position. The power switch is located at
Do not set base on carpet or other soft surface. This could cause air
the back of the
machine in the lower bottom corner. When the power switch is
flow restriction and damage to unit.
turned on it isFor
in “stand
by” status and
there
is notheindication
light.
best performance,
regularly
clean
Intake Filter
and panel
4 Position the headset
your of
ears
adjust the position of the flexible arm
located inover
the back
the and
machine.
so that the oxygen
is machine
below the
nose.
Do notoutlet
use the
more
than 60 minutes per session.
6Positioning headset:
Adjust operating time if necessary.
into
jacktoselection
ofadjust
your personal
media player.
Turnthe
on audio
the
music
as follows:
up/down
direction
On/Off Button
Larger Hole
Press
the
Music
selection
button
one time,
the first
music Water,
selection
2 the
oxygen
outlet.
Relaxing
nature
sounds
provided
(Daytime
Brook,
Dripping
Whale
Small
Hole
Music
Selection
Button
TURBO
Button
Start
Timer
Button
indicator
will lightBrook)
and first
will beononwhen
continuously.
Calls,
& Nighttime
canmusic
be turned
the Oxygen Bar is in
( Less air flow )
( More air flow )
Press the
Music on
selection
button music
two times,
the second
music selection
operation.
Turning
the provided
selection
as follows:
indicator
will
light
and
second
music
will
be
on
continuously.
Press the Music selection button one time, the first music selection
[ MainTime
bodythe
]will
Press
Music
the third music selection
indicator
lightselection
and first button
music three
will betimes,
on continuously.
Setting
indicator
will
lightselection
and thirdbutton
music two
will be
on continuously.
Press
the
Music
times,
the
second music selection
Front of machine
Back of machine
Press thewill
Music selection
button
fourwill
times, on
the fourth music selection
1 Press
indicator
andon
second
music
the “Power”light
button
the control
panel be
to startcontinuously.
the machine.
indicator
will
lightselection
and fourth
musicthree
will be
on continuously.
Handle
Music
button
times,
the third
music selection
ThePress
musicthe
does
not operate
unless
turned on.
Press thewill
Music
selection
button
five
times,
all
the music selection
2 Setindicator
light
and
third
music
will
be
on
continuously.
Control
Panel
the running
time
by pressing the Start
Timer Button as follows :
Oxygen
indicators
will light
and music
will four
be on
sequentially
from
the first
one to
Press
the
Music
selection
button
times,
the fourth
music
selection
Outlet
Press
the
Button
the fourth
one. one time and the unit will run 15 minutes, and the 15Intake
indicator
will light
and fourth
music will be on continuously.
Filter Panel
minute
window
will light.
Pressindicator
the Music
selection
button six times, all the
Pressthe
the
Musictwo
selection
button
fivewill
times,
all minutes
the music
selection
Press
Button
times
and
the
unit
run
30
and
the
30
music indicators will be off and music will stop.
indicators
will light
andwill
music
be on sequentially from the first one to
minute
indicator
window
light.will
Exhaust
Vent
the
fourth
one.
Press
the
Button
three
times
and
the
unit will run 45 minutes and the 45
2 Music volume can be adjusted. Use the
volume control button to
Fold-Out
minutes
indicator
willbutton
light. six times,
Press the
Musicwindow
selection
all the music indicators will
adjust
the
sound
volume.
Headset
Press
Button
four
be offthe
and
music
willtimes
stop.and the unit will run 60 minutes and the 60
Rack
3 Music
canindicator
not playwindow
alone when
the Oxygen Bar operation stops.
minutes
will light.
3 Music volume can be adjusted. Use the volume control button to
VOLUME
Press the Button one time again and the unit running time will be reset
to
adjust
the sound volume.
15 minutes.
4 Music can not play alone when the Oxygen Bar operation stops.
3 When the set time is counting down, the time indicator
will change indicating the time remaining.
A
C Turbo Air Flow
End of
Operation
1D
To receive
accelerated
air flowCycle
strengthened from 2.5
liters/minute to 3.0 liters/minute press the Turbo button
1 When
once. This
feature
auto
off after
3 minutes.
the set
time will
ends,
theshut
machine
Heatwill automatically
activate the blowing cycle for one minute
in order to
Dispelling
Air Intake
speed up the discharge of vapors. Vent
Power Switch
TURBO
Power Cord
7
Operation
Diagram - Headset
Operation
A Time Setting
Headset
] set switch
3[Operation
Press
thethe
power
" " (ON)
position.
The
power switch is located at
8 When
time is to
counting
down,
the time
indicator
Operation
the back of the machine in the lower bottom corner. When the power switch is
will change indicating
Headset the time remaining.
turned on it is in “stand by” status and there is no indication light.
4 Position the headset over your ears and adjust the position of the flexible arm
Setting
Music
Selection
so thatTime
the oxygen
outlet
Ear
Buds is below the nose.
A
B Time Setting
A
Positioning headset:
81Headset
Flexible
When
the can
set Arm
time
is counting
time
indicator
Ear buds
be used
to listendown,
to youthe
own
music
selection
by plugging
them
Adjusting
Knob for
8 When
the set
timeEar
is counting
the time indicator
Oxygen
Outlet
Postion
Over
Placement
Around
Neck
Placement
will change
indicating
the timedown,
remaining.
into the audio jack of your personal media player.
will change indicating the time remaining.
2 Relaxing nature sounds provided (Daytime Brook, Dripping Water, Whale
Headset Tube
& Nighttime
Brook) can be turned on when the Oxygen Bar is in
Music
Selection
BCalls,
operation.
Turning
on the provided music selection as follows:
Music
Selection
BOxygen Outlet
selection
button
time,
theselection
first music
1 EarPress
buds the
canMusic
be used
to listen
to youone
own
music
byselection
plugging them
1 Ear
buds
canwill
be
used
to listen
to youmedia
own
selection by plugging them
light
first
music
will
bemusic
on continuously.
intoindicator
the audio
jack
ofand
your
personal
player.
into the audio jack of your personal media player.
Press the Music selection button two times, the second music selection
2 Relaxing
nature sounds provided (Daytime Brook, Dripping Water, Whale
indicator
will light
andprovided
second music
will be on continuously.
2 Relaxing
nature
sounds
Dripping
Water,
Whale
Calls, & Nighttime
Brook)
can be (Daytime
turned onBrook,
when the
Oxygen
Bar is
in
Press
the MusicBrook)
selection
three
music
Calls,
& Nighttime
can button
be turned
ontimes,
when the
the third
Oxygen
Barselection
is in
operation. Turning on the provided music selection as follows:
indicator
will light
music
will be
on continuously.
Operation
operation.
Turning
onand
the third
provided
music
selection
as follows:
Press
the
Music
one
time,
music
selection
Adjust
Air
Press
theFlow
Music selection
selection button
button
fourOutlet
times,the
thefirst
fourth
music
selection
Operation
Oxygen
Press
the will
Music
time,
first music selection
indicator
lightselection
and firstbutton
music one
will be
on the
continuously.
indicator
will light and
fourth
music
will beThe
on continuously.
3 Pressindicator
the power
to "first
" music
(ON)
position.
power switch is located at
willswitch
light and
will
be on continuously.
Press
the
button
two
the
second
music
selection
1the
Press
the Music
Music
selection
button
five times,
times,
allWhen
the
music
selection
Move
the
arm
in an selection
Getting
started
back
of the
machine
in the lower
bottom
corner.
the power
switch is
Press
the will
Music
button
two will
times,
thecontinuously.
second music selection
indicator
lightselection
and second
music
be on
indicators
light
andstatus
musicand
willthere
be onissequentially
from
the first one to
up/down
to adjust
turned
onbox
itdirection
iscontaining
inwill
“stand
by”
noon
indication
light.
1 Open
the
your
Rejuvenating
Oxygen
indicator
will
light selection
and
second
music
willtimes,
be
continuously.
Larger
Hole
Press
the
Music
button
three
the
third music
selection
thethe
fourth
one. over
the
oxygen
outlet.
4 Bar
Position
headset
your
ears
and
adjust
the
position
of
the
arm
with
Turbo
Air
Flow,
check
the
contents
and
Press
the will
Music
selection
button
three
times,
the third music flexible
selection
Small
Hole
indicator
light
and
third
music
will
be
on
continuously.
Press
the Music
selection
button
six times, all the music indicators will
so that
thethe
oxygen
outlet
isthird
below
the
nose.
make
sure
following
components
are
enclosed:
indicator
will
light
and
music
will
be
on
continuously.
(
Less
air
flow
)
(
More
air
flow
Press the Music selection button four times, the fourth music selection) *
be off
and musicunit
will stop.
Oxygen
concentrator
Press
the
Music
button
four
fourth music selection
Positioning
headset:
indicator
will
lightselection
and fourth
music
willtimes,
be onthe
continuously.
3Headset
Music
volume
can
be
adjusted.
Use
the
volume
control
button
to VOLUME
and
hose
(including
optional
condensation
indicator
light selection
and
fourth
music
willtimes,
be onall
continuously.
Press thewill
Music
button
five
the music
selection
areas of high
Over
Ear
Placement
Around
Neck*In
Placement
adjust
the
sound
volume.
Time
Setting
humidity,
useto
the
Press
the
Music
selection
button
five
times,
all
the
music
selection
chamber
and
Ear
buds)
indicators will light and music will be on sequentially from the first
one
condensation chamber to
4 Music
can
not
play
alone
when
the
Oxygen
Bar
operation
stops.
indicators
will
light
and
music
will
be
on
sequentially
from
the
first
one
to
Owner’s
Manual
collect
excess
water
the fourth one.
condensate from the unit.
Press
the
“Power”
button
on thebutton
control
panel
to start
themusic
machine.
2 1
the
fourth
If there
are
missing
items,
please
contact
the
Press
the one.
Music
selection
six
times,
all the
indicators will
Note: Using
ThePress
music
does
not operate
unless
turned
on. all the music indicators
Music
selection
button
six times,
will the
dealer
where
you
purchased
your
Rejuvenating
be
off the
and
music
will stop.
condensation chamber
2
Set
the
running
time
by
pressing
the
Start
Timer
Button
as
follows
:
be
off
and
music
will
stop.
will
reduce
airflow. Use
Oxygen
Bar
with Turbo
Air adjusted.
Flow.
3 Music
volume
can
be
Use the volume control button to onlyVOLUME
if necessary.
End
of
Operation
Cycle
3 Read
Owner’s
Manual
carefully.
Press
the
Button
one
time
and
the
unit
will
run
15
minutes,
and
the
15
3 Music
canvolume.
be adjusted. Use the volume control button to VOLUME
adjustvolume
the sound
4 Connect
minute
indicator
window
will
light.
the
hose
provided
the
oxygen
outletBar
on the
side ofstops.
the Oxygen Bar.
the
sound
volume.
4 adjust
Music
can
not play
aloneto
when
the Oxygen
operation
Presscan
the not
Button
times
and
the Oxygen
unitwill
will automatically
run
minutes and
the 30
When
the
set
timetwo
ends,
the
machine
41 Music
play
alone
when
the
Bar30
operation
stops.
Operating
Procedure
minute indicator
window
willfor
light.
activate
the
blowing
cycle
one minute in order to
Press
theathe
Button
three
times
and
theisunit
willand
run 45 minutes and the 45
1 Place
speed
up
discharge
of vapors.
unit on
stable,
flat surface
which
clean
minutes
indicator
window
will
light.
Adjust
Air
Flow
free of dust.
Do notOperation
set base on carpet
or other
soft
Oxygen
Outlet
End
Press
the of
Button four times andCycle
the unit will
run 60 minutes and the 60
surfaceEnd
as thisof
could
cause air flowCycle
restriction and
Operation
minutes indicator window will light.
damage
to
unit.
1
the
arm
in anone time again and the unit running time will be reset to
Press
the
Button
1 Move
When
the
set
time
ends,switch
the machine
2 8Check
to
see
that
the power
is in thewill
" "automatically
up/down
adjust
15 minutes.
1 When
thedirection
setblowing
timetoends,
the
machine
will automatically
activate
the
cycle
for
one
minute
in order to
Larger Hole
(OFF)
position.
Plug
power
cord
into
electrical
outlet.
oxygen
outlet.
activate
the
blowing
one
minute
in order
to
3 the
speedthe
up
the
discharge
offor
vapors.
When
set
time
is cycle
counting
down,
the time
indicator
Small
Hole
speed
up the
discharge
vapors.
will
change
indicating
theoftime
remaining.
( Less air flow )
( More air flow )
A
D
D
D
8A Time Setting
88
Operation
Operation
2 After
blowing
ends,
3 Press
thethe
power
switch
to " the"heat
(ON)dispelling
position. The power switch is located at
the fan
backwill
of continue
the machine
in for
the3lower
bottom
Operation
to run
minutes
to corner. When the power switch is
Operation
turned
onaway
it is inhot
“stand
by” machine
status and
drive
air. The
willthere
thenis no indication light.
4 Position the headset over your ears and adjust the position of the flexible arm
turn off automatically. Turn the power
so that the oxygen outlet is below the nose.
switch off if you are not going to use it
Positioning
headset:
2 After
blowing
ends, the heat dispelling
withinthe
a short
time.
Exhaust
2 After
thecontinue
blowing to
ends,
the 3heat
dispelling
fan
will
for
gas vent
notEar
berun
used
forminutes
a periodtoof
3 If the unit will
Over
Placement
Around Neck Placement
fan
will continue
to run
3 minutes
to
drive
hotthe
air.
Thefor
machine
willelectrical
then
time, away
remove
power
cord from
drive
away
hot air. TheTurn
machine
will then
turn
off
automatically.
the power
outlet.
turn
off
automatically.
Turn
the
power
switch off if you are not going to use it
switch
offshort
if youtime.
are not going to use it
within a
Exhaust
within
a
short
time.
Exhaust
gas vent
3 If the unit will not be used for a period of
gas vent
the unit
will not
usedcord
for afrom
period
of
3 Iftime,
remove
the be
power
electrical
Cleaning Condensation
Chamber
time,
cord off
from
theelectrical
unit and remove the Power Cord
outlet.remove the power Turn
Dangerregions offrom
electrical
1 outlet.
In geographic
highthe
humidity,
useoutlet
the before maintenance to
avoid
electrical
shock.
condensation
chamber to collect excess water
Adjust
Air Flow
Oxygen Outlet
condensate from the unit.
Maintenance
A
During
12 Move
theoperation,
arm in anwater vapor may condense
Cleaning
Condensation
Chamber
A
andCleaning
the direction
optional condensation
chamberChamber
in
up/down
to adjust
Condensation
A
Cleaning
the
Air
Intake
Filters
thegeographic
middle
section
of the
external
connection
the
oxygen
outlet.
1B
In
regions
of high
humidity,
use
theHole
Small
hose
may be regions
used
to of
collect
it.
1 In
geographic
humidity,
use
the
condensation
chamber
tohigh
collect
excess
water
( Less airwill
flow )
Note:
Using
the
condensation
condensation
chamber
to
collect
1 condensate
Pull off the Intake
Filter
onexcess
the water
from the
unit.Panel chamber
Intake
Larger Hole Filter
Panel
( More air flow )
Accumulated water
reduce airflow.
Use
theonly
unit.if necessary.
rear ofoperation,
the from
machine.
2 condensate
During
water vapor may condense
Time
Setting
2 2During
water
vaportap
may
condense
Rinse
thoroughly
with warm
water.
and
theoperation,
optional
condensation
chamber
in
Open
Close
3 When using the condensation chamber if
and
the
optional
condensation
chamber
middle
of the
connection
3 the
Shake
outsection
water, put
in aexternal
dry place
andin
1 Press
water
level
exceeds
pour
theconnection
water
outto start the machine.
the
middle
section
of
the
external
the
“Power”
button
on
theit.control
panel
hose
may
be
used
to1/3,
collect
allow
to air
dry.
by
gently
twisting
the
condensation
chamber
hose
may
be
used
to
collect
it.
The
music
does
operate unless
turned on.
Note:
Using
thenot
condensation
chamber
will
Accumulated water
Replace
Intake
Filter.
to
open
it.the
Then
lightly
shake
both
the upper
2 4Set
Note:
the
condensation
chamber
will Button as followsAccumulated
theUsing
running
time
by
pressing
the Start
Timer
:
water
reduce
airflow.
Use
only
if necessary.
5reduce
Clean
the end
Intake
Filter
once
a month.
If
airflow.
Use
only
if
necessary.
and
lower
of
the
condensation
chamber.
Press the Button one time and the unit will run 15 minutes, and the 15
Open
Close
the Oxygen
Bar
iscondensation
usedwill
frequently,
the if by
minute
indicator
window
light.
Re-assemble
thecondensation
chamber
3 When
using
the
chamber
Open
Close
Press
the
Button
two times
the unit will run 30 minutes and the 30
3 When
Intakeusing
Filter
willcondensation
have
to pour
beand
cleaned
the
chamber
twisting
it closed.
water
level
exceeds
1/3,
the waterifout
minute
indicator
window
will light.
every
two
weeks.
water
level
exceeds
1/3,
pour
the water
out
by
gently
twisting
the
condensation
the
Button threeexceeds
times andmore
thechamber
unit
will
runit45
minutes
thebackflow
45
4 by
IfPress
water
accumulation
than
1/2,
may
causeand
water
gentlyit.
twisting
the condensation
chamber
to
open
Then
lightly
shake
both
the
upper
minutes
indicator
window
will
light.
and
resulting
water
accumulation
on the
external connection hose.
to
open
it. Then
shakeand
both
and
lower
end
oflightly
the
chamber.
Press
the
Button
fourcondensation
times
thethe
unitupper
will run 60 minutes and the 60
and
lower
end
of
the
condensation
chamber.
minutes indicator
window will light.
the condensation
by Filter
5 Re-assemble
Sometimes
excessive
water
willchamber
cause
abnormal
sounds generated by
Press
the
Button
one
time
again
and
the
unit
Re-assemble
the condensation chamber by running time will be reset to
twisting
itand
closed.
bubbles
this
can
be
solved
by
clearing
the
accumulated
water.
15 minutes.
twisting
it closed.
34 When
theaccumulation
set time is counting
time
If water
exceedsdown,
morethe
than
1/2,indicator
it may cause water backflow
4 will
Cleaning
Headset
Tube
Headset
Ifand
water
accumulation
exceeds
more
1/2, and
it may
cause water
change
indicating
the
time remaining.
resulting
waterthe
accumulation
on than
the
external
connection
hose.backflow
and resulting water accumulation on the external connection hose.Oxygen Outlet
5 Sometimes excessive water will cause abnormal sounds generated by
1 During the use of Oxygen
5 Sometimes
water
will by
cause
abnormal
sounds generated
bubbles andexcessive
this can be
solved
clearing
the accumulated
water. by
concentrator,
there
be
bubbles
and this
can will
be solved
by clearing the accumulated water.
9
water condensation in the
A
C
5 Clean the Intake Filter once a month. If
avoid electrical shock.
the Oxygen Bar is used frequently, the
Intake Filter will have to be cleaned
every two weeks.
tube from unit, and rinse these parts with warm water and allow
the parts to air dry.
3 Re-attach the parts to the unit.
Maintenance
B
Intake
Filter
Panel
Cleaning theTurn
Air off
Intake
the unitFilters
and remove the Power Cord
Danger
from the electrical outlet
before maintenance to
Filter
1 Pull off the Intake Filteravoid
Panelelectrical
on the shock.
rear of the machine.
2 Rinse thoroughly with warm tap water.
3 Shake
out water,the
put inHeadset
a dry place and
Cleaning
Tube and Headset
Changing
allow
to air dry. the Air Intake Filters
Oxygen Outlet
4 Replace the Intake Filter.
1 During the use of Oxygen
1 5concentrator,
Pull
off the Intake
Filter
Panelaon
the If
Clean
once
month.
thereFilter
will be
the
Oxygen
Bar
is
used
frequently,
the
rear
of
the
machine.
water condensation in the
Intake
Filter
will
have
to
be
cleaned
Rinse thoroughly
with warm tap water.
2 condensation
chamber
every out
two water,
weeks.put in a dry place and
3 Shake
and headset tube. Proper
allow to air
dry.
Intake
cleaning
is necessary
if not
Attach the Parts
Oxygen Outlet
Filter
4 Replace the Intake Filter.
used for a long period of
Filter
Panel
5 Clean the Intake Filter once a month. If
time.
the Oxygen Bar is used frequently, the
Intake Filter will have to be cleaned
Condensation chamber and front part of headset
2 Separate
everyCleaning
twothe
weeks.
the Headset Tube and Headset
tube from unit. Rinse these parts with warm water and allow the
Oxygen Outlet
parts to air dry.
1 During the use of Oxygen
3 Re-attach the parts to the unit.
concentrator, there will be
water condensation in the
condensation chamber
and
headset tube.
Proper
Cleaning
the
Headset Tube and Headset
cleaning is necessary if not
Attach the Parts
Oxygen Outlet
Oxygen Inlet
used for a long period of
1 During the use of Oxygen
time.
will be chamber and front part of headset
Separate the there
Condensation
2 concentrator,
water
condensation
in thethese parts with warm water and allow
tube from unit, and rinse
Separate the chamber
Condensation chamber and front part of headset
2 condensation
the parts to air dry.
tube
from unit.
Rinse these parts with warm water and allow the
headset
tube.
3 and
Re-attach
the
partsProper
to the unit.
parts to is
airnecessary
dry.
cleaning
if not
Attach the Parts
Oxygen Inlet
3 used
Re-attach
the
parts
to
the unit.
for a long period of
time.
C
B
C
C
Maintenance
D
Cleaning the Cabinet
Maintenance
Troubleshooting
2 Separate the Condensation chamber and front part of headset
A : Unit does not turn on
tube from unit, and rinse these parts with warm water and allow
1. Check power switch located on the back of the machine to insure it is on.
the Cabinet
theCleaning
parts to air dry.
2. Check power source and connections.
3 Re-attach the parts to the unit.
3. Check that your wall outlet is live.
1 Wipe the cabinet with a soft, moist, clean cloth.
4. Check that power cord is not damaged.
2 Do not use washing detergent, benzene, thinner or alcohol.
Oxygen creates life by converting fuel (carbohydrates, fats and proteins) into energy
during
aerobic
respiration.
levelsisofemitted.
oxygen result in lower energy production making
B: Motor
runs,
but no Low
oxygen
us feel
and
drained
of energy. Additional oxygen can benefit people from every
1. sluggish
Check
all
hose
connections.
Cleaning
Cabinet
walk of life
in virtually allthe
that we
do. Studies have shown that there are multiple benefits
2. Check for damaged hoses or hose kinks.
to using concentrated oxygen. When adding concentrated oxygen to your weekly routine,
3. Check
that filters are
clean.
various
improvements
Some
of the
benefits
the cabinetcan
withresult.
a soft,
moist,
clean
cloth.include:
1 Wipe
D
Benefits of the Oxygen Bar
D
Troubleshooting
use washing
2 Do not
• Oxygen
improves
generaldetergent,
well being *7benzene, thinner or alcohol.
C: Limited oxygen flow
1. Check
for
or hose and
kinks.
: Unit
does
notdamaged
turn
on hosesalertness
•AOxygen
heightens
concentration,
memory *2
1.
switch
located
2.Check
Checkpower
voltage
of wall
outlet.on the back of the machine to insure it is on.
• Oxygen gives you energy! 90% of our energy comes from oxygen, and only 10% from
2.
power
source
connections.
3.Check
Check
that
areand
clean.
food
and
water
*4 filters
3. Check that your wall outlet is live.
• Oxygen helps keep energy levels which allows longer exercise sessions,
4. Check
that power
which
helps weight
loss *1cord is not damaged.
Specifications
11
•B:
Oxygen
vital tobut
your
memory, thinking and sight *3
Motorisruns,
noimmune
oxygensystem,
is emitted.
1. Check
all hose
connections.
• Oxygen
promotes
healing
and counters aging *6
2. Check for damaged hoses or hose kinks.
• Oxygen
strengthens
your
3. Check
that filters
areheart,
clean.reducing the risk of heart attacks *2
• Oxygen calms your mind and stabilizes your nervous system *3
C: Limited oxygen flow
• Oxygen speeds up the body's recovery after physical exertion *5
1. Check for damaged hoses or hose kinks.
• Oxygen
provides
a natural
2. Check
voltage
of wall remedy
outlet. for headaches, migraines and hangovers *2
3. Check that filters are clean.
• Oxygen relieves temporary altitude discomfort *6
• Oxygen improves digestion and cell metabolism *4
11
• Oxygen relieves muscle stiffness, supports pre-athletic performance *1
• Oxygen lessens chronic fatigue syndrome and gives you better sleep patterns *6
References:
1.) Mechanisms of dyspnoea relief and improved exercise endurance after furosemide inhalation in COPD, Thorax
1993;48:708-713; doi:10.1136/thx.48.7.708, BJ Lipworth
2 Separate the Condensation chamber and front part of headset
2.) Long-term oxygen therapy improves health-related quality of life, C. Lewis , P. Young , Y. Kennedy , J. E. Garrett and J. Kolbe
Respiratory Medicine, Volume 98, Issue 4, Pages 285-293
tube from unit, and rinse these parts with warm water and allow
the parts to air dry.
Do not use washing detergent, benzene, thinner or alcohol.
32 Re-attach
the parts to the unit.
3.) Long-Term Oxygen Therapy, Stephen P. Tarpy, M.D., and Bartolome R. Celli, M.D. Volume 333:710-714 September 14, 1995
1 Wipe the cabinet with a soft, moist, clean cloth.
10
11
4.) Oxygen Therapy in Chronic Obstructive Pulmonary Disease Proceedings of the ATS, May 1, 2008; 5(4): 513 - 518.
5.) Recommendations on the use of exercise testing in clinical practice, Eur. Respir. J., January 1, 2007; 29(1): 185 - 209.
6.) Oxygen: the good, the bad, and the necessary...Thorax, December 1, 2004; 59(12): 1005 - 1006.
7.) Acceptability of oxygen concentrators: the patient's view Br J Gen Pract. 1990 Oct;40(339):415-7
11
© Zadro Health Solutions, Inc.
Innovative Ideas That Make Life Easier™
Huntington Beach, CA 92649
(714) 892-9200 FAX (714) 892-7477
E-Mail: [email protected]
Website: www.zadrohs.com
Rev.07082011