1
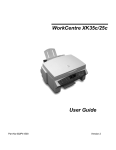
P1210UG-8
6/30/00
3:59 PM
Page 1
User Guide (EN)
Guide de l’Utilisateur (FR)
Guía del Usuario (ES)
Guia do Usuário (PT)
User Guide (ZH)
721P56290
DocuPrint P1210
LASER
LASER
LASER
LASER
LASER
PRINTER
PRINTER
PRINTER
PRINTER
PRINTER
(EN)
(FR)
(ES)
(PT)
(ZH)
P1210UG-8
6/30/00
3:59 PM
Page 2
Xerox Corporation
1350 Jefferson Road
Rochester, NY 14623
United States of America
Xerox Europe
Bessemer Road
Welwyn Garden City
Herts AL7 1HE
United Kingdom
©2000 Xerox Corporation. Xerox®, The Document Company®, the stylized X,
DocuPrint, and the identifying product names and numbers herein are trademarks
of Xerox Corporation. Xerox Canada Ltd. and Xerox Europe are licensees of all the
trademarks. Copyright protection claimed includes all forms and matters of
copyrightable materials and information now allowed by statutory or judicial law or
hereinafter granted, including without limitation material generated from the
software programs which are displayed on the screen such as icons, screen display
tools, etc. Product names used in this guide may be trademarks or registered
trademarks of their respective companies and are hereby acknowledged. All nonXerox brands and product names are trademarks or registered trademarks of their
respective companies.
Publication number: 721P56290
P1210UG-8
6/30/00
3:59 PM
Page 1.1
TABLE
OF
CONTENTS
English
TA B L E O F C O N T E N T S
Thank you for purchasing the Xerox
DocuPrint P1210. In this guide you will
find information essential for setting up and
operating your laser printer.
Unpacking
Printer Components
Connections
Control Panel
Cartridge Installation
Loading Paper
Installing Software
Print Driver Features
Multi-Purpose Tray Printing
Printer Specifications
Troubleshooting
Installing Memory
Getting More Information
Printer Certifications
Language Codes
1-2
1-3
1-4
1-4
1-5
1-7
1-9
1-13
1-14
1-16
1-17
1-21
1-23
1-24
1-25
User Guide
EN
FR
ES
PT
ZH
1.1
P1210UG-8
6/30/00
3:59 PM
Page 1.2
U N PAC K I N G
Unpacking
AC Power
Cord
PC Parallel
Cable
Included in some countries.
(meets IEEE 1284
specifications)
DocuPrint P1210
Note: Carefully
remove any shipping
tape from the
printer.
Print
Cartridge
OC
UP
RIN
T
CD
User Guide
Note: The DocuPrint P1210 is equipped with a
parallel port for use with IBM Compatible
computers (with a 100mhz Pentium or higher
equivalent processor.) USB cable sold separately.
Note: Place the printer on a flat, stable surface
leaving 6 inches (15cm) around the printer and 1
foot (30cm) of space in front.
Do not place the printer in direct sunlight, near
heat sources or air conditioners, in dusty or dirty
environments, or near devices that contain
magnets or generate magnetic fields (such as
loud speakers or base units of cordless
telephones.)
1.2
User Guide
P1210UG-8
6/30/00
3:59 PM
Page 1.3
PRINTER
COMPONENTS
Front View
Top Cover
Control Panel
Top Tray
(Face Down Output)
Multi-Purpose Tray
(Manual Feed)
Tray 1
Paper Level Indicator
EN
FR
Rear View
Rear Cover/Rear Tray
(Face Up Output)
ES
PT
USB Port
Parallel Port
ZH
Power Switch
Power Cord Connector
User Guide
1.3
P1210UG-8
6/30/00
3:59 PM
Page 1.4
CONNECTIONS/CONTROL
PA N E L
Connections
1
USB Cable
Connect cable.
(Sold separately)
or
Parallel Cable
Connect cable.
Power Cord
2 AC
Connect to your printer to a
Caution: Turn off your computer
before connecting your printer
cable or power cord.
properly grounded outlet.
Turn the power on.
Control Panel
Error Light
Blinking: Insufficient memory
On: Cover open, cartridge not installed or
not seated properly
On with Paper Light: Paper jam
Paper Light
On: Out of Paper
On with Error Light: Paper jam
Cancel Button
To cancel print job, hold the cancel
button until all lights blink, then release.
Print Button
To print a Configuration Sheet, hold the print
button until all lights blink, then release.
1.4
User Guide
Manual Light
On: Multi-purpose tray
(manual feed) ready
Press print button to start job
Data Light
On: Ready to receive data
Slow blink: Receiving data
Fast blink: Printing
Note: When all lights are
blinking, this indicates a system
error. Turn the power off and
then back on to clear. If problem
persists, call your local Xerox
Helpline.
P1210UG-8
6/30/00
3:59 PM
Page 1.5
CARTRIDGE
INSTALLATION
Print Cartridge Installation
Open the top cover.
1
Remove the print cartridge from the bag.
2
EN
Note: Do not expose cartridge to direct
sunlight or strong room light for more
than 10 minutes.
FR
ES
PT
Carefully remove the sealing tape from the
print cartridge.
3
ZH
Note: Pull sealing tape completely out
of the cartridge.
User Guide
1.5
P1210UG-8
6/30/00
3:59 PM
Page 1.6
CARTRIDGE
INSTALLATION
4
5
6
1.6
User Guide
Shake the print cartridge from side to side
to distribute the toner evenly.
Holding the print cartridge by the handle,
insert the cartridge into the printer until it
clicks into place.
Close the top cover securely.
P1210UG-8
6/30/00
3:59 PM
Page 1.7
LOADING
PA P E R
Loading Paper
Pull the paper tray out.
1
Caution: Do not remove tray while printing.
This may cause paper jams.
Press the bottom plate until it locks
into place.
Pinch the Rear Paper Guide and adjust to
the length of the print media.
2
3
EN
Rear Paper
Guide
FR
ES
PT
For legal or folio size paper, press the tab
down and pull the rear wall all the way out,
to adjust tray length.
ZH
4
User Guide
1.7
P1210UG-8
6/30/00
3:59 PM
Page 1.8
LOADING
5
PA P E R
Load paper. Ensure that the paper is placed
beneath the metal corner guide. If using
pre-printed paper, load paper with the print
side facing down.
Note: Observe the maximum limit
indicator. Tray holds a maximum of 250
sheets of paper.
6
Adjust the Side Guide to lightly touch
the paper.
7
Insert the tray back into the printer.
Side Guide
1.8
User Guide
P1210UG-8
6/30/00
3:59 PM
Page 1.9
INSTALLING
SOFTWARE
Installing Software
The P1210 supports many operating systems
Please go to the section which corresponds
with your operating system for installation
instructions.
Installation for Windows 95, 98,
NT 4.0, 2000
1 Insert the Xerox DocuPrint P1210 CD into
your CD-ROM drive. If Windows runs your
CD automatically, skip to step 4.
2 Select Run from the Start menu.
3 Type d:\setup.exe (where “d” is your CDROM drive letter), then click OK.
CD Contents
• Software Utilities
• Print Drivers
• Reference Guide
– Print Media Specifications
– Configuring the PCL Driver
– Setting Properties
– Driver Features
– Using Printer Utilities
– Solving Printing Problems
EN
4 Select the appropriate language.
FR
5 Select the Print Driver and follow the
on-screen instructions to install.
6 If desired, install RCP (Remote
Control Panel).
7 If connected to the printer by a USB
connection and using Windows 98, you will
need to install the USB Port Driver located
on the CD. Select your appropriate
language, then select USB Port Driver.
ES
Note: RCP is a Windows-based program
that allows the user to set default printer
values.
PT
ZH
Note: For Windows 98, the USB port
driver must be installed in order to print to
the DocuPrint P1210 via a USB
connection.
You are now ready to print from your PC.
User Guide
1.9
P1210UG-8
6/30/00
3:59 PM
Page 1.10
INSTALLING
Note: In order to print from your
Macintosh to the DocuPrint P1210, you
must be running OS 8.6x or higher
operating system and have a USB
enabled Macintosh.
SOFTWARE
Installation for Macintosh
1 Insert the Xerox DocuPrint P1210 CD into
your CD-ROM drive.
2 Double click the P1210 CD.
3 Based on the table located in the back of
this guide, select your appropriate
language code (ie. “EN” for English).
4 Click on the folder Installer, and double
click the P1210 installer icon.
CD Contents
• Print Driver
• Reference Guide
– Print Media Specifications
– Configuring the PCL Driver
– Setting Properties
– Driver Features
– Using Printer Utilities
– Solving Printing Problems
5 Click Continue then Install to install the
print driver.
6 After the driver is installed, select Quit to
finish installation or select Continue to
install the PostScript Printer Descriptions.
7 Go to the Chooser. Select the Xerox
Docuprint icon and then select Docuprint
P1210 in the scroll window. Close
the Chooser.
You are now ready to print to your
DocuPrint P1210 from your Macintosh.
1.10
User Guide
P1210UG-8
6/30/00
3:59 PM
Page 1.11
INSTALLING
SOFTWARE
Linux Installation
1 Log in to Linux as Super User (root)
account.
2 Insert the Xerox DocuPrint P1210 CD
into the CD-ROM drive.
Note: these instructions are a guide to
installing the PCL5e driver for Linux. The
Linux driver installation script supports
RedHat 6.0 or greater.
3 Open a terminal window.
For Gnome interface users, (Utilities
GNOME terminal.)
4 Mount your CD-ROM and run a
script file:
mount -t iso9660 /dev/cdrom /mnt/ cdrom
cd /mnt/cdrom/en/linux
./install.sh
5 Setup your print driver using printtool.
EN
• Run the printtool program.
Run program...
printtool, select Run.
If you get an error message, regarding
ncpfs, click Ignore to continue installing a
local printer.
FR
ES
• From the RedHat Linux Print System
Manager, select Add, Printer type:
Check mark Local printer, then click OK.
PT
• An Auto-detection device dialogue box
should idicate that /dev/1p0 is “Detected”.
click OK.
ZH
• The Edit Local Print Entry dialogue box
should appear. Use the defaults, click
Select.
• For printer type, select Xerox DocuPrint
Series PCL5e Compatible, click OK.
User Guide
1.11
P1210UG-8
6/30/00
3:59 PM
Page 1.12
INSTALLING
Note: The P1210 is dependant upon the
native driver shipping with your Linux
RedHat OS. Therefore, the features and
functions listed in the table on the next
page may not all be available.
SOFTWARE
• On Edit Local Printer Entry dialogue
box, click OK.
6 At the end of installation, close
RedHat’s printtool by clicking “X” in the
upper right hand corner of the windows.
Your Xerox Printer will be the default printer
(lp) for printing. If printing a postscript (.ps)
file, use the lpr command to print. For
instance, if a print command for readme.pdf
generates a readme.ps file, open a terminal
window and type “lpr readme.ps” in order to
print this file.
1.12
User Guide
6/30/00
3:59 PM
Page 1.13
PRINT
DRIVER
FEATURES
PCL Print Driver Features
Properties
Number of Copies
Paper
Paper Size
Paper Source
Paper Type
Image Quality
Image Quality
Page Layout
P1210UG-8
Usage /Description
Windows*
Mac
Select 1-999 copies
★
★
Select from supported paper sizes
(See “Printer Specifications”).
★
★
Select Printing from Tray 1, MP Tray or
Tray 2 (if installed).
★
★
★
★
★
★
Select from Plain paper, Bond,
Transparency, Card stock, Preprinted,
Colored paper, Envelope
Select enhancement setting for graphical
and/or text printing.
Select font printing.
★
Select for draft mode printing.
★
Graphics Mode
Select vector or raster mode.
★
Page Orientation
Select Portrait or Landscape.
★
Manual 2 Sided printing
Print two-sided documents.
★
Select 1-16 (Windows) or 1-4 (Mac)
images per physical page.
★
Booklet Printing
Create booklets from documents.
★
Poster Printing
Create posters from documents.
★
Fit to Page (Win)/
Scaling (Mac)
Adjust image to fit to page size.
True Type Fonts
Toner Saver
Multiple Up (Win)/
Layout (Mac)
Watermarks
Create and use watermarks on documents.
EN
FR
★
ES
PT
★
ZH
★
★
★
★
†
Note: Refer to the Reference Guide on your CD for more information.
*These features can be located under the Properties tab of your Print Menu.
†The watermark feature for Macintosh can be located under Page Setup.
User Guide
1.13
P1210UG-8
6/30/00
3:59 PM
Page 1.14
M U LT I - P U R P O S E T R AY P R I N T I N G
Multi-Purpose Tray Printing
Note: When printing on certain envelopes,
heavier weight papers, trnsparencies, or
paper labels, manually feed them one at a
time through the Multi-Purpose tray.
The Multi-Purpose Tray (Manual Feed) is to
be used as an alternate paper source for
printing onto special print media.
1
Pull open the Multi-Purpose Tray
(front panel).
2
Pull out the Multi-Purpose Tray Extension.
3
Load print media against the left edge of
the tray then slide the width guide on the
right against the print media. Observe the
maximum limit indicator. Do not
overload tray.
Multi-Purpose Tray
Extension
1.14
User Guide
P1210UG-8
6/30/00
3:59 PM
Page 1.15
M U LT I - P U R P O S E T R AY P R I N T I N G
Load envelopes, with the flap down, against
the left edge of the tray then slide the width
guide on the right against the envelopes.
4
Note: You can stack up to 100 sheets of
paper or 10 envelopes for automatic feeding.
Caution: Never use envelopes with clasps, snaps,
windows, coated linings, or self-stick adhesives.
These envelopes may severely damage the
printer. Do not feed stamped envelopes through
the printer.
EN
When printing on special media, open the
rear output tray cover and pull out the paper
support extension.
FR
5
ES
PT
ZH
When you finish printing from the MultiPurpose Tray, push the support extensions
back in and close both covers.
6
User Guide
1.15
P1210UG-8
6/30/00
3:59 PM
Page 1.16
PRINTER
SPECIFICATIONS
Printer Specifications
Item
Specification and Description
Print Speed
Up to 12ppm (A4/Letter)
Resolution
True 600 x 600 dpi; 1200 dpi Resolution (Windows)
Output Capacity
Input Capacity
Power Rating
Acoustic Noise
Operating
Environment
Weight
External
Dimensions
Print Cartridge
Face Down: 250 Sheets, Face Up: 100 Sheets
Tray 1: 250 sheets of paper (16 to 28lbs/60 to 105gsm)
MP Tray: 100 sheets of paper (16 to 53lbs/60 to 199gsm) or 10 envelopes
Option Tray 2: 550 sheets of paper (16 to 28lbs/60 to 105gsm)
AC100~128V/200V~240V, 50/60Hz
Standby: Less than 39dB; Operating: Less than 49dB
Temperature: 10~30˚C/ 50~90˚F; Humidity: 20~80%RH
14.9 Kg/ 32.8 lbs. (with packaging materials)
360(W) X 407(D) X 249(H)mm/ 14.2(W) X 16.1(D) X 9.8(H)in.
Laser Print Cartridge: Yield approximately 3,000 letter/A4 pages, 5% area
coverage (included with the printer) Reorder number: 106R441 (for Canada,
Europe, Middle East Africa and the US), 106R439 (for all other countries.)
High Yield Laser Print Cartridge: Yield approximately 6,000 letter/A4 pages, 5%
area coverage. Reorder number: 106R442 (for Canada, Europe, Middle East
Africa and the US), 106R440 (for all other countries.)
Emulation
PCL6, PCL5e, Epson; PostScript Level 3 (optional)
Fonts
45 scalable (35 Intellifont,1 Bitmap, Euro)
CPU
66MHz, 32 bit RISC processor
Memory
Standard 4MB, Expandable to 68MB: (Installed into the slot labeled DRAM
Module) 72 pin, EDO, non-parity: 60ns. 8MB, 16MB, 32MB or 64MB
Interface
1.16
User Guide
Bidirectional Parallel Standard (IEEE 1284)
–Modes supported: Compatible, Nibble, Byte, ECP
USB Interface Standard
–USB 1.0/1.1 compliant, 12Mbps, 1 port
P1210UG-8
6/30/00
3:59 PM
Page 1.17
TROUBLESHOOTING
Troubleshooting
Problem
The printer does not print
Faded printing
Job did not completely print;
received an error sheet
Possible Cause
Things to try...
Data Light is not on.
If the Data Light is off, check the power
switch and power source.
Printer Cable is not connected
properly.
Check all connections. If using a parallel
cable, make sure the clips on the
connector are securely fastened.
Error Light is on.
Check to see that the print cartridge is
properly inserted in the machine.
Paper Light and Error Light are on.
Check to see if there is a paper jam.
Paper Light is on.
Printer is out of paper; add paper.
Manual Light and Data Light are on.
Printer is in manual feed mode and is
waiting for paper to be fed through the
MP Tray.
Toner is low, time to replace the
print cartridge.
Remove the print cartridge and shake it
gently to evenly distribute the remaining
toner, then reinsert the cartridge or insert
a new print cartridge.
Out of memory
Reduce the complexity of the print job;
Do not send the entire job to the printer,
instead print it in sections, i.e., pp 1-5,
pp 6-10, etc.; Reduce the print resolution,
i.e., from 1200 dpi to 600 dpi; Add a
minimum of 8MB of additional memory.
Printed page has some
missing characters or data
Differences in vector mode vs. raster
mode
In PCL driver, change your Image
Quality mode to raster and select text
mode: download as bitmap image.
Difficulties printing via
the parallel port
(Windows users)
Printer is not directly connected to
the PC
If you have any intermediate device
between PC and printer, please remove
device and connect printer directly to PC.
Illegal Operation Error
Message
Print Driver error
Report error to your local support
organization.
EN
FR
ES
PT
ZH
Note: For more troubleshooting tips, please refer to the electronic Reference Guide, which is
available on the product CD provided with your printer.
User Guide
1.17
P1210UG-8
6/30/00
3:59 PM
Page 1.18
TROUBLESHOOTING
Clearing Paper Jams Inside
the Printer
Note: On the rare occasion you encounter
a paper jam, the following instructions
will assist you in clearing the jam.
1.18
User Guide
1
Open the top cover and remove the print
cartridge. Once the print cartridge is
removed from the printer, be careful not to
expose it to heat or direct sunlight.
2
Carefully lift up the guide feed and gently
remove jammed paper. After removing
jammed paper, flip down the guide feed.
3
Replace the print cartridge and close the
top cover. Printing will resume.
P1210UG-8
6/30/00
3:59 PM
Page 1.19
TROUBLESHOOTING
Clearing Paper Jams in
the Output Area
If the paper is almost completely visible,
gently pull paper to remove.
If the jammed paper is not visible or there
is resistance when you pull the paper, open
the rear cover. Detach the vinyl strip and
press the rear cover down until the plastic
clips of the tray snap out.
1
2
EN
FR
Note: Please detach the vinyl strap prior
to pushing down the rear cover.
If there is still resistance when you try to
remove the paper, pinch the Handle and
release the exit roller.
3
ES
PT
ZH
Handle
User Guide
1.19
P1210UG-8
6/30/00
3:59 PM
Page 1.20
TROUBLESHOOTING
4
5
Gently remove the jammed paper. Refer to
“Clearing Paper Jams Inside the Printer” if
unable to remove the paper.
Replace and secure the exit roller and
reattach the vinyl strap. Close the rear cover.
Open and close the top cover to resume
printing.
Clearing Paper Jams in
the Input Area
1.20
User Guide
1
Pull out the paper tray.
2
Gently remove jammed paper.
3
Slide the tray back into the printer. Open
and close the top cover to resume printing.
P1210UG-8
6/30/00
3:59 PM
Page 1.21
INSTALLING
OPTIONAL
Installing Optional Memory
MEMORY
Note: For users who plan to run complex
print jobs or print a majority of print jobs
at 1200dpi, a minumum of 8MB of
additional memory is recommended.
Memory needs to be purchased separately.
(RAM Specifications: 72 pin, EDO, nonparity: 60ns.)
Caution: The controller board and internal
options are sensitive to static electricity.
Before installing or removing an internal
option, discharge static electricity from your
body by touching something metal, such as a
metal plate on a device connected to a
grounded outlet.
Go to the back of the printer. Turn the
printer off and disconnect the power cord
and printer cable.
1
Remove the two outer screws and the
control board cover.
2
EN
FR
ES
PT
Install the memory SIMM, at a slight angle,
into the slot labeled “DRAM Module”.
3
ZH
User Guide
1.21
P1210UG-8
6/30/00
3:59 PM
Page 1.22
INSTALLING
OPTIONAL
4
User Guide
Push back on the SIMM until it clicks into
place. (Make sure the SIMM is secured in
place by the metal clips.)
5
Replace the side cover and tighten the two
outer screws.
6
Reconnect the power cord and printer cable.
Turn the power on.
7
1.22
MEMORY
Print a configuration sheet (hold down the
print button until all lights blink, then
release). Confirm the new memory value
on your sheet.
P1210UG-8
6/30/00
3:59 PM
Page 1.23
GETTING
MORE
Detailed information for your DocuPrint
P1210 is in the electronic Reference Guide,
which is available on the product CD
provided with your printer. The Reference
Guide is provided in the following
languages: English (EN), French (FR),
Italian (IT), German (DE), Spanish (ES),
Portuguese (PT), Dutch (NL), Russian
(RO), and Simplified Chinese (ZH).
The Windows PCL6 driver provided with
your printer has many specialized print
features, like Watermarks and multiple-up
printing. To learn more about these features,
please access the on-line Help available
through the Xerox DocuPrint P1210 PCL6
driver. To access the on-line help, just click
the ‘Help’ button located on the lower right
hand corner of the driver window. For
Macintosh users, information concerning
print driver features can be found in the
Reference Guide located on the P1210 CD.
INFORMATION
CD Contents
• Software Utilities
• Print Drivers
• Reference Guide (found in the folder
labeled Docs)
– Print Media Specifications
– Configuring the PCL Driver
– Setting Properties
– Driver Features
– Using Printer Utilities
– Solving Printing Problems
EN
FR
Drivers are available on our website. Please
visit www.xerox.com and select "Get
Drivers and Utilities."
ES
For support and service, refer to your
warranty pack for local contacts. Additional
information can be found at www.xerox.com.
PT
ZH
User Guide
1.23
P1210UG-8
6/30/00
3:59 PM
Page 1.24
PRINTER
CERTIFICATIONS
Laser Safety
The Xerox DocuPrint P1210 complies with safety standards, and is certified as a Class 1 Laser product under the U.S.
Department of Health and Human Services (DHHS) Radiation Performance Standard according to the Radiation Control
for Health and Safety Act of 1968. The printer does not emit hazardous laser radiation.The use of controls, adjustments,
or procedures other than those specified in the documentation might result in hazardous exposure to
laser light.
(European Union) Declaration of Conformance
The CE marking applied to this product symbolizes Xerox Ltd. Declaration of Conformity with the following applicable
Directives of the European Union as of the dates indicated:
January 1, 1995: Council Directive 73/23/EC amended by Council Directive 93/68/EC, on the harmonization of the laws
of the Member States related to equipment designated for use within certain voltage limits.
January 1, 1996: Council Directive 89/336/ED, approximation of the laws of the member states related to electromagnetic
compatibility. When applicable
March 9, 1999; Council Directive 99/5/EC, on the harmonization of the laws of the Member States related to radio and
telecommunications terminal equipment.
A full declaration, defining the relevant Directives and referenced standards can be obtained from your Xerox Ltd.
representative.
WARNING: Changes or modifications to this equipment not specifically approved by Xerox Europe may void the user’s
authority to operate this equipment.Shielded cables must be used with this equipment to maintain compliance with the
EMC Directive (89/336/EEC).
WARNING: In order to allow this equipment to operate in proximity to Industrial, Scientific and Medical (ISM)
equipment, the external radiation from ISM equipment may have to be limited or special mitigation measures taken.
Australia and New Zealand
Changes or modifications to this equipment not specifically approved by Fuji Xerox Australia Pty. Limited may void the
user’s authority to operate this equipment. Shielded cables must be used with this equipment to maintain compliance with
the Radiocommunications Act 1992.
Radio Frequency Emissions
United States and Canada
This equipment has been tested and found to comply with the limits for a Class B digital device, pursuant to Part 15 of
the FCC Rules. These limits are designed to provide reasonable protection against harmful interference in a residential
installation. This equipment generates, uses and can radiate radio frequency energy and, if not installed and used in
accordance with the instructions, may cause harmful interference to radio communications. However, there is no
guarantee that interference will not occur in a particular installation. If this equipment does cause harmful interference to
radio or television reception, which can be determined by turning the equipment off and on, the user is encouraged to try
to correct the interference by one or more of the following measures:
• Reorient or relocate the receiving antenna.
• Increase the separation between the equipment and receiver.
• Connect the equipment into an outlet on a circuit different from that to which the receiver is connected.
• Consult the dealer or an experienced radio/TV technician for help.
Changes or modifications to this equipment not specially approved by Xerox Corporation may void the authority granted
by the FCC to operate this equipment. Shielded cables must be used with this equipment to maintain compliance with
FCC regulations.In order to allow this equipment to operate in proximity to Industrial, Scientific and Medical (ISM)
equipment, the external radiation from ISM equipment may have to be limited or special migration measures taken.
1.24
User Guide
P1210UG-8
6/30/00
3:59 PM
Page 1.25
LANGUAGE
CODES
Language Codes
Code
(XX)
Language
BG
Bulgarian
CS
Czech†
DA
Danish†
DE
German*
EL
Greek
EN
English*
ES
Spanish*
ET
Estonian
FI
Finnish†
FR
French*
HE
Hebrew
HU
Hungarian†
IT
Italian*
LT
Lithuanian
LV
Latvian
NL
Dutch†
NO
Norwegian†
PL
Polish†
PT
Portuguese*
RO
Romanian†
RU
Russian†
SH
Croatian
SK
Slovakian
SL
Slovenian
SV
Swedish†
TR
Turkish
ZH
Chinese†
EN
FR
ES
PT
ZH
* Macintosh and Windows print drivers available.
†Windows print driver available
User Guide
1.25