1
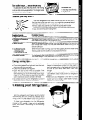
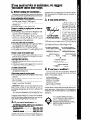
Adjusting
I,
2.
3.
4.
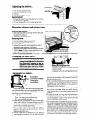
the shelves.. .
First, remove food from shelf.
Slide shelf straight out to stop.
Lift front.
Slide the rest of the way out.
Replacing
Shelf:
I. Fit back of shelf on top of guides with wire stops
on the bottom of guides.
2. Lift front, slide shelf In until it clears guide stops.
Shelf Guide
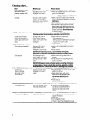
Removing crispers and crisper cover.. .
Removlng the Crispers:
Lilt the Front, Then the Back.
1. Slide crisper straiaht out to stop, lift front, then slide
the rest of the wai out.
2. Replace in the reverse order.
I
I
IIIf I
Removing Cover:
1. Lift front and remove the cover support.
2. Lift out cover by pulling up and out.
Replacing
Cover:
I, Fit back of cover into notch supports on walls of
refrigerator, then lower front into place.
2. Replace cover support with the long tab towards
the front. Note: If support needs adjustment, turn
base right to raise, or left to lower.
me
‘ull out to stop.
Front and Pull Again.
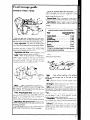
Changing the light bulb...
WARNING: Before removlng the light bulb, either
unplug the refrlfjeratoror
dlrconnect
the electricity
leading
to the refrigerator at the main power supply.
Shock and injury can occur if electricity remains connected.
Automatic
lower Slgnal
Arm to Start It.
If you have Model ET16JM and have the automatic
ice maker accessory, or if you have Model ET16JKand
plan to add one later [Part No. ECKMF-83). there are a
few things you will want to know:
l
l
l
l
6
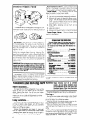
The ON/OFF lever is a wire signal arm.
Down...for making ice automatically;
Up,, .to shut off the ice maker.
Shake the bin occasionally
to keep cubes separated, and to obtain increased storage capacity.
It is normal for ice crescents to be attached
by a
corner. They will break apart easily.
Ycu WIII hear water running when ice maker IS
working. You’ll hear ice fall into the bin Don’t let
these sounds bother you.
The ice maker will not operate until the freezer is
cold enough to make ice. This can take overnight.
first.
1. Reach behind control console to find bulb.
2. Remove bulb.
3. Replace with a 40.watt appliance
bulb.
a-Bm*l~~w IKSSGuwm
m---IR-
ice maker.. .
Raise Slgnal
Arm to Stop Ice Maker.
l
Unplug Ke refrigerator
l
l
l
l
Because of new plumbing
connections,
the first
ice may be discolored cr off-flavored. Discard the
first few batches of ice.
If ice is not being made fast enough and more ice
is needed, turn the Refrigerator Control toward a
higher number. Wait a day and. if necessary, turn
the Freezer Control toward A.
If you remove the ice bin, raise the signal arm to
shut off the ice maker. When you return the bin,
push it all the way in and lower the arm to the ON
position.
If cubes are stored too long, they may develop an
off-flavor...like
stale water. Throw them away. They
will be replaced.
Cubes in the ice bin can also
become smaller by evaporation.
. Good water quality is important for good ice quality
It is not recommended
that the ice maker be connected to a softened water supply Water softener
chemicals such as salt from a malfunctioning
softener can damage the ice maker mold and lead to
poor quality ice. If a softened water supply cannot
be avoided, then it is important that the water softener be well maintained and operating properly.