Download Tributaries AC200 User's Manual
Transcript
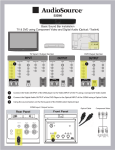
1 1 UNIVERSAL DIGITAL/ANALOG Digital Coax, Toslink Optical and 2 Channel Analog R/L ©2010 Gordon J. Gow Technologies, Inc. All rights reserved. TRIBUTARIES® is a registered trademark of Gordon J. Gow Technologies, Inc. All other trademarks are the property of their respective owners. As we continually strive to improve our products, TRIBUTARIES® reserves the right to change product specifications without notice. The technical and other information contained herein is not intended to set forth all technical and other specifications of TRIBUTARIES® products. Additional information can be obtained on-line at www.tributariescable.com Gordon J. Gow Technologies, Inc. Orlando, FL 32809 www.tributariescable.com AC200 Universal Digital / Analog Audio Converter www.tributariescable.com 2 2 5. Audio Performance Level 5.1 Analog Audio Input Level Output Reference Level Output T.H.D+N Signal to Noise Ratio L/R 1Vrms + 0.05dB 0.01 % > 90dB Coax 0 dB - 0.35dB 0.01 % > 90dB Optical 0 dB - 0.35dB 0.01 % > 90dB 2Vrms 1KHz 5.2 Digital Coax Input Level Output Reference Level Output T.H.D+N Signal to Noise Ratio L/R 1Vrms + 0.05dB 0.01 % > 90dB 0dBFS 1KHz Coax 0 dB - 0.35dB 0.01 % > 90dB Optical 0 dB - 0.35dB 0.01 % > 90dB 5.3 Digital Optical Input Level Output Reference Level Output T.H.D+N Signal to Noise Ratio L/R 1Vrms + 0.05dB 0.01 % > 90dB 0dBFS 1KHz Coax 0 dB - 0.35dB 0.01 % > 90dB Optical 0 dB - 0.35dB 0.01 % > 90dB 1. Introduction Tributaries AC200 is a bi-directional Audio convertor. With three different types of connections, digital coax, toslink optical and 2 channel analog R/L audio, the AC200 can convert all three signals into any desired format. Analog audio can be converted to digital and digital audio can be converted to analog. Conversion is done simultaneously without signal loss and provides 3 clean split audio signals all available on the output end. The AC200 is easy to install and use. 2. Features •Integrated digital filter and Digital -to-Analog Convertor (DAC) •Integrated Analog-to-Digital Convertor (ADC) •Supports sampling frequencies from 16 to 100KHz •Provides electromagnetic noise free transmission •Easy to install and use •Compact design 3. Package Contents •AC200 Universal Digital / Analog Audio Convertor •5V Universal Power Supply 6. Audio Input to Output Comparison Chart LPCM 2CH Input: Analog Stereo L/R or Digital Coax or Digital Optical LPCM 2CH Input: Digital Coax or Optical Output Output Format Notes L/R Analog 2CH 0.01 % Coax LPCM2CH (48KHz) 0.01 % 0.01 % Optical LPCM2CH (48KHz) Output Output Format Notes L/R Does not Support Odd sound Coax LPCM 2CH/AC3/DTS Bypass Optical LPCM 2CH/AC3/DTS Bypass 5 3 2 3 1 1 6. Connection and Installation UNIVERSAL DIGITAL/ANALOG BLU RAY OR Digital Coax, Toslink Optical and 2 Channel Analog R/L AC200 DVD PLAYER OR OPTICAL OPTICAL COAXIAL COAXIAL L/R L/R AMPLIFIER OR TV Table of Contents SET-TOP BOX 1. Introduction........…………………….....................….....…………............. 2 2. Features.................................................................................................... 2 3. Package Contents.................................................................................... 2 4. Operation Controls and Functions......................................................... 3 4.1 Top Indicator Panel.......................................................................... 3 4.2 Right Input Panel............................................................................. 3 4.3 Left Output Panel............................................................................ 4 4.4 Back Input Selection Panel.............................................................. 4 5. Audio Performance Levels...................................................................... 5 5.1 Analog Audio Input.......................................................................... 5 5.2 Digital Coax Input............................................................................. 5 5.3 Digital Optical Input........................................................................ 5 6. Audio Input to Output Comparison Chart............................................ 5 7. Connection and Installation................................................................... 6 8. Specifications........................................................................................... 6 7. Specifications 1. 2. 3. 4. 5. 6. 7. Input Ports: Input Formats: Sample Frequency: Output Ports: L/R Input Impedance: L/R Output Impedance: Power Supply: 8. Dimensions: 9. Weight (g): 10.Operating Temperature: 11.Storage Temperature: 1 Optical, Coaxial and L/R Analog Audio Toslink, SPIDIF and LPCM 2CH 32kHZ, 44.1KHz, 48KHz and 96KHz Optical, Coaxial and L/R Analog Audio 47K Ω 47K Ω 5V/ 1A, Universal Power Supply CE/FCC/ UL Certified 3.8”(W) x 3.4”(D) x 1.4”(H) 4.25 oz. 32F - 104F -4F - 140F 2 3 4 1 6 2 2 4.3 Left Output Panel 1 4. Operation Controls and Functions 4.1 Top Indicator Panel 1 4.2 Right Input Panel 2 Power LED Indicator light: When the LED is green the AC200 is on, a RED light indicates the AC200 is off. 2 Analog LED Indicator light: The blue LED will illuminate when the L/R input is selected. 3 Digital Coax Audio LED Indicator light: The blue LED light will illuminate when the COAX input is selected. 4 2 3 4 1 1 3 1 2 1 3 2 3 4 1 2 1 L/R Output: Using an Analog Audio pair connect to the L/R Input of 1 Receiver 2 your equipment such as TV, or3Amplifier. 2 Coax Output: Using a 75 ohm digital coaxial cable connect to the Digital Coax Input of your equipment such as TV, Receiver or Amplifier. 3 Optical Output: Using an Optical cable connect to the Optical Input 1 Receiver of your equipment such as1 TV, Amplifier. 2 2 or33 Optical LED Indicator light: The blue LED will illuminate when the Optical input is selected. 4.4 Back Input Selection Panel 2 3 4 1 1 1 3 2 3 1 Optical Input: Using an Optical cable connect to the Optical output of your source equipment. 2 Coax Input: Using a 75 ohm digital coaxial cable connect to the Digital Coax output of your 1source equipment. 2 3 3 L/R Input: Using an Analog Audio pair connect to the L/R output of your source equipment. 1 3 2 2 3 3 3 2 3 1 DC 5V: Connect the 5 volt power supply (included) to your AC outlet. 2 Input Selector: Use this switch to select appropriate input from Optical, Coaxial or L/R audio. 3 Power Button: Push this button to turn power on or off. 4 3


