1
User´s guide
UK
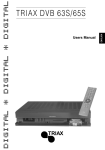
TRIAX DVB 75SI
*HWWLQJVWDUWHG
You do not have to read this entire user's guide to be able to watch
television from satellites orbiting 36,000 km in space.
However, we still recommend that you read the entire user's guide
carefully in order to get a complete overview of the many features
and possibilities offered by your new Triax DVB 75SI and to get the
most out of your new satellite receiver and dish system.
The TRIAX DVB 75SI has been factory pre-programmed. To you
this means easy and quick connection and installation of receiver
and dish system. Before you connect the receiver, you should,
however, read the chapter ’Installation and initial operation’.
7LSV
• Place your satellite receiver on a plane, horizontal and stable
surface.
• Make sure that the satellite receiver is positioned away from heat
sources, e.g. radiators. Do not expose the receiver to more than
8+% humidity and ambient temperatures below +15° and over
+35°.
• Do not cover the vent holes. Make sure that there is minimum 10
cm clear space above the receiver.
• Do not connect the satellite receiver to the mains before all other
connections have been established.
• The receiver should be disconnected from the mains and the dish
during thunderstorms.
• Your receiver is covered by a statutory performance warranty.
The warranty does not cover damage caused by disassembly of
the unit by unauthorised personnel, and the warranty does not
cover direct or indirect damage caused by lightning. Do not
remove the top cover from the receiver.
• Used batteries and other waste harmful to the environment
should be disposed of according to current legislation.
• Satellite operators are distributing an increasing number
channels in the high digital quality that your new DVB 75SI
designed to receive. Please note that it may be necessary
make regular satellite or transponder searches to get access
all the new channels.
of
is
to
to
• If you have any questions, please contact your local TRIAX
dealer.
&RQJUDWXODWLRQV RQ \RXU QHZ 75,$; VDWHOOLWH
UHFHLYHU
2
TRIAX DVB 75 SI
7DEOHRIFRQWHQWV
Getting started ............................................................................................................................. 2
Tips.............................................................................................................................................. 2
Table of contents ......................................................................................................................... 3
Introduction.................................................................................................................................. 4
Supplied accessories................................................................................................................... 4
The Triax DVB 75SI, an interactive satellite receiver................................................................... 5
1. Control buttons and connections ............................................................................................. 6
1.1 Front view........................................................................................................................... 6
1.2 Rear view ........................................................................................................................... 6
1.3 Remote control................................................................................................................... 6
1.4 The front of the satellite receiver ........................................................................................ 6
1.4 The front of the satellite receiver ........................................................................................ 7
1.5 The rear of the satellite receiver......................................................................................... 7
1.6 The remote control ............................................................................................................. 7
New digital technology................................................................................................................. 8
2. Installation and initial operation................................................................................................ 9
2.1 Pay-TV card readers .......................................................................................................... 9
2.2 Connection of the satellite receiver .................................................................................... 9
2.3 Connection of the ”LNB INPUT” satellite signal................................................................ 10
2.4 Connection to your TV ..................................................................................................... 11
2.4.1 Connection via SCART cable: ................................................................................... 11
2.4.2 Connection via RF cable:........................................................................................... 11
2.4.2.1 Setting of the UHF output channel ...................................................................... 12
2.5 Connection of a VCR ....................................................................................................... 13
2.5.1 Connection of a Super VHS video recorder............................................................... 13
2.6 Connection to a Hi-fi amplifier .......................................................................................... 13
2.6.1 Analog audio connection ........................................................................................... 13
2.6.2 Digital audio connection (AC3) .................................................................................. 14
2.7 PC connection via serial RS 232 connector ..................................................................... 14
2.8 Connection of a modem to your telephone line ................................................................ 14
2.9 Switching on the satellite receiver .................................................................................... 15
3. Daily operation....................................................................................................................... 16
3.1 On/Off (standby)............................................................................................................... 16
3.2 Change of channels ......................................................................................................... 16
3.2.1 Quick change of channels via the remote control ...................................................... 16
3.2.2 Quick change of channels from the front panel ......................................................... 17
3.2.3 Quick change of channels via a screen list................................................................ 17
3.3 Change of volume, [V+] and [V-] ...................................................................................... 18
3.4 Display channel and programme information, [info] ......................................................... 18
3.5 Change of subtitle language, [blue].................................................................................. 18
3.6 Display channel and satellite information, [green] ............................................................ 19
3.7 Change to previous channel, [back] ................................................................................. 19
3.8 Temporary interruption of sound, [mute] .......................................................................... 19
3.9 Change between TV and radio programmes [TV/R] ........................................................ 19
4. Settings (advanced use) ........................................................................................................ 20
4.1 The main menu ................................................................................................................ 20
4.2 Menu language ................................................................................................................ 20
4.3 An outline of the DVB 75SI system menus....................................................................... 22
5. Troubleshooting ..................................................................................................................... 24
6. Technical terms ..................................................................................................................... 24
7. Technical specifications......................................................................................................... 26
3
TRIAX DVB 75SI
,QWURGXFWLRQ
The TRIAX DVB75SI is an advanced digital satellite receiver based
on the latest technology.
In addition to support of DiSEqC functions for controlling switches
and LNBs for reception from more than one satellite position, the
DVB 75SI features OpenTV (version EN2) and an integrated
Electronic Programme Guide (EPG).
All functions are easy to set via the remote control and supported by
an extensive OSD (On-Screen-Display) screen-based menu system.
To be able to use the receiver you must have a suitable satellite dish
mounted and correctly adjusted to receive the desired satellite
positions.
The purpose of this User's guide is to ease the installation and use
of your Triax DVB 75SI satellite receiver:
• The User's guide uses the term 'satellite receiver' or 'receiver'
when referring to the Triax DVB 75SI.
• When preparing this User's guide, we particularly focused on
’Installation’ and ’Adjustments’. A glossary is available at the end
of this User's guide.
• Your new satellite receiver has already been pre-programmed
from factory. This enables you to get quick access to your
preferred programmes. However, new channels are constantly
being made available from the satellites and you may have to
make regular transponder searches to make sure that your
programme list is up to date.
• The satellite receiver is set to display Danish screen menu texts
as default. If you wish to change this or if you wish to change
other settings, please follow the instructions in chapter 4.
• In this User's guide all references to buttons on the remote
control are made with the printed number or symbol in square
brackets [ ]. The remote control button with the text ’P+’ will thus
be referred to as the [P+] button, and the button with the text
’menu’ will be referred to as the [menu] button, etc.
6XSSOLHGDFFHVVRULHV
1 RC75 remote control
2 batteries
1 user's guide
1 SCART cable (1 metre, fully connected)
1 telephone cable (10 metres)
1 mains cable
4
TRIAX DVB 75 SI
7KH7ULD['9%6,DQLQWHUDFWLYHVDWHOOLWH
UHFHLYHU
OpenTV is the name of the operating system of the receiver (also
known as its API). Consequently, the DVB 75SI enables you to fully
utilise all channels that broadcast interactive services based on the
OpenTV system (e.g. ARD, ZDF, RTL and the Viasat channels subscription dependant).
Interactive means that in addition to your normal role as a passive
television viewer you'll be able to actually take part in the
programme. When and if the transmission is prepared for it, you will
be able to use your remote control to e.g. change camera view,
participate in viewer polls, get more background information, browse
through news, check the programme guide, etc.
The system works by sending 'invisible' data in parallel with the
television transmission. This data is called the interactive services.
NB: The above
trademarks are
registered
trademarks of the
respective
companies.
When your DVB 75SI receives an interactive service it will load it into
the receiver and execute it. This is very much similar to loading and
executing a program on a PC. When the service is started it will take
over the control of the receiver and it may take over the screen as
well (using pictures, graphics and texts). "APPL" will be displayed on
the front panel. As normal, you may control the receiver with the
remote control. You can abort a service using the [exit] button, just
as a change of channel using the [P+] or [P-] buttons will abort a
running interactive application and the receiver will return to normal
television mode.
If the interactive application requires that information about your
choices is sent back to the programme provider, your DVB 75SI
automatically uses the built-in modem. The modem sends and
receives the required information via your telephone connection.
This way you may participate in direct television polls or order a
movie. The modem is often referred to as the 'return channel' of the
receiver.
To receive and execute interactive services is normally free of
charge, but access to them may be subject to subscription status.
Use of the return channel is normally charged for as a normal
telephone conversation.
The DVB 75SI requires a normal telephone connection. If you have
an ISDN connection, the DVB 75SI must be connected via an A/B
output (normally available via an ISDN modem or a T/A adapter). If
you do not have a normal telephone connection available, you
cannot use the interactive services that require a return channel.
Your DVB 75SI can easily be set to ignore all interactive services in
case you temporarily only wish to watch normal television.
5
TRIAX DVB 75SI
&RQWUROEXWWRQVDQGFRQQHFWLRQV
)URQWYLHZ
TRIAX DVB 75 SI
2"
1
2
3
4
5HDUYLHZ
6
10
8
VORSICHT !
ELEKTROSCHOK-GEFAHR
M A D E IN G ER M A N Y
NICHT ÖFFNEN !
AERIAL IN
DISH IN PU T
L
TV SCART
230V ~ 50Hz
MAX. 30 W
DIGITAL AUDIO OUT
R
DC 13/18V
MAX 0,4 A
5
CAUTION !
RISK OF ELECTRIC SHOCK
DOLBY DIGITAL / PCM
11
PHONE
12
TV OUT
RS 232
14
7
$%
79
(;7
5
799&56$7
AUDIO OUT
VCR SCART
9
13
5HPRWHFRQWURO
15
17
18
16
3
3
29
28
23
25
27
6
19
20
21
30
OK
H[LW
EDFN
PHQX
JXLGH
9
9
75,$;
DO NOT OPEN !
22
24
26
TRIAX DVB 75 SI
7KHIURQWRIWKHVDWHOOLWHUHFHLYHU
1) Standby (on/off) button
2) Step-by-step change of
programme/channel.
3) Embedded Viaccess smart card
reader.
7KHUHDURIWKHVDWHOOLWHUHFHLYHU
5) LNB INPUT: For connection of the
aerial cable from the LNB unit.
6) AERIAL IN: For connection of the
cable from a VHF/UHF antenna or a
cable system.
7) TV OUT: For connection to a television
set via an RF aerial cable.
8) TV: SCART connector for connecting
the satellite receiver to a television set.
Cable included.
9) VCR: SCART connector for connecting
the satellite receiver to a VCR.
7KHUHPRWHFRQWURO
15) Standby (On/Off). Sets the receiver in
standby mode. It will start from the
favourite list and the channel last used.
16) Muting: Temporary sound switch-off.
17) A/B: Activates the audio menu on the
screen in case of channels with several
audio tracks.
18) TV/SAT: Switches between TV, VCR
and SAT signals to the television set.
19) TV/R: Switches between digital
television and radio reception.
20) 0-9: Numeric buttons from 0 to 9 for
direct entry of programme place numbers and other numeric entries. When
using interactive services, the buttons
are taken over by the application.
21) P+ and P-: Step-by-step change of
programme.
22) Info: Activates information banner
23) exit: Exits running application or menu.
24) back: Goes back to the previous level
of the interactive application or the
main menu.
25) menu: Activates and displays the
receiver main menu for system
settings.
26) guide: On Viasat channels the Viasat
OpenTV portal application is activated,
and on other channels the Triax EPG
is activated.
4)
Common Interface slot
(For PCMCIA CA modules. For
decoding via different Common Access
standards)
10) L/R AUDIO: Phono connector with
stereo audio signal for connecting the
satellite receiver to a HI-FI stereo set.
11) Digital audio: Phono connector with a
digital audio signal.
12) Phone: Telephone connector for
connection to an analog telephone
connection
13) Mains connection: The satellite
receiver is ready for operation when
connected to the mains (230V, 50Hz)
14) RS232: For connection of a PC.
27) V+ and V-: Step-by-step volume ctrl.
28) OK: Opens and displays the current
programme list and confirms entries.
29) Cursor buttons: Active during
interactive applications and in the main
menu for change of function and line
on the screen.
Outside applications: Up/Down
functions as channel switch and
left/right as volume control.
30) Red, Green, Blue, Yellow: Function
buttons the function of which depends
on the interactive application active at
any time.
Function at normal television reception:
yellow = Triax EPG
blue = Subtitle language on pay-TV
channels
green = Channel/signal information
When in standby mode the receiver
may also be started by means of these
buttons and thus your respective
favourite programme lists will be
activated:
red = Danish programme list
yellow = Swedish programme list
blue = Norwegian programme list
green = Viasat/General programme list
7
TRIAX DVB 75SI
1HZGLJLWDOWHFKQRORJ\
A few years ago satellite reception was based entirely on analog
technology, but today more and more channels use the new digital
technology, and your new DVB 75SI is designed to receive digital
signals.
Digital technology has made it possible to transmit 6-8 television
channels using only one bandwidth. In the past one single analog
channel would take up the entire bandwidth. Today, it is possible to
transmit television channels with audio features and subtitles in
several languages. And often at the same time. The user is free to
select the mix that suits him/her best. Additionally, the picture quality
has been improved significantly. The quality difference can be
compared to the quality difference between normal VHS video
recorders and DVD video players.
Thus there are many good reasons for changing over to digital
technology, and by choosing the DVB 75SI you have enabled
yourself to take part in the digital development in many years to
come.
A lot of very exciting interactive services are already being offered,
which the DVB 75SI will give you access to. And you will no doubt
see a lot more in future.
It is easy to predict that more and more satellite broadcasters will
offer their own interactive EPG in future. This will of course make it
very easy for you, the user, to get an overview of all the present and
following programmes. Using the EPG you can easily plan what you
want to watch and when. To a large extent, the EPG will take over
the task of providing television guides and other information
previously solved by television magazines and newspapers.
8
TRIAX DVB 75 SI
,QVWDOODWLRQDQGLQLWLDORSHUDWLRQ
Follow the installation instructions supplied with your satellite dish.
3D\79FDUGUHDGHUV
Your Triax DVB 75SI satellite receiver can receive Pay-TV channels
encoded in many different access systems. It is capable of handling
two different common access systems simultaneously.
DVB 75SI has an embedded Viaccess Common Access System and
a dedicated card reader (to the left/in the middle of the front panel).
Whenever you wish to receive programs encoded with this access
system (e.g. channels from the Sirius satellite: TV3, TV1000,
Cinema, etc.), you simply insert the smart card from Viasat into the
integrated Viaccess card reader.
Additionally, the DVB 75SI is equipped with a Common Interface slot
(to the right on the front panel), where you may insert one of the
many different Conditional Access Modules (CAM) and a
corresponding smart card. CAM modules are available for many
different Common Access systems e.g. CONAX (used by Canal
Digital), Irdeto, Viaccess, Nagravision, Cryptoworks, etc.
Consult your programme supplier or your dealer concerning correct
smart cards, subscriptions and CAM modules.
You do not have to have a subscription and a smart card to use your
DVB 75SI. But without a subscription you will only be able to receive
channels that are free of charge (free-to-air).
&RQQHFWLRQRIWKHVDWHOOLWHUHFHLYHU
When the satellite dish has been mounted, connect cables to all the
connectors and sockets of the satellite receiver required.
Important! Do not connect the receiver to the mains before all
other connections have been made.
9
TRIAX DVB 75SI
&RQQHFWLRQRIWKHµ/1%,1387µVDWHOOLWHVLJQDO
Connect the aerial cable (double-shielded 75 Ohm SAT coaxial
cable) from the LNB unit of the dish to the F-connector of the
receiver.
If the F-connector has not yet been mounted on the cable:
• Strip the cable as illustrated on the drawing, and
2 8 mm
3
• Position the F-connector correctly on the cable and firmly secure
it. Make sure that the cable shield contacts the F-connector
sheath without the shield contacting the inner conductor because
that would lead to a short circuit.
Note!
• Your DVB 75SI has a pre-programmed channel list as it has been
prepared to receive channels from satellites which especially
service the Scandinavian countries: Thor/Intelsat (1 deg. West)
and Sirius (5 deg. East) in the order mentioned.
If your satellite dish has also been set up to receive these two
positions we recommend that you connect them via a 2x1
DiSEqC switch, in the same order (viz.: Thor/Intelsat as position 1
(DiSEqC A/A) and Sirius as position 2 (DiSEqC B/A)). The DVB
75SI has been pre-programmed for this, and you do not have to
take any further action. If you can receive other positions, you
should use a 4x1 DiSEqC switch. The preprogramming also
includes ASTRA (19 degrees East) and Eutelsat/HotBird (13
degrees East).
If you want another set-up, you must alter the settings under ‘LNB
Settings’ in the main menu correspondingly. For further details,
please see chapter 4.3.
Please note that a later resetting of the receiver to the factory
setting will also reset this setting to the basic setting.
• We recommend that you record how you have set up your
satellite dish and the LNBs in order for you to have this
information on hand if you want to reset or change the system
settings later.
10
TRIAX DVB 75 SI
• You can change the factory pre-programming of the channel list,
and even generate favourite lists via the main menu and search
for new channels. Please note that resetting to the factory setting
always resets the receiver to the basic setting and removes any
changes you might have made yourself. The pre-programming
and favourite lists can also be changed in connection with an
upgrade of the satellite receiver software, if you accept this (see
chapter 4.3).
&RQQHFWLRQWR\RXU79
&RQQHFWLRQYLD6&$57FDEOH
You will get the optimum picture quality by connecting the SCART
connector of the satellite receiver to the SCART connector of your
TV by means of the SCART cable (supplied accessories). If your TV
is so set up, it will now automatically switch over to satellite reception
when the satellite receiver is activated. If you use this type of
connector, you can proceed to chapter 2.5.
&RQQHFWLRQYLD5)FDEOH
SCART connection
If your TV is not provided with a SCART connector, the satellite
receiver can be connected to the antenna input on the TV. With this
type of connection it is only possible to reproduce the sound from the
satellite receiver in mono, and the picture quality does not live up to
the high digital quality that your satellite receiver can otherwise
deliver via the SCART connector.
First remove the aerial cable coming from your normal terrestrial
antenna (outdoor, indoor or cable system) from the TV antenna input
and connect it to the antenna/modulator input (ANT IN) of the
satellite receiver. Subsequently, connect the antenna/modulator
output (ANT OUT) of the satellite receiver with a suitable TV
connecting cable to the antenna input of your TV.
RF connection
In order to be able to make the subsequent adjustment of the UHF
output channel, you must connect your satellite receiver to the mains
and switch it on by means of the [standby] button on the remote
control. This is required in order to be able to see the picture of the
satellite receiver on your TV so that you can select channels and fine
tune the UHF channel on your TV. Now set your TV to the transmitter channel of the satellite receiver which has been factory-set at
channel 38.
Select a free programme place on your TV and set it to channel 38
(see the TV user's guide). If you do not get a clear picture on channel 38, the reason may be that channel 38 or an adjacent channel is
already occupied by a programme that you receive via the antenna.
You can ascertain this by removing the aerial cable from the
connector (ANT IN) on the satellite receiver.
11
TRIAX DVB 75SI
If you get a clear picture from the satellite receiver, you must then
set your satellite receiver to use another transmitter channel in the
range from channel 21 to channel 69 (see below).
6HWWLQJRIWKH8+)RXWSXWFKDQQHO
NOTE: A change of the UHF output channel of the satellite receiver
requires a change of setting via the main menu of the receiver. The
UHF output channel can only be seen when the TV is set to channel
38 as described above.
If the setting above results in an unsatisfactory picture, you must
temporarily remove the aerial cable from the antenna/modulator
input (ANT IN) of the satellite receiver. This is the only way to make
sure that you can use the UHF channel 38 set to temporarily display
the main menu of the satellite receiver on the screen to enable you
to make the necessary changes.
• Activate the main menu of the receiver by
pressing the [menu] button on the remote
control.
The main menu now appears on the screen, and
the top menu line with the text ‘TV programmes’
is clearly marked to appear different from the
lines below. (See chapter 4.2, page 20)
• In the main menu you must now mark up the
menu line ’Settings’ by moving the marking on
the screen downwards by means of the
cursor/arrow buttons [arrow down] of the
remote control until the line ‘Settings’ is marked
and highlighted.
• Confirm the choice by pressing the [OK] button
of the remote control. Now the submenu
’Settings’ will appear on the screen.
• Mark up the menu line ’Audio/Video Settings’
in the same way.
• Confirm the choice by pressing the [OK] button
of the remote control. Now the submenu ’Audio/Video Settings’ will appear on the screen.
• Now select the menu line ’UHF output channel’
by marking up this line by means of the [arrow
buttons] of the remote control.
• Now you can enter the new UHF output channel
that you want to use on your TV by entering the
number of the channel directly via the numerical
buttons [0-9] (channel 21 to channel 69) on the
remote control.
12
TRIAX DVB 75 SI
• Confirm the choice of channel by pressing [OK], then a dialogue
box will appear which you will have to acknowledge by pressing
[OK] or [back]. Now the UHF transmitter channel of the satellite
receiver will be changed correspondingly, and the picture will
therefore disappear from you TV which is still set on channel 38.
• Now set your TV to receive on the new UHF transmitter channel
of the satellite receiver. If you still do not receive a good picture
without interference on the channel just set, you must repeat the
procedure described until you find a channel.
• When you have found a UHF channel without interference, do not
forget to store it on your TV. The satellite receiver automatically
stores the new setting when you press the [menu] button on the
remote control.
• Disconnect the satellite receiver from the mains.
UHF
transmitter
channel
chosen:
_________
REMEMBER: Please note that a later resetting to factory settings
always resets the satellite receiver to the original UHF channel
setting on channel 38. We therefore recommend that you make a
note of the UHF channel that you change your satellite receiver to
use here to your left to enable you to make the same setting again
after a resetting without having to experiment first.
&RQQHFWLRQRID9&5
Connect your VCR via a SCART cable to the SCART connector
marked VCR on the satellite receiver. At playback VCRs normally
send a switch signal to the satellite receiver via the SCART cable.
Thus the VCR signal is automatically transmitted to the TV where it
is displayed on the screen.
If your VCR does not send this switch signal, you can switch by
means of the [EXT] button of the remote control.
&RQQHFWLRQRID6XSHU9+6YLGHRUHFRUGHU
VCR connection
If you have a Super VHS VCR, you can make Super VHS quality
recordings from your digital satellite receiver. See sections 4.3.2 and
4.3.3 for information on how to set the signal type of the two SCART
connectors (RGB, Composite video and S-VHS)
&RQQHFWLRQWRD+LILDPSOLILHU
$QDORJDXGLRFRQQHFWLRQ
Analog audio
To get the optimum sound quality you can connect the satellite
receiver to a Hi-fi amplifier. To do this you must connect the Audio R
and Audio L connectors at the back of the satellite receiver with a
suitable cable to the corresponding input on your Hi-fi amplifier (e.g.
AUX, TAPE1 or TAPE2).
13
TRIAX DVB 75SI
'LJLWDODXGLRFRQQHFWLRQ$&
If your Hi-fi amplifier has a digital audio input, you can connect the
AUDIO OUT DIGITAL connector to the digital audio input on your
amplifier. Available sample frequencies: 16, 22.05, 24, 32, 44.1 and
48 KHz.
NOTE: If you receive a satellite channel transmitting full AC3 digital
sound, you must choose the AC3 audio channel via the [A/B] button
on the remote control and the corresponding screen menu. When
the AC3 audio channel has been selected, the sound is exclusively
transmitted from the digital audio output of the satellite receiver (See
also chapter 4.4.4).
Digital audio
3&FRQQHFWLRQYLDVHULDO56FRQQHFWRU
The RS232 connector can be used for linking the satellite receiver
with the serial COM port of a PC. A so-called ’straight through’ serial
cable must be used (pin-1-to-pin-1, pin-2-to-pin-2, etc.).
From Triax’ home page (http://www.triax.dk) you can download e.g.
new software for updating the satellite receiver system software via a
PC programme (e.g. HyperTerm). For this purpose you have to use
the serial number of your receiver. The system software can also be
updated via satellite without use of a PC.
&RQQHFWLRQRIDPRGHPWR\RXUWHOHSKRQHOLQH
The DVB 75SI has an integrated telephone modem. You must
connect the satellite receiver modem connector via the supplied
telephone cable (10 m) to the nearest telephone socket in your
house. If the cable is too short, extension cables and connection
boxes are available from your teleshop.
Often the connection can be made via the small RJ-11 connector in
the supplied cable which fits into the ’phone’ connection of a number
identifier, answer phone or fax. Alternatively, you can go to the
teleshop to buy an adapter which fits into the wall socket of your
telephone connection.
Modem connection
via number
indicator
The modem connection of the satellite receiver requires connection
to a normal telephone line. If you have an ISDN installation, you can
only connect the model to the telephone line if you have an A/B or
TA adapter which gives a normal analog telephone signal. An ISDN
modem usually features such an adapter or it can be bought
separately in your teleshop.
Modem connection
via wall socket
14
TRIAX DVB 75 SI
The modem is automatically used by the satellite receiver when you
receive interactive services requiring a return channel. It is also used
when you want to buy services such as IPPV (Impulse-Pay-PerView, e.g. KIOSK and pay movies). When you have accepted to by
the programme in question, the modem automatically dials up the
telephone number stored on the smart card, contacts the
administration computer of the programme provider and debits your
account.
NOTE: This function will only work if the modem connection of your
satellite receiver is connected to a telephone line, and only if the line
is free (not busy). Moreover, a modem call in progress will
automatically be interrupted if you lift the receiver of your telephone
to make a normal telephone call. In that case you will have to repeat
the order or try again later.
Modem connection
via ISDN modem or
other A/B adapter.
6ZLWFKLQJRQWKHVDWHOOLWHUHFHLYHU
If you have followed the above instructions carefully, you simply
connect the satellite receiver mains plug to the wall socket and
switch the receiver on by means of the red On/Standby button on the
remote control. With your Triax DVB 75SI satellite receiver you can
now enjoy the many digital channels and interactive services at your
disposal.
15
TRIAX DVB 75SI
'DLO\RSHUDWLRQ
This section describes the satellite receiver functions which you will
need every day, and which can be operated via your remote control.
2Q2IIVWDQGE\
When your satellite receiver has been connected to the wall socket
(and the electric current has been switched on), you may switch the
satellite receiver on and off by pressing the [standby] button of the
satellite receiver. The [standby] button on the front panel has the
same function.
You can also switch on the receiver by pressing one of the four
coloured buttons which will switch on the receiver and the
corresponding favourite list (programme list). As a starting point, the
four favourite lists of the receiver are as follows: [red] button =
Danish programme list, [yellow] button = Swedish programme list,
[blue] button = Norwegian programme list and [green] button =
Basic list.
When the receiver has been switched on once via a coloured button,
it will remember the setting and the programme list which will be then
active until another coloured button is used to switch on the receiver.
You should only switch off the satellite receiver entirely (and/or
remove the plug from the wall socket) if you are not going to use the
satellite receiver for a long time (e.g. during holidays). However,
smart card updating will only take place when the receiver is
switched on.
NOTE: The automatic update functions of the satellite receiver are
only active when the satellite receiver is in standby mode. Therefore
the satellite receiver will automatically go into standby mode after 12
hours if no remote control button has been pressed during that
period. You can change or delete the period of this ”floating sleeptimer” in the main menu (See chapter 4 ’Settings').
&KDQJHRIFKDQQHOV
In the following description of methods for change of channels we
anticipate that only a normal TV picture from a chosen channel is
displayed, and that no system or submenus are displayed on the
screen. The satellite receiver stores the channel chosen last and
automatically starts on this channel when switched on again after
having been switched off (or put in stand-by mode).
4XLFNFKDQJHRIFKDQQHOVYLDWKHUHPRWHFRQWURO
Your satellite receiver contains a pre-programmed programme list.
In chapter 4 ”Settings” you can read how to change this or another
one of the programme lists at your own option.
16
$%
(;7
799&56$7
3
%'
#
3
OK
Section of a remote
control with standby
button and four
arrow/coloured
buttons.
TRIAX DVB 75 SI
$%
3
(;7
799&56$7
#
3
You can use the [P+] and [P-] buttons of the remote control to go to
the previous or next channel of the programme list.
You can use the numeric buttons of the remote control [0-9] to select
any channel number from the active programme list. The numbers
entered are displayed in a small box at the bottom left-hand corner of
your TV screen.
If you hesitate more than 3 seconds after entering a
number of the channel number, the satellite receiver
assumes that you have completed your entries and
switches to the channel number entered.
The satellite receiver will switch more rapidly if you
press the [OK] button when you have entered the last
number.
The [arrow up] and [arrow down] buttons of the
remote control can be used for changing channels
just as [P+] and [P-]. Note that these two buttons
may have another function during execution of an
OpenTV application, which may take over both
buttons.
4XLFNFKDQJHRIFKDQQHOVIURPWKHIURQWSDQHO
In addition to the [standby] button on the satellite receiver front
panel, there are two buttons that have the same functions as the
[P+] and [P-] buttons of the remote control, as described above.
4XLFNFKDQJHRIFKDQQHOVYLDDVFUHHQOLVW
As an alternative to the methods for change of channel described
above a screen picture can display the active programme list.
The programme list will be displayed on the screen
when the [OK] button is pressed during ordinary TV
watching.
You can scroll through this programme list using the
[arrow buttons] of the remote control and switch to
any channel by marking it in the list and pressing the
[OK] button of the remote control.
At the top of the screen you can see which
programme list is currently active (the picture shows
a red list, the Danish programme list). You may
change to one of the other lists by setting the receiver
in standby mode (press the [standby] button), and
switching it on again by pressing one of the other
[coloured buttons].
When the [back] button is pressed, the screen list
will disappear without any change of channel.
17
TRIAX DVB 75SI
&KDQJHRIYROXPH>9@DQG>9@
The volume (audio level) of the satellite receiver can be adjusted to
higher or lower audio levels by means of the [V+] and [V-] buttons
on the remote control. This setting only applies to the audio signal to
the TV via a SCART or an antenna connection, NOT to the audio
signal for a VCR via a SCART connection.
During normal operation the [arrow right] and [arrow left] buttons
have the same function as the [V+] and [V-] buttons but these two
buttons may have another function during the execution of an
OpenTV application, which may take over both buttons.
If no other screen menus are displayed on the screen, graphics
indicating the relative volume will be displayed in the top right-hand
corner, and the DVB 75SI will commit this setting to memory.
'LVSOD\FKDQQHODQGSURJUDPPHLQIRUPDWLRQ>LQIR@
With the [i] button of the remote control you can get
information on the present channel name and number
in the programme list, and other programme-related
details. You can also see at what hour a broadcast
begins or ends and icons (small figures) for the
language, coding, teletext, etc. of the audio channels.
Most channels first display a banner containing the
same information which is usually displayed at each
change of channel. If more detailed programme
information is sent to the channel, the information
banner will increase in size after 2-4 seconds, and the
extended information will be displayed.
By pressing the [i] button again you can switch from
information about the present broadcast to information
about the next broadcast.
The information banner will disappear when the [i]
button (or [exit] or [back] buttons) is pressed again.
&KDQJHRIVXEWLWOHODQJXDJH>EOXH@
You can change the language of the subtitles by
pressing the [blue] button of the remote control. This
is only possible on the channels which broadcast
separate subtitles (TV1000, Cinema, Canal Digital,
etc.), and thus it does not affect the subtitles which is
usually transmitted as part of the broadcast picture
(as for Danmarks Radio and TV3).
18
H[LW
EDFN
PHQX
JXLGH
TRIAX DVB 75 SI
'LVSOD\FKDQQHODQGVDWHOOLWHLQIRUPDWLRQ
>JUHHQ@
When the [green] button of the remote control is
pressed, a window containing information about the
basic data of the selected channel will be displayed.
These data include e.g. the name of the satellite,
transponder data, various PID numbers, signal
strength and quality.
The window will disappear when the [green] button is
pressed again.
16:9
16:9 format
A/B
Several audio
tracks
Right mono
&KDQJHWRSUHYLRXVFKDQQHO>EDFN@
You can change between the last two channels watched by pressing
the [back] button.
7HPSRUDU\LQWHUUXSWLRQRIVRXQG>PXWH@
By pressing the [mute] button of the remote control you can
temporarily switch off (mute) the sound. It is a useful function when
the telephone rings in the middle of the most ear-splitting action
movie.
A crossed-out loudspeaker symbol is displayed during muting.
You can switch the sound back on by pressing the same button
again.
Left mono
Digital Audio
&KDQJHEHWZHHQ79DQGUDGLRSURJUDPPHV>795@
With the [TV/R] button of the remote control you can change
between the TV and radio programme lists of the DVB 75SI. At the
same time you will change between TV and radio reception.
The operation is the same of the two programme lists but during
reception of radio programmes a black TV picture is shown. Only the
channel selection bar is displayed at the bottom of the screen.
Coded channel
Subtitles
TxT
Teletext
Banner icons
and meaning.
19
TRIAX DVB 75SI
6HWWLQJVDGYDQFHGXVH
If you find that the basic settings of the satellite receiver meet your
demands, you do not have to change any of them.
When you have connected your new Triax DVB 75SI satellite
receiver and started using it, you can optimise it for your own use if
you wish.
This section contains an outline of the functions that you can use to
change the "behaviour" and/or mode of operation of the satellite
receiver.
Please note that if you make a change, this will be effective until the
satellite receiver is reset to factory setting. You can activate the
resetting yourself, and resetting can take place when updating the
system software.
You should therefore make notes when you change the settings of
the satellite receiver to ensure that you do not forget them and have
to start all over again after a factory setting.
7KHPDLQPHQX
All settings and changes must be made via the menu system of the
satellite receiver. The main menu is activated by pressing the
[menu] button of the remote control, and thus the first level of the
menu system will be displayed, which is also called the main menu.
As illustrated one of the main menu lines is
highlighted to indicate that pressing the [OK]
button will bring you to the submenu marked.
Instead you can select other lines in the main
menu and thus get access to other submenus by
pressing the [arrow buttons] of the remote
control.
If by mistake you press [OK], and thus get access
to a wrong submenu, or if you simply want to go
back one level, you must press [back].
With the buttons [exit] and [menu] you exit the main menu and
return to normal TV or radio reception.
The entire main menu and all its submenus are outlined on page 25.
0HQXODQJXDJH
In this menu you can select the language of the OSD (On-ScreenDisplay) menu texts of your choice. You can choose between the
languages Danish, Norwegian, Swedish, Finnish, German, English,
French, Italian, Turkish, Portuguese and Spanish. The DVB 75SI
supports the Latin alphabet (character set), but not Greek, Arabian
and Cyrillic (Russian).
20
H[LW
EDFN
PHQX
JXLGH
9
9
TRIAX DVB 75 SI
The menu language is changed as follows:
• Activate the main menu by pressing the [menu]
button of the remote control. The system main
menu will be displayed on the screen.
• Press the [arrow up] button of the remote
control once, or the [arrow down] button five
times to mark the ’Menu language’ line.
• Press the [OK] button of the remote control to
inform the system that you want to proceed to
the selected submenu. A menu with a list of
selectable languages will be displayed. You can
scroll up and down between the 11 languages
by pressing the [arrow up] or [arrow down]
buttons of the remote control.
• Now you can store the selected language by
exiting the main menu by pressing the [menu]
button of the remote control, or by going back to
the main menu using the [back] button if you
want to change other system settings.
NOTE: As described in section 3.1, your DVB 75SI receiver has four
programme lists, which can be activated through the four coloured
buttons when the receiver is switched on from standby mode. As a
starting point, the pre-programmed programme lists are designed for
different countries (see 3.1). When the coloured buttons are used to
switch to another programme list, the system also changes the
language of the screen texts (OSD texts) to the language of the
country concerned and the corresponding language of subtitles and
sound.
To ease the work concerned with "customising" your receiver for
you, selection of another language in the main menu as described
above will automatically lead to a change of subtitles and sound to
the same language. This means for instance that if you wish to use
the yellow favourite list for a list of news or film channels, you simply
have to switch to the yellow programme list, change the OSD
language from Swedish to English, and that's it.
You may subsequently carry out individual searches, deletions or
rearrange the contents of the programme list, or make individual
language settings in the submenus provided for that purpose.
21
TRIAX DVB 75SI
$QRXWOLQHRIWKH'9%6,V\VWHPPHQXV
Select channel for list
TV programmes
Press the
[menu] button
of the remote
control to open
Move channel in list
Radio programmes
Lock channel
Main menu
Search
EPG (active after update)
Menu language
22
Search programme
Search all
Search transponder
Search satellite
TRIAX DVB 75 SI
Audio/Video settings
LNB set-up
Data for LNB (position)
Basic settings
System Information
Set satellite position
Change of PIN code
(standard code = 0000)
Access settings
Back to factory setting
Settings
Factory/default setting
Delete all programmes from
current programme list
Service channel for
downloading of new
software version.
Timer settings
Modem settings
23
TRIAX DVB 75SI
7URXEOHVKRRWLQJ
Problem
Cause
Remedy
No picture, no sound, and front No mains voltage
display not illuminated
Check mains cable and socket
No picture, no sound, but front Short circuit in LNB supply,
display illuminated
defective cable connection
Turn off DVB 75SI, remove
short circuit and turn receiver
on again.
Defective or wrong cable
connection
Defective LNB
Wrong adjustment of LNB unit
Periodic squares in the picture Strong rain or snow
(macro blocking)
Wrong adjustment of dish
Periodically frozen picture, no
sound
Dish too small
An obstruction between dish
Periodically black screen and and satellite (e.g. a tree)
the message 'No signal'
Sound OK, no picture
Poor picture and sound on
channels that were previously
OK
The remote control does not
work
Radio reception has been
selected
The dish has been turned or is
defective
The programme is transmitted
on another transponder
The programme is no longer
transmitted
Flat batteries
Check all cable connections
Replace LNB
Turn the dish so that LNB units
point at satellite correctly.
Remove snow from the dish
Adjust the dish correctly (within
1 degree)
Use bigger dish
Make sure that there are no
obstructions.
Switch to TV reception [TV/R]
Check satellite dish and LNB.
Carry out programme search
None
Replace batteries
7HFKQLFDOWHUPV
Aerial cable:
Conax:
Connecting cable between the modulator
of the satellite receiver and the TV
antenna input, as an alternative if no
SCART connector is available.
Digital coding method.
AV: see SCART
24
Data compression/MPEG1/MPEG2:
Transmission of the present TV standard
(625 lines and 50 Hz picture frequency)
requires a digital data amount of 216
Mbit/s. This would require transmission
TRIAX DVB 75 SI
bandwidths that are not available either
terrestrially or via satellite.
Therefore a reduction of the data amount
is made through data reduction. In
Europe MPEG-2 is the universal
standard for data compression. MPEG2
is an extension of MPEG1.
DiSEqC:
Digital Satellite Equipment Control: A
digital control signal for controlling the
DiSEqC-compatible units of the dish over
the coaxial cable.
DVB:
Digital Video Broadcasting: a digital,
universal transmission technique for
picture, graphics, sound and text as well
as for data of any shape and quality.
Frequency:
Physical quantity, indicates the number
of cycles per second, measured in Hertz
(Hz).
LNB/LNC:
(Low Noise Block Converter): Receiving
unit in the dish focus, converts the
satellite frequency range to the
intermediate frequency of the receiver.
LOF:
Local oscillator frequency, indicated in
MHz or GHz, depending on LNB and
frequency range received.
Received frequency of receiver =
transmitter frequency of satellite - LOF.
Intermediate frequency:
The frequency range from the satellite
cannot be transmitted via a cable and is
therefore converted to the intermediate
frequency range from 950 to 2050 MHz
by the LNB. This allows for transmission
and processing in the receiver.
IF = Intermediate frequency
Modulation with 22 KHz:
11 GHz range from 10.70 GHz to 11.70 GHz
For switching between 13/18 Volt and
between 2 LNBs. When using universal
LNB: For switching from lower to higher
range (11.70 to 12.75 GHz).
12 GHz range from 11.70 GHz to 12.75 GHz
Modulator:
b) Receiver:
Output terminal on the satellite receiver
or video tape recorder, for connection to
the TV by means of aerial cable.
Frequency range:
a) Satellite and LNB:
Intermediate frequency or 1 IF: 950 to 2150
MHz
Unit of frequency / Designation /
Cycles per second:
1 Hz
1 Hertz
1
1 kHz
1 Kilohertz
1,000
1 MHz
1 Megahertz 1,000,000
1 GHz
1 Gigahertz
1,000,000,000
Coaxial cable:
Connecting cable between LNB and
satellite receiver, for transmission of
signals received and for supply of power
to LNB unit.
Multifeed:
Outdoor unit consisting of a dish and
several LNBs for reception of various
satellites.
Satellite dish:
A dish-shaped antenna (reflector) made
of metal or metallised synthetic material
for bunching of electromagnetic waves
from the satellite in a focus.
Polarisation:
For better utilisation of the available
frequency bands the satellites transmit
adjacent programmes, with opposite
polarisation (horizontal and vertical or
25
TRIAX DVB 75SI
circular left or circular right). Reception of
both types of polarisation requires two
single LNBs or a V/H-LNB (Universal
LNB).
reception of data from earth station,
amplification and radiation/transmission
to earth.
Receiver: see satellite receiver
A designation for a three-band LNB. For
reception of the ranges FFS (10.70 11.70 GHz), BBS (11.70 - 12.50 GHz)
and FFS High Band (12.50 - 12.75 GHz).
The total range is divided into two bands:
Satellite:
Universal LNB:
A designation for the transmitting unit in
space. Most often referred to by name
and position, e.g. ASTRA 19° East,
EUTELSAT 13° East
Low Band: 10.70 - 11.80 GHz; LOF 9750 MHz
Satellite receiver:
High Band: 11.70 - 12.75 GHz; LOF 10600 MHz
The signals received and converted by
the LNB cannot be processed by the TV.
The satellite receiver processes them,
and transmits audio and video signals
(AV) to the TV through its outputs.
Power supply:
SCART:
A connector on TV sets, VCRs, satellite
receivers and other entertainment
equipment for transmission of audio
(sound) and video (picture) signals (AV).
Transponder:
Carries out the processing of one or
more programmes from a satellite, i.e.
LNBs are powered through the coaxial
cable to which the receiver supplies a
voltage of 14 or 18 Volt.
Outdoor unit:
A designation for the equipment
mounted outside, consisting of satellite
dish/offset dish and one or more LNBs
for reception of signals from one or more
satellites, and DiSEqC converters, if
any.
Viacces:
Digital coding method.
7HFKQLFDOVSHFLILFDWLRQV
Front end:
Input frequency range: 950...2150 MHz
Input level: -65 dBm ... -25 dBm
Noise level: max. 12 dB
Tuner input: F-connector
Input impedance: 75 Ohm
AFC-pull-in range: +/- 3 MHz
Demodulation: Shaped QPSK
Symbol rate: 2...32 Mbauds, SCPC comp.
FEC: Viterbi and Reed-Solomon
Viterbi rates: 1/2, 2/3, 3/4, 5/6, 7/8, auto
(K=7)
Video:
Video compression: MPEG-2 and MPEG-1
compatible
Active picture surface: 720 Pixel x 576 lines
Picture format: 4:3 / 16:9
Pictorial material: 16:9 Automatic
adjustment to 16:9 TV (via SCART)
26
Letterbox filtering for 4:3 TV
Audio:
Audio compression: MPEG-1 & MPEG-2 I+II
Audio mode: Dual (main/sub), stereo
Sample frequencies: 32 kHz, 44.1 kHz, 48
kHz, 16 kHz, 22.05 kHz, 24 kHz
Audio parameter: Analog output
Output level: L/R 0.5 r.m.s. (nominal)
Output impedance: 600 Ohm
THD > 60 dB (1 kHz)
Crosstalk < - 65 dB
Dynamic range > 60 dB
Audio parameter: Analog input
Input level: L/R 0.5 V r.m.s. (nominal)
Input impedance > 40 kOhm
Audio parameter: Digital / electrical output
(SP/DIF): Output level: 0.5 V ss at 75 Ohm
Sample frequencies: 32 kHz, 44.1 kHz, 48
kHz over phono connector
TRIAX DVB 75 SI
Video input:
Input level: FBAS 1 Vs-s +/- 0.3 dB
at 75 Ohm
Input level: RED 0.7 Vs-s+/-0.1Vp-p
at 75 Ohm
Input level: GREEN 0.7 Vs-s+/-0.1Vp-p
at 75 Ohm
Input level: BLUE 0.7 Vs-s+/-0.1Vp-p
at 75 Ohm
Teletext demultiplex according to the ETS
300 472 standard
Teletext in VBI according to ITU-R
BT.653.2, in lines: 6-22 and 320-335
TV SCART:
Output: CVBS, RGB and S-VHS replaceable
VCR SCART:
Input: CVBS, RGB or S-VHS
Output: CVBS or S-VHS
Serial port RS 232:
Type RS 232, bi-directional
Bit rate: Max. 115 kBit/s
Connector: D-SUB connector, 9-pin
Function: Update of system software and
pre-programming
PLL modulator:
Output channel range: UHF, channels 21-69
Antenna input 47...862 MHz
Input impedance: 75 Ohm
Output impedance: 75 Ohm
Standard: PAL B/G and PAL I
Favourite lists:
3 lists, assigned red, yellow and blue
buttons on the remote control.
Green button gives access to standard
Viasat list (1-500), plus selectable channels
501-999
Number of active satellite positions:
Max. 4 (DiSEqC 1.0, SAT POS/SAT OPT)
Max. 32 (DiSEqC 1.2 - rotor control)
Number of satellite positions: 32 in total
A transponder (home-transponder) has
been stored for each one of the 32 satellite
positions, enabling the user to carry out
automatic programme searches at the
different satellite positions.
Remote control:
System: RC-5
Sub-system address: 10 (SAT 1)
Modulation frequency: 36 kHz
Infrared wavelength: 950 nm
Power supply:
<30 W (in operation, horizontal polarisation /
400 mA LNB power)
<15 W (in operation, without LNB)
< 7 W (standby)
Input voltage: 180-250 VAC/(47…63) Hz
In general:
Dimensions: (wxdxh) 370 mm x 265 mm x
65 mm
Weight: 2.2 kg
LNB power supply:
LNB power: Max. 400 mA; short-circuit
protected
Vertical LNB voltage: <14.0 V unloaded,
>11.5 V at 400 mA
Horizontal LNB voltage: <20 V unloaded,
> 17.5 V at 400 mA
LNB voltage in standby mode: on/off
22 kHz modulation: 22 kHz +/- 2 kHz, amplitude 0.6 V +/- 0.2 V
Programme storage/satellite positions:
Programme number, favourite list, TV:
999 TV programmes (P1 to P999)
Programme number, favourite list, radio:
999 radio programmes (R1 to R999)
Programme memory:
TV/radio: a total of 4000 programmes.
27