1
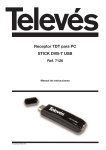
DVB-T USB SET-TOP BOX
User Manual
Version: 1.0
(February 2005)
TRANSYSTEM INC.
No.1-2 Li-Hsin Rd.I Science-Based
Industrial Park, Hsinchu, Taiwan
Tel:+886-3-5780393 Fax:+886-3-5784111
e-mail: [email protected]
website: www.transystem.com.tw
Table of Contents
Chapter 1 DVB-T USB SET-TOP BOX Introduction ...................…..........……......3
1.1 Introduction ............................................................................................…….... 3
1.2 Package Content ....................................................................................….….... 3
.
1.3 System requirements ......................................................................…..................3
1.4 Features .....................................................................................................….........4
1.5 Hardware specification……………………………………………….…….…...4
Chapter 2 Installation Procedure ..................................................…...….….......5
Chapter 3 System Setup .....................................................................……...........12
3.1 How to scan ................................................................................…...........…..….12
3.2 Control panel introduction....................................................................……......13
3.3 Functional setting.................................................................................... .….….15
3.4 Right click menu...........................................................................................…........20
Chapter 4 Trouble Shooting.................................................................. . .…...…21
2
Chapter 1. DVB-T USB SET-TOP BOX Introduction
1.1 Introduction
DVB-USB is an advanced-designed digital television receiver for PC users,
especially for viewing and recording digital programs. Recordings can be
made while viewing the programs or prescheduled in advance.
DVB-USB enables viewing multiple channels simultaneously, and also allows
you to switch to your favorite channel instantly after browsing through the
channels. What’s more, the convenient “TimeShift” function provides a new
television watching experience by allowing you to pause, replay, and even
fast-forward or rewind the ongoing programs.
1.2 Package Content
△ DVB-T USB SET-TOP BOX x 1
△
△
△
△
Quick Installation Guide x 1
USB Cable x 1
DVB-T Active Antenna x 1
Driver CD (Multi-language Software and User’s Manual) x 1
1.3 System Requirements
△
△
△
△
△
△
△
△
△
△
△
Microsoft Windows 2000/XP
Desktop PC or Notebook PC
750MHz CPU or above
128M RAM or above
VGA Card with at the least 16MB Memory
Sound Card
Free USB Port
Microsoft Direct X 9.0b or above
Digital Terrestrial TV Antenna
64QAM @ USB2.0 only
10MB Hard Disk Space for running the software
3
1.4 Features
△
△
△
△
△
△
△
△
△
△
△
Support DVB Protocol (ETS 300 744)
Digital Terrestrial TV and Radio Program Receiving
Real Time Digital Video Recording (DVR) and Scheduling Recording
Time-Shifting
Electronic Program Guide (EPG)
Snapshot
Multi Channel Preview
Channels Auto Scan 6/7/8 M
Teletext *
Favorite List
MPEG-II Software Decoding
Note: The Digital Radio mentioned here is not the same with DAB
(Digital Audio Broadcasting), it means the audio broadcasting by the
DVB-T content provider.
Note: * Depends on Content Provider
1.5 Hardware Specification
△
△
△
△
△
△
△
△
Support DVB-T(EN300744)
USB 2.0/1.1 interface
DC 5V±5% Power Input
Tuner 5V±5% Power output
USB Bus-Powered, current<500mA @ 5V DC
DVB-T IEC connector
Green LED: Signal Lock
Red LED: Power Indicator
4
Chapter 2. Installation Procedure
Before you proceed with the installation, it is important that you to know: A
complete installation includes “Driver” and “Application Program”,
both parts can be installed easily from the software CD. Please follow
the instructions.
It is strongly recommended that you use the DVB-T Active
Antenna included in the product packaging to avoid possible
short-circuit and device damage.
Note1: The following installation is operated under Windows
2000. (Procedures are the same in Windows XP)
Note2: Be sure the DVB-T USB SET-TOP BOX is connected to your PC
when you are installing the software.
Note3: After connecting DVB-T SET-TOP BOX to your computer, a
pop-up window saying “Found New Hardware Wizard” will
appear. Please click “Cancel” to quit the wizard, the driver
will be installed automatically from CD.
5
A.
Execute the “Setup.exe” program from the CD. The InstallShield Wizard
will check the operating system version first. Please follow the directions after
it finishes checking.
B.
Click “Next” to continue.
C.
Choose “I agree….” and click “Next” to continue.
6
D. Enter your user information and click “Next” to continue.
E. Please input 16 serial numbers and click “Next” to continue.
(Serial number can be found on the software CD label)
7
F. Please read the information and click “Next” to continue.
G. Please select the user interface language that you want to install and click “Next”
to continue.
H. Select an installation folder and click “Next” to continue.
8
(Or click “Change” to switch to an existing folder)
I. Select a shortcut folder and click “Next” to continue.
9
J. Please click “Next” to process with installation
K. Restart the computer and make sure the DVB-T USB SET-TOP BOX is connected
to your computer correctly. Please wait 2-3 minutes for the system to find the
device. The DVB-T USB SET-TOP BOX is now successfully installed.
10
L. Click “Finish” to complete the installation.
Note: A dialog saying “Digital Signature Not Found” might appear to warn you
that the device hasn’t got Microsoft Digital Signature. Select “Yes” to continue
the installation, the software has been tested and proved to work correctly with
Windows.
11
Chapter 3. System Setup
3.1 How to scan
Before watching or listening to TV/Radio, start “Scan Channel” and choose
one of the four channel scanning methods (including “Country/Region”, “All”,
“Range”, and “Single”) to conduct program scanning. The scan results will be
shown on the TV and Radio lists, you can also save the list for future use.
The program will ask you to scan channel when you first execute DVB-USB.
Step1. Please select a Country or Area you are in.
Step2. Please click “Start” to scan.
Step3. Please click “OK ” when the scan is finished.
3.2 Control panel introduction
The DVB-USB default control panel is shown below.
It allows switching to
All main functions can be operated via the
different panels as required.
buttons or shuttle on the control panel. Messages delivered to you will be
shown on the left side of the LCD to give you a full understanding of the
current status.
12
Buttons
Play – TV, files
Stop – TV, recordings, files, TimeShift
Pause – TV, recordings, files, TimeShift
Fast-Forward – files, TimeShift
Rewind – Files, TimeShift
Snapshot (capture single image)
Record TV
Minimize to taskbar
End program
Enable/Disable TimeShift
Play files
Open function setting window
Open EPG window
Open My Favorite
Open Teletext
Mute On/Off
Numeric keypad ( 0~9 )
Clear input
Next channel
Previous channel
Change to the last channel
Return to TV
View multiple channels
Maximize to full screen / restore down
Volume Shuttle (Adjust volume )
13
LCD display
1
2
54
3
6
8
9
7
11
1
Display volume
2
Mute on/off
3
Display playing status
4
Display RF strength
5
Display RF quality
6
Display media type
7
Display channel
8
Display TimeShift playing time
9
Display playing speed
10
11
10
Display file name or name of external device
A time scroll will appear after TimeShift is activated. Red
represents the recorded sections and green represents
sections available for recording.
14
3.3 Functional setting
3.3.1 General
Full screenÆ Activate full screen playing
Always on Top Æ Fix the image display window on top of the desktop
Enable OSD Æ Turn on OSD display
Refresh RD Information Æ Turn on RF information display
15
3.3.2 Scan channel
RF frequency Æ There are 4 modes available for selection: “Country/Region”,
“All”, “Range”, and “Single”.
Bandwidth Æ There are 3 types of bandwidth available for selection: “6”, “7”,
and “8”
Start Æ Start scanning
Stop Æ Stop scanning
Scan process Æ Display scan completion rate
TV Æ Display scanned TV program list
Radio station Æ Display scanned radio program list
Open Æ Open created program list
Save Æ Save program list
Save as Æ Save program list as other file name
Delete Æ Delete programs from one list
Delete All Æ Delete programs from all lists
16
3.3.3 Recorder
Storage Resource Æ Display computer’s memory size
Save To Æ Set recording path
Progress Æ Display recording progress
Enable Preset Æ Activate pre-schedule recording function
Delete All Æ Delete all pre-schedule programs
Delete Æ Delete a pre-schedule program
Note: Once recording is completed, the “OK” sign will appears on
the list
17
3.3.4 Display
Brightness Æ Adjust image
brightness Contrast Æ Adjust image
contrast Hues Æ Adjust image hues
Saturation Æ Adjust image saturation
Reset Æ Restore to default settings
18
3.3.5 Capture
Set image capture to Clipboard or an assigned folder
3.3.6 TimeShift
Set time limit for TimeShift.
19
3.4 Right click menu
The following functions will appear when right clicking on the control panel or
TV broadcasting window.
20
Chapter 4. Trouble Shooting
1. The “Found new hardware wizard” window pops up while
plugging in the DVB-T USB SET-TOP BOX
Please refer to “Chapter 2. Installation Procedure” in the user manual. In Windows
XP/2000, if you change the USB port, you have to install the driver again.
2. DVB-T USB SET-TOP BOX does not work properly
In most cases, it’s because of the drivers were not installed well. You might check
the driver installation in the device manager of Windows Control Panel. In the
device category “Sound, video and game controllers”, there must be a device
named “DVB-T USB2.0/1.1 adapter”. If not, please remove the USB box, plug it into
the USB port again and follow the steps in “Chapter 2. Installation procedure” in the
user manual to re-install the driver.
3. Windows cannot find DVB-T USB SET-TOP BOX
a. Check whether DVB-T USB SET-TOP BOX was connected correctly in the USB port.
b. After the USB box is plugged into the USB port, wait for at least 3 seconds before
you launch DVB-USB.
c. Re-start the operation system.
d. Run "Add/Remove Hardware Device" from Windows "Control Panel" to install
the correct drivers.
e. Unplug the USB box, and then plug it again. Please note that the interval
between plug and unplug should be at least 3 seconds.
f. Plug DVB-T USB SET-TOP BOX into another USB port of the PC.
4.
Windows cannot find the driver of DVB-T USB SET-TOP BOX
Make sure the original CD-ROM is in the CD-ROM drive during the installation.
Please indicate the correct directory where the drivers are located in Windows if
install the drivers by manual.
5. Can not lock any program channel when auto scan.
Please click "OK" button after making or changing any setting in "Scan Channel"
before scanning the terrestrial signal.
Check the cable connection between DVB-T USB SET-TOP BOX and the antenna.
Please note that the cable should be connected well to the connector of the
DVB-T USB SET-TOP BOX. Exit DVB-USB. Unplug the USB box, and then plug it
again. Note that the interval between plug and unplug should be at least 3
seconds. Launch DVB-USB and test again.
21
6. When error dialog box pops up or black screen appears
Might be resulted from poor signal quality, DVB-USB doesn't receive enough data
of program or receives wrong data. Please check the connection between DVB-T
USB SET-TOP BOX and the antenna.
Please check the driver of VGA card or on board VGA chip.
Please make sure your operation system is Microsoft Windows 2000/XP.
Please install Microsoft DirectX9.0b or above.
7. Failed to play program
Make sure you have installed Sound Card Driver and the Sound Card is working.
Please note that no matter you want to listen to the audio or not, the sound card
and its driver must be installed.
Please check the signal quantity and strength.
8. When playing program, I can only hear the sound but
can’t see any images.
Please make sure your VGA driver and Microsoft DirectX9.0 were installed correctly.
9. DTV MPEG2 video playback on Notebook PC's is not
smooth
MPEG2 video playback consumes lots of CPU power. To get better performance,
please make sure "Power-saving" mode of the Notebook PC is disabled and the CPU
should run at its maximum frequency.
22