Download Receptor TDT para PC STICK DVB
Transcript
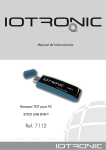
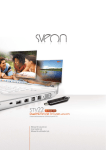
Receptor TDT para PC
STICK DVB-T USB
Ref. 7126
Manual de instrucciones
© Copyright, Televés, S.A.
STICK DVB-T USB
Manual de instrucciones
Índice
1.-
.......................................................
Pág.
Introducción STICK USB DVB-T . . . . . . . . . . . . . . . . . . . . . . . . . . . . . . . . . . . . . . . . . . . . .
4
1.1.- Introducción . . . . . . . . . . . . . . . . . . . . . . . . . . . . . . . . . . . . . . . . . . . . . . . . . . . . . . .
4
1.2.- Contenido del embalaje . . . . . . . . . . . . . . . . . . . . . . . . . . . . . . . . . . . . . . . . . . . . . .
4
1.3.- Requisitos del sistema . . . . . . . . . . . . . . . . . . . . . . . . . . . . . . . . . . . . . . . . . . . . . . .
4
1.4.- Características . . . . . . . . . . . . . . . . . . . . . . . . . . . . . . . . . . . . . . . . . . . . . . . . . . . . . .
4
1.5.- Especificaciones del hardware . . . . . . . . . . . . . . . . . . . . . . . . . . . . . . . . . . . . . . . . .
4
2.-
Procedimiento para la instalación . . . . . . . . . . . . . . . . . . . . . . . . . . . . . . . . . . . . . . . . . . . .
5
3.-
Configuración del sistema . . . . . . . . . . . . . . . . . . . . . . . . . . . . . . . . . . . . . . . . . . . . . . . . .
13
3.1.- Como iniciar la búsqueda . . . . . . . . . . . . . . . . . . . . . . . . . . . . . . . . . . . . . . . . . . . . .
13
3.2.- Introducción al panel de control . . . . . . . . . . . . . . . . . . . . . . . . . . . . . . . . . . . . . . . .
14
3.3.- Configuración funcional . . . . . . . . . . . . . . . . . . . . . . . . . . . . . . . . . . . . . . . . . . . . . . .
16
3.4.- Menú botón derecho . . . . . . . . . . . . . . . . . . . . . . . . . . . . . . . . . . . . . . . . . . . . . . . . .
21
4.-
Funciones Principales . . . . . . . . . . . . . . . . . . . . . . . . . . . . . . . . . . . . . . . . . . . . . . . . . . . . .
22
5.-
Solución de problemas . . . . . . . . . . . . . . . . . . . . . . . . . . . . . . . . . . . . . . . . . . . . . . . . . . . .
26
3
STICK DVB-T USB
Manual de instrucciones
1.- Introducción STICK USB DVB-T
1.1.- Introducción
El DVB-USB es un receptor de televisión digital de diseño
avanzado para usuarios de NB y PC. Está especialmente
indicado para visualizar y grabar programas digitales. Las
grabaciones de los programas se pueden realizar al mismo
tiempo que se estén viendo o se puede programar la grabación con anterioridad.
El DVB-USB permite ver múltiples canales de forma simultánea, y también permite cambiar a un canal favorito de forma
instantánea después de mirar los canales. Es más, la función práctica "TimeShift" proporciona una forma nueva de
ver la televisión al poder detener, repetir, e incluso avanzar
rápidamente o rebobinar los programas en curso.
1.2.- Contenido del embalaje
1 x STICK USB DVB-T
1 x CD Drivers
1 x Mando a distancia
(Software multilingüe y Manual de instrucciones)
1 x Antena para DVB-T (UHF/VHF)
3 x Guía de Instalación rápida
1 x Prolongador USB
1.3.- Requisitos del Sistema
Microsoft Windows 2000/XP
Puerto USB libre
PC sobremesa o Notebook PC
Microsoft Direct X 9.0c o superior
800MHz CPU o superior, 1GHz recomendado
10MB de espacio en el disco duro para el software
128M RAM o superior, 256MB es recomendada
500MB de espacio en disco duro para el funcionamiento
de Time-Shifting, la grabación de video digital en tiempo
real (DVR) y la grabación programada.
Tarjeta VGA con un mínimo de memoria de 16MB
Tarjeta de sonido
1.4.- Características
Soporta protocolo DVB (ETS 300 744)
Búsqueda automática de canales 6/7/8 M
Receptor de TV Digital Terrestre y Radio
Teletexto *
Grabación de video digital en tiempo real (DVR) y grabación programada
Lista de Favoritos
Time-Shifting
DxVA
Guía electrónica de programación (EPG)
Multilingüe
Toma de instantáneas
Subtítulos
Descodificación de Software MPEG-II
Previsualización de varios canales
1.5.- Especificaciones de Hardware
Soporte DVB-T (EN300744)
Conector CEI
Interfaz USB 2.0
Antena para DVB-T x 1 (UHF/VHF)
Entrada de corriente DC 5V±5%
LED verde: Encendido
Alimentación Bus USB, corriente <500mA @ 5V DC
Nota: La radio digital mencionada aquí no es lo misma que
DAB (transmisión audio digital), queriendo decir que es la
transmisión de audio del proveedor de contenidos DVB-T.
Nota: * Depende del proveedor de contenidos
4
STICK DVB-T USB
Manual de instrucciones
2.- Procedimiento de instalación
Antes de proceder con la instalación, es importante saber:
Una instalación completa incluye "Driver" y "Programa de aplicación", ambos pueden ser instalados fácilmente desde el CD
de software.
Por favor siga las instrucciones.
Nota: Asegúrese que el STICK USB DVB-T "NO" esté conectado al PC mientras se instala el software.
A.- Al poner el CD en el CD-ROM la instalación comenzará de forma automática. Si esto no fuese así ejecutar el programa
"Setup.exe" desde el CD.
B.- El primer paso es instalar el driver y Windows mostrará la siguiente ventana de advertencia, seleccione "Continuar". Si
utiliza Windows 2000, aparecerá "Digital Signature Not Found". Seleccione "Yes" para continuar con la instalación.
5
STICK DVB-T USB
Manual de instrucciones
C.- Después de completar la instalación del driver haga clic en "Finish" para salir de la instalación y configuración del driver
y automáticamente irá a la aplicación.
D.- Instalación USB-DTV. Haga clic en "Siguiente" para continuar.
E.- Seleccione "Acepto…." y haga clic en "Siguiente" para continuar.
6
STICK DVB-T USB
Manual de instrucciones
F.- Introduzca la información de usuario y haga clic en "Siguiente" para continuar.
G.- Introduzca el número de série de 16 dígitos y haga clic en "Siguiente" para continuar.
(El número de série se encuentra en la etiqueta del CD de software)
H.- Seleccione el lenguaje de interfaz que desea instalar y haga clic en "Siguiente" para continuar.
7
STICK DVB-T USB
Manual de instrucciones
I.- Seleccione una carpeta de instalación y haga clic en "Siguiente" para continuar.
(O haga clic en "Cambiar..." para cambiar a una carpeta ya existente)
J.- Seleccione una carpeta para los accesos directos y haga clic en "Siguiente" para continuar.
K.- Haga clic en "Siguiente" para continuar con la instalación
8
STICK DVB-T USB
Manual de instrucciones
L.- Reinicie el ordenador y asegúrese de que el STICK USB DVB-T esté conectado correctamente al ordenador. Espere 2-3
minutos hasta que el sistema encuentre el dispositivo. El STICK USB DVB-T se ha instalado correctamente.
M.- Haga clic en "Terminar" para completar la instalación.
N.- Conecte el dispositivo al PC. Windows intentará encontrar el driver, y mostrará la ventana "Asistente para hardware
nuevo encontrado". Si utiliza Windows XP, aparecerá la ventana que se muestra a continuación y le permitirá escoger
la actualización del driver desde Windows, seleccione "No por el momento" y haga clic en "Siguiente" .
9
STICK DVB-T USB
Manual de instrucciones
O.- Seleccione "Instalar automáticamente …" y haga clic en "Siguiente" .
P.- Durante la instalación del driver aparecerá una ventana de instalación de Software, seleccione "Continuar". Si utiliza
Windows 2000, aparecerá "Digital Signature Not Found", seleccione "Yes" para continuar con la instalación. El software ha sido probado y se ha demostrado que funciona perfectamente con Windows.
Q.- Seleccione "Finish" para cerrar el asistente.
10
STICK DVB-T USB
Manual de instrucciones
Intérprete adicional
Al instalar el driver, éste comprobará el sistema. Si el sistema es inferior a Windows 2000 Service Pack 4 / XP Service Pack
2, el driver instalará Direct X 9.0c (ver ventana abajo) en el ordenador.
- Seleccione "I accept the agreement" y haga clic en "Next" .
- Haga click en "Next".
- Después de la instalación, haga clic en "Finish", el ordenador se reiniciará de forma automática.
11
STICK DVB-T USB
Manual de instrucciones
Desinstalación
Paso 1. Se puede entrar de dos formas:
Seleccione ”Inicio” => ”Programas” => ”USB-DTV” =>”Desinstalar USB-DTV”.
Seleccione ”Panel de Control” => ”Agregar o Quitar Programas” => ”USB-DTV 1.4” => Haga click en "Quitar"
Tal y como muestra la ventana de abajo, después haga clic en "Siguiente".
Paso 2. Cuando haya terminado de quitar el programa, haga clic en "Terminar", y reinicie el ordenador.
12
STICK DVB-T USB
Manual de instrucciones
3.- Configuración del sistema
3.1.- Como iniciar la búsqueda
Antes de ver o escuchar la TV/Radio es necesario iniciar "Escanear canal" y escoger uno de los cuatro métodos de búsqueda, pero antes de iniciar la búsqueda de programas incluir "País/Area", "Todo", "Rango" y "Unico". Los resultados de la
búsqueda se mostrarán en las Listas de TV y Radio, también se podrá guardar la lista para su utilización en un futuro.
El programa pedirá que realice la búsqueda de canales al ejecutar el DVB-USB por primera vez.
Paso 1. Seleccione el país o región en donde se encuentra.
Paso 2. Haga clic en "Inicio" para iniciar la búsqueda.
Paso 3. Haga clic en "OK " cuando la búsqueda se haya completado.
13
STICK DVB-T USB
Manual de instrucciones
3.2.- Introducción al panel de control
El panel de control por defecto DVB-USB se muestra abajo. Todos los funciones principales pueden ser manejadas mediante los botones del panel de control. Para una visión clara y completa del estado, recibirá mensajes que se mostrarán en la
parte izquierda del LCD indicando el estado actual.
Botones
Iniciar - TV, archivos
Abrir mis favoritos
Parar - TV, grabaciones, archivos, TimeShift
Abrir teletexto
Pausa - TV, grabaciones, archivos, TimeShift
Mute On/Off
Avance rápido - archivos, TimeShift
Teclado numérico (0~9)
Retroceso - archivos, TimeShift
Borrar entrada
Toma una imagen
Canal siguiente
Grabar TV
Canal anterior
Minimizar a la barra de herramientas
Cambiar al último canal
Finalizar programa
Volver a modo TV
Habilitar/Deshabilitar TimeShift
Ver multiples canales
Reproducir archivos
Maximizar a pantalla completa / restablecer
Abrir ventana de configuración de funciones
Ajuste volumen
Abrir ventana EPG
Idioma del Audio
Canal de audio
Subtítulos
14
STICK DVB-T USB
Manual de instrucciones
Display LCD
4
8
5
7
6
9
3
1
2
1
Indicación de volumen
2
Indicación del Canal de audio y estado de Mute (on/off)
3
Indicación del estado de reproducción
4
Indicación del nivel de señal de RF
5
Indicación de la calidad de la señal de RF
6
Indicación del tipo de fuente
7
Muestra el número de canal
8
Indicación de tiempo para TimeShift
9
Muestra el nombre de archivo o dispositivo externo
15
STICK DVB-T USB
Manual de instrucciones
3.3.- Configuración funcional
3.3.1.- General
Pantalla completa: Activar pantalla completa
Siempre encima: Fijar la ventana visualizadora de imagen
en primer plano
OSD Disponible: Activa el menú en pantalla
Refrescar Información RF: Activar el visualizador de
información RF
3.3.2.- Búsqueda de canales
Frecuencia RF: Hay cuatro modos disponibles:
"Pais/Area", "Todo", "Rango", y "Unico".
Ancho de Banda: Hay 3 tipos de ancho de banda disponibles: "6", "7", y "8" MHz.
Inicio: Iniciar la búsqueda
Detener: Detener la búsqueda
Escaneo en proceso: Visualiza el estado del proceso de
búsqueda
TV: Visualizar la lista de programas de TV encontrados
Estación de Radio: Visualizar la lista de programas de
radio encontrados
Abrir: Abrir lista de programas creados
Guardar: Guardar lista de programas
Guardar como: Guardar lista de programas con otro
nombre de archivo
Borrar: Borrar programas de una lista
Borrar Todo: Borrar programas de todas las listas
16
STICK DVB-T USB
Manual de instrucciones
3.3.3.- Como grabar programas
Recurso de almacenaje: Visualizar el tamaño de la memoria del ordenador
Guardar a: Establecer lugar para la grabación
Progreso: Visualizar el progreso de la grabación
Prefijar Disponible: Activar la función de grabación preprogramada
Borrar Todo: Borrar todos los programas programados
Borrar: Borrar un programa programado
Nota: Una vez que la grabación esté completada, aparecerá "OK" en la lista
3.3.4.- Display
Brillo: Ajustar el brillo de la imagen
Contraste: Ajustar el contraste de la imagen
Matiz: Ajustar el color de la imagen
Saturación: la saturación de la imagen
Restaurar: Restaurar la configuración por defecto
DxVA: Aceleración de Video Microsoft DirectX. Una especificación API de Microsoft para el uso de hardware
de aceleración de operaciones de descodificación
2-D.
Deinterlace: Convierte video entrelazado en forma no
entrelazado.
17
STICK DVB-T USB
Manual de instrucciones
3.3.5.- Capturar
Coloca la imagen capturada en el portapapeles o en una
carpeta asignada
3.3.6.- Dispositivo
Selecciona el dispositivo de video o audio
18
STICK DVB-T USB
Manual de instrucciones
3.3.7.- Audio
El AC3 reconocerá al descodificador AC3 en el PC como
filtro AC3.
3.3.8.- TimeShift
Seleccionar Modo tiempo o Modo de memoria intermedia
para TimeShift.
19
STICK DVB-T USB
Manual de instrucciones
3.3.9.- Máscara
Seleccione una máscara.
3.3.10.- Información
Muestra información sobre video, audio y canales
20
STICK DVB-T USB
Manual de instrucciones
3.4.- Menú botón derecho
Las siguientes funciones aparecerán cuadro se pulsa el botón derecho en el panel de control o ventana de emisión TV.
21
STICK DVB-T USB
Manual de instrucciones
4.- Funciones principales
TimeShift
Esta función ha reemplazado a la función tradicional de TV. Ya no se perderá un programa nunca más.
Como operar
Haga clic en "TS", el programa se comenzará a grabar (éste se guardará temporalmente en los discos duros). Si se arrastra
el punto de control hacia adelante lo máximo posible en la línea de tiempo roja, se podrá disfrutar de los contenidos de la
grabación.
Mientras se pone el "TimeShift", se puede incluso, avanzar por encima de la línea verde del tiempo para alcanzar la emisión
en directo al presionar "Forward Scan", o se puede ver el contenido de nuevo pulsando "Backward Scan"
Ilustración
A: El inicio del TimeShift.
B: Punto de control
C: La emisión en directo.
A-C: El contenido de la grabación
(Rojo)
C-D: El tiempo restante que puede
ser grabado (Verde)
A B C
D
Programar las grabaciones con antelación
Se pueden programar con antelación varias órdenes de grabación, y éstas se guardarán en el lugar que se les designe.
Pasos para la operación:
Haga click en
Pulse la página [ Grabar ].
Marque "Prefijar Disponible".
Para crear la grabación preprogramada, pulse el botón izquierdo del ratón en la primera linea vacia, después haga
doble clic en ella y entrará en la página “Grabar Entrada”.
Escoga el canal que aparecerá en la columna de canal.
Introduzca la información en los campos [ Tiempo de Inicio ] y [ Tiempo Final ].
Haga click en "OK".
22
STICK DVB-T USB
Manual de instrucciones
Grabación de Video Digital en Tiempo Real (DVR)
Se puede grabar el programa que se esté viendo en ese momento; el programa también se guardará en el lugar que se le
designe.
Pasos para la operación
Haga clic en
y comenzará "DVR"
Haga clic en
otra vez, si se quiere detener la grabación, o haga clic en
para detener la grabación.
Grabar Imagen
Se puede capturar la imagen del programa en marcha, y guardar esta imagen en formato BMP (*.bmp). Después se podrá
editar la imagen con el software del PC.
Paso a seguir
Haga clic en "Grab Image", la imagen se guardará.
Guía electrónica de programación (EPG)
Se puede consultar toda la programación con una semana de antelación mediante la EPG.
Paso a seguir
Haga clic en
programa.
, entonces se podrá ver con todo detalle la programación de la semana entrante y no perderse ningún
Preste mucha atención a este paso y compruebe que la franja horaria sea correcta, si no fuese así, la EPG tampoco será
correcta.
23
STICK DVB-T USB
Manual de instrucciones
Lista de Favoritos
Se puede escoger algunos canales favoritos de la lista y bien borrarlos o modificarlos.
Pasos a seguir
Seleccione los canales favoritos de la lista de canales, pulse el botón derecho del ratón, y éste mostrará “Añadir a
Favoritos”.
Indicación de TV, RADIO o FAVORITOS
S
Mueva el cursor a “S”, el ”TV” que está en la parte de arriba de la imagen cambiará a “RADIO”, haga clic en “S” de
nuevo, los programas escogidos anteriormente formarán la lista de favoritos.
24
STICK DVB-T USB
Manual de instrucciones
Previsualización Multicanal
Se pueden ver los 9 canales al mismo tiempo y escoger tu programa favorito para ver después de haber mirado todos los
canales.
Pasos a seguir
Haga click en
Utilice la teclas "Av Pág" y "Re Pág" que en el PC cambiarán de CH1~9 a CH10~otros. Siguiendo esta regla, usted
podrá mirar 9 programas en la pantalla cada vez.
Cambiar el modo de ventana
Se puede cambiar el modo de ventana según las necesidades.
Pasos a seguir
Pantalla completa: Haga click en
, la ventana en la pantalla cambiará a pantalla completa.
Reducción de ventana: Haga click en "Esc" para cambiar a ventana en la pantalla.
25
STICK DVB-T USB
Manual de instrucciones
5.- Solución de Problemas
La ventana "Found new hardware
wizard" aparece mientras se conecta
el STICK USB DVB-T
Consulte el apartado “2.- Procedimiento para la instalación" en el manual de instrucciones.
Si se cambia el puerto USB en Windows XP/2000, hay que instalar de nuevo el driver.
Que hacer si el STICK USB DVB-T no
funciona correctamente
En la mayoría de los casos, es debido a que los drivers no se instalaron bien. Sería conveniente comprobar la instalación de los drivers en el administrador de dispositivos en el
panel de Control de Windows. Dentro de la categoría de dispositivos "Sonido, video y juegos", deberá haber un dispositivo llamado "InAF9015 BDA". Si no fuese así, quite el dispositivo USB, vuelva a conectarlo al puerto USB y sigua los pasos del apartado “2.
Procedimiento para la instalación" en el manual de instrucciones para volver a instalar el
driver.
Windows no puede encontrar el STICK
USB DVB-T
a. Compruebe si el STICK USB DVB-T esta bien conectado al Puerto USB.
b. Después de conectar el dispositivo USB al puerto USB, espere al menos 3 segundos
antes de arrancar el DVB-USB.
c. Reinicie el sistema operativo.
d. Ponga en marcha "Agregar/Quitar Hardware" desde el "Panel de Control" de Windows
para instalar los drivers correctos.
e. Desconecte el dispositivo USB, y después conéctelo de nuevo. El intervalo entre la desconexión y su posterior conexión deberá ser al menos de 3 segundos.
f. Conecte el STICK USB DVB-T a otro Puerto USB del PC.
Windows no puede encontrar el driver
del STICK USB DVB-T
Asegúrese de que el CD-ROM original esté en el lector de CD-ROM durante la instalación.
No se puede bloquear ningún canal de
programas mientras funciona la búsqueda
Haga clic en "OK" después de crear o cambiar cualquier programación en "Búsqueda de
Canal" antes de buscar la señal terrestre.
Compruebe la conexión del cable entre el STICK USB DVB-T y la antena. Tenga en cuenta
que el cable deberá estar bien conectado al conector del STICK USB DVB-T. Salga del
DVB-USB. Desconecte el dispositivo USB, y después vuelva a conectarlo. Tenga en cuenta
que el intervalo entre la conexión y desconexión deberá ser al menos de 3 segundos.
Arranque el DVB-USB y pruebe de nuevo.
Qué hacer cuando aparece el diálogo
de error o pantalla en negro
Puede ser causado por la mala calidad de la señal, el DVB-USB no recibe suficientes datos
del programa o recibe datos erróneos. Compruebe la conexión entre el STICK USB DVB-T
y la antena.
Compruebe el driver de la tarjeta VGA o chip VGA integrado.
Asegúrese que el sistema operativo sea Microsoft Windows 2000/XP.
Instale Microsoft DirectX9.0c o superior.
No se puede poner el programa en
marcha
Asegúrese de que se haya instalado el driver de la tarjeta de sonido y que la tarjeta de
sonido esté funcionando. Tenga en cuenta que tanto si se quiere escuchar el audio como si
no, la tarjeta de sonido y su driver deberán estar instalados.
Compruebe la calidad de la señal y su potencia.
Al poner un programa solo se escucha
el sonido pero no se ve ninguna imagen
Asegúrese de que el driver VGA y Microsoft DirectX9.0c estén instalados de forma correcta.
La reproducción de video DTV MPEG2
en el PC Notebook no es fluido
La reproducción de video MPEG2 consume muchos recursos de su CPU. Para conseguir
un mayor rendimiento, asegúrese que el modo de "Ahorro de energía" del PC Notebook
esté deshabilitado, de esta manera la CPU debería funcionar a su máxima frecuencia.
26
STICK DVB-T USB
Manual de instrucciones
27
Red Comercial Nacional
A CORUÑA C.P. 15011
Gregorio Hernández 8.
Tfnos.: 981 27 47 31 /981 27 22 10
Fax:
981 27 16 11
[email protected]
BURGOS C.P. 09188
C/Campanero, 3, S. Adrián de Juarros
Tfno.: 947 56 04 58
Móvil: 670 73 75 86
[email protected]
MADRID C.P. 28005
Paseo de los Pontones 11
Tfnos.: 91 474 52 21 /91 474 52 22
Fax: 91 474 54 21
[email protected]
SEVILLA C.P. 41008
Pol. Ind. Store - C/ A-6. Nave 5
Tfnos.: 95 443 64 50 /95 443 58 00
Fax: 95 443 96 93
[email protected]
ALMERÍA C.P. 04008
Campogrís 9.
Tfno.: 950 23 14 43
Fax:
950 23 14 43
[email protected]
GIJÓN C.P. 33210
C/Japón, 14
Tfnos.: 985 15 25 50 /985 15 29 67
Fax : 985 14 63 89
[email protected]
MÁLAGA C.P. 29006
C/ La Boheme 55
Pol. Ind. Alameda 2
[email protected]
BADAJOZ C.P. 06010
C/Jacobo Rodríguez,
Pereira, nº11-Oficina
Tfno.: 924 20 74 83
Móvil: 670 70 21 93
Fax:
924 20 01 15
[email protected]
JAÉN C.P. 23007
Hermanos Pinzón, 8-bajo
Tfnos.: 953 29 50 40 /953 29 52 11
Móvil: 636 984489
Fax: 953 29 52 10
[email protected]
TENERIFE C.P. 38108
Avda. El Paso, 25 Los Majuelos- La Laguna
Tfnos.: 922 31 13 14 /922 31 13 16
Fax: 922 31 13 33
[email protected]
PAMPLONA C.P. 31007
Avda. Sancho el Fuerte 5
Tfno.: 948 27 35 10
Fax: 948 17 41 49
[email protected]
LOGROÑO C.P. 26004
San Prudencio 19. bajo
Tfno.: 941 23 35 24
Fax: 941 25 50 78
[email protected]
BILBAO C.P. 48150
Iberre kalea, módulo 16, pabellón 15-B
Sangroniz-Sondika
Tfnos.: 94 471 12 02 /94 471 24 78
Fax: 94 471 14 93
[email protected]
A CORUÑA
GIJÓN
LUGO
OURENSE
ZAMORA N
GUIPÚZCOA
ÁLAVA
ASTURIAS
BURGOS
NAVARRA
HUESCA
SORIA
ZAMORA
BARCELONA
ZARAGOZA
SEGOVIA
SALAMANCA
GUADALAJARA
ÁVILA
OPORTO
LISBOA
TOLEDO
CUENCA
VALENCIA
ALICANTE
JAÉN
MURCIA
BALEARES
GRANADA
HUELVA
SEVILLA
ALMERÍA
MÁLAGA
CÁDIZ
CANARIAS
SUCURSALES
TENERIFE
DELEGACIONES
CEUTA
LAS PALMAS
ZARAGOZA C.P. 50002
C/ Monasterio de Alahón 1-3
Tfno.: 976 41 12 73
Fax: 976 59 86 86
[email protected]
TELEVES ELECTRONICA PORTUGUESA
MAIA - OPORTO
Via . Dr Francisco Sa Carneiro. Lote 17.
ZONA Ind. MAIA 1. Sector-X MAIA. C.P. 4470 BARCA
Tel./Fax: 00 351 22 9478900
GSM: 00 351 968581614
[email protected]
LISBOA
C.P. 1000 Rua Augusto Gil 21-A.
Tel.: 351 21 7932537 Fax: 351 21 7932418
[email protected]
PALMA DE
MALLORCA
ALBACETE
BADAJOZ
CÓRDOBA
TARRAGONA
CASTELLÓN
CIUDAD REAL
VIGO C.P. 36204
Escultor Gregorio Fernández, 5
Tfnos.: 986 42 33 87 /986 42 40 44
Fax: 986 42 37 94
[email protected]
TERUEL
MADRID
CÁCERES
GIRONA
LA RIOJA
PALENCIA
VALENCIA C.P. 46022
Plaza Jordi San Jordi s/n
Tfnos.: 96 337 12 01 /96 337 12 72
Fax: 96 337 06 98
[email protected]
Red Comercial Internacional
BILBAO
CANTABRIA
LEÓN
VIGO
PALMA DE MALLORCA C.P.
07007
Ferrer de Pallares 45. bajo D.
Tfno.: 971 24 70 02
Fax: 971 24 53 42
[email protected]
LAS PALMAS C.P. 35006
Gral. Mas de Gaminde 26
Tfnos.: 928 23 11 22 /928 23 12 42
Fax: 928 23 13 66
[email protected]
BARCELONA C.P. 08940
C/ Sant Ferrán, 27
Cornellá - Barcelona
Tfnos.: 93 377 08 62 /93 474 29 50
Fax:
93 474 50 06
[email protected]
SANTIAGO
MURCIA C.P. 30010
Polígono Conver - C/ Rio Pliego 22
Tfnos.: 968 26 31 44 /968 26 31 77
Fax: 968 25 25 76
[email protected]
7126_000_ES
MELILLA
FÁBRICAS
TELEVES FRANCE S.A.R.L.
1 Rue Louis de Broglie
Parc d'Activités de l'Esplanade
77400 St Thibault des Vignes FRANCE
Tél.: +33 (0)1 60 35 92 10
Fax: +33 (0)1 60 35 90 40
[email protected]
TELEVES ITALIA S.r.l.
S.op.Viale Liguria 24
20068 Peschiera Borromeo (MI) Italia
Tel.: (+39)-0251650604 (RA)
Fax: (+39)-0255307363
[email protected]
TELEVES MIDDLE EAST FZE
P.O. Box 17199
JEBEL ALI FREE ZONE DUBAI,
UNITED ARAB EMIRATES
Tel.: 9714 88 343 44 Fax: 9714 88 346 44
[email protected]
Rúa B. de Conxo, 17
15706 SANTIAGO DE COMPOSTELA
Tel. 981 52 22 00 Fax 981 52 22 62
[email protected] www.televes.com
Miembro de número del
Empresa
Registrada
ER 224/1/94
TELEVES UNITED KINGDOM LTD
Unit 11 Hill Street, Industrial State
CWMBRAN, GWENT NP44 7PG.
(United Kingdom)
Tel.: 44 01 633 87 58 21
Fax: 44 01 633 86 63 11
[email protected]
Adaptateur TNT pour PC
STICK DVB-T USB
Ref. 7126
Manuel d’utilisation
© Copyright, Televés, S.A.
STICK DVB-T USB
Manuel d’utilisation
Table des Matières . . . . . . . . . . . . . . . . . . . . . . . . . . . . . . . . . . . . . . . . . . . . . . .
1.-
Pag.
Introduction au DVB -T USB TICK . . . . . . . . . . . . . . . . . . . . . . . . . . . . . . . . . . . . . . . . . . .
4
1.1.- Introduction . . . . . . . . . . . . . . . . . . . . . . . . . . . . . . . . . . . . . . . . . . . . . . . . . . . . . . .
4
1.2.- Contenu de la boite . . . . . . . . . . . . . . . . . . . . . . . . . . . . . . . . . . . . . . . . . . . . . . . . .
4
1.3.- Equipements nécessaires . . . . . . . . . . . . . . . . . . . . . . . . . . . . . . . . . . . . . . . . . . . . .
4
1.4.- Description. . . . . . . . . . . . . . . . . . . . . . . . . . . . . . . . . . . . . . . . . . . . . . . . . . . . . . . . .
4
1.5.- Spécification Produit . . . . . . . . . . . . . . . . . . . . . . . . . . . . . . . . . . . . . . . . . . . . . . . . .
4
2.-
Procédure d'Installation . . . . . . . . . . . . . . . . . . . . . . . . . . . . . . . . . . . . . . . . . . . . . . . . . . . .
5
3.-
Configuration Système. . . . . . . . . . . . . . . . . . . . . . . . . . . . . . . . . . . . . . . . . . . . . . . . . . . . .
13
3.1.- Comment scanner . . . . . . . . . . . . . . . . . . . . . . . . . . . . . . . . . . . . . . . . . . . . . . . . . . .
13
3.2.- Introduction au panneau de contrôle . . . . . . . . . . . . . . . . . . . . . . . . . . . . . . . . . . . .
14
3.3.- Configuration fonction . . . . . . . . . . . . . . . . . . . . . . . . . . . . . . . . . . . . . . . . . . . . . . . .
16
3.4.- Menu click droit . . . . . . . . . . . . . . . . . . . . . . . . . . . . . . . . . . . . . . . . . . . . . . . . . . . . .
21
4.-
Fonction principale . . . . . . . . . . . . . . . . . . . . . . . . . . . . . . . . . . . . . . . . . . . . . . . . . . . . . . .
22
5.-
Causes de non fonctionnement . . . . . . . . . . . . . . . . . . . . . . . . . . . . . . . . . . . . . . . . . . . . .
26
3
STICK DVB-T USB
Manuel d’utilisation
1.- Introduction au DVB-T USB STICK
1.1.- Introduction
DVB-USB est un adaptateur de télévision terrestre numérique pour utilisateurs de PC fixe et portable, permettant la
visualisation et l'enregistrement de programmes TV numériques. L'enregistrement peut se faire pendant la visualisation
du programme ou être programmé à l'avance.
tanés, vous permettant ainsi de passer instantanément sur
votre chaîne favorite. De plus, la fonction "Time Shift" vous
offre une nouvelle expérience télévisuelle avec les fonctions
pause, lecture, avance rapide ou retour sur les programmes
en cours.
DVB-USB autorise l'affichage de plusieurs canaux en simul-
1.2.- Contenu de la boite
1 x Stick DVB-T USB
1 x CD de drivers
1 x Remote control unit
(Logiciel multi langues et manuel d'utilisation)
1 x Antenne droite DVB-T (UHF/VHF)
3 x Guide d'installation rapide
1 x USB xtension cable
1.3.- Equipements nécessaires
Microsoft Windows 2000/XP
Port USB libre
Ordinateur PC ou Notebook PC
Microsoft Direct X 9.0c ou supérieur
CPU 800MHz ou supérieur, 1GHz recommandé
10MB d'espace disque disponible pour l'utilisation de logiciel
128M RAM ou plus, 256MB recommandé
500MB d'espace disque pour l'utilisation du
Time-Shifting, Enregistrement vidéo numérique en temps
réel (DVR) et programmation d'enregistrement.
Carte vidéo VGA avec 16MB de mémoire
Carte son
1.4.- Description
Compatible au protocole DVB (ETS 300 744)
Recherche automatique des canaux 6/7/8 M
Réception des canaux TV et Radio en numérique terrestre
Teletexte *
Enregistrement vidéo en temps réel (DVR) et programmateur
Liste favoris
Time-Shifting
DxVA
Guide électronique des programmes (EPG)
Multi-langue
Capture d'écran
Sous-titre
Logiciel décodage MPEG-II
Visualisation Multi Chaînes
1.5.- Spécification produit
Compatible DVB - T (EN300744)
Connecteur IEC
Interface USB 2.0
Antenne droite DVB-T x 1 (UHF/VHF)
Entrée alimentation DC 5V±5%
LED verte: POWER ON
USB Bus-Powered, courant<500mA @ 5V DC
Note: Les radios numériques mentionnées ici ne sont pas
les radios DAB (Digital Audio Broadcasting), les paramètres
de ces radios dépendent des fournisseurs de contenu
DVB-T, des multiplexes audio.
Note: * Dépend du fournisseur
4
STICK DVB-T USB
Manuel d’utilisation
2.- Procédure d'Installation
Avant de démarrer l'installation, il est important de savoir:
Qu'une installation complète comprend les "Drivers" et le "programme d'application", qui peuvent être installés facilement à
partir du CD. Merci de suivre ces instructions.
Note: Assurez vous que le DVB-T USB STICK "n'est pas" connecté à votre PC lorsque vous installez le logiciel.
A.- Lorsque vous insérez le CD dans le lecteur CD-ROM, l'installation débute automatiquement. Si ce n'est pas le cas, exécutez le programme "Setup.exe" disponible sur le CD.
B.- La première étape est l'installation des drivers et Windows affichera une fenêtre d'avertissement, sélectionnez
"Continuer". Si vous utilisez Windows 2000, apparaîtra le message "Digital Signature Not Found". Sélectionnez "Yes"
pour continuer l'installation.
5
STICK DVB-T USB
Manuel d’utilisation
C.- Après l'installation complète des drivers, cliquez sur "Finish" pour sortir du programme d'installation des drivers.
D.- Installation USB DTV. Cliquez sur "Suivant" pour continuer.
E.- Choisissez "J’accepte les …." et cliquez sur "Suivant" pour continuer.
6
STICK DVB-T USB
Manuel d’utilisation
F.- Entrez vos informations personnelles et cliquez sur "Suivant" pour continuer.
G.- Entrez le numéro de série à 16 chiffres et cliquez sur "Next" pour continuez. (Ce numéro se trouve sur l'étiquette du CD)
H.- Sélectionnez la langue de l'interface utilisateur que vous souhaitez pour l'installation et cliquez sur "Suivant" pour continuer.
7
STICK DVB-T USB
Manuel d’utilisation
I.- Sélectionnez un répertoire d'installation et cliquez sur "Suivant" pour continuer.
(Ou cliquez sur "Parcourir ..." pour choisir un autre répertoire existant)
J.- Sélectionnez un raccourci et cliquez sur "Suivant" pour continuer.
K.- Cliquez sur "Suivant" pour procéder à l'installation
8
STICK DVB-T USB
Manuel d’utilisation
L.- Redémarrez l'ordinateur et assurez vous que le STICK DVB-T USB est correctement connecté à celui-ci. Attendez 2-3
minutes pour que le système trouve le produit. Le STICK DVB-T USB est maintenant correctement installé.
M.- Cliquez sur "Terminer" pour compléter l'installation.
N.- Branchez le produit au PC, Windows trouvera le driver, et une fenêtre "Assistant matériel détecté". Si vous utilisez
Windows XP, un fenêtre s'affiche, permettant le téléchargement des drivers depuis Windows update, sélectionnez "Non,
pas pourcette fois" et cliquez sur "Suivant".
9
STICK DVB-T USB
Manuel d’utilisation
O.- Sélectionnez "Installer le logiciel…" et cliquez sur "Suivant".
P.- Pendant l'installation des drivers, une fenêtre s'affichera, sélectionnez "Continuer quand même". Si vous utilisez
Windows 2000, apparaîtra "Digital Signature Not Found". Sélectionnez "Yes" pour continuer l'installation. Le logiciel a
été testé et validé pour fonctionner correctement avec Windows
Q.- Cliquez sur "Finish" pour fermer l'installation.
10
STICK DVB-T USB
Manuel d’utilisation
Partie optionnelle
Lorsque vous installez ce driver, l'installation teste votre système, si celui ci est antérieur à Windows 2000 Service Pack 4 /
XP Service Pack 2, le driver installera Direct X 9.0c (comme l'image ci-dessous) sur votre ordinateur.
- Sélectionnez "I accept the agreement" et cliquez sur "Next".
- Cliquez sur "Next".
- Après l'installation, cliquez sur "Finish", l'ordinateur redémarre automatiquement.
11
STICK DVB-T USB
Manuel d’utilisation
Désinstallation
Etape 1. Vous pouvez le faire de 2 façons:
Sélectionnez ”Démarrer” => ”Programmes” => ”USB-DTV” =>”Désinstaller USB-DTV”.
Sélectionnez ”Panneau de configuration” => ”Ajouter ou supprimer des programmes” => ”USB-DTV 1.4” => cliquez sur
"Supprimer". L'image suivante s'affiche, appuyez sur "Next".
Etape 2. Lorsque la désinstallation est terminée, cliquez sur "Finish", et redémarrez l'ordinateur.
12
STICK DVB-T USB
Manuel d’utilisation
3.- Configuration système
3.1.- Comment scanner
Avant de visionner et d'écouter les chaînes TV/Radio, lancez "Recherche canaux" et choisissez une des quatre méthodes
de recherche ("Pays/Region", "Tout", "Gamme", et "Unique"). Le résultat du scan s'affiche sur les listes TV et Radio, vous
pouvez maintenant sauvegarder la liste pour une utilisation ultérieure.
Le programme vous demande de rechercher les canaux quand vous exécutez pour la première fois le logiciel DVB-USB.
Etape 1. Sélectionnez le pays ou la zone où vous êtes.
Etape 2. Cliquez sur "Demarrer" pour lancer la recherche.
Etape 3. Cliquez sur "OK " quand la recherche est terminée.
13
STICK DVB-T USB
Manuel d’utilisation
3.2.- Introduction au Panneau de contrôle
Le panneau de contrôle par défaut du DVB-USB est affiché ci-dessous. Toutes les fonctions principales peuvent être sélectionnées via les boutons ou les icônes sur le panneau de contrôle. Les messages délivrés à votre attention s'afficheront sur
la partie gauche de l'écran LCD pour vous indiquer les informations en cours.
Boutons
Lecture - TV, fichiers
Ouverture Favoris
Stop - TV, enregistrement, fichiers, TimeShift
Ouverture télétexte
Pause - TV, enregistrement, fichiers, TimeShift
Mute On/Off
Avance rapide - fichiers, TimeShift
Clavier numérique ( 0~9 )
Retour - fichiers, TimeShift
Effacer entrée
Capture écran (capture image unique)
Chaîne suivante
Enregistrement TV
Chaîne précédente
Minimiser dans la barre des taches
Retour à la dernière chaîne
Fin du programme
Retour TV
Activer/Désactivez TimeShift
Visualisation multi - canaux
Ouverture fichiers
Agrandir en plein écran / restaurer
Ouverture fenêtre configuration des fonctions
Réglage volume
Ouverture fenêtre EPG
Choisir la langue d’audio
Choisir le canal d’audio
Choisir les sous titres
14
STICK DVB-T USB
Manuel d’utilisation
Afficheur LCD
4
8
5
7
6
9
3
1
2
1
Affichage volume
2
Affichage le canal d’audio et le état de “Mute” (on/off)
3
Affichage statut de lecture
4
Affichage niveau signal
5
Affichage qualité signal
6
Affichage type média
7
Affichage canal
8
Affichage TimeShift temps de lecture
9
Affichage nom de fichier ou nom de l'élément externe
15
STICK DVB-T USB
Manuel d’utilisation
3.3.- Configuration fonction
3.3.1.- Général
Plein Ecran: Active la lecture plein écran
Toujours au Premier Plan: Fixe l'affichage de l'image en
haut du bureau
Autoriser OSD: Active l'affichage OSD
Refraichir Information RF: Active l'affichage des informations RF
3.3.2.- Recherche canaux
Fréquence RF: 4 modes de sélection disponibles:
"Pays/Region", "Tout", "Gamme", et
"Unique".
Largeur de bande: 3 types de largeur de bande disponibles: "6", "7", et "8" MHz
Demarrer: Démarrer la recherche
Arreter: Arrêter la recherche
Analyse en cours: Affiche la progression du scan
TV: Affiche la liste des programmes TV scannés
Station par Radio: Affiche la liste des programmes Radio
scannés
Ouvrir: Ouvrir une liste de programmes crée
Enregistrer: Sauvegarder une liste de programmes
Enregistrer Comme: Sauvegarder une liste de programmes sous un autre nom
Supprimer: Effacer des programmes d'une liste
Supprimer Tout: Effacer les programmes de toutes les listes
16
STICK DVB-T USB
Manuel d’utilisation
3.3.3.- Programme d'enregistrement
Ressource de stockage: Affiche la mémoire de l'ordinateur
Enregistrer Vers: Configuration emplacement de stockage
En cours: Affichage de la progression de l'enregistrement
Autoriser Pre-configuration: Active la fonction de programmateur d'enregistrement
Supprimer Tout: Efface tout les programmateurs
Supprimer: Efface un programmateur
Note: Une fois un enregistrement complet, le signe "OK"
apparaît sur la liste
3.3.4.- Affichage
Luminosité: Ajuste la luminosité de l'image
Contraste: Ajuste le contraste de l'image
Nuance: Ajuste l'hue de l'image
Saturation: Ajuste la saturation de l'image
Re-Initialisation: Revenir aux paramètres par défaut
DxVA: Microsoft DirectX Video Acceleration. Une spécification Microsoft API pour l'utilisation d'un logiciel
d'accélération des opérations de décodage 2-D.
Deinterlace: Conversion d'une vidéo entrelacée sur une
vidéo non entrelacée.
17
STICK DVB-T USB
Manuel d’utilisation
3.3.5.- Capture
Configuration des captures d'image dans le Clipboard ou
dans un répertoire.
3.3.6.- Option
Choix des options Audio et Vidéo.
18
STICK DVB-T USB
Manuel d’utilisation
3.3.7.- Audio
AC3 détection du décodeur AC3 sur votre PC.
3.3.8.- TimeShift
Configuration durée ou taille pour le TimeShift.
19
STICK DVB-T USB
Manuel d’utilisation
3.3.9.- Skin
Choix du skin.
3.3.10.- Information
Affiche les informations sur vidéo, audio et canal.
20
STICK DVB-T USB
Manuel d’utilisation
3.4.- Menu click droit
Les fonctions suivantes apparaissent lorsque vous cliquez droit sur le panneau de contrôle ou sur la fenêtre TV.
21
STICK DVB-T USB
Manuel d’utilisation
4.- Fonction principale
TimeShift
Cette fonction élargie le visionnage traditionnel de la télévision, désormais, vous ne manquerez plus un seul moment
de votre programme.
Comment faire
Cliquez sur "TS", le programme démarre l'enregistrement (le programme est temporairement sauvegardé sur le disque dur), lorsque vous revenez, mettez le point de contrôle sur le début de temps en rouge, alors vous pouvez visionner le contenu enregistré.
Pendant le "TimeShift" en cours, vous pouvez aller en avant jusqu'au début de la ligne verte pour voir le programme en live
en pressant "En avant", ou revoir le contenu en pressant "Retour"
Illustration
A: Début du TimeShift.
B: Point de contrôle.
C: Retour au "live".
A-C: Le contenu enregistré
(Rouge).
C-D: Le temps restant pour
enregistrement (Vert).
A B C
D
Enregistrement différé
Vous pouvez programmer plusieurs enregistrements, qui peuvent être sauvegardés à la position désignée.
Comment faire:
Cliquez sur
Appuyez sur page [ Enregistrement ].
Appuyez sur "Autoriser Pre-configuration".
Entrez dans l'enregistrement différé, appuyez sur le bouton gauche de la souris, puis double cliquez et entrez dans
“Entrer Enregistrement”.
Choisissez le canal désiré parmi les canaux présents dans la liste.
Entrez les informations dans les champs [ Temps de Depart ] et [ Temps de Fin ].
Cliquez sur "OK".
22
STICK DVB-T USB
Manuel d’utilisation
Enregistrement vidéo numérique en temps réel (DVR)
Vous pouvez enregistrer le programme en cours de visionnage; alors, ce programme sera sauvegardé sur l'emplacement
désigné.
Comment faire
Cliquez sur
et le "DVR" commence.
Cliquez sur
de nouveau, si vous désirez arrêter l'enregistrement, ou cliquez
pour stopper l'enregistrement.
Enregistrement image
Vous pouvez garder des images à partir du programme en cours, et les sauvegarder sous format BMP (*.bmp).
Comment faire
Cliquez sur "Saisir l’image", L'image est sauvegardée.
Guide électronique des programmes (EPG)
Vous pouvez connaître tous les programmes jusqu'à une semaine avec l'EPG.
Comment faire
Cliquez sur
, alors vous pouvez voir le détail de tous les programmes de la semaine en cours.
Assurez vous bien que votre système OS soit à la bonne heure et à la bonne date, si l'heure est incorrecte, l'EPG le sera
également.
23
STICK DVB-T USB
Manuel d’utilisation
Liste favorite
Vous pouvez choisir quelques chaînes favorites de la liste, ainsi que les supprimer ou les modifier.
Comment faire
Choisissez les chaînes favorites de la liste de canaux, et appuyez sur le bouton droit de la souris, alors apparaît
“Ajouter aux Favoris”.
Classement par TV, RADIO ou FAVORIS
S
Déplacez le curseur jusqu'à “S”, le ”TV” qui est en haut de l'image pour changer “RADIO”, cliquer sur le “S” de nouveau, la chaîne favorite que vous avez choisi avant sera dans la liste de favoris.
24
STICK DVB-T USB
Manuel d’utilisation
Visualisation Multi-canaux
Vous pouvez regarder jusqu'à 9 chaînes en même temps, et choisir votre programme favori pour le regarder normalement.
Comment faire
Cliquez sur
Utilisez "Pg Up" et "Pg Dn" de votre ordinateur pour changer entre CH1~9 et CH10~+. Vous changez ainsi les 9 programmes à chaque fois.
Changement du mode fenêtre
Vous pouvez changer la fenêtre selon votre besoin.
Comment faire
Plein écran: Cliquez sur
, Le mode fenêtre passera en mode plein écran.
Réduction fenêtre: Cliquez sur "Esc" pour revenir au mode fenêtre.
25
STICK DVB-T USB
Manuel d’utilisation
5.- Causes de non fonctionnement
La fenêtre "Nouveau matériel détecté"
s'affiche pendant le branchement du
STICK DVB-T USB
Référez vous au "Chapitre 2. Procédure d'installation" du manuel. Sur Windows XP/2000, si
vous changez de port USB, vous devez de nouveau installer les drivers.
Le STICK DVB-T USB ne fonctionne
pas correctement
Dans la plupart des cas, il s'agit d'un problème d'installation des drivers. Vous devez vérifier l'installation des drivers dans le gestionnaire de périphérique Windows. Dans la catégorie "Contrôleurs Audio, vidéo et jeu", il doit y avoir une ligne nommée "AF9015 BDA
Device". Si ce n'est pas le cas, retirez le produit USB, rebranchez le sur le port USB et suivez les étapes du "Chapitre 2. Procédure d'installation" du manuel pour refaire l'installation
des drivers.
Windows ne trouve pas le STICK DVBT USB
a. Vérifiez que le STICK DVB-T USB est correctement connecté sur un port USB.
b. Après que le produit USB soit branché sur un port, attendez 3 secondes avant de lancer
DVB-USB.
c. Redémarrer votre OS.
d. Exécutez "Ajout de matériel" depuis le "Panneau de configuration" Windows pour installer les bons drivers.
e. Débranchez le produit USB, puis rebranchez le. L'intervalle de temps entre le débranchement et le branchement doit être au moins de 3 secondes.
f. Branchez le STICK DVB-T USB sur un autre port USB du PC.
Windows ne trouve pas les drivers du
STICK DVB-T USB
Vérifiez que le CD-ROM est dans le lecteur CD-ROM pendant l'installation.
Aucun programme n'est trouvé pendant la recherche auto.
Cliquez sur "OK" après avoir changé ou fait une modification dans "Recherche canaux"
avant de scanner le signal.
Vérifiez la connexion du câble entre le STICK DVB-T USB et l'antenne. Le câble doit être
bien raccordé au connecteur du STICK DVB-T USB. Sortir de DVB-USB. Débranchez le
produit USB et rebranchez le. L'intervalle de temps entre le débranchement et le branchement doit être au moins de 3 secondes. Lancez DVB-USB et testez de nouveau.
Une boite de dialogue d'erreur ou un
écran noir s'affiche
Cela peut résulter d'une mauvaise qualité de signal, DVB-USB ne reçoit pas assez de données du programme ou reçoit des données erronées. Vérifiez la connexion entre le STICK
DVB-T USB et l'antenne.
Vérifiez les drivers de la carte VGA ou du chipset VGA intégré.
Assurez vous que votre OS est Microsoft Windows 2000/XP.
Installez Microsoft DirectX9.0c ou supérieur.
Impossible de lire le programme
Assurez vous qu'une carte son et ses drivers soient installés et que celle-ci fonctionne
correctement. Notez que même si vous ne voulez pas avoir d'audio, une carte son et ses
drivers doivent quand même être installés.
Vérifiez la qualité et la quantité de signal.
Pendant la lecture d'un programme, je
peux juste entendre mais pas voir les
images.
Assurez vous que les drivers VGA et Microsoft DirectX9.0c sont correctement installés.
La lecture vidéo DTV MPEG2 sur un
PC notebook n'est pas lisse
La lecture MPEG2 vidéo consomme beaucoup de puissance du CPU. Pour avoir de meilleures performances, assurez vous que le mode "Power-saving" du Notebook PC soit
désactivé et que le CPU fonctionne à sa fréquence maximum.
26
STICK DVB-T USB
Manuel d’utilisation
27
Red Comercial Nacional
A CORUÑA C.P. 15011
Gregorio Hernández 8.
Tfnos.: 981 27 47 31 /981 27 22 10
Fax:
981 27 16 11
[email protected]
BURGOS C.P. 09188
C/Campanero, 3, S. Adrián de Juarros
Tfno.: 947 56 04 58
Móvil: 670 73 75 86
[email protected]
MADRID C.P. 28005
Paseo de los Pontones 11
Tfnos.: 91 474 52 21 /91 474 52 22
Fax: 91 474 54 21
[email protected]
SEVILLA C.P. 41008
Pol. Ind. Store - C/ A-6. Nave 5
Tfnos.: 95 443 64 50 /95 443 58 00
Fax: 95 443 96 93
[email protected]
ALMERÍA C.P. 04008
Campogrís 9.
Tfno.: 950 23 14 43
Fax:
950 23 14 43
[email protected]
GIJÓN C.P. 33210
C/Japón, 14
Tfnos.: 985 15 25 50 /985 15 29 67
Fax : 985 14 63 89
[email protected]
MÁLAGA C.P. 29006
C/ La Boheme 55
Pol. Ind. Alameda 2
[email protected]
BADAJOZ C.P. 06010
C/Jacobo Rodríguez,
Pereira, nº11-Oficina
Tfno.: 924 20 74 83
Móvil: 670 70 21 93
Fax:
924 20 01 15
[email protected]
JAÉN C.P. 23007
Hermanos Pinzón, 8-bajo
Tfnos.: 953 29 50 40 /953 29 52 11
Móvil: 636 984489
Fax: 953 29 52 10
[email protected]
TENERIFE C.P. 38108
Avda. El Paso, 25 Los Majuelos- La Laguna
Tfnos.: 922 31 13 14 /922 31 13 16
Fax: 922 31 13 33
[email protected]
PAMPLONA C.P. 31007
Avda. Sancho el Fuerte 5
Tfno.: 948 27 35 10
Fax: 948 17 41 49
[email protected]
LOGROÑO C.P. 26004
San Prudencio 19. bajo
Tfno.: 941 23 35 24
Fax: 941 25 50 78
[email protected]
BILBAO C.P. 48150
Iberre kalea, módulo 16, pabellón 15-B
Sangroniz-Sondika
Tfnos.: 94 471 12 02 /94 471 24 78
Fax: 94 471 14 93
[email protected]
A CORUÑA
GIJÓN
LUGO
OURENSE
ZAMORA N
GUIPÚZCOA
ÁLAVA
ASTURIAS
BURGOS
NAVARRA
HUESCA
SORIA
ZAMORA
BARCELONA
ZARAGOZA
SEGOVIA
SALAMANCA
GUADALAJARA
ÁVILA
OPORTO
LISBOA
TOLEDO
CUENCA
VALENCIA
ALICANTE
JAÉN
MURCIA
BALEARES
GRANADA
HUELVA
SEVILLA
ALMERÍA
MÁLAGA
CÁDIZ
CANARIAS
SUCURSALES
TENERIFE
DELEGACIONES
CEUTA
LAS PALMAS
ZARAGOZA C.P. 50002
C/ Monasterio de Alahón 1-3
Tfno.: 976 41 12 73
Fax: 976 59 86 86
[email protected]
TELEVES ELECTRONICA PORTUGUESA
MAIA - OPORTO
Via . Dr Francisco Sa Carneiro. Lote 17.
ZONA Ind. MAIA 1. Sector-X MAIA. C.P. 4470 BARCA
Tel./Fax: 00 351 22 9478900
GSM: 00 351 968581614
[email protected]
LISBOA
C.P. 1000 Rua Augusto Gil 21-A.
Tel.: 351 21 7932537 Fax: 351 21 7932418
[email protected]
PALMA DE
MALLORCA
ALBACETE
BADAJOZ
CÓRDOBA
TARRAGONA
CASTELLÓN
CIUDAD REAL
VIGO C.P. 36204
Escultor Gregorio Fernández, 5
Tfnos.: 986 42 33 87 /986 42 40 44
Fax: 986 42 37 94
[email protected]
TERUEL
MADRID
CÁCERES
GIRONA
LA RIOJA
PALENCIA
VALENCIA C.P. 46022
Plaza Jordi San Jordi s/n
Tfnos.: 96 337 12 01 /96 337 12 72
Fax: 96 337 06 98
[email protected]
Red Comercial Internacional
BILBAO
CANTABRIA
LEÓN
VIGO
PALMA DE MALLORCA C.P.
07007
Ferrer de Pallares 45. bajo D.
Tfno.: 971 24 70 02
Fax: 971 24 53 42
[email protected]
LAS PALMAS C.P. 35006
Gral. Mas de Gaminde 26
Tfnos.: 928 23 11 22 /928 23 12 42
Fax: 928 23 13 66
[email protected]
BARCELONA C.P. 08940
C/ Sant Ferrán, 27
Cornellá - Barcelona
Tfnos.: 93 377 08 62 /93 474 29 50
Fax:
93 474 50 06
[email protected]
SANTIAGO
MURCIA C.P. 30010
Polígono Conver - C/ Rio Pliego 22
Tfnos.: 968 26 31 44 /968 26 31 77
Fax: 968 25 25 76
[email protected]
7126_000_FR
MELILLA
FÁBRICAS
TELEVES FRANCE S.A.R.L.
1 Rue Louis de Broglie
Parc d'Activités de l'Esplanade
77400 St Thibault des Vignes FRANCE
Tél.: +33 (0)1 60 35 92 10
Fax: +33 (0)1 60 35 90 40
[email protected]
TELEVES ITALIA S.r.l.
S.op.Viale Liguria 24
20068 Peschiera Borromeo (MI) Italia
Tel.: (+39)-0251650604 (RA)
Fax: (+39)-0255307363
[email protected]
TELEVES MIDDLE EAST FZE
P.O. Box 17199
JEBEL ALI FREE ZONE DUBAI,
UNITED ARAB EMIRATES
Tel.: 9714 88 343 44 Fax: 9714 88 346 44
[email protected]
Rúa B. de Conxo, 17
15706 SANTIAGO DE COMPOSTELA
Tel. 981 52 22 00 Fax 981 52 22 62
[email protected] www.televes.com
Miembro de número del
Empresa
Registrada
ER 224/1/94
TELEVES UNITED KINGDOM LTD
Unit 11 Hill Street, Industrial State
CWMBRAN, GWENT NP44 7PG.
(United Kingdom)
Tel.: 44 01 633 87 58 21
Fax: 44 01 633 86 63 11
[email protected]
PC DTT Receiver
STICK DVB-T USB
Ref. 7126
User Instructions
© Copyright, Televés, S.A.
DVB-T USB STICK
User Instructions
Table of Contents . . . . . . . . . . . . . . . . . . . . . . . . . . . . . . . . . . . . . . . . . . . . . . . .
1.-
Pág.
Introduction DVB-T USB STICK. . . . . . . . . . . . . . . . . . . . . . . . . . . . . . . . . . . . . . . . . . . . . .
4
1.1.- Introduction . . . . . . . . . . . . . . . . . . . . . . . . . . . . . . . . . . . . . . . . . . . . . . . . . . . . . . . .
4
1.2.- Package Content . . . . . . . . . . . . . . . . . . . . . . . . . . . . . . . . . . . . . . . . . . . . . . . . . . .
4
1.3.- System requirements . . . . . . . . . . . . . . . . . . . . . . . . . . . . . . . . . . . . . . . . . . . . . . . . .
4
1.4.- Features . . . . . . . . . . . . . . . . . . . . . . . . . . . . . . . . . . . . . . . . . . . . . . . . . . . . . . . . . . .
4
1.5.- Hardware specification . . . . . . . . . . . . . . . . . . . . . . . . . . . . . . . . . . . . . . . . . . . . . . .
4
2.-
Installation Procedure . . . . . . . . . . . . . . . . . . . . . . . . . . . . . . . . . . . . . . . . . . . . . . . . . . . . .
5
3.-
System Setup. . . . . . . . . . . . . . . . . . . . . . . . . . . . . . . . . . . . . . . . . . . . . . . . . . . . . . . . . . . .
13
3.1.- How to scan . . . . . . . . . . . . . . . . . . . . . . . . . . . . . . . . . . . . . . . . . . . . . . . . . . . . . . . .
13
3.2.- Control panel introduction . . . . . . . . . . . . . . . . . . . . . . . . . . . . . . . . . . . . . . . . . . . . .
14
3.3.- Functional setting. . . . . . . . . . . . . . . . . . . . . . . . . . . . . . . . . . . . . . . . . . . . . . . . . . . .
16
3.4.- Right click menu . . . . . . . . . . . . . . . . . . . . . . . . . . . . . . . . . . . . . . . . . . . . . . . . . . . .
21
4.-
Main Functions. . . . . . . . . . . . . . . . . . . . . . . . . . . . . . . . . . . . . . . . . . . . . . . . . . . . . . . . . . .
22
5.-
Trouble Shooting . . . . . . . . . . . . . . . . . . . . . . . . . . . . . . . . . . . . . . . . . . . . . . . . . . . . . . . . .
26
3
DVB-T USB STICK
User Instructions
1.- DVB-T USB STICK Introduction
1.1.- Introduction
DVB-USB is an advanced-designed digital television
receiver for NB and PC users, especially for viewing and
recording digital programs. Recordings can be made while
viewing the programs or prescheduled in advance.
instantly after browsing through the channels. What's more,
the convenient "TimeShift" function provides a new
television watching experience by allowing you to pause,
replay, and even fast-forward or rewind the ongoing
programs.
DVB-USB enables viewing multiple channels simultaneously,
and also allows you to switch to your favorite channel
1.2.- Package Content
1 x DVB-T USB Stick
1 x USB xtension cable
1 x Remote control unit
1 x Driver CD (Multi-language Software and User's Manual)
1 x DVB-T Stand Antenna (UHF/VHF)
3 x Quick Installation Guide
1.3.- System Requirements
Microsoft Windows 2000/XP
Free USB Port
Desktop PC or Notebook PC
Microsoft Direct X 9.0c or above
800MHz CPU or above, 1GHz recommended
10MB Hard Disk Space for running the software
128M RAM or above, 256MB recommended
500MB Hard Disk Space for running the Time-Shifting,
Real Time Digital Video Recording (DVR) and Scheduling
Recording.
VGA Card with at the least 16MB Memory
Sound Card
1.4.- Features
Support DVB Protocol (ETS 300 744)
Channels Auto Scan 6/7/8 M
Digital Terrestrial TV and Radio Program Receiving
Teletext *
Real Time Digital Video Recording (DVR) and Scheduling
Recording
Favorite List
Time-Shifting
DxVA
Electronic Program Guide (EPG)
Multi-language
Snapshot
Subtitle
MPEG-II Software Decoding
Multi Channel Preview
1.5.- Hardware Specification
Support DVB-T(EN300744)
IEC connector
USB 2.0 interface
DVB-T Stand Antenna x 1 (UHF/VHF)
DC 5V±5% Power Input
Green LED: POWER ON
USB Bus-Powered, current<500mA @ 5V DC
Note: The Digital Radio mentioned here is not the same with
DAB (Digital Audio Broadcasting), it means the audio
broadcasting by the DVB-T content provider.
Note: * Depends on Content Provider
4
DVB-T USB STICK
User Instructions
2.- Installation Procedure
Before you proceed with the installation, it is important that you to know:
A complete installation includes "Driver" and "Application Program", both parts can be installed easily from the software CD.
Please follow the instructions.
Note: Be sure the DVB-T USB STICK is "not" connected to your PC when you are installing the software.
A.- When put the CD in to the CD-ROM the installation will run automatically. If not automatically run installation execute the
"Setup.exe" program from the CD.
B.- First step is install the driver and windows will pop up this warning window, select "Continue Anyway" . If you are using
Windows 2000, it will appear "Digital Signature Not Found" will appear. Select "Yes" to continue the installation.
5
DVB-T USB STICK
User Instructions
C.- After completing the driver installation click "Finish" to exit driver setup Installation will go to application automatically.
D.- DVB USB-T Setup. Click "Next" to continue.
E.- Choose "I agree…." and click "Next" to continue.
6
DVB-T USB STICK
User Instructions
F.- Enter your user information and click "Next" to continue.
G.- Please input 16 serial numbers and click "Next" to continue. (Serial number can be found on the software CD label)
H.- Please select the user interface language that you want to install and click "Next" to continue.
7
DVB-T USB STICK
User Instructions
I.- Select an installation folder and click "Next" to continue. (Or click "Change" to switch to an existing folder)
J.- Select a shortcut folder and click "Next" to continue.
K.- Please click "Next" to proceed with installation
8
DVB-T USB STICK
User Instructions
L.- Restart the computer and make sure the DVB-T USB STICK is connected to your computer correctly. Please wait 2-3
minutes for the system to find the device. The DVB-T USB STICK is now successfully installed.
M.- Click "Finish" to complete the installation.
N.- Plug the device into PC, then the Windows will try to find the driver, and popup "Find New hardware wizard". If you are
using the Windows XP, the window shown below will pup up, let you select to update the driver from Windows update,
please select "No, not this time" and click "Next" .
9
DVB-T USB STICK
User Instructions
O.- Select the "Install the software…" and click "Next" .
P.- During the driver installation, a "Software installation" window will pop up, please select "Continue Anyway". If you are
using Windows 2000, it will appear "Digital Signature Not Found" will appear. Select "Yes" to continue the installation.
The software has been tested and proved to work correctly with Windows.
Q.- Click "Finish" to close the wizard.
10
DVB-T USB STICK
User Instructions
Addition interpret
When you are installing this driver, the driver will check your system, if your system is lower than Windows 2000 Service
Pack 4/ XP Service Pack 2, the driver will install Direct X 9.0c (as the below picture) for your computer.
- Select the "I accept the agreement" and click "Next".
- Click "Next".
- After installing, click "Finish", the computer will auto- restart.
11
DVB-T USB STICK
User Instructions
Uninstall operation
Step 1. You can enter by 2 methods:
Select ”Start” => ”Programs” => ”USB-DTV” =>”Uninstall USB-DTV”.
Select ”Control Panel” => ”Add or Remove Programs” => ”USB-DTV 1.4” => click "Remove"
the picture as below, then click "Next".
Step 2. When the remove program finish, please click "Finish", and restart the computer.
12
DVB-T USB STICK
User Instructions
3.- System Setup
3.1.- How to scan
Before watching or listening to TV/Radio, start "Scan Channel" and choose one of the four channel scanning methods
(including "Country/Area", "All", "Range", and "Single") to conduct program scanning. The scan results will be shown on the
TV and Radio lists, you can also save the list for future use.
The program will ask you to scan channel when you first execute DVB-USB.
Step 1. Please select a Country or Area you are in.
Step 2. Please click "Start" to scan.
Step 3. Please click "OK " when the scan is finished.
13
DVB-T USB STICK
User Instructions
3.2.- Control panel introduction
The DVB-USB default control panel is shown below. All main functions can be operated via the buttons or shuttle on the
control panel. Messages delivered to you will be shown on the left side of the LCD to give you a full understanding of the
current status.
Buttons
Play - TV, files
Open My Favorite
Stop - TV, recordings, files, TimeShift
Open Teletext
Pause - TV, recordings, files, TimeShift
Mute On/Off
Fast-Forward - files, TimeShift
Numeric keypad ( 0~9 )
Rewind - Files, TimeShift
Clear input
Snapshot (capture single image)
Next channel
Record TV
Previous channel
Minimize to taskbar
Change to the last channel
End program
Return to TV
Enable/Disable TimeShift
View multiple channels
Play files
Maximize to full screen / restore down
Open function setting window
Adjust volume
Open EPG window
Select audio Language
Select audio Channel
Select Subtitle
14
DVB-T USB STICK
User Instructions
LCD display
4
8
5
7
6
9
3
1
2
1
Display volume
2
Display Audio Channel and Mute on/off status
3
Display playing status
4
Display RF strength
5
Display RF quality
6
Display media type
7
Display channel
8
Display TimeShift playing time
9
Display file name or name of external device
15
DVB-T USB STICK
User Instructions
3.3.- Functional setting
3.3.1.- General
Full screen: Activate full screen playing
Always on Top: Fix the image display window on top of
the desktop
Enable OSD: Turn on OSD display
Refresh RD Information: Turn on RF information display
3.3.2.- Scan channel
RF frequency: There are 4 modes available for selection:
"Country/Region", "All", "Range", and
"Single".
Bandwidth: There are 3 types of bandwidth available for
selection: "6", "7", and "8"
Start: Start scanning
Stop: Stop scanning
Scan process: Display scan completion rate
TV: Display scanned TV program list
Radio station: Display scanned radio program list
Open: Open created program list
Save: Save program list
Save as: Save program list as other file name
Delete: Delete programs from one list
Delete All: Delete programs from all lists
16
DVB-T USB STICK
User Instructions
3.3.3.- Record Program
Storage Resource: Display computer's memory size
Save To: Set recording path
Progress: Display recording progress
Enable Preset: Activate pre-schedule recording function
Delete All: Delete all pre-schedule programs
Delete: Delete a pre-schedule program
Note: Once recording is completed, the "OK" sign will
appears on the list
3.3.4.- Display
Brightness: Adjust image brightness
Contrast: Adjust image contrast
Hues: Adjust image hues
Saturation: Adjust image saturation
Reset: Restore to default settings
DxVA: Microsoft DirectX Video Acceleration. A Microsoft
API specification for the use hardware acceleration
of 2-D decoding operations.
Deinterlace: converting interlaced video (a sequence of
flied) into a non-interlaced form (a sequence
of frames)
17
DVB-T USB STICK
User Instructions
3.3.5.- Capture
Set image capture to Clipboard or an assigned folder
3.3.6.- Device
Choose video or audio device.
18
DVB-T USB STICK
User Instructions
3.3.7.- Audio
AC3 It will detect the AC3 decoder in your PC, like AC3
Filter.
3.3.8.- TimeShift
Set time mode or buffer mode for TimeShift.
19
DVB-T USB STICK
User Instructions
3.3.9.- Skin
Choose skin.
3.3.10.- Information
Show video, audio & channel information.
20
DVB-T USB STICK
User Instructions
3.4.- Right click menu
The following functions will appear when right clicking on the control panel or TV broadcasting window.
21
DVB-T USB STICK
User Instructions
4.- Main Functions
TimeShift
This function overthrew the traditional TV function, you will not miss any your watching program anymore.
Operation
Click "TS", the program start to record (the program be temporarily saved in hard discs), when you come back, pull the
control point to the most front in the red time line, then you can enjoy the content which you recorded.
During the "TimeShift" playing, You can even fast forward over the beginning of green time line to catch up on the live
broadcast by pressing "Forward Scan", or watch the content again by pressing "Backward Scan"
Illustrate
A: The start for TimeShift.
B: Control point
C: The live broadcast.
A-C: The record content (Red)
C-D: The rest time can be
recorded (Green).
A B C
D
Preset Record
You can pre-set several recording schedules, and those will be saved at the position which you designate.
Operation steps:
Click
Press [ Record ] page.
Press "Enable Preset".
Enter the Preset Record, press the left key of the mouse, then click twice and enter “Record Input”page.
Choice the channel which you want to present on the channel column.
Input the information in [ Start Time ] and [ End Time ] fields.
Click "OK".
22
DVB-T USB STICK
User Instructions
Real Time Digital Video Recording (DVR)
You can record the current program which you are watching; also, the program will be saved on the position which you
designate.
Operation step
Click
and start "DVR"
Click
again, if you want to stop record, or click
to stop the record.
Grab Image
You can grab image from the playing program, and save this image by BMP (*.bmp) format. Then you can edit the picture by
your software.
Operation step
Click "Grab Image", the picture will be saved.
Electronic Program Guide (EPG)
You can know all schedule program of witnin one week by EPG.
Operation
Click
then you can see all detail schedule of program within coming week and not miss any wonderful one.
Emphasize here further and please check your system time in your own OS, if the time is incorrect, the EPG is incorrect as
well.
23
DVB-T USB STICK
User Instructions
Favorite List
You can chooce some favorite channels from the list, and you can delete or modify.
Operation Step
Choose the favorite channels from the channel list, press the right key of mouse, it will show “Add to Favorite”.
Caption of TV, RADIO or FAVORITE
S
Move cursor to the “S”, the ”TV” which on the top of the picture will change to “RADIO”, click the “S” again, the
favorite channels you chose before will enter the favorite list.
24
DVB-T USB STICK
User Instructions
Multi Channel Preview
You can watch those 9 channels on the same time, and choose your favorite program to watch normally after browsing it all.
Operation Steps
Click
Use"Pg Up" and "Pg Dn" which on your computer to change the CH1~9 and CH10~others. Following the rule ,you
could browse 9 program on the screen in each time.
Switch the Window mode
You can switch the window depend on your need.
Operation Steps
Full screen: Click
the window screen will switch to full screen.
Reduction Windows: Click "Esc" to switch to window screen.
25
DVB-T USB STICK
User Instructions
5.- Trouble Shooting
The "Found new hardware wizard"
window pops up while plugging in the
DVB-T USB STICK
Please refer to "2.- Installation Procedure" in the user manual. In Windows XP/2000, if you
change the USB port, you have to install the driver again.
DVB-T USB STICK does not work
properly
In most cases, it's because of the drivers were not installed well. You might check the
driver installation in the device manager of Windows Control Panel. In the device category
"Sound, video and game controllers", there must be a device named "AF9015 BDA
Device". If not, please remove the USB box, plug it into the USB port again and follow the
steps in "Chapter 2. Installation procedure" in the user manual to re-install the driver.
Windows cannot find DVB-T USB
STICK
a. Check whether DVB-T USB STICK was connected correctly in the USB port.
b. After the USB box is plugged into the USB port, wait for at least 3 seconds before you
launch DVB-USB.
c. Re-start the operation system.
d. Run "Add/Remove Hardware Device" from Windows "Control Panel" to install the correct
drivers.
e. Unplug the USB box, and then plug it again. Please note that the interval between plug
and unplug should be at least 3 seconds.
f. Plug DVB-T USB STICK into another USB port of the PC.
Windows cannot find the driver of
DVB-T USB STICK
Make sure the original CD-ROM is in the CD-ROM drive during the installation.
Can not lock any program channel
when auto scan.
Please click "OK" button after making or changing any setting in "Scan Channel" before
scanning the terrestrial signal.
Check the cable connection between DVB-T USB STICK and the antenna. Please note that
the cable should be connected well to the connector of the DVB-T USB STICK. Exit DVBUSB. Unplug the USB box, and then plug it again. Note that the interval between plug and
unplug should be at least 3 seconds. Launch DVB-USB and test again.
When error dialog box pops up or
black screen appears
Might be resulted from poor signal quality, DVB-USB doesn't receive enough data of
program or receives wrong data. Please check the connection between DVB-T USB STICK
and the antenna.
Please check the driver of VGA card or on board VGA chip.
Please make sure your operation system is Microsoft Windows 2000/XP.
Please install Microsoft DirectX9.0c or above.
Failed to play program
Make sure you have installed Sound Card Driver and the Sound Card is working. Please
note that no matter you want to listen to the audio or not, the sound card and its driver
must be installed.
Please check the signal quantity and strength.
When playing program, I can only hear
the sound but can't see any images.
Please make sure your VGA driver and Microsoft DirectX9.0c were installed correctly.
DTV MPEG2 video playback on
Notebook PC's is not smooth
MPEG2 video playback consumes lots of CPU power. To get better performance, please
make sure "Power-saving" mode of the Notebook PC is disabled and the CPU should run
at its maximum frequency.
26
DVB-T USB STICK
User Instructions
27
Red Comercial Nacional
A CORUÑA C.P. 15011
Gregorio Hernández 8.
Tfnos.: 981 27 47 31 /981 27 22 10
Fax:
981 27 16 11
[email protected]
BURGOS C.P. 09188
C/Campanero, 3, S. Adrián de Juarros
Tfno.: 947 56 04 58
Móvil: 670 73 75 86
[email protected]
MADRID C.P. 28005
Paseo de los Pontones 11
Tfnos.: 91 474 52 21 /91 474 52 22
Fax: 91 474 54 21
[email protected]
SEVILLA C.P. 41008
Pol. Ind. Store - C/ A-6. Nave 5
Tfnos.: 95 443 64 50 /95 443 58 00
Fax: 95 443 96 93
[email protected]
ALMERÍA C.P. 04008
Campogrís 9.
Tfno.: 950 23 14 43
Fax:
950 23 14 43
[email protected]
GIJÓN C.P. 33210
C/Japón, 14
Tfnos.: 985 15 25 50 /985 15 29 67
Fax : 985 14 63 89
[email protected]
MÁLAGA C.P. 29006
C/ La Boheme 55
Pol. Ind. Alameda 2
[email protected]
BADAJOZ C.P. 06010
C/Jacobo Rodríguez,
Pereira, nº11-Oficina
Tfno.: 924 20 74 83
Móvil: 670 70 21 93
Fax:
924 20 01 15
[email protected]
JAÉN C.P. 23007
Hermanos Pinzón, 8-bajo
Tfnos.: 953 29 50 40 /953 29 52 11
Móvil: 636 984489
Fax: 953 29 52 10
[email protected]
TENERIFE C.P. 38108
Avda. El Paso, 25 Los Majuelos- La Laguna
Tfnos.: 922 31 13 14 /922 31 13 16
Fax: 922 31 13 33
[email protected]
PAMPLONA C.P. 31007
Avda. Sancho el Fuerte 5
Tfno.: 948 27 35 10
Fax: 948 17 41 49
[email protected]
LOGROÑO C.P. 26004
San Prudencio 19. bajo
Tfno.: 941 23 35 24
Fax: 941 25 50 78
[email protected]
BILBAO C.P. 48150
Iberre kalea, módulo 16, pabellón 15-B
Sangroniz-Sondika
Tfnos.: 94 471 12 02 /94 471 24 78
Fax: 94 471 14 93
[email protected]
A CORUÑA
GIJÓN
LUGO
OURENSE
ZAMORA N
GUIPÚZCOA
ÁLAVA
ASTURIAS
BURGOS
NAVARRA
HUESCA
SORIA
ZAMORA
BARCELONA
ZARAGOZA
SEGOVIA
SALAMANCA
GUADALAJARA
ÁVILA
OPORTO
LISBOA
TOLEDO
CUENCA
VALENCIA
ALICANTE
JAÉN
MURCIA
BALEARES
GRANADA
HUELVA
SEVILLA
ALMERÍA
MÁLAGA
CÁDIZ
CANARIAS
SUCURSALES
TENERIFE
DELEGACIONES
CEUTA
LAS PALMAS
ZARAGOZA C.P. 50002
C/ Monasterio de Alahón 1-3
Tfno.: 976 41 12 73
Fax: 976 59 86 86
[email protected]
TELEVES ELECTRONICA PORTUGUESA
MAIA - OPORTO
Via . Dr Francisco Sa Carneiro. Lote 17.
ZONA Ind. MAIA 1. Sector-X MAIA. C.P. 4470 BARCA
Tel./Fax: 00 351 22 9478900
GSM: 00 351 968581614
[email protected]
LISBOA
C.P. 1000 Rua Augusto Gil 21-A.
Tel.: 351 21 7932537 Fax: 351 21 7932418
[email protected]
PALMA DE
MALLORCA
ALBACETE
BADAJOZ
CÓRDOBA
TARRAGONA
CASTELLÓN
CIUDAD REAL
VIGO C.P. 36204
Escultor Gregorio Fernández, 5
Tfnos.: 986 42 33 87 /986 42 40 44
Fax: 986 42 37 94
[email protected]
TERUEL
MADRID
CÁCERES
GIRONA
LA RIOJA
PALENCIA
VALENCIA C.P. 46022
Plaza Jordi San Jordi s/n
Tfnos.: 96 337 12 01 /96 337 12 72
Fax: 96 337 06 98
[email protected]
Red Comercial Internacional
BILBAO
CANTABRIA
LEÓN
VIGO
PALMA DE MALLORCA C.P.
07007
Ferrer de Pallares 45. bajo D.
Tfno.: 971 24 70 02
Fax: 971 24 53 42
[email protected]
LAS PALMAS C.P. 35006
Gral. Mas de Gaminde 26
Tfnos.: 928 23 11 22 /928 23 12 42
Fax: 928 23 13 66
[email protected]
BARCELONA C.P. 08940
C/ Sant Ferrán, 27
Cornellá - Barcelona
Tfnos.: 93 377 08 62 /93 474 29 50
Fax:
93 474 50 06
[email protected]
SANTIAGO
MURCIA C.P. 30010
Polígono Conver - C/ Rio Pliego 22
Tfnos.: 968 26 31 44 /968 26 31 77
Fax: 968 25 25 76
[email protected]
7126_000_UK
MELILLA
FÁBRICAS
TELEVES FRANCE S.A.R.L.
1 Rue Louis de Broglie
Parc d'Activités de l'Esplanade
77400 St Thibault des Vignes FRANCE
Tél.: +33 (0)1 60 35 92 10
Fax: +33 (0)1 60 35 90 40
[email protected]
TELEVES ITALIA S.r.l.
S.op.Viale Liguria 24
20068 Peschiera Borromeo (MI) Italia
Tel.: (+39)-0251650604 (RA)
Fax: (+39)-0255307363
[email protected]
TELEVES MIDDLE EAST FZE
P.O. Box 17199
JEBEL ALI FREE ZONE DUBAI,
UNITED ARAB EMIRATES
Tel.: 9714 88 343 44 Fax: 9714 88 346 44
[email protected]
Rúa B. de Conxo, 17
15706 SANTIAGO DE COMPOSTELA
Tel. 981 52 22 00 Fax 981 52 22 62
[email protected] www.televes.com
Miembro de número del
Empresa
Registrada
ER 224/1/94
TELEVES UNITED KINGDOM LTD
Unit 11 Hill Street, Industrial State
CWMBRAN, GWENT NP44 7PG.
(United Kingdom)
Tel.: 44 01 633 87 58 21
Fax: 44 01 633 86 63 11
[email protected]


