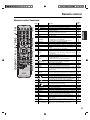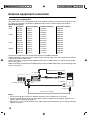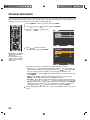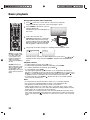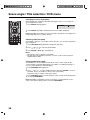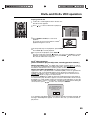
1
15, 19, 22, 26, 32-inch class LCD TV/DVD COMBINATION 15DV703R 19DV703R 19DV704R 22DV703R 22DV704R 26DV703R 32DV703R OWNER’S MANUAL Owner’s Record The model and serial numbers are on the back of your TV/DVD. Record these numbers in the spaces below. Refer to these numbers whenever you communicate with your Toshiba dealer about this TV/DVD. © 2010 Toshiba Corporation Before operating the unit, please read this manual thoroughly. Model number: _________________ Serial number: _________________ IMPORTANT Unauthorized recording of copyright television programmes, films, video tapes and other materials may infringe on the rights of copyright owners and be contrary to copyright laws. WARNING To prevent fire or shock hazard, do not expose this equipment to rain or moisture. MAINS SUPPLY This unit is designed to operate from an AC 220–240V, 50 Hz household mains supply. CAUTION: THIS UNIT IS A CLASS 1 LASER PRODUCT. THIS UNIT USES A VISIBLE LASER BEAM WHICH COULD CAUSE HAZARDOUS RADIATION EXPOSURE IF DIRECTED. BE SURE TO OPERATE THE PLAYER CORRECTLY AS INSTRUCTED. THE FOLLOWING CAUTION LABEL IS LOCATED ON THE REAR PANEL OF THE UNIT. CLASS 1 LASER PRODUCT WHEN THIS UNIT IS PLUGGED INTO THE WALL OUTLET, DO NOT PLACE YOUR EYES CLOSE TO THE OPENINGS TO LOOK INTO THE INSIDE OF THIS UNIT. USE OF CONTROLS OR ADJUSTMENTS OR PERFORMANCE OF PROCEDURES OTHER THAN THOSE SPECIFIED HEREIN MAY RESULT IN HAZARDOUS RADIATION EXPOSURE. DO NOT OPEN COVERS AND DO NOT REPAIR THE UNIT YOURSELF. REFER SERVICING TO QUALIFIED PERSONNEL. Precautions Important safety information This unit has been produced according to all current safety regulations. The following safety tips should safeguard users against careless use and the dangers connected with such use. • Although this unit has been carefully manufactured and rigorously checked prior to leaving the factory, as with all electrical appliances, it is possible for problems to develop. If you notice smoke, an excessive build-up of heat or any other unexpected phenomena, you should disconnect the plug from the main power socket immediately. • This unit should only be connected to an AC 220–240V 50 Hz mains power supply. Do not attempt to connect it to any other type of supply. • The unit must be connected to a main socket outlet with a protective earthing connection. • The socket outlet must be installed near the equipment and can be accessed easily. • Install the unit in a location where no one can accidentally trip over the power cord. • Take note that toddlers can pull the unit down from its installation surface by means of its power cord. Children can hurt themselves when doing this. • Always hold the plug when disconnecting the unit from the socket outlet. Do not pull on the power cord. The flex can become overloaded and cause a short circuit. • Keep away from rodents. Rodents (and also cockatiels) enjoy biting into electric flexes. The animal can cause a short circuit (fire hazard!) and receive a fatal electric shock. • When you leave your home for a long period of time, unplug the power cord for safety reasons. • To protect the unit during a thunder storm, unplug the power cord and disconnect the antenna. Caution: Do not touch the antenna connector. • Ensure that the unit is sufficiently ventilated. Never place the unit next to or underneath curtains. • The unit becomes warm when in operation. Do not place any covers or blankets on the unit in order to prevent overheating. The ventilation holes are not to be blocked. Do not set up near radiators. Do not place the unit in direct sunshine. • Do not use this unit near heat sources. The casing and power cord could be damaged by the intensity of the heat. • Never place hot objects or open flame sources, such as lighted candles or night-lights, on or close to the unit. High temperatures can melt plastic and lead to fires. • If you intend to wall mount the unit, contact the shop where you purchased the unit for advice, and leave the installation work to professionals. Improper installation can cause damage and/or injuries. • When installing the unit on a wall, allow at least 10 cm clearance between the rear of the unit and the wall. Clearance of less than 10 cm will obstruct the vents and cause the unit to overheat, resulting to faults or damage to the unit. • When placing the unit on a shelf, allow at least 10 cm clearance space around the whole unit. • It is recommended that you install this unit on a stable and shock-free surface to avoid the risk of a tip-over. • Avoid placing the unit on any surfaces that may be subject to vibrations or shocks. • Observe fall-prevention measures. If these measures are not taken, the unit can tip over and cause damage and/or injuries. Contact the shop where you purchased the unit to obtain full details of these measures. • When a TV stand is used: – Make sure the unit is fully on the stand and is placed in the centre. – Do not leave the stand doors open. You could be hurt as a result of the unit falling or breaking, or your fingers being caught or jammed. Take extra precautions if you have children. • Do not expose the unit to dripping or splashing. Do not place any objects filled with liquids, such as vases, on or near the unit. • Liquids spilled into the unit can cause serious damage. Turn the unit off and disconnect the mains power supply, then consult a qualified service person before attempting to use the unit again. • The screen is made of glass and can break if damage is done to it. Be careful when collecting sharp edged glass splinters. • Use a damp—not wet—cloth to clean the unit. • Do not open this unit. An attempt to repair the unit by a non-expert could be dangerous and potentially cause a fire hazard. All repairs should be carried out by qualified service personnel only. 1 Precautions NOTES ON MOISTURE CONDENSATION Moisture condensation damages the unit. Please read the following carefully. Moisture condensation occurs, for example, when you pour a cold drink into a glass on a warm day. Drops of water form on the outside of the glass. In the same way, moisture may condense on the head drum or the optical pick-up lens inside this unit, one of the most crucial internal parts of the unit. • Moisture condensation occurs during the following cases: – When you bring the unit directly from a cold place to a warm place. – When you use the unit in a room where you just turned on the heater, or a place where cold wind from the air conditioner directly hits the unit. – In summer, when you use the unit in a hot and humid place just after you moved the unit from an air conditioned room. – When you use the unit in a humid place. • Do not use the unit when moisture condensation may occur. If you use the unit in such a situation, it may damage discs and internal parts. Remove the disc, connect the mains lead of the unit to the mains power outlet, turn on the unit, and leave it for two or three hours. After two or three hours, the unit will have warmed up and any moisture would have evaporated. Keep the unit connected to the mains power outlet and moisture condensation will seldom occur. HEADPHONE WARNING Loud music can damage your hearing irreversibly. Do not set the volume to a high level when listening through headphones, particularly for extended listening periods. EXCLUSION CLAUSE PLEASE TAKE NOTE Toshiba shall under no circumstances be liable for loss and/or damage to this product caused by: • fire; • earthquake; • accidental damage; • intentional misuse of the product; • use of the product in improper conditions; • loss and/or damage caused to the product whilst in the possession of a third party; • any damage or loss caused as a result of the owner’s failure and/or neglect to follow the instructions set out in the owner’s manual; • any loss or damage caused directly as a result of misuse or malfunction of the product when used simultaneously with associated equipment; Furthermore, under no circumstances shall Toshiba be liable for any consequential loss and/or damage including but not limited to the following: loss of profit, interruption of business, an/or loss of recorded data whether caused during normal operation or misuse of the product. TECHNICAL LIMITATIONS • If stationary images generated by text services, channel identification logos, computer displays, video games, on-screen menus, etc. are left on the TV screen for any length of time, they could leave an afterimage. It is always advisable to reduce both the brightness and contrast settings. • The LCD panel contained in this TV is manufactured using an extremely high level of precision technology; however, there may be an occasional pixel (dot of light) that does not operate properly (does not light, remains constantly lit, etc.). This is a structural property of LCD technology, it is not a sign of malfunction, and is not covered under your warranty. Such pixels are not visible when the picture is viewed from a normal viewing distance. 2 Installation WHERE TO INSTALL – Locate the TV away from direct sunlight and strong lights. Soft, indirect lighting is recommended for comfortable viewing. Use curtains or blinds to prevent direct sunlight falling on the screen. – Place the TV on the floor or a sturdy, level, stable surface that can support the weight of the TV. To secure the TV, use a sturdy strap from the hook(s) on the rear of the TV to a wall stud, pillar or other immovable structure. Make sure the strap is tight, secure, and parallel to the floor (not applicable to 19 and 22-inch models). – The LCD display panel is manufactured using an extremely high level of precision technology, however sometimes some parts of the screen may be missing picture elements or have luminous spots. This is not a sign of a malfunction. – Make sure the TV is located in a position where it cannot be pushed or hit by objects, as pressure will break or damage the screen, and that small items cannot be inserted into slots or openings in the case. 26, 32-inch models 15-inch model Retractable pedestal stand and locating the LCD TV (Applicable to 19 and 22-inch models) Observe the following safety precautions: (1) Ensure that the unpacking and transfer of the TV is carried out by two or more people. (2) Put the LCD TV on a large level area that can support the weight of the TV. (3) Grab the pedestal stand and lift the display up. Confirm the pivot is locked. (4) Place the TV on a sturdy, level surface that can support the weight of the TV. To fold the pedestal stand (Applicable to 19 and 22-inch models) (1) Slide the lever on the back side of the pedestal stand to the left. (2) Lay the display down. Notes: • Do not operate the LCD TV when the pedestal stand is folded. The pedestal stand should not be folded at any time except for packing purposes. • 22-inch model is used here for illustration purpose. To install the LCD TV using a wall bracket If you decide to wall mount your LCD TV, always use a wall bracket appropriate for the size and weight of the LCD TV. Caution: Two people are required for installation. (1) Unplug and remove any cables and/or other component connectors from the rear of the TV. (2) Follow the instructions provided with your wall bracket. Before proceeding, make sure the appropriate bracket(s) are attached to the wall and the back of the TV as described in the instructions provided with the wall bracket. (3) After attaching the appropriate bracket(s) to the wall and the back of the TV, remove the pedestal stand from the TV as described below. 3 Installation Removing the pedestal stand (1) Carefully lay the front of the TV face down on a flat, cushioned surface such as a quilt or blanket. Leave the stand protruding over the edge of the surface. Note: Extreme care should always be used when removing the pedestal stand to avoid damage to the LCD panel. (2) Remove the screws shown in the below figures. This will allow removal of the pedestal stand. (3) Once you have removed all screws holding the pedestal stand in place, remove the pedestal stand from the TV by sliding the pedestal stand away from the TV. 26, 32-inch models 19, 22-inch models 15-inch model Two screws Two screws Three screws Hook Sturdy strap (as short as possible) Note: 22-inch model is used here for illustration of 19, 22-inch models. VENTILATION The TV emits heat when in operation. Do not place any covers or blankets on the TV, this may cause overheating. Do not block ventilation holes, or set up near radiators. Do not place in direct sunshine. When placing on a shelf leave 10 cm (4 inches) free space around the entire TV. 4 Hooks Sturdy strap (as short as possible) Features TV • Auto channel memory • On-screen programming • Picture control adjustments • Power auto shut off • Multi-language on-screen display DVD Player • • • • • • • Multi-language setup menu Multi-angle scene support Adjustable aspect ratio Zoom feature Repeat playback A-B repeat playback Program playback • • • • • • Random playback Parental control Supports DVDs (Region 5 / Region All), VCDs and audio CDs MP3 / JPEG / DivX® CD playback Supports PAL and NTSC DVDs Digital output for Dolby Digital (AC-3) and DTS Contents Preparation Precautions Installation Features TV controls Remote control Antenna connection External equipment connection AC power connection 1 3 5 6 9 11 12 16 TV operation Auto installation Guide to Using the TV Main menu On-screen language selection Automatic tuning Channel allocation Manual tuning Basic operations Teletext service NICAM Two-channel sound reception Picture formats AV colour adjustment Media Player TV Main menu 17 18 18 19 20 21 22 23 24 24 25 26 27 29 Disc playback Disc precautions Basic playback (DVD / VCD / Audio CD) Advanced playback Zoom function Scene navigation 31 32 33 34 34 Scene bookmarks Repeat playback A-B repeat playback Program playback Random playback Scene angle Title selection DVD menu Soundtrack language Audio channel Subtitle Playback information VCD playback control (PBC) MP3 / JPEG / DivX® and Audio CD information About the file browser Audio file playback JPEG file operation DivX® and DivX® VOD operation MP3 / JPEG / DivX® and Audio CD playback modes 35 36 36 37 37 38 38 38 39 39 39 40 40 41 42 43 44 45 46 Function setup Customizing disc playback Disc Setup menu 48 49 Additional information Troubleshooting Specifications 52 55 Manufactured under license from Dolby Laboratories. Dolby and the double-D symbol are trademarks of Dolby Laboratories. Manufactured under license under U.S. Patent #: 5,451,942 & other U.S. and worldwide patents issued & pending. DTS and the Symbol are registered trademarks and DTS Digital Out and the DTS logos are trademarks of DTS, Inc. Product includes software. © DTS, Inc. All Rights Reserved. HDMI, the HDMI logo and High-Definition Multimedia Interface are trademarks or registered trademarks of HDMI Licensing LLC. is a trademark of DVD Format/Logo Licensing Corporation. DivX® , DivX Certified® and associated logos are registered trademarks of DivX, Inc. and are used under license. Unauthorized recording of copyrighted television programs, films, video cassettes and other materials may infringe the rights of copyright owners and be contrary to copyright laws. Note: Unless otherwise indicated, the examples used throughout this manual are based on the 26DV703R model. 5 TV controls Front panel 19, 22, 26, 32-inch models Auto brightness sensor Speaker Remote sensor On/Standby indicator 15-inch model Auto brightness sensor Speaker Remote sensor (embedded) On/Standby indicator Left side EJECT button Disc slot VOLUME (+/–) buttons HDMI2 jack PLAY / CHANNEL button STOP / CHANNEL button 26, 32-inch models USB jack MENU button INPUT / ENTER button Headphone jack POWER button Note: Some indicators of 32-inch model are printed on other sides of buttons or jacks. 6 TV controls Left side EJECT button Disc slot VOLUME (+/–) buttons 19, 22-inch models PLAY / CHANNEL button STOP / CHANNEL button HDMI2 jack MENU button USB jack INPUT / ENTER button Headphone jack POWER button Note: 22-inch model is used here for illustration purpose. For 19-inch model, some indicators are printed on another side of the buttons. Disc slot HDMI2 jack 15-inch model USB jack Headphone jack Adjusting the screen angle Applicable to the following models only: – 19DV703R – 19DV704R – 22DV703R – 22DV704R You can adjust the angle of the TV screen 3° forward or 15° backward from a vertical angle. Hold the base of the TV while adjusting the screen. 7 TV Controls Top side 15-inch model POWER button INPUT / ENTER button EJECT button PLAY / MENU button STOP / CHANNEL CHANNEL VOLUME (+/–) buttons button button Rear side AC input jack 15, 19, 22, 26, 32-inch models COMPONENT VIDEO IN jacks PC IN jack HDMI1 jack AUDIO IN L/R jacks Antenna jack VIDEO IN jack OPTICAL DIGITAL AUDIO OUT jack 8 HDMI1/PC AUDIO IN jack Remote control Remote control functions Item Key 1 2 3 4 5 EJECT TV/DVD (On/Standby) SLEEP 0–9 6 7 8 DISPLAY MUTE DVD MENU TOP MENU 9 SUBTITLE 10 INPUT 11 12 AUDIO SELECT 13 VOL +/– 14 CH RTN ZOOM 15 16 ENTER CH LIST / / / P (Programme) +/– 18 PLAY 19 MENU SETUP 20 RETURN 17 21 22 23 24 25 26 27 28 29 30 31 32 33 34 35 Refer to page Eject a disc. 32 Toggle between the TV and DVD mode. 32 Toggle between on and standby power states. 18 Configure the sleep timer. 22 – Select a channel 22 – Select a teletext page 23 – Input the parental access password 51 View the TV or DVD operation status. 22, 40 Mute the volume. 22 38 – In DVD mode, view the DVD menu screen. 42 – In JPEG CD mode, display image thumbnails. 38 – In DVD mode, select a DVD title. 42 – In JPEG CD mode, view the image file browser. Set the subtitle of a multi-language DVD. 39 Select the input source. 12 Pause the teletext display to ‘hold’ the current page in place. 23 Change the soundtrack language of a multi-language DVD 39 or VCD. Increase or decrease the system volume. 22 – In TV mode, switch to the last channel selected prior to 22 the current one. – In DVD mode, change the image viewing scale of a video 34, 44 or image file. Toggle the teletext display on or off. 23 – When using the TV menu, enable a menu option or view 18 a sub-menu screen. – When in TV mode, display the channel list. 22 Function – Cursor buttons to navigate on-screen displays. – When in TV mode, select the TV channel. Start or resume disc playback. – In TV mode, display the TV Main menu. – In DVD mode, display the DVD Setup menu. – When viewing a sub-directory in a file browser screen, go back to the previous file directory. – In DVD mode, when viewing the Setup menu, close the menu screen. EXIT/ – Close a menu screen. CANCEL – In menu setting mode, disregard the last change made. STOP Cancel disc playback. SKIP Jump to the previous chapter/track. REV – During playback, play in fast reverse direction. – In teletext mode, reveal the answers to quiz questions. SKIP – During playback, jump to the next chapter/track. – In teletext mode, toggle the display size. FF – During playback, play in fast forward direction. – In teletext mode, view a subpage. SLOW Slow motion playback in reverse direction. SLOW Slow motion playback in forward direction. PLAY MODE Select the playback mode. PAUSE Temporarily stop disc playback. MARKER Mark specific playback points in a DVD, VCD, or audio CD. ANGLE – In DVD mode, change the scene angle (multi-angle DVD) – In JPEG CD mode, rotate the image display. JUMP Select the specific point where to start disc playback. REPEAT A-B Repeat playback of a specific section between two set points (A – B). PIC SIZE – In TV/DVD mode, change the display’s aspect ratio. – In JPEG CD mode, adjust the thumbnail size. Coloured buttons (red, In a teletext screen, view the page corresponding to the field green, yellow, blue) with the same colour as the button you pressed. 18 22 32 18 48 27-28 42 48 18 32, 43 33 33 23 33 23 33 23 33 33 36–37 32 35 38 44 34 36 25 42 23 9 Remote control Battery installation 1 Open the battery compartment cover in the direction of the arrow. 3 Close the battery 2 Install two “R03/AAA/UM-4” (penlight size, supplied) batteries, paying attention to the polarity indicated in the battery compartment. compartment. Battery precautions • Use two “R03/AAA/UM-4” size penlight batteries for the remote control. • If the remote control does not operate correctly, or if the operating range becomes reduced (i.e., you need to get closer to the TV to use the remote control), replace batteries with new ones. • Do not mix old and new batteries. • Weak batteries can leak and severely damage the remote control transmitter. Always remove batteries if they become weak or if the remote control is not to be used for an extended period of time. • Dispose of batteries in designated disposal area. • Never throw batteries into the fire. • Never expose batteries to excessive heat such as sunshine, fire or the like. Transmission range Aim the remote control at the remote sensor and press the control buttons to operate. Make sure the remote control is within approximately five meters and 30° angle (on either side) of the remote sensor. 5 meters 5 meters 19, 22, 26, 32-inch models 15-inch model Notes: • When direct sunlight, an incandescent lamp, fluorescent lamp or any other strong light shines on the remote sensor, the remote operation may become unstable. • When there is an obstacle between the TV and the transmitter, the remote control transmitter may not operate. 10 Antenna connection Connect an indoor or outdoor antenna to the antenna jack on the rear panel as shown below. For all antenna circuit problems, consult your local antenna contractor. Outdoor antenna connection The type of antenna required depends on the location of your home, its distance from the local TV transmitter, and possible sources of interference in your area. If you do not have an antenna and you are uncertain of what type to buy, you should seek the advice of a local antenna contractor. RF cable (not supplied) Antenna jack Satellite receiver connection Satellite receiver Component video cable (not supplied) To Component Audio In To Audio Out To Component Video In (Y, Pb, Pr) To Component Video Out Audio cable (not supplied) When a satellite receiver is connected, use the remote control that came with the receiver to switch channels. 11 External equipment connection Input Selection The devices connected to the input jacks on the rear panel of the TV will determine which input sources can be activated. (1) Press INPUT to view the Source Selection screen. (2) Press / to select which input source to use. (3) Press ENTER to switch to the selected source. Optional equipment connection reminders • All input terminals are located on the rear side of the TV except HDMI2, USB and headphone jacks. • When you connect an equipment to your TV, be sure to turn off the power and unplug the equipment from the wall outlet before making any connections. Connecting a VCR Connect the VCR to the TV as shown. Select “AV” as the input source. To Audio/Video Out To Audio/Video In Audio/video cable (not supplied) Connecting a game console If your game console requires an AV connection, connect it to the TV as shown. Select “AV” as the input source. However, if your game console is using another cable connection, identify the cable type and proceed to the related section in the succeeding pages. To Audio/Video Out To Audio/Video In Audio/video cable (not supplied) Connecting a camcorder If your camcorder requires an AV connection, connect it to the TV as shown. Select “AV” as the input source. However, if your camcorder is using another cable connection, identify the cable type and proceed to the related section in the succeeding pages. To Audio/Video In To Audio/Video Out 12 Audio/video cable (not supplied) External equipment connection Connecting a device with Component Video output Connect the device to the TV as shown. Select “Component” as the input source. Component video cable (not supplied) To Component Video Out To Audio Out To Component Audio In To Component Video In Audio cable (not supplied) Connecting an HDMI device Connect the device to the TV as shown. Select “HDMI1” or HDMI2” as the input source. The HDMI1/ HDMI2 input receives digital audio and uncompressed video from an HDMI device. HDMI cable (type A connector, not supplied) To HDMI In To HDMI Out TV side panel HDMI device Notes: • When you connect the HDMI device to HDMI1 terminal on the TV, set the “HDMI1 Audio” to “HDMI”. See “HDMI1 Audio” on page 29. • This TV does not support receiving HDMI audio in Bitstream format. Please configure your HDMI playback device to PCM audio first. Connecting a DVI device Connect the device to the TV as shown. Select “HDMI1” as the input source. The HDMI1 input receives uncompressed digital video from a DVI device. When you connect the HDMI1 terminal to a DVI device with an HDMI-to-DVI adapter cable, it only transfers video signal, so it is necessary to use a separate audio cable to transfer the audio signal HDMI-to-DVI Adapter cable (HDMI type A connector, not supplied) To DVI out DVI device To HDMI In To Audio Out To HDMI1/PC AUDIO In Audio cable (not supplied) Notes: • When you connect the DVI device to HDMI1 terminal on the TV, set the “HDMI1 Audio” to “DVI”. See “HDMI1 Audio” on page 29. • If you connect the DVI device to HDMI2 terminal on the TV and select “HDMI2” as the input source, only video signal can be output. 13 External equipment connection Connecting a computer (PC) You can use your TV as a display device for your computer. Before you connect the computer to your TV, adjust the computer’s resolution to 1360×768 and set the on-screen refresh rate to 60 Hz. Monitor Display modes Mode VGA SVGA XGA WXGA Resolution 640×480 Vertical Frequency 60.000 Hz Horizontal Frequency 31.500 kHz Pixel Clock Frequency 25.200 MHz 640×480 72.809 Hz 37.861 kHz 31.500 MHz 640×480 75.000 Hz 37.500 kHz 31.500 MHz 800×600 56.250 Hz 35.156 kHz 36.000 MHz 800×600 60.317 Hz 37.879 kHz 40.000 MHz 800×600 72.188 Hz 48.077 kHz 50.000 MHz 800×600 75.000 Hz 46.875 kHz 49.500 MHz 1024×768 60.004 Hz 48.363 kHz 65.000 MHz 1024×768 70.069 Hz 56.476 kHz 75.000 MHz 1024×768 75.029 Hz 60.023 kHz 65.000 MHz 1280×720 59.870 Hz 47.776 kHz 78.750 MHz 1280×768 59.995 Hz 47.396 kHz 68.250 MHz 1360×768 60.015 Hz 47.712 kHz 85.500 MHz Connect the computer to the TV with either the PC IN or HDMI connection. When connecting a computer to the PC IN terminal on the TV, select “PC” as the input source and use a VGA cable and an audio cable. When connecting a computer to the HDMI terminals with an HDMI cable, see “Connecting an HDMI device” on page 13. When connecting a computer to the HDMI terminals with an HDMI-to-DVI cable, see “Connecting a DVI device” on page 13. HDMI-to-DVI cable (not supplied) To HDMI In To HDMI Out HDMI cable (not supplied) To HDMI1/PC Audio In To Audio Out To PC In Audio cable (not supplied) To VGA port VGA cable (not supplied) Notes: • The on-screen display will have a different appearance in PC mode than in TV mode. • If there is flickering in the display or if the display appears distorted or misaligned, adjust the PC settings. See “PC Setting” on page 29. • When the TV is in PC mode and there is no video signal from the computer, the “No signal” message appears on-screen. 14 External equipment connection Connecting an audio amplifier You can connect an audio amplifier with a built-in digital surround sound decoder (Dolby Digital / DTS / MPEG) to the TV as shown. To Optical Digital Audio Out To Optical Digital Audio In Optical audio cable (not supplied) Note: DTS decoders that do not support the DVD-DTS interface may not work properly with this TV. Connecting a headphone Connect the headphone to the TV as shown. 15-inch model 19, 22-inch models 26, 32-inch models To Headphone jack Notes: • When an amplifier or a headphone is connected to the TV, the built-in speakers will be disabled. • When using an amplifier or a headphone, make sure the volume on both the TV and external audio output device is set to a reasonable listening level. • 19 and 32-inch models have indicators printed on other sides of buttons or jacks, different from the illustrated 22 and 26-inch models. Connecting a USB device Connect the USB device to the TV as shown. 15-inch model 19, 22-inch models 26, 32-inch models To USB jack Note: • For details on how to access the files stored in the USB device, see “Media Player” on page 27 and 28. • 19 and 32-inch models have indicators printed on other sides of buttons or jacks, different from the illustrated 22 and 26-inch models. 15 AC power connection Connecting AC power Connect the AC cord plug into the TV/DVD’s AC INPUT jack, then connect the AC cord into a functional AC outlet. 220–240V 50 Hz AC outlet AC input jack AC power cable (supplied) Notes: • Never connect the AC cord plug to other than the specified voltage (220–240V 50 Hz). Use the supplied power cord only. • If you cause a static discharge when touching the TV and the TV fails to function, simply unplug it from the AC outlet and plug it back in. The TV should return to normal operation. • If the AC cord plug is plugged in for the first time, wait for approximately five (5) seconds before pressing on the TV or on the remote control. Power Return If the power is cut off while you are using the TV and the power is resupplied, the Power Return feature will turn the TV on automatically. If the power is going to be off for a long time or you are going to be away from the TV for a long time, unplug the power cord from the wall outlet to prevent the TV from turning on in your absence. 16 Auto installation When you turn on the TV for the first time, the Automatic Installation routine is activated. This routine helps you select the on-screen language and perform an auto programme search using the TV’s built-in tuner. If you are using an external TV receiver (e.g. for satellite or digital TV), you need to tune it separately according to its own instructions. Notes: • To cancel the Auto Tuning process, press ENTER. • The Automatic Tuning process will only start by itself the first time you switch the TV on. To enable “Auto Tuning” in a later time, see page 19. 1 Make sure that the aerial and power connections are made, then press TV or on the remote control to turn on the TV. The power indicator on the front of the TV changes to green. 2 On the “Auto Installation” menu, the Language option is automatically highlighted. Press / to select the preferred language. 3 Press / to select “Auto Tuning”, then press ENTER. 4 The confirmation message will appear. Check your aerial connection, then press ENTER. on the Auto Tuning The TV will now automatically detect all available channels in your area and store them in the TV’s memory. Note: Please be patient. The Auto Tuning process can take several minutes to complete. When the “Programming Now” status bar is completely highlighted, the Auto Tuning process is complete. 17 Using the TV Main menu / On-screen language selection Pre-step: Make sure that the antenna and power connections are made, then press control. on the TV or on the remote Using the Main menu When you press on the remote control, the On/Standby indicator will light up green. To place the TV in standby mode, press again. The On/Standby indicator will change from green to red. To turn on the TV from standby mode, press again. Or you can press PLAY on the remote control or / on the TV. To turn off the TV completely, press and disconnect the AC power cord. Notes: • If no button is pressed for more than approx. 60 seconds, the menu screen will automatically close. • If you have already selected your preferred language at the Auto Installation stage, you do not need to go through the procedure described on the right. 18 1 Press TV/DVD to switch to TV mode, then press MENU. The Main menu will appear on the screen. 2 Press / to select a menu category, then press ENTER to view the corresponding menu screen. There are four menu categories: “Picture”, “Sound”, “Channel”, and “Setup”. 3 Press / to select the menu option you want to configure. Each menu screen has a legend bar that shows which remote control buttons you need to press to navigate the screen. Press levels. / to adjust options expressed in Press / to change an option setting. Legend bar 4 5 Once you have adjusted a menu option to your preferred setting, press ENTER. Press MENU to return to the previous menu or press EXIT to return to the normal screen. On-screen language selection This TV supports a multi-language on-screen display. There are 15 language options: English, Français, Español, Deutsch, Italiano, Nederlands, Svenska, Ελληνικά, Polski, Norsk, Suomi, Dansk, Türkçe, Русский and Português. 1 In the Main menu screen, press / to select “Setup”, then press ENTER. Press / to select Language, then press ENTER. Press / to select your preferred language. 2 Press EXIT to return to the normal screen. Automatic tuning Perform the Auto Tuning process to search and save new TV channels that have become available after performing the Automatic Installation routine. Go to page 17 for more information. Pre-step: Make sure that the antenna and power connections are made, then press on the TV or on the remote control. 1 2 3 Press TV/DVD to switch to TV mode, then press MENU. 4 Press ENTER to start the Auto Tuning process. Press / to select “Channel”, then press ENTER. Press / to select “Auto Tuning”, then press ENTER. The sound will be muted during this process. When the Auto Tuning is completed, the TV will automatically switch to the normal screen. 19 Channel allocation The automatic station presetting stores channels in the order that they have been detected. Use the “Ch Allocation” menu to change this channel sequence. The “Ch Allocation” have other options that lets you skip (hide) or erase channels. You can also change the channel label for easier identification. 1 2 3 Press TV/DVD to switch to TV mode, then press MENU. 4 Press / to select a channel allocation option, then press ENTER. Press / to select “Channel”, then press ENTER. Press / to select “Ch Allocation”, then press ENTER. Note: When configuring the channel allocation options, it is recommended to start with CH 1 then continue with the other channels afterwards. There are several ways to customize your channel allocation settings. • Sort – Press / to select the channel that you want to move, then press to move the channel label to the left side of the list. Press / to select the position that you want to move the channel to, then press to confirm the move. • Erase Program – Press / to select the channel that you want to erase, then press ENTER. • Skip – Press / to select the channel that you want to skip, then press ENTER. The (*) mark appears next to the skipped channel. • Ch Label – Press / to select channel that you want to rename, then press / to select “Ch Label”. Press / repeatedly until the character you want appears in the first space. When the character you want appears, press ENTER. Repeat this step to enter the rest of the characters. If you want to remove the channel label, press / to select “Label Clear”, then press ENTER. 5 20 After configuring the channel allocation options, press EXIT to return to the normal screen. Manual tuning The Auto Tuning process stores all available stations in the reception area. However, some stations with weak or poor reception may not be detected. If this is the case and you still want to store these stations in the TV, perform the manual tuning procedure described below. Fine Tuning adjustment Under a normal receiving condition, the station search will stop automatically at the best receiving position. That picture will appear without disturbance. This receiving position will be automatically saved. You don’t need to fine tune it (“Fine” option in step 6 on the right). In the rare case of a bad receiving condition, the station search might not stop at the best receiving position. The picture display in that station will appear disturbed, (e.g. wavy lines). Only in this case will you need to manually fine tune the station’s position. 1 Press TV/DVD to switch to TV mode, then press MENU. Press / to select “Channel”, then press ENTER. 2 Press / to select “Manual Tuning”, then press ENTER. 3 Press / to select “Colour System”, then press / to select the TV system applicable to your area (“PAL” or “SECAM”). If you’re not certain of the correct option, select “Auto”. 4 Press / to select “Sound System”, then press / to select the sound system applicable to your area (“B/G”, “I”, “D/K” or “L/L’”). If you are receiving a SECAM broadcast, select “L/L’”. If you’re not certain of the correct option, select “Auto”. Note: Sometimes when “Auto” is selected, there will be no sound output. If this happens, select an option other than “Auto”. 5 Press / to select “Search”, then press to search for channels in the lower frequency or to search for channels in the higher frequency. The search will begin. It will stop at each station that has a good reception. If you want to stop the search, press ENTER. 6 Press / to select “Fine”, then press / to fine tune until the station is adjusted to the best position. 7 Press EXIT to return to the normal screen. 21 Basic operations Channel selection • Using the number buttons. For example: – CH 2: Press 0 and within 2 seconds, press 2. The TV will switch to CH 2. – CH 29: Press 2 and within 2 seconds, press 9. The TV will switch to CH 29. • Pressing the P +/– buttons. The TV will take approx. 2 seconds to switch from one channel to another. Only channels saved in the TV and are active can be displayed. Skipped channels will not appear (see page 20). • Using the Channel List. Press CH LIST, then press / to select the preferred channel. Press CH LIST again to switch to the selected channel. Channel return Press CH RTN to display the last viewed channel prior to the current one. Press CH RTN again to switch back to the channel you were watching. Volume adjustment Press VOL +/– to adjust the volume. The volume level indicator disappears after three seconds. Mute Press MUTE to turn off the sound. “Mute” will appear on-screen. Press MUTE again or VOL +/– to turn the volume back on. Information display Press DISPLAY to view the information screen. This panel shows the current channel number and label, as well as the sleep timer status. Current settings for the sound mode, picture size, and resolution are also displayed. This screen will automatically close after approx. 6 seconds. Sleep timer Press SLEEP to set the sleep timer. “Sleep Timer” and the timer setting appears on-screen for approx. 4 seconds. Each time you press SLEEP, the timer setting increase in 10 minutes increments (10m, 20m, 30m, 40m…1h 10m, 1h 20m…2h 0m). To cancel the sleep timer, press SLEEP repeatedly until “Off” appears. 22 Teletext service A teletext service offers a range of text-based information, typically including news stories, sport articles, weather forecasts, and TV schedules. Information is sent page by page. The TV can store up to 256 teletext pages. These pages can only be accessed once after they have been stored. Fastext/TOPtext The Fastext/TOPtext is teletext with a special directory represented by four different coloured fields (red, green, yellow and blue) on the lower part of the screen. These fields are linked to specific pages. The coloured buttons on the remote control correspond to these coloured fields. Assuming the current page = p, then p+1 is on the red field, p+2 is on the green field, p+3 is on the yellow field, and p-1 is on the blue field. To illustrate, if you are viewing page 184, page 185 is on the red field, page 186 is on the green field, page 187 is on the yellow field, and page 183 is on the blue field. Toggle teletext on and off Teletext is not available in all channels. Select a channel that shows teletext, then press . You will now see a teletext page. TELETEXT Press again to switch to split TV-teletext display mode. You will now see both the teletext page and the TV program. TELETEXT Press once more to close the teletext screen. Notes: • If “100” is shown without any text information, the current channel does not support teletext. • You can not change channels when there is a teletext display. Turn off the teletext if you want to switch to another channel. Select page Press P +/– until the page you want appears. You can also view a specific page by pressing the number buttons (0–9) to input the page number. If you input the wrong page number, just enter three random numbers. After that the field will be clear again. Input the correct page number. Hold page Some pages are divided into subpages. Subpages are automatically displayed as they are transmitted. In order to hold a page, press . Press again to display the next subpage. Directly select a subpage You can directly view a subpage without pressing repeatedly. Subpage numbers are displayed below the coloured bar. Press / to select a subpage. Press to toggle the subpage function on or off. Notes: You can only select other teletext pages when the subpage function is switched off. Teletext display size Press to increase the size the teletext display. Either the upper or lower half of the screen is enlarged. Each time you press , the display toggles between half-screen (larger text) or fullscreen (regular text size) display mode. Answering quiz questions Some teletext pages contain quiz questions. Answers to these questions are hidden within the page. Press to reveal the answers. Page 100 Press ENTER to show page 100 of a multi-page teletext. 23 NICAM / Two-channel sound reception The TV’s built-in tuner can detect and receive NICAM stereo broadcasts. NICAM stereo sound reception 1 2 3 Press TV/DVD to switch to TV mode, then press MENU. Press / to select “Sound”, then press ENTER. Press / to select “NICAM”, then press / to select the preferred NICAM setting—”Auto” to enable NICAM reception or “Off” if you want to use standard mono FM audio reception. The following types of broadcast are possible with NICAM transmissions. The display panel when a broadcast signal is received appears for approx. three seconds. Note: A bad reception can cause disturbance in the stereo sound. In some cases, the NICAM stereo sound may not be received correctly. In the case of a two-channel sound reception, press AUDIO SELECT to switch to the sound channel with the better audio quality. • “NICAM ST” appears when a NICAM STEREO broadcast signal is received. • “NICAM M1” appears when a NICAM MONO A broadcast signal is received. • “NICAM M1 / M2” appears when a NICAM MONO A and MONO B broadcast signal is received. • “NICAM Off” appears when a NICAM signal is received and the NICAM option is set to “Off”. 4 Press EXIT to return to the normal screen. Two-channel sound reception When a two-channel sound reception is available, press AUDIO SELECT to select your preferred audio channel. Each time you press AUDIO SELECT, the sound channel will switch between the two alternative channels available. Sound Sound “NICAM M1 / M2” appears when a NICAM MONO A and MONO B broadcast signal is received. Press AUDIO SELECT to switch between the sound channels. 24 Picture formats Use the Picture Size function to adjust the height/width ratio of the picture display. Press PIC SIZE repeatedly until the preferred picture format appears. Auto If your TV signal includes a widescreen signalling (WSS) stream, selecting “Auto” will allow the TV to automatically adjust the picture display based on this stream. 4:3 Displays the picture in the standard 4:3 format with vertical black bands on the left and right sides. Important: Using the Picture Size function to change the format of the displayed image for the Real (HDMI mode only) purposes of public Displays the picture in its original size. display or commercial gain may infringe on copyright laws. 16:9 Select this format when the TV is receiving a 16:9 signal from an external source (for example, a digital decoder). This uniformly stretches a 4:3 picture horizontally to fill the screen. DVDs often stores a 16:9 image “anamorphically”, meaning a 16:9 image is stored as a horizontally compressed 4:3 image. Select the 16:9 format to restore the image to its proper 16:9 proportions. Cinema This mode is used to zoom in or expand a 4:3 “letter box” picture (with black bars at the top and bottom) so that it fills more of the screen. Note: Using this format will slightly cut off part of the picture due to the image expansion. However, it is possible to scroll the picture up or down to view the cutoff section on the top or bottom part of the picture. See “Vertical Position” on page 30. 14:9 This enlarges a 4:3 picture to the 14:9 format. 25 AV colour adjustment Use the AV Colour menu option to adjust the picture colour settings in AV mode. These settings do not apply when the TV is in any other mode. Note: DVD players that play NTSC DVDs (i.e. multi-region / region code-free), can produce different signals based on the player model. Possible signals include PAL, SECAM, NTSC 3.58, NTSC4.43 and PAL60. If you are using an external DVD player, connect it to the TV through the component video jack or HDMI jack. 26 / 1 2 3 4 Press INPUT and then 5 Press / to select the preferred colour system. Options include “PAL”, “SECAM”, “NTSC4.43”, “NTSC3.58”, and “PAL60”. If you’re not certain of the system used in your area or if the setting you’ve selected results to horizontal stripes in the picture display, select the “Auto” setting. 6 Press EXIT to return to the normal screen. to select “AV”, then press ENTER. Press MENU. Press / to select Press / to select “AV Colour”. “Setup”, then press ENTER. Media Player The TV allows you to enjoy photos and music stored on a USB device. Using the Media Player 1 2 3 4 Insert the USB device into the USB jack of the TV. 5 Press / to select a Media Player option, then press ENTER. Press TV/DVD to switch to TV mode, then press MENU. Press / Press / ENTER. to select “Setup”, then press ENTER. to select “Media Player”, then press Note: Press EXIT to exit from the Media Player. Media Player Specifications USB device – USB Mass Storage Class devices (MSC) Notes: • Connectivity is not guaranteed for all devices. • Connect the USB device to the TV directly. • Do not use a USB hub. Supported file system – FAT12, FAT16 and FAT32 Maximum number of files – 2000 / Folder Supported photo format / file extension – JPEG Exif ver 2.2 (Not all Exif information will be displayed) / .JPG • Maximum viewable resolution: 8192 x 8192 pixels • Maximum photo size: 9MB Supported music format / file extension – MPEG-1 / .MP3 • Sampling rate: 8, 11, 12, 16, 22, 24, 32, 44, 48 kHz • ID3: ver.1, ver.2.3 • Photo – The photo thumbnail view appears. Press / / / to select a file or folder, then press ENTER to view the selected file in full screen or to open the selected folder. • Music – The music list appears. Press / to select a file or folder, then press ENTER or PLAY to begin playing the selected music file or to open the selected folder. • Auto Start – If the Auto Start is set to “On”, a confirmation prompt will appear when a USB device is inserted into the USB jack. Basic Operation In photo view mode • Press / to view the previous or next file. • Press ENTER to switch between Single View or Slide Show mode. • Press to rotate the image 90 degrees clockwise or press to rotate the image 90 degrees counterclockwise. • Press RETURN to return to the previous directory. Note: Picture zooming and size selection are not supported. In music mode • Press PLAY to start music playback. • Press STOP to stop music playback. • Press PAUSE to pause music playback. • Press SKIP or SKIP to skip to play next or previous music file. • Press RETURN to return to the previous directory. Note: Optical audio out function is not supported for USB MP3 playback. Notes: • Do not insert/remove the USB device while in use. Remove the USB device after exiting from the Media Player. • Only limited types of U3 USB device are supported. Therefore, it is suggested not to use U3 USB for playing Media Player. • If a card reader is used to play media player, make sure to insert the memory card into the card reader before connecting it to the TV. • It may take some time to open a file of large size. 27 Media Player Use the Quick Menu to set your preferred Media Player setting. 1 2 3 4 In Photo mode or Music mode, press MENU to display the Quick Menu. Press / to select the item you want to adjust, then press ENTER. Press / to select the preferred setting. Press RETURN to return to the previous menu or mode. Photo Quick Menu • Sort*1 – Sets the file sorting preference in thumbnail view. Select “Title” to sort the files by file name; select “New” or “Old” to sort the files by file date from new to old or old to new. • Interval Time – Sets the preferred time interval to view the photos. Note: The Quick Menu items are different when • Repeat – Sets to display the*2 photo in the same folder repeatedly (“On” or “Off”). you access from photo • Background Music Select – Selects background music for the photo display from the music stored in the USB device. When the available music list appears, thumbnail, photo view, press / to select the desired music and then press ENTER or PLAY to play music list or music the music. Press RETURN repeatedly to return to the photo mode with the selected playback modes. music on. To stop the background music, select “Background Music Select” from photo quick menu and press ENTER to display the music list. Press STOP to stop the music. • Sleep Timer*2 – Sets the sleep timer to turn off the Media Player and the TV (up to 120 minutes in 10-minute increments). Music Quick Menu • Sort*3 – Sets the file sorting preference in music list. Select “Title” to sort the files by file name; select “New” or “Old” to sort the files by file date from new to old or old to new. • Repeat – Sets the preferred music repeat mode (“1”, “All” or “Off”). • Sound *4– Adjusts the audio quality (“Bass”, “Treble”, or “Balance”). • Sleep Timer*4 – Sets the sleep timer to turn off the Media Player and the TV (up to 120 minutes in 10-minute increments). *1 This Quick Menu item is only available for access from the thumbnail view mode. *2 This Quick Menu item is only available for access from the single view or slide show mode. *3 This Quick Menu item is only available for access from the music list. *4 This Quick Menu item is only available for access from the music playback mode. You must obtain any required permission from copyright owners to download or use copyrighted content. Toshiba cannot and does not grant such permission. 28 TV Main menu The TV Main menu has several menu options you can configure to suit your viewing preferences. Category Picture Menu Picture Setting Description Brightness Adjust the black level. This aspect determines the point where grays become pure black. Contrast Adjust the white level. This aspect determines how bright the brightest whites should appear. Sharpness Adjust the sharpness or softness of the display. Colour Adjust the colour intensity. Tint*1 Adjust the balance of the red, green, and blue colours in the display. Colour Temperature Adjust the level of white balance in the display. Available settings include: • Cool – Picture appears with a bluish tint. • Standard – Picture appears more white. • Warm – Picture appears with a reddish tint. Backlight Adjust the backlight level. DynaLight Strengthen the black colouring of dark areas in the video according to the level of darkness. Picture Preference Select one of the four preset picture modes. • Sports – High contrast display for clear-cut images. • Standard – Picture is viewed in its original display mode. • Movie – Picture quality is suited for viewing under dim lighting conditions to deliver a “cinema” experience. • Memory – When you adjust any of the items in the Picture Setting menu, this mode is automatically applied. Picture Size You can choose from six picture formats to adjust the height/width ratio of the display. See page 25 for more information. Blue Back You can set the TV to automatically switch the display to a blue screen and mute the sound if the signal is weak or absent. Setting can either be “On” or “Off”. PC Setting*2 Sound Option Hor Position Adjust the image position horizontally. Ver Position Adjust the image position vertically. Clock Minimize any vertical bars or stripes visible on the screen background. Phase Adjust this option if the computer’s display frequency has been set to 60 Hz. This will optimize picture quality by eliminating flickering in the display. Auto Adjust When individual adjustment of PC settings results in rough edges or flickering in the picture display, select Auto Adjust to automatically adjust all settings to their ideal position based on the current VGA signal. DNR*3 DNR or digital noise reduction improves the picture quality by filtering out unusable data (“noise”) from a faulty input signal (e.g. a video film in letterbox format or a noisy analog cable TV signal). Setting can either be “On” or “Off”. Auto Brightness Sensor When the “Auto Brightness Sensor” feature is set to “On”, the TV will automatically optimize the backlighting levels to suit ambient light conditions. Reset Reset all Picture menu settings to their factory preset values. NICAM Enable or disable the reception of NICAM stereo broadcasts. Setting can either be “Auto” or “Off”. See page 24 for more information. Bass Adjust the low-pitched sounds. Treble Adjust the high-pitched sounds Balance Adjust the sound balance between the left and right speakers. Surround When enabled, the audio signal is expanded to a wider listening field and made deeper to output a pseudo surround sound from the TV speakers for a more enjoyable viewing experience. This feature works with stereo signals from TV broadcast or AV input. Setting can either be “On” or “Off”. HDMI1 Audio Select the appropriate audio input when connecting an HDMI or DVI device to HDMI1 jack. Reset Reset all Sound menu settings to their factory preset values. *1 Adjust this option if you use an NTSC 3.58 MHz or NTSC 4.43 MHz signal through one of the AV inputs, and “NTSC” or “Auto” has been selected for the AV Colour option. *2 This option can only be accessed when the input source is set to PC mode. *3 In Component mode (except when using a 480i/576i signal), this option cannot be selected. 29 TV Main menu Category Channel Setup Menu Option Description Auto Tuning Perform an automatic channel search. See page 19 for more information. Manual Tuning Perform a channel search for stations with weak or poor signal. See page 21 for more information. Ch Allocation Customize the channels stored in the TV. See page 20 for more information. Media Player View the photos or play the music stored on a USB device inserted into the TV USB jack. See page 27 and 28 for more information. Language Select the preferred language for the on-screen display. See page 18 for more information. Video Label You can assign labels to the input connectors to make it easier to identify the device connected to them. These labels are displayed on the “Source Selection” and information display screens. Vertical Position When the picture format is set to “Cinema” (see page 25), you can adjust the vertical position of the display to view the top and bottom sections that have been cut off due to the image expansion. Press / to adjust the vertical position of the picture by up to +10 upward and -10 downward. Auto 4:3 Default*4 Select the default picture size for a 4:3 picture. The picture can either be displayed in its original 4:3 format or expand it to 16:9 proportions. AV Colour*5 Select the colour system for the display when using signal from the audio/video terminals. See page 26 for more information. Auto Shut Off When enabled, the TV automatically shuts off after 15 minutes of nonoperation when the last viewed TV channel stops broadcasting. Setting can either be On or Off. Reset Reset all TV settings to their factory preset values. Once the TV reset process has been completed, the TV will automatically turn off. Press on the remote control to turn it back on. *4 In TV mode, this option is only available when the “Picture Size” is set to “Auto”. In Component mode, this option is only available when there is a 480i/576i signal. *5 PAL is the colour system used in Germany. NTSC 3.58 is used in the USA. If the picture shows horizontal stripes, set this option to “Auto”. 30 Disc precautions The built-in DVD player in this unit plays DVDs with the or playable region number mark. DVDs with other region markings will not be playable. The message “Disc region incorrect” appears on-screen to indicate such cases. Disc playback reminders • DVD-Video, Video CD, Audio CD and MP3 / JPEG /DivX® CD are automatically recognized. • The following disc formats are supported: DVD, DVD-R/RW (video format only), CD, and CD-R/RW. Some DVD-/RW and CD-R/RW discs may be incompatible. • Do not play DVD-ROM, DVD-Audio, CDV, CD-G or Photo CD to prevent accidental erasure of pre-recorded material. • This unit can play an 8 cm disc. • DO NOT use a disc adapter or load an irregularly shape disc into the unit. This may interfere with the operation of the unit. You may not be able to remove the disc. • Please do not use aftermarket accessories, such as a ring protector. This may interfere with the operation of the unit. • Most DVDs are copy-protected. Recording it in on a video tape can result to distorted pictures. This is not a defect of the unit. Disc structure DVD When two or more movies are recorded on a disc, the disc is divided into two or more sections. Each section is called a “Title”. The titles can be subdivided into many sections. Each section is called a “Chapter”. Video CD / Audio CD A video CD or audio CD can contain several items. Each item is called a “Track”. DVD Video Disc Title 2 Title 1 Chapter 1 Chapter 2 Track 1 Track 2 Chapter 1 Chapter 2 Chapter 3 Video CD / Audio CD Track 3 Track 4 Track 5 Disc maintenance On handling discs • Do not touch the playback side of the disc. • Do not stick a label or adhesive tape on the disc. • Do not scratch the disc. • Do not get dirt on the surface of the disc. • Do not drop or bend the disc. Playback side On removing a disc from its case • Be sure to hold the edge of disc. Do not touch the surface of the disc. • Carefully remove the disc from its case. On storing discs • Store the disc in a CD case to prevent scratching the surface or exposing it to dirt or accidental damage. • Do not leave the disc exposed to direct sunlight or store in hot or humid places. On cleaning discs Fingerprints and dust on the disc may cause picture and sound deterioration. Always keep the disc clean. • Use a a soft cloth to wipe the disc from the centre outwards. • If you cannot wipe off the dust with a soft cloth, wipe the disc lightly with a slightly moistened soft cloth and finish with a dry cloth. • Do not use any type of solvent such as thinner, benzine, commercially available cleaners or antistatic spray for vinyl LPs. It may damage the disc. 31 Basic playback Basic playback (DVD / VCD / Audio CD) 1 Press on the unit or on the remote control to turn on the unit. The power indicator on the front of the unit changes to green. 2 Press TV/DVD on the remote control to switch to DVD mode. The DVD start-up screen will appear on the screen. 3 Load a disc in the disc slot. Important: Remember to load the disc with the label side (if present) facing forward. Hold the disc by the edge (DO NOT touch the disc surface) and align it with the guides to slide it into the slot. 4 The prompt “Insert Disc” changes to “Reading” and then playback starts. Reading Note: If you are using an audio amplifier, turn it on, then select the correct input source based on the kind of cable you used to connect the amplifier to the TV. Caution: Keep your fingers well clear of the disc slot when loading or unloading a disc. Neglecting to do so may cause serious personal injury. If the disc has its own menu, it will be displayed on-screen. Press / / / navigate the disc menu, then press ENTER to implement the selected menu option. to Playback controls • • • • To adjust playback volume, press VOL + / –. To temporarily suspend disc playback (still mode), press PAUSE . To continue playback from still mode, press PLAY . To stop playback, press STOP . The unit supports playback resume function. If you stopped the disc playback before it is completed, the unit records the stop point. appears on-screen. Press PLAY to resume playback on the previous stop point. If you press STOP twice in quick succession or unload the disc, the unit will clear the stop point. • To remove the disc, press EJECT . Wait for the disc to be ejected and then remove the disc from the slot. Notes: • In some instances the unit may take a minute or so to start disc playback. • Do not move the unit during playback. Doing so may damage the disc. • The playback resume function may not work on some discs. • High resolution pictures on some discs may occasionally cause “noise” on the picture display. If this is the case, reduce the Sharpness setting under the Picture Setting menu. Go to page 29 for more information. • If the unit does not operate properly, static electricity build-up may be the cause. Turn off the unit, then disconnect the power cord from the AC outlet. Reconnect the power cord, then press on the unit or on the remote control to turn on the unit again. 32 Advanced playback The unit supports several playback modes that allows you to play discs at various speeds. Playing in fast reverse or fast forward directions (DVD / VCD / Audio CD) • Press REV to play in fast reverse direction. • Press FF to play in fast forward direction. Each time you press REV or FF , the playback speed changes. To resume normal playback, press PLAY . Notes: • The sound is muted during reverse and forward scan. • The playback speed may differ depending on the disc. • You can use fast reverse / fast forward playback for MP3 and DivX® CDs. Playing frame by frame (DVD / VCD) Press PAUSE during playback. Each time you press PAUSE , the picture advances one frame. To resume normal playback, press PLAY . Notes: • The sound is muted during frame by frame playback. • You can use frame by frame playback for DivX® CD. Playing in slow motion (DVD / VCD) • Press SLOW to play in reverse in slow motion speed. • Press SLOW to play forward in slow motion speed. Each time you press SLOW or SLOW , the playback speed changes. To resume normal playback, press PLAY . Notes: • The sound is muted during slow motion playback. • You can use forward slow motion playback for DivX® CD. • Slow motion reverse playback does not work on DivX® CD. Locating a chapter or track (DVD / VCD / Audio CD) • Press SKIP to locate succeeding chapters or tracks. Playback starts from the beginning of the selected chapter or track. • Press SKIP to start playback from the beginning of the current chapter or track. When you press SKIP twice in quick succession, playback will start from the beginning of the preceding chapter or track. Disc playback reminders • If an incompatible disc is loaded, one of the following error messages appears on-screen: “Incorrect Disc”, “Disc region incorrect” or “Enter password”. If this is the case, check your disc again. Go to page 31 for a list of supported disc formats, and to page 53 for playback-related troubleshooting instructions. • When you load a disc with the playback side facing backward, “Reading” appears on-screen but it will be replaced by “Incorrect Disc”. Eject the disc and load it again making sure the playback side is now facing forward. • The playback resume function may not work on some discs. • Some DVDs may have fixed playback operations designed by the DVD manufacturer. The unit follows this fixed playback design. In such cases, some playback features may not be available. You may refer to the instructions accompanying with the DVD. • Do not put any objects other than compatible discs on the disc slot. Doing so may cause damage to the unit. • There may be a few seconds between the action of pressing a button and the function it activates. • The prohibition symbol “X” appears on the upper right corner of the screen when you try to employ a playback function that is not available on the disc, or that is not yet accessible at this time. This does not indicate a problem with the unit. 33 Zoom function / Scene navigation Using the Zoom function (DVD / VCD) You can change the viewing scale of a picture by using the Zoom function. 1 Press ZOOM during playback. 1 The view will zoom into the centre of the image. Each press of the ZOOM button will increase the scale value: 1 (× 1.3), 2 (× 1.5) and 3 (× 2.0). 2 Press / / / to pan the scene and view different sections of the picture. 3 To return to normal view, press ZOOM repeatedly until “ Off” appears. Notes: • You can use the Pause, Slow and Search playback functions in Zoom mode. • You can use the Zoom function for DivX® CD. • Zoom function may not apply to some discs. Locating a specific scene (DVD / VCD / Audio CD) Scene navigation options differ depending on the kind of disc. DVDs use the title, chapter or record time to locate the start point for playback. Audio and video CDs use the record time or track number. To view the disc’s title/track or chapter/track list, press DISPLAY. Press JUMP during playback, resume or stop 1 mode. 2 Press / Jump Title Chapter Time to select a navigation option. Jump Title Chapter Time the number buttons (0–9) to key in a value 3 Use for the navigation option you selected. If you input a wrong number, press CANCEL. Refer to the disc package to check the correct number. 4 Press PLAY Jump Title Chapter Time or ENTER to start playback. Notes: • When you use title navigation, playback starts from the first chapter of the selected title. • Scene navigation by record time is applicable only to DivX® CDs. • For audio and video CDs, you can locate a scene by track number or record time. • For PBC-enabled VCDs, turn off the PBC function first before using the Jump function. Go to page 40 for instructions. • Scene navigation may not apply to some discs. 34 Scene bookmarks Bookmarking a scene (DVD / VCD / Audio CD) Scene bookmarks refer to specific points in the playback range that have been marked for later access. You can create up to three markers per disc. playback, press MARKER at the scene 1 During where you would like to place the bookmark. / to select a blank marker, then 2 Press press ENTER to bookmark the selected scene. Marker 1 Marker 2 Marker 3 Marker 1 Marker 2 Marker 3 3 Press MARKER to close the Bookmark window. Note: Bookmarking a scene may not apply to some discs. Viewing a bookmark (DVD / VCD / Audio CD) The saved scene bookmarks are only accessible during the current session. Once you eject the disc or turn off the unit, all bookmarks will be cleared. 1 Press MARKER during playback mode. 2 Press / Marker 1 Marker 2 Marker 3 to select the saved marker. Marker 1 Marker 2 Marker 3 3 Press ENTER to start playback on the scene saved in the selected bookmark. Note: In some cases, subtitles for the marked scene may not display. Deleting a bookmark (DVD / VCD / Audio CD) • Perform steps 1 and 2 above, then press CANCEL. 35 Repeat playback / A-B repeat playback \ Enabling repeat playback (DVD / VCD) You can choose to repeat DVD playback by title or chapter. For VCDs, you can repeat a single track or the entire disc. 1 Press PLAY MODE during playback. [DVD] Press ENTER repeatedly to select a 2 repeat mode. It can either be by “Chapter” or by “Title”. The unit automatically starts repeat playback after finishing the current title or chapter. [VCD] Press / to select “Repeat”, then press ENTER repeatedly to select a repeat mode. It can either be “Single” or “All”. Play Mode : Title Repeat Play Mode Mode : Normal Repeat : Single Note: If you set the repeat mode during stop mode, press PLAY to start repeat playback. 3 Press PLAY MODE again to close the Play Mode window. Notes: • To resume normal playback, select “Off” in step 2 above. • The repeat mode is cancelled when the SKIP or SKIP pressed. • Repeat playback is not applicable to PBC-enabled VCDs. • The repeat playback function may not apply to some discs. buttons are Enabling A-B repeat playback (DVD / VCD / Audio CD) In A-B repeat playback, a specific section between two set points will be played repeatedly until you turn off the A-B repeat mode. playback, press REPEAT A-B at the 1 During point where you would like the playback loop to A begin. This sets your “A” point. the playback reaches the point where you 2 When would like the playback loop to stop, press A B REPEAT A-B again. This sets your “B” point. The section between points A and B will be played repeatedly in a loop until you turned off the repeat A-B mode. Notes: • To resume normal playback, press REPEAT A-B until “ Off” appears on-screen. • In some cases, subtitles for the repeated scene may not display. • The A-B repeat mode may not apply to some DVD scenes. • The A-B repeat mode is not applicable to interactive DVDs and JPEG CDs. 36 Program playback / Random playback \ Enabling program playback (VCD) You can program the playback sequence of tracks on a VCD. 1 Press PLAY MODE during stop mode. Play Mode Mode : Normal Repeat : Off Program Playback / to select “Mode”, then press 2 Press ENTER repeatedly to select “Program”. Play Mode Mode : Program Repeat : Off Program Playback 3 Press / to go to the right column. Press / to select the playback position, then use the number buttons (0–9) to input the track for that position. To program other tracks, repeat this step. If you input a wrong number, press CANCEL. 4 Press / to return to the left column. Press / to select “Program Playback”, then press ENTER. Notes: • The program and random playback modes are not applicable to PBC-enabled VCDs. • The program and random playback modes are only applicable during the current session. Once you eject the disc or turn off the unit, these modes will be disabled. • For procedures applicable to audio / MP3 / JPEG / DivX® CDs, go to pages 46 and 47. Play Mode Mode : Program Repeat 1 9 1 2 3 9 3 11 : Off Program Playback Play Mode Mode : Program Repeat : Off Program Playback To resume normal playback, in step 2, set “Mode” to “Normal”. Changing the program playback 1 Set “Mode” to “Program”. change the track input for a playback position, press / to select a playback 2 To position, then press CANCEL. Use the number buttons (0–9) to input the new track for the selected position. To remove a track from the program list, press / to select the playback position you want to remove a track from, then press CANCEL. To clear the program list, press / to select “Clear Program”, then press ENTER. Enabling random playback (VCD) You can set the unit to play VCD tracks at random. 1 Press PLAY MODE during stop mode. Play Mode Mode : Normal Repeat : Off Program Playback / to select “Mode”, then press 2 Press ENTER repeatedly to select “Shuffle”. Play Mode Mode : Shuffle Repeat : Off Program Playback 3 Press PLAY to start random playback. 37 Scene angle / Title selection / DVD menu Changing the scene angle (DVD) When playing back a DVD recorded with multi-angle scenes, you can select the scene angle that you prefer. 1 Press ANGLE during playback. 1/2 2 Press ANGLE repeatedly until the preferred scene angle is displayed. Note: Depending on the DVD, you may not be able to change the scene angle even if multi-angle data are recorded on the disc. Selecting a DVD title (DVD) Some DVDs contain two or more titles. If this is the case, you can select a particular title for playback. 1 Press TOP MENU during playback to display the title menu. 2 Press / / / to select the preferred title. 3 Press ENTER or PLAY to start playback. Notes: • Title selection may not apply to some DVDs. • The title menu may simply be referred to a “menu” or “title” in the instructions supplied with the DVD. Using the DVD menu (DVD) Some DVDs have an encoded menu that allows users to select a specific disc content, enable a particular DVD feature (e.g. subtitle or soundtrack language), or choose a particular title (for multi-title DVDs). 1 Press DVD MENU during playback. / / / to select a DVD menu item, then press ENTER to access it. 2 Press Use the same keys to enable an option for the selected item. Repeat this step to configure other menu options. DVD MENU again to resume playback on the scene that was playing when 3 Press you pressed DVD MENU. Note: Depending on the DVD, you may not be able to resume playback on the same scene that was playing when you pressed DVD MENU. 38 Soundtrack language / Audio channel / Subtitle Selecting the soundtrack language (DVD) You can select the soundtrack language when you play a multilingual DVD. During playback, press AUDIO SELECT repeatedly until the preferred language track is selected. D 5.1 Ch Eng Notes: • If the preferred language option is not heard after selecting it for several times, that language is not recorded on the disc. • The soundtrack language selected is only applicable for the current session. When you stop playback and try to play the disc again, the default language track will be used. • If you select the “DTS” option in DVDs with DTS feature, no sound will be heard from the TV/DVD’s speakers. You need to connect an amplifier equipped with a DTS decoder to the optical digital audio out jack. Selecting the audio channel (VCD) During playback, press AUDIO SELECT repeatedly until the preferred audio channel is heard. Options include “Stereo”, “Left, “Right”, and “Mix”. Viewing subtitles (DVD) When playing back a disc recorded with subtitles, you can select the subtitle language or turn the subtitle off. To view subtitles, press SUBTITLE repeatedly during playback until the preferred language is selected. The Subtitle prompt will disappear after a few seconds. To disable subtitles, press SUBTITLE until “Off” appears. 1/5 Eng Off Notes: • Not all DVDs have encoded subtitles. • The subtitle selection may revert to the default language when you stop playback and try to play the DVD again. • In some cases, the selected subtitle may not display immediately. 39 Playback information / VCD playback control (PBC) Viewing the playback information (DVD / VCD) You can view the playback status and other disc information. During playback, press DISPLAY. DVD mode Elapsed/remaining time for current title Elapsed/remaining time for current chapter DVD Video Time TT 00:01:52/00:09:11 Title Chapter 1/2 2/5 CH 00:01:41/00:00:01 Chapter no. Title no. Press DISPLAY again Audio type Subtitle status (if on, will show language) 1/5 2 Ch Eng off 1/1 Bitrate 2.205Mbps Bit rate Scene angle status VCD mode Elapsed/remaining time for current disc Elapsed/remaining time for current track VCD2.0 Time DISC 00:00:19/00:16:12 Track 1/8 Track 00:00:19/00:02:28 Track no. (if PBC is enabled, “PBC On” will be displayed) To close the display panel, press DISPLAY again. Turning off the PBC function (VCD) 1 Press PLAY MODE in stop mode. / to select “Mode”, then press 2 Press ENTER repeatedly to select “Normal”. Play Mode Mode : Normal Repeat : Off Program Playback 3 Press PLAY MODE again to close the screen. Turning on the PBC function (VCD) Follow steps 1–2 above, then press ENTER repeatedly until “PBC” appear. When enabled, PBC allows interactive VCD playback using the remote control. 40 MP3 / JPEG / DivX® and Audio CD information This unit can play MP3, JPEG, and DivX® files recorded on a CD-R or CD-RW disc. To create the MP3 / JPEG / DivX® disc, you need a Windows PC with a CD-RW drive and a file encoding software. You must use a Windows PC to create the MP3 / JPEG / DivX® disc. Important: • The DVD player in the unit requires discs/recordings that meet certain technical standards in order to achieve optimal playback quality. There are many different types of recordable disc formats (including CD-R discs containing MP3 files). Not all recordable discs will produce optimal playback quality. The technical criteria set forth in this owner’s manual are meant only as a guide. Use of CD-RW discs for recording MP3 files is not recommended. • You must obtain any required permission from copyright owners to download or use copyrighted content. Toshiba can not and does not grant such permission. MP3 / JPEG / DivX® CD playback reminders • Make sure the filename of the MP3, JPEG, and DivX® files in the CD includes the 3-character file extension (“mp3”, “jpg”, “div”, “divx”, and “avi”) to make it compliant with the ISO 9660 standard. • This unit can read 2000 files per disc. If a disc has more than 2000 files, it reads the first 2000 files. The remaining files will be omitted. • To play the files in sequence based on the recorded order: – Use an encoding software that records data alphabetically or numerically. – Include a two- or three-digit number prefix on the filename (ex. “01” “02” or “001” “002”). – Refrain from making too many sub-folders. • It may take more than one minute for this unit to read MP3, JPEG, and DivX® files depending on the disc structure. • Music recorded based on the “Joliet Recording Specification” can be played back. • This unit does not support data disc burned using the Apple Mac OS (Hierarchical File System, HFS format). • MP3 / JPEG / DivX® CDs cannot be used for recording purpose. Filename display reminders • The maximum number of characters for filename display is 15. • Only the following characters will be displayed: A through Z (both upper and lower case), 0 through 9, and the underscore symbol (_). • Non-supported characters will be replaced with a hyphen (-). MP3 / JPEG / DivX® CD limitations • Depending on the recording conditions, some MP3 / JPEG / DivX® CDs cannot be played back in your TV/DVD. • Only MP3, JPEG, and DivX® files recorded in a CD-R/RW disc will be played. Other files will not be read nor displayed. MP3 and DivX® file encoding information • MP3 – File format: MPEG-1 Audio – Sampling frequency: 32 kHz, 44.1 kHz, 48 kHz – Bit rate: 32 to 320 kbps (constant bit rate or variable bit rate) The recommended recording setting for high-quality sound is 44.1 kHz sampling frequency and 128 kbps constant bit rate. • DivX® – Version: DivX® 3, 4, 5, and 6 (specifically 3.1.1, 4.1.2, 5.0.2, 5.0.5, 5.1.1, 5.2.1, 6.0 at Home Theater profile) – File format: MPEG1 Layer2 (MP2) or MPEG1 Layer3 (MP3) – Sampling frequency: 32 kHz, 44.1 kHz, 48 kHz – Bit rate: 32 to 320 kbps – Resolution: 720 × 576 at 25 fps (max), 720 × 480 at 30 fps (max) DivX® , DivX Certified® and associated logos are registered trademarks of DivX, Inc. and are used under license. MPEG Layer-3 audio coding technology licensed from Fraunhofer IIS and Thomson. 41 About the file browser File browser elements Select files File icons Music file (MP3 or audio CD track) Picture file (JPEG) Movie file (DivX® video) If a CD contains a mixture of MP3, DivX® and JPEG files, and PLAY is pressed without selecting a file, playback automatically begins starting from the first file in the list. Setting the file type listing You can choose the type of files listed in the file browser (not applicable to audio CDs). 1 Press to move the selection highlight to the Option panel. 2 Press / to highlight “Select files”, then press ENTER. 3 Press / to select a file type from the list—Audio, Photo or Video. 4 Press ENTER to add or remove the check mark next to each file type. Checked file type will be displayed in the file browser. 5 Press twice to move the selection highlight back to the file list. Viewing image files in thumbnail mode You can change the browser’s view mode from list mode to thumbnail mode. This is convenient when browsing for JPEG files. 1 Press DVD MENU. 2 Press / / / to select an image file. To return the browser to list mode, press TOP MENU. Notes: • If the current directory has more than eight files, press / to scroll the file list. • To see folder contents, select a folder and then press ENTER. • To return to the root directory, press RETURN or select “Go Up...” then press ENTER. • In thumbnail mode, press PIC SIZE repeatedly to change the thumbnail size. • The repeat, random, program playback modes can be enabled during audio playback. Go to pages 46 and 47 for related instructions. 42 Audio file playback Playing an audio file 1 Load an MP3 or audio CD in the disc slot. The file browser appears on-screen. The first audio file in the list automatically plays. / 2 Press playback. Folder-1 Folder-2 MP3-1 MP3-2 MP3-3 MP3-4 MP3-5 MP3-6 Select files JPEG Preview to select another audio file for Folder-1 Folder-2 MP3-1 MP3-2 MP3-3 MP3-4 MP3-5 MP3-6 Select files JPEG Preview 3 Press ENTER to start playback. To temporarily stop audio playback, press PAUSE Press PLAY . to resume playback. To stop audio playback, press STOP . The unit records the stop point. appears on-screen. Press PLAY to resume playback on the previous stop point. If you press STOP twice in quick succession or unload the disc, the unit will clear the stop point. 43 JPEG file operation Viewing a JPEG file 1 Load a disc containing JPEG files in the disc slot. The file browser appears. 2 Press / to select an image file for viewing. A preview of the selected file is displayed in the Preview panel. 3 Notes: • The Jump and A-B repeat modes are not available when viewing JPEG images. • When an image exceeds 5760 × 3840 pixels, the image display can appear cropped. This applies when viewing the image in the Preview panel of the file browser; or when in the thumbnail, fullscreen, or slide show modes. Press ENTER or PLAY fullscreen mode. /Picture-01.JPG Picture-01 Picture-02 Picture-03 Picture-04 Picture-05 Picture-06 Picture-07 Picture-08 Select files JPEG Preview W: 2048 H: 1536 to view the selected file in Viewing a slide show If there are multiple JPEG files in the selected directory, you can view them in a slide show. For instructions on how to enable the slide show feature and set the interval period between pictures, go to page 50. 1 Open the file folder containing the JPEG files you want to include in the slide show. 2 Press / to select the file you want to be the starting image for the slide show. 3 Press ENTER or PLAY . When the slide show is completed, the file browser appears. Note: The interval time between images may increase if the file size is too big. To view the previous or next image in the slide show, press SKIP SKIP or . To temporarily stop the slide show, press PAUSE appears briefly on-screen. Press PLAY slide show. To stop the slide show, press STOP . or SKIP to resume the . The file browser appears. Fullscreen mode / Slide show options To view the previous or next image in the current folder / slide show, press SKIP or SKIP . To rotate an image, press ANGLE repeatedly until the preferred angle is obtained. The image angle is adjusted in 90° increments. The current angle setting is shown on-screen: “90°”, “180°”, “270°”, or “No rotation”. To magnify an image, press ZOOM repeatedly until the image is displayed in the preferred scale. The current zoom setting is indicated by the following icons: 1 (× 1.3), 2 (× 1.5) and 3 (× 2.0). To return to normal view, press ZOOM repeatedly until “ Off” appears. 44 DivX® and DivX® VOD operation Playing a DivX® file ® 1 Load a disc containing DivX files in the disc slot. The file browser appears. 2 Press / to select a DivX® file for playback. /Movie-01.DIVX Movie-01 Movie-02 Movie-03 Movie-04 Movie-05 Movie-06 Movie-07 Movie-08 ENTER or PLAY 3 Press playback. Select files JPEG Preview to start movie Go to page 32 for more information on DivX® playback navigation controls. To temporarily stop movie playback, press PAUSE Press PLAY . to resume playback. To stop the movie playback, press STOP . The unit records the stop point. appears on-screen. Press PLAY to resume playback on the previous stop point. If you press STOP twice or unload the disc, the unit will clear the stop point. DivX® VOD information [DivX Certified® to play DivX(R) video, including premium content.] ABOUT DIVX VIDEO: DivX® is a digital video format created by DivX, Inc. This is an official DivX Certified device that plays DivX video. Visit www.divx.com for more information and software tools to convert your files to DivX video. ABOUT DIVX VIDEO-ON-DEMAND: This DivX Certified® device must be registered in order to play DivX Video-on-Demand (VOD) content. To generate the registration code, locate the DivX VOD section in the device setup menu. Go to vod.divx.com with this code to complete the registration process and learn more about DivX VOD (Go to page 51 for instructions.). If an incorrect DRM file is loaded, the message “Authorization Error This player is not authorized to play this video.” appears on-screen. DivX® VOD content can only be played for a certain number of times. A message prompt will appear to show the allowable number of views. If you intend to consume all your view options during the current session, press / to select “Yes”, then press ENTER. View DivX(R)VOD Rental This rental has 5 views left. Do you want to use one of your 5 views now? Yes No If you attempt to play DivX® VOD content that has already reached its view limit, the message “Rental Expired” appears on-screen. In this case, you will not be able to play the file. 45 MP3 / JPEG / DivX® and Audio CD playback modes Enabling repeat playback You can choose to repeat CD playback by track or the entire disc. stop mode, in the Option panel of the file 1 During browser, press to select “Repeat”. / ENTER repeatedly to select a repeat 2 Press mode, “Track” or “All”. Note: These playback modes are only applicable during the current session. Once you eject the disc or turn off the unit, these modes will be disabled. Folder-1 Folder-2 MP3-1 MP3-2 MP3-3 Select files Folder-1 Folder-2 MP3-1 MP3-2 MP3-3 Select files 3 Press PLAY . The unit automatically starts repeat playback after finishing the current track. To resume normal playback, select “Off” in step 2 above. Enabling random playback You can set the unit to play files at random. stop mode, in the Option panel of the file 1 During browser, press to select “Mode”. / ENTER repeatedly to set the mode to 2 Press “Shuffle”. Folder-1 Folder-2 MP3-1 MP3-2 MP3-3 Folder-1 Folder-2 MP3-1 MP3-2 MP3-3 Edit Mode Edit Mode 3 Press PLAY . The unit automatically applies the shuffle mode. To resume normal playback, select “Normal” in step 2 above. Enabling the Music Intro mode When the “Music Intro” mode is enabled, the first 10 seconds of an audio track is played. This is useful if you are simply looking for a particular track in a list. stop mode, in the Option panel of the file 1 During browser, press to select “Mode”. / ENTER repeatedly to set the mode to 2 Press “Music Intro”. Folder-1 Folder-2 MP3-1 MP3-2 MP3-3 Folder-1 Folder-2 MP3-1 MP3-2 MP3-3 3 Press PLAY . The unit starts to play the first 10 seconds of each track in the list. To resume normal playback, select “Normal” in step 2 above. 46 Edit Mode Music Intro Edit Mode MP3 / JPEG / DivX® and Audio CD playback modes Enabling program playback You can customize the file playback sequence. stop mode, in the Option panel of the file 1 During browser, press to select “Edit Mode”, / then press ENTER. Once the Edit Mode button is highlighted in black, you can now select files to add into the program playlist. / / / to select a file, then press 2 Press ENTER to mark it for inclusion in the program Note: The program playback mode is only applicable during the current session. Once you eject the disc or turn off the unit, this mode will be disabled. playlist. A check mark will appear next to the file. Repeat this step to mark any other files you want to add in the program playlist. the Option panel, press / to select “Add 3 In To Program”, then press ENTER to add the marked files in the programmed playlist. 4 Press 5 Press / Folder-1 Folder-2 MP3-1 MP3-2 MP3-3 Edit Mode Program View Folder-1 Folder-2 MP3-1 MP3-2 MP3-3 Edit Mode Program View Folder-1 Folder-2 MP3-1 MP3-2 MP3-3 Edit Mode Program View Add To Program to select “Edit Mode”, then press ENTER to disable it. / to select “Program View”, then press ENTER. In Program View, only the files you added in step 3 are displayed. MP3-1 MP3-2 MP3-3 MP3-4 Edit Mode Browser View Clear Program Folder-1 Folder-2 MP3-1 MP3-2 MP3-3 MP3-4 MP3-5 MP3-6 Program View the program file list, press / to select a 6 In file, then press PLAY to start playback. Edit Mode Program View Add To Program Browser View MP3-1 MP3-2 MP3-3 MP3-4 Edit Mode Browser View Clear Program Removing a file from the program list During stop mode, switch to Program view, press / / / 1 Mode” on the Option panel, then press ENTER to enable it. 2 Press 3 Press to go to the program list. 4 Press 5 Press to go to the Option panel. to select “Edit / / / to select the file you want to remove, then press ENTER. Repeat this step 3 to mark any other files you want to remove from the list. / to select “Clear Program”, then press ENTER. 47 Customizing disc playback Configuring the disc playback settings You can customize the setup settings for disc playback. 1 In DVD mode, press SETUP during stop mode. Parental DRC E.B.L. Menu : :Russian Off Subtitle QSound TV Screen Set Password : :Russian 4:3 On DivX subtitle Output Display : :ASCII Interlace On Audio :Russian Picture Mode DivX(R) :VOD Auto OSD / to select a setup tab, then press The first setup option is highlighted. 2 Press . :English JPEG Interval : 5 Seconds Screen Saver : On Display Menu : :On English Picture Mode :Auto QSound Set Password : On Subtitle English JPEG Interval Output Audio :Off Interlace : English DivX(R) VOD / to select the setup option you want 3 Press to customize. Display Menu : :On English Picture Mode :Auto QSound Set Password : On Subtitle English JPEG Interval Output Audio :Off Interlace : English DivX(R) VOD 4 Press or ENTER to display a list of available option settings. :::Off Off English Off On QSound Subtitle Set Password : On English Picture Mode Parental DRC Menu Display JPEG OutputInterval Audio :Off : English Interlace DivX(R) VOD / to select an option setting, then press ENTER to apply and save it. Go to pages 49–51 for list of description for each option setting. 5 Press 6 To configure another option on the same setup tab, repeat steps 3–5. To configure an option on another tab, press , then use the / a setup tab. Repeat steps 3–5 to configure the preferred option. 7 Press SETUP or RETURN to close the Setup screen. 48 keys to select Disc Setup menu Setup overview Tab Option Description Go to page Menu Select the language for the DVD menu display. Subtitle Select the subtitle language for disc playback. DivX subtitle Select the subtitle encoding format to use during DivX® content playback. Audio Select the audio language for disc playback. OSD Select the language for the Setup screen display. Display Choose whether to show a status display whenever a button is pressed. Picture Mode Select the DVD source content. JPEG Interval Select the interval time between images in a slide show. Night Mode Toggle the night mode on or off. Digital Out Select the format for the digital audio output corresponding to your audio connection. Parental Set the restriction level for allowable disc content. Password Change the access password for the parental control setting. DivX (R) VOD Display the 10-character registration code for viewing DivX® VOD content. DivX Deregistration Display the 8-character deregistration code. 49 50 50 51 Note: These settings are retained in the unit’s memory. It remains active even if the power is turned off. Subtitle and Audio Setup details Parental DRC E.B.L. Menu : :Russian Off Subtitle QSound TV Screen Set Password : :Russian 4:3 On DivX subtitle Output Display Audio : :ASCII Interlace On :Russian Picture Mode DivX(R) :VOD Auto OSD :English JPEG Interval : 5 Seconds Screen Saver : On Select the language for the subtitle display and audio track output during disc playback. English, Spanish, The selected language will be Italian, German, heard or seen. and Russian Auto (Subtitle) The unit will display the subtitle in the disc’s default language. Menu and OSD Off (Subtitle) There will be no subtitle display. Select the language for the DVD and Setup menu display. Options include: English, Spanish, German, Italian, and Russian. Note: If you want to change the OSD language, you can perform it using the TV Menu. Go to page 18. Note: If the selected language is not available, the default disc language will be used. DivX subtitle Select the subtitle encoding format to use during DivX® content playback. Options include: ASCII, Unicode, Turkish, Hebrew, Arabic, and KOI8_R. 49 Disc Setup menu Parental DRC Menu Display Night Mode Parental Menu E.B.L. :::Off Off English :On Output Audio Display JPEG :Off OutputInterval: English Audio Interlace Choose whether to show a status display whenever a button is pressed. Off There will be no on-screen display when any button is pressed. On There will be an on-screen display when any button is pressed (default). ::On English Interlace Picture DivX(R) Mode VOD : Auto DivX(R) VOD Display :Off :: Off :Off English Digital Out :Bitstream Subtitle TV Screen Set Password : :4:3 English QSound Subtitle SetMode Password : On English Picture :Auto JPEG Interval : 5 Seconds Screen Saver : On Night Mode Select to toggle the Night Mode feature on or off. When enabled, this function allows for automatic volume level adjustment for audio that may be too low (e.g. whispered dialogues) or too high (e.g. a thunderstorm scene). Off Audio retained its disc recording volume level. On Volume level is automatically adjusted depending on the scene content. Picture Mode The source content of a DVD can either be recorded in: film format (images are recorded at 24 frames per second) or video format (images are recorded at 30 frames per second). Note: The Night Mode feature is only applicable to Dolby Digital-featured DVDs. The adjusted sound level depends on the DVD encoding. Auto Digital Out Select the sound format of the digital output depending on the enabled signal connection. Film The DVD player automatically detects the type of source content and converts that signal in an appropriate method based on the TV’s current aspect ratio. This option will normally suit most DVDs. Note: If picture appears cut off or doubled, select the “Video” setting. JPEG Interval Select the interval time between images during a JPEG slide show. Slide show option is disabled. 5, 10, or 15 Images will be displayed in a slide show. seconds The selected interval time between images will be applied. 50 Disable digital sound output. Select this option when there is no equipment connected to the Optical Digital Audio Out jack. PCM Change Dolby Digital output to PCM. Select this option when using a two-channel digital stereo amplifier. Suitable for playback of DVDs recorded in a film format. Video Suitable for playback of DVDs recorded in a video format. Off Off Bitstream Select this option to output the signal in its native format. Note: MPEG audio will always be in PCM format regardless of the Digital Output setting. Disc Setup menu DRC Menu E.B.L. Parental : English Off :Off QSound Subtitle TV Screen Password : 4:3 On :Change English DivX(R) Audio VOD Display :Display : On English DivX Deregistration Picture Mode : Auto:Display JPEG Interval : 5 Seconds Screen Saver : On Parental A DVD is usually encoded with a rating level to indicate the recommended audience age. You have the option to select the content rating level allowed for playback in your TV/DVD. You will be prompted to key in the system password to access this setup option. For initial access to this menu: 1) Press / to select “Parental”, then press ENTER. 2) Press “0000” on the “Enter password” prompt, then press ENTER. This is the system pre-setting password. 3) Press ENTER again to view the parental rating levels. 4) Press / to select the allowable rating level, then press ENTER. The higher the level number, the more severe the content is. Off No playback restriction. All discs can be played regardless of content rating. Level 1–5 Discs of varied non-adult ratings will be played back. Level 6–8 Discs of varied adult only ratings will be played back. Notes: • The Parental rating levels correspond to the US movie ratings. Level 1 – Level 2 – Level 3 – Level 4 – Kid Safe G PG PG-13 Level 5 – Level 6 – Level 7 – Level 8 – PG-R R NC-17 Adult Password Select this option to change the access password for the parental control setting. 1) Press / to select “Password”, then press ENTER. 2) On the “Enter password” prompt, use the number buttons (0–9) to input the current password, then press ENTER. If the password has not been set yet key in “0000”. This is the system pre-setting password. 3) On the “Enter New Password” prompt, use the number buttons (0–9) to input the new password, then press ENTER. You will be prompted to confirm the new password. 4) Use the number buttons (0–9) to input the new password again, then press ENTER. The system password is now set. Note this new password for future reference. If you forget the system password: 1) Make sure there is no disc in the disc slot. 2) Press and hold down “4” on the remote control, then press - on the unit. The “Initializing” message appears on-screen to indicate that the password has been reset to its default factory setting “0000”. All Setup-related settings will also be reset to their default factory values. DivX (R) VOD In order to play DivX® VOD (Video-On-Demand) content on this unit, you first need to register the unit with your DivX® VOD content provider. During registration you will be required to provide your unit’s registration code. To generate this code, select DivX (R) VOD, then press ENTER. Note down the 10-character registration code that is displayed. DivX Deregistration In order to deregister this unit, you will be required to provide your unit’s deregistration code. To generate this code, select DivX Deregistration, then press ENTER. Note down the 8-character deregistration code that is displayed. • Some discs may not have their rating level encoded on the disc though it’s indicated on the disc jacket. Playback restriction will not apply to these discs so make sure to restrict access to it manually. To temporarily cancel the parental restriction: 1) Load the restricted content DVD that you want to play. 2) Use the number buttons (0–9) to input the system password on the “Enter password” prompt, then press ENTER. This suspension of the parental restriction setting only applies until the disc is ejected. 51 Troubleshooting Troubleshooting Refer to the following checklist to troubleshoot simple problems that may occur during TV operation. If the problem persists after trying these solutions, consult your local dealer or service outlet for assistance. Check that all connections are properly made when using the TV with another equipment. Symptom Possible solution Go to page Power • Make sure the power cord connection is secure. • Try another AC outlet. • Unplug the power cord and then plug it back in. 16 Poor sound or no sound. • The station or cable TV may have problems. Try another station. • Check the volume adjustment level or the mute status. • Check for sources of possible interference. 22 22 54 Poor picture or no picture. • The station or cable TV may have problems. Try another station. • Check the antenna connections; if necessary, reorient the antenna. • Check for sources of possible interference. • Check the “Picture” settings. 22 11 54 29 Poor reception on some channels. • The station or cable TV may have problems Try another station. • The station signal may be weak, reorient the antenna. • Check for sources of possible interference. 22 11 54 Poor colour or no colour. • • • • The station or cable TV may have problems. Try another station. Make sure channels are saved in the TV’s memory. Check the “Picture” settings. Check the antenna connections; if necessary, reorient the antenna. • Check for sources of possible interference. 22 19, 21 29 11 54 Picture wobbles or drifts. • The station or cable TV may have problems. Try another station. • Make sure channels are saved in the TV’s memory. • Check the antenna connections; if necessary, reorient the antenna. • The cable TV company is scrambling the signal. 22 19, 21 11 – No reception. • Check the cable TV connections. • The station or cable TV may have problems. Try another station. 11 22 TV/DVD does not operate. TV broadcast reception Check the antenna connections; if necessary, reorient the Horizontal or diagonal bars on • antenna. the screen. • Check for sources of possible interference. 11 No reception above the channel 13. • If an antenna is used, check the UHF antenna connections. 11 TV shuts off. • The “Auto shut off” feature is enabled. • The sleep timer has been activated. • There is a power interruption. 30 22 – Display is not shown in your preferred language. • Set your preferred language. 18 52 54 Troubleshooting Symptom Possible solution Go to page Disc playback Playback does not start. • No disc is loaded. Insert a compatible disc. • The disc may be dirty. Clean the disc. • The disc format is not supported. 32 31 31 No picture. • The TV is not in DVD mode. 32 No sound. • The TV is in the special playback mode. • If an external speaker is connected, check its volume control. • If you are using an amplifier, check the optical digital audio out connection. 33 – 15 Picture is distorted during fast • The picture will be distorted occasionally. This is normal. reverse/forward playback. – Stopping playback, search, slow motion play, repeat/ program, etc. cannot be performed. • These playback features are not applicable to all discs. – The TV keys or the remote control is not functioning. • Turn off the TV and unplug the AC power cord for several minutes. Reconnect the AC power cord. 16 Playback does not start when • The disc may not be compliant with the “Parental” setting. the title is selected. 51 The audio soundtrack and/or subtitle language cannot be changed. • The disc has no multi-language option encoded on it. 39 No subtitle. • The disc has no subtitle encoded on it. • Subtitles are disabled. Press SUBTITLE. 39 Scene angle cannot be changed. • The disc has no multi-angle scenes. 38 “X” appears on the screen. • The function is not applicable to the disc or to the current mode. 33 • Aim the remote control at the remote sensor. • Make sure you are using the remote control within approximately five meters of the TV or reduce the light in the room. • Make sure there’s no obstruction on the path of the beam. • The batteries are no longer working. Replace the batteries. • Make sure the batteries are properly positioned. 10 The Media Player does not function. • Make sure that devices are connected correctly. • If you connect a USB device with separate cable or through USB hub, the TV does not recognize the USB device. – The photo files in the Media Player cannot be displayed. • Make sure you select “Photo” in the Media Player menu. • Make sure the photo file format is supported. 27 The music files in the Media • Make sure you select “Music” in the Media Player menu. Player cannot be displayed or • Make sure the music file format is supported. played back. 27 Remote control operation The remote control does not function. Media Player operation 53 Troubleshooting Reception disturbances Most types of TV interference can be resolve by adjusting the height and position of the VHF/UHF antenna. Outdoor antennas are recommended for best results. The most common types of TV interference are shown below. If one of these symptoms occurs when the unit is connected to a cable TV system, the disturbance may be caused by the local cable TV company broadcast. Ignition Black spots or horizontal streaks may appear, the picture may flutter or drift. Usually caused by interference from automobile ignition systems, neon lamps or AC powered tools and appliances such as drills or hair dryers. Snow If the unit is located far from the TV station, in a fringe reception area where the signal is weak, small dots may appear in the picture. Ghost Ghosts are caused by the TV signal following two paths. One is the direct path and the other is reflected by tall buildings, hills or other large objects. Changing the direction or position of the antenna may improve the reception. Radio frequency RFI is caused by two-way radios. interference This type of interference produces (RFI) moving ripples or diagonal streaks in the picture. Some cases may cause a loss of contrast in the picture. Changing the direction and position of the antenna or installing an RFI filter may improve the picture. Care and maintenance • To prevent fire or shock hazard, ALWAYS disconnect the unit from the power source before cleaning the unit. • Wipe the display panel surface gently using only a soft cloth (supplied.) A hard cloth may damage the surface of the panel. • Avoid contact with alcohol, thinner, benzene, acidic or and alkaline solvent cleaners, abrasive cleaners, or chemical cloths, which may damage the surface. • Never spray volatile compounds such as insecticide on the cabinet. Such products may damage or discolour the cabinet. 54 Specifications 19DV703R 19DV704R 22DV703R 22DV704R 26DV703R 32DV703R Operation 32 W Power consumption Standby 0.8 W 34 W 55 W 75 W 109 W 0.8 W 0.8 W 0.8 W 0.8 W Weight 11.7 lb (5.3 kg) 12.8 lb (5.8 kg) 19.4 lb (8.8 kg) 26.0 lb (11.8 kg) Model 15DV703R General Power supply AC 220–240V 50 Hz 7.3 lb (3.3 kg) Width 15.9 inch (403.1 mm) 18.9 inch (480.9 mm) 21.7 inch (552.3 mm) 26.2 inch (666.0 mm) 31.7 inch (804.6 mm) Dimensions Height 12.6 inch (320.7 mm) 14.4 inch (365.8 mm) 15.9 inch (404.5 mm) 19.3 inch (490.0 mm) 23.2 inch (590.0 mm) Depth 5.6 inch (140.9 mm) Operating temperature 8.5 inch (215.0 mm) 8.5 inch (215.0 mm) 10.2 inch (260.0 mm) 10.0 inch (255.0 mm) 5–35 °C (41–95 °F) LCD Approximate visible screen size (diagonal) 15.6 inch (396.2 mm) 18.5 inch (469.9 mm) 22.0 inch (558.8 mm) 26.0 inch (660.4 mm) 32.0 inch (812.8 mm) Type Low-glass Active Matrix TFT colour LCD Number of pixels (H × V) 1366 × 768 Television Television system SECAM D/K Russia, PAL, B/G, D/K, I, L/L’ AV input receivable PAL, SECAM, NTSC 3.58, NTSC 4.43, PAL 60 Preset channels 99 channels Frequency range IreE2~E4, X~Z+2, S1~S10, E5~E12, S11~S41, E21~E69 Antenna input VHF / UHF 75 unbalanced Speaker 30 x 96 mm 8 x 2 30 x 96 mm 8 Audio output power (max.) 3W+3W 3W+3W x 2 30 x 96 mm 8 3W+3W x 2 45 x 167 mm 6 5W+5W x 2 45 x 167 mm 6 x2 10 W + 10 W DVD player Signal system PAL, NTSC Supported disc size 12 cm, 8 cm Audio frequency response DVD: 4 Hz - 22 kHz CD: 4 Hz - 20 kHz SNR (signal-to-noise ratio) 85 dB Harmonic distortion 0.02% Digital audio Optical × 1 CD: 775–805 nm Wavelength DVD: 640–660 nm Pickup Accessories Output CD: 0.5 mW power DVD: 1.0 mW (max.) (1) Remote control (2) Batteries (R03/AAA/UM-4) (1) AC power cord Notes: • This model complies with the above specifications. • Designs and specifications are subject to change without notice. • This model may not be compatible with features and/or specifications that may be added in the future. 55 This product uses some software programs which are distributed under the GPL. This product uses some software programs which are distributed under the Creative Commons Licence. This product uses some software programs which are distributed under the Independent JPEG Group. MPEG Layer-3 audio compression technology licensed by Fraunhofer IIS and THOMSON multimedia. The GNU General Public License (GPL) Version 2, June 1991 Copyright (C) 1989, 1991 Free Software Foundation, Inc. 59 Temple Place, Suite 330, Boston, MA 02111-1307 USA Everyone is permitted to copy and distribute verbatim copies of this license document, but changing it is not allowed. Preamble The licenses for most software are designed to take away your freedom to share and change it. By contrast, the GNU General Public License is intended to guarantee your freedom to share and change free software--to make sure the software is free for all its users. This General Public License applies to most of the Free Software Foundation’s software and to any other program whose authors commit to using it. (Some other Free Software Foundation software is covered by the GNU Library General Public License instead.) You can apply it to your programs, too. When we speak of free software, we are referring to freedom, not price. Our General Public Licenses are designed to make sure that you have the freedom to distribute copies of free software (and charge for this service if you wish), that you receive source code or can get it if you want it, that you can change the software or use pieces of it in new free programs; and that you know you can do these things. To protect your rights, we need to make restrictions that forbid anyone to deny you these rights or to ask you to surrender the rights. These restrictions translate to certain responsibilities for you if you distribute copies of the software, or if you modify it. For example, if you distribute copies of such a program, whether gratis or for a fee, you must give the recipients all the rights that you have. You must make sure that they, too, receive or can get the source code. And you must show them these terms so they know their rights. We protect your rights with two steps: (1) copyright the software, and (2) offer you this license which gives you legal permission to copy, distribute and/or modify the software. Also, for each author’s protection and ours, we want to make certain that everyone understands that there is no warranty for this free software. If the software is modified by someone else and passed on, we want its recipients to know that what they have is not the original, so that any problems introduced by others will not reflect on the original authors’ reputations. Finally, any free program is threatened constantly by software patents. We wish to avoid the danger that redistributors of a free program will individually obtain patent licenses, in effect making the program proprietary. To prevent this, we have made it clear that any patent must be licensed for everyone’s free use or not licensed at all. The precise terms and conditions for copying, distribution and modification follow. TERMS AND CONDITIONS FOR COPYING, DISTRIBUTION AND MODIFICATION 0. This License applies to any program or other work which contains a notice placed by the copyright holder saying it may be distributed under the terms of this General Public License. The “Program”, below, refers to any such program or work, and a “work based on the Program” means either the Program or any derivative work under copyright law: that is to say, a work containing the Program or a portion of it, either verbatim or with modifications and/or translated into another language. (Hereinafter, translation is included without limitation in the term “modification”.) Each licensee is addressed as “you”. Activities other than copying, distribution and modification are not covered by this License; they are outside its scope. The act of running the Program is not restricted, and the output from the Program is covered only if its contents constitute a work based on the Program (independent of having been made by running the Program). Whether that is true depends on what the Program does. 1. You may copy and distribute verbatim copies of the Program’s source code as you receive it, in any medium, provided that you conspicuously and appropriately publish on each copy an appropriate copyright notice and disclaimer of warranty; keep intact all the notices that refer to this License and to the absence of any warranty; and give any other recipients of the Program a copy of this License along with the Program. You may charge a fee for the physical act of transferring a copy, and you may at your option offer warranty protection in exchange for a fee. 2. You may modify your copy or copies of the Program or any portion of it, thus forming a work based on the Program, and copy and distribute such modifications or work under the terms of Section 1 above, provided that you also meet all of these conditions: a) You must cause the modified files to carry prominent notices stating that you changed the files and the date of any change. b) You must cause any work that you distribute or publish, that in whole or in part contains or is derived from the Program or any part thereof, to be licensed as a whole at no charge to all third parties under the terms of this License. c) If the modified program normally reads commands interactively when run, you must cause it, when started running for such interactive use in the most ordinary way, to print or display an announcement including an appropriate copyright notice and a notice that there is no warranty (or else, saying that you provide a warranty) and that users may redistribute the program under these conditions, and telling the user how to view a copy of this License. (Exception: if the Program itself is interactive but does not normally print such an announcement, your work based on the Program is not required to print an announcement.) These requirements apply to the modified work as a whole. If identifiable sections of that work are not derived from the Program, and can be reasonably considered independent and separate works in themselves, then this License, and its terms, do not apply to those sections when you distribute them as separate works. But when you distribute the same sections as part of a whole which is a work based on the Program, the distribution of the whole must be on the terms of this License, whose permissions for other licensees extend to the entire whole, and thus to each and every part regardless of who wrote it. Thus, it is not the intent of this section to claim rights or contest your rights to work written entirely by you; rather, the intent is to exercise the right to control the distribution of derivative or collective works based on the Program. In addition, mere aggregation of another work not based on the Program with the Program (or with a work based on the Program) on a volume of a storage or distribution medium does not bring the other work under the scope of this License. 3. You may copy and distribute the Program (or a work based on it, under Section 2) in object code or executable form under the terms of Sections 1 and 2 above provided that you also do one of the following: a) Accompany it with the complete corresponding machine-readable source code, which must be distributed under the terms of Sections 1 and 2 above on a medium customarily used for software interchange; or, 56 b) Accompany it with a written offer, valid for at least three years, to give any third party, for a charge no more than your cost of physically performing source distribution, a complete machine-readable copy of the corresponding source code, to be distributed under the terms of Sections 1 and 2 above on a medium customarily used for software interchange; or, c) Accompany it with the information you received as to the offer to distribute corresponding source code. (This alternative is allowed only for noncommercial distribution and only if you received the program in object code or executable form with such an offer, in accord with Subsection b above.) The source code for a work means the preferred form of the work for making modifications to it. For an executable work, complete source code means all the source code for all modules it contains, plus any associated interface definition files, plus the scripts used to control compilation and installation of the executable. However, as a special exception, the source code distributed need not include anything that is normally distributed (in either source or binary form) with the major components (compiler, kernel, and so on) of the operating system on which the executable runs, unless that component itself accompanies the executable. If distribution of executable or object code is made by offering access to copy from a designated place, then offering equivalent access to copy the source code from the same place counts as distribution of the source code, even though third parties are not compelled to copy the source along with the object code. 4. You may not copy, modify, sublicense, or distribute the Program except as expressly provided under this License. Any attempt otherwise to copy, modify, sublicense or distribute the Program is void, and will automatically terminate your rights under this License. However, parties who have received copies, or rights, from you under this License will not have their licenses terminated so long as such parties remain in full compliance. 5. You are not required to accept this License, since you have not signed it. However, nothing else grants you permission to modify or distribute the Program or its derivative works. These actions are prohibited by law if you do not accept this License. Therefore, by modifying or distributing the Program (or any work based on the Program), you indicate your acceptance of this License to do so, and all its terms and conditions for copying, distributing or modifying the Program or works based on it. 6. Each time you redistribute the Program (or any work based on the Program), the recipient automatically receives a license from the original licensor to copy, distribute or modify the Program subject to these terms and conditions. You may not impose any further restrictions on the recipients' exercise of the rights granted herein. You are not responsible for enforcing compliance by third parties to this License. 7. If, as a consequence of a court judgment or allegation of patent infringement or for any other reason (not limited to patent issues), conditions are imposed on you (whether by court order, agreement or otherwise) that contradict the conditions of this License, they do not excuse you from the conditions of this License. If you cannot distribute so as to satisfy simultaneously your obligations under this License and any other pertinent obligations, then as a consequence you may not distribute the Program at all. For example, if a patent license would not permit royalty-free redistribution of the Program by all those who receive copies directly or indirectly through you, then the only way you could satisfy both it and this License would be to refrain entirely from distribution of the Program. If any portion of this section is held invalid or unenforceable under any particular circumstance, the balance of the section is intended to apply and the section as a whole is intended to apply in other circumstances. It is not the purpose of this section to induce you to infringe any patents or other property right claims or to contest validity of any such claims; this section has the sole purpose of protecting the integrity of the free software distribution system, which is implemented by public license practices. Many people have made generous contributions to the wide range of software distributed through that system in reliance on consistent application of that system; it is up to the author/donor to decide if he or she is willing to distribute software through any other system and a licensee cannot impose that choice. This section is intended to make thoroughly clear what is believed to be a consequence of the rest of this License. 8. If the distribution and/or use of the Program is restricted in certain countries either by patents or by copyrighted interfaces, the original copyright holder who places the Program under this License may add an explicit geographical distribution limitation excluding those countries, so that distribution is permitted only in or among countries not thus excluded. In such case, this License incorporates the limitation as if written in the body of this License. 9. The Free Software Foundation may publish revised and/or new versions of the General Public License from time to time. Such new versions will be similar in spirit to the present version, but may differ in detail to address new problems or concerns. Each version is given a distinguishing version number. If the Program specifies a version number of this License which applies to it and “any later version”, you have the option of following the terms and conditions either of that version or of any later version published by the Free Software Foundation. If the Program does not specify a version number of this License, you may choose any version ever published by the Free Software Foundation. 10. If you wish to incorporate parts of the Program into other free programs whose distribution conditions are different, write to the author to ask for permission. For software which is copyrighted by the Free Software Foundation, write to the Free Software Foundation; we sometimes make exceptions for this. Our decision will be guided by the two goals of preserving the free status of all derivatives of our free software and of promoting the sharing and reuse of software generally. NO WARRANTY 11. BECAUSE THE PROGRAM IS LICENSED FREE OF CHARGE, THERE IS NO WARRANTY FOR THE PROGRAM, TO THE EXTENT PERMITTED BY APPLICABLE LAW. EXCEPT WHEN OTHERWISE STATED IN WRITING THE COPYRIGHT HOLDERS AND/OR OTHER PARTIES PROVIDE THE PROGRAM “AS IS” WITHOUT WARRANTY OF ANY KIND, EITHER EXPRESSED OR IMPLIED, INCLUDING, BUT NOT LIMITED TO, THE IMPLIED WARRANTIES OF MERCHANTABILITY AND FITNESS FOR A PARTICULAR PURPOSE. THE ENTIRE RISK AS TO THE QUALITY AND PERFORMANCE OF THE PROGRAM IS WITH YOU. SHOULD THE PROGRAM PROVE DEFECTIVE, YOU ASSUME THE COST OF ALL NECESSARY SERVICING, REPAIR OR CORRECTION. 12. IN NO EVENT UNLESS REQUIRED BY APPLICABLE LAW OR AGREED TO IN WRITING WILL ANY COPYRIGHT HOLDER, OR ANY OTHER PARTY WHO MAY MODIFY AND/OR REDISTRIBUTE THE PROGRAM AS PERMITTED ABOVE, BE LIABLE TO YOU FOR DAMAGES, INCLUDING ANY GENERAL, SPECIAL, INCIDENTAL OR CONSEQUENTIAL DAMAGES ARISING OUT OF THE USE OR INABILITY TO USE THE PROGRAM (INCLUDING BUT NOT LIMITED TO LOSS OF DATA OR DATA BEING RENDERED INACCURATE OR LOSSES SUSTAINED BY YOU OR THIRD PARTIES OR A FAILURE OF THE PROGRAM TO OPERATE WITH ANY OTHER PROGRAMS), EVEN IF SUCH HOLDER OR OTHER PARTY HAS BEEN ADVISED OF THE POSSIBILITY OF SUCH DAMAGES. END OF TERMS AND CONDITIONS How to Apply These Terms to Your New Programs If you develop a new program, and you want it to be of the greatest possible use to the public, the best way to achieve this is to make it free software which everyone can redistribute and change under these terms. To do so, attach the following notices to the program. It is safest to attach them to the start of each source file to most effectively convey the exclusion of warranty; and each file should have at least the “copyright” line and a pointer to where the full notice is found. One line to give the program’s name and a brief idea of what it does. Copyright (C) <year> <name of author> This program is free software; you can redistribute it and/or modify it under the terms of the GNU General Public License as published by the Free Software Foundation; either version 2 of the License, or (at your option) any later version. 57 This program is distributed in the hope that it will be useful, but WITHOUT ANY WARRANTY; without even the implied warranty of MERCHANTABILITY or FITNESS FOR A PARTICULAR PURPOSE. See the GNU General Public License for more details. You should have received a copy of the GNU General Public License along with this program; if not, write to the Free Software Foundation, Inc., 59 Temple Place, Suite 330, Boston, MA 02111-1307 USA Also add information on how to contact you by electronic and paper mail. If the program is interactive, make it output a short notice like this when it starts in an interactive mode: Gnomovision version 69, Copyright (C) year name of author Gnomovision comes with ABSOLUTELY NO WARRANTY; for details type ‘show w’. This is free software, and you are welcome to redistribute it under certain conditions; type ‘show c’ for details. The hypothetical commands ‘show w’ and ‘show c’ should show the appropriate parts of the General Public License. Of course, the commands you use may be called something other than ‘show w’ and ‘show c’; they could even be mouse-clicks or menu items--whatever suits your program. You should also get your employer (if you work as a programmer) or your school, if any, to sign a “copyright disclaimer” for the program, if necessary. Here is a sample; alter the names: Yoyodyne, Inc., hereby disclaims all copyright interest in the program ‘Gnomovision’ (which makes passes at compilers) written by James Hacker. signature of Ty Coon, 1 April 1989 Ty Coon, President of Vice This General Public License does not permit incorporating your program into proprietary programs. If your program is a subroutine library, you may consider it more useful to permit linking proprietary applications with the library. If this is what you want to do, use the GNU Library General Public License instead of this License. Malloc License Notices This is a version (aka dlmalloc) of malloc/free/realloc written by Doug Lea and released to the public domain, as explained at http://creativecommons.org/licenses/publicdomain. Copyright-Only Dedication (based on United States law) or Public Domain Certification The person or persons who have associated work with this document (the "Dedicator" or "Certifier") hereby either (a) certifies that, to the best of his knowledge, the work of authorship identified is in the public domain of the country from which the work is published, or (b) hereby dedicates whatever copyright the dedicators holds in the work of authorship identified below (the "Work") to the public domain. A certifier, moreover, dedicates any copyright interest he may have in the associated work, and for these purposes, is described as a "dedicator" below. A certifier has taken reasonable steps to verify the copyright status of this work. Certifier recognizes that his good faith efforts may not shield him from liability if in fact the work certified is not in the public domain. Dedicator makes this dedication for the benefit of the public at large and to the detriment of the Dedicator's heirs and successors. Dedicator intends this dedication to be an overt act of relinquishment in perpetuity of all present and future rights under copyright law, whether vested or contingent, in the Work. Dedicator understands that such relinquishment of all rights includes the relinquishment of all rights to enforce (by lawsuit or otherwise) those copyrights in the Work. Dedicator recognizes that, once placed in the public domain, the Work may be freely reproduced, distributed, transmitted, used, modified, built upon, or otherwise exploited by anyone for any purpose, commercial or non-commercial, and in any way, including by methods that have not yet been invented or conceived. 58 Следующий символ означает, что данное изделие не может утилизироваться как бытовые отходы. При надлежащей утилизации изделия вы помогаете предотвратить негативное воздействие на окружающую среду и здоровье человека. Для получения подробных сведений об утилизации данного изделия обратитесь в администрацию своего города, местную компанию по сбору отходов или в магазин, где вы приобрели данное устройство. The use of the symbol indicates that this product may not be treated as household waste. By ensuring this product is disposed of correctly, you will help prevent potential negative consequences for the environment and human health, which could otherwise be caused by inappropriate waste handling of this product. For more detailed information about recycling of this product, please contact your local city office, your household waste disposal service or the shop where you purchased the product. PRINTED IN CHINA