1
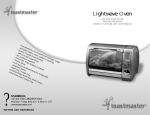
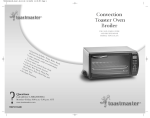
389U Cover_IB_25-5-02
25/5/02
10:46
Page 1
Toaster Oven
Broiler
USE AND CARE GUIDE
AND RECIPE BOOK
MODEL 389U
• 10
0
and °-500°
F
4
•T
oas -hour adjus
ts u
•B
tab
dig
r
l
• In oils st p to f ital tim e ther
o
e
mo
c
u
er
r
• T lude aks,
stat
s en sea slices
hre
e ra
am food of b
e
ck
pos l bake and c read
itio
hic
ken
ns pan
?
389U
Questions
Call toll free 1-800-947-3744
Monday – Friday, 8:00 a.m. - 5:30 p.m. CST
www.toastmaster.com
389U_IB_25-5-02
25/5/02
10:44
Page 1
READ AND SAVE
THESE INSTRUCTIONS
WARNING: A risk of fire and electrical shock exists in all electrical
appliances and may cause personal injury or death. Please follow all
safety instructions.
IMPORTANT SAFEGUARDS
When using electrical appliances, basic safety precautions should
always be followed, including the following:
◆ Read all instructions before using appliance.
◆ Do not immerse cord, plug or appliance in water or any other
liquid (see instructions for cleaning).
◆ Do not touch hot surfaces. Always use oven mitts when handling
the bake/broil pan and wire rack.
◆ This appliance is not for use by children.
◆ Close supervision is necessary when this appliance is used near
children.
◆ Unplug from outlet when not in use and before cleaning. Press
stop button before unplugging. Allow to cool before attaching or
removing parts while cleaning.
◆ To disconnect, press the stop button, then grip the plug and pull
out from the wall outlet. Never pull on the cord.
◆ Do not operate a damaged appliance. Do not operate with a
damaged cord or plug or after the appliance malfunctions, or has
been dropped or damaged in any manner. Return appliance to the
nearest authorized service facility for examination, repair, electrical
or mechanical adjustment.
◆ Use accessory attachments only if recommended by Toastmaster
Inc.
◆ Do not use outdoors or while standing in a damp area.
◆ Do not use appliance for other than intended use.
◆ Do not let cord hang over edge of table or counter or touch hot
surfaces.
◆ Do not place appliance or cord on or near any hot surface,
including a gas or electric burner or in a heated oven.
◆ Do not leave appliance unattended while broiling or toasting.
◆ Do not clean with metal scouring pads. Pieces can break off the
pad and touch electrical parts.
◆ When using this appliance, provide at least 4 inches space above
and on all sides for air circulation. Do not use on surfaces where
heat may cause a problem.
1.
389U_IB_25-5-02
25/5/02
10:44
Page 2
◆ Extreme caution must be used when moving an appliance
containing hot oil or other hot liquids.
◆ Use extreme caution when removing tray or disposing of hot grease.
◆ A fire may occur if this appliance touches or is covered by
flammable material, including curtains, draperies, walls, etc., when
in operation.
◆ Do not store any materials other than the manufacturer’s
recommended accessories in this appliance when not in use.
◆ Do not cover the crumb tray or any part of the oven with metal
foil. This will cause overheating of the oven.
◆ Extreme caution should be exercised when using containers
constructed of material other than metal.
◆ Do not place any flammable material such as paper, cardboard,
plastic, etc., next to, on top of, or in the oven.
◆ When broiling, the bake/broil tray and wire rack must be used.
◆ Oversized foods or utensils must not be inserted into the oven.
◆ CAUTION: Never leave the toaster-oven-broiler unattended when
broiling or toasting.
SAVE THESE INSTRUCTIONS
CAUTION: A short power supply cord is provided to reduce the risk
of personal injury resulting from becoming entangled in or tripping
over a longer cord. Extension cords are available from local hardware
stores and may be used if care is exercised in their use. If an
extension cord is required, special care and caution is necessary. Also
the cord must be: (1) marked with an electrical rating of 125 V, and
at least 13 A., 1625 W., and (2) the cord must be arranged so that it
will not drape over the countertop or tabletop where it can be pulled
on by children or tripped over accidentally.
ELECTRIC POWER: If electric circuit is overloaded with other
appliances, your Toaster Oven Broiler may not operate properly. The
Toaster Oven Broiler should be operated on a separate electrical circuit
from other operating appliances.
POLARIZED PLUG: This appliance has a polarized plug, (one blade
is wider than the other). As a safety feature to reduce the risk of
electrical shock, this plug is intended to fit in a polarized outlet only
one way. If the plug does not fit fully in the outlet, reverse the plug. If
it still does not fit, contact a qualified electrician. Do not attempt to
defeat this safety feature.
2.
Toaster Oven Broiler Use and Care Guide
389U_IB_25-5-02
25/5/02
10:44
Page 3
Before Your First Use
Carefully unpack the Toaster Oven Broiler, removing all packaging
materials. To remove any dust that may have accumulated during
packaging, wash the bake/broil pan, wire rack and crumb tray. Wipe
the outside of the machine with a damp cloth. Do not use harsh or
abrasive cleaners on any part of the machine.
Fill out warranty information on the back of the book.
Place away from edge of counter on a dry, clean stable surface away
from burners and away from areas where cooking grease or water may
splatter onto it.
Plug into a 120 V ~ 60 Hz outlet.
Important Safety Tips
◆ The oven cavity, crumb tray, bake/broil pan, wire rack and food
will be very hot after use. Use oven mitts.
◆ Unplug unit and allow to cool before cleaning. Remove any bread
crumbs or other materials from inside the oven using a damp
sponge, cloth or a small, portable vacuum cleaner.
Power Outage
Your Toastmaster Toaster Oven Broiler has a 15 minute power
interrupt feature on all functions, toast-bake-broil. If the power comes
back on within 15 minutes, the program will resume.
3.
389U_IB_25-5-02
25/5/02
10:44
Page 4
Toaster Oven Broiler Introduction
Control Panel
DISPLAY WINDOW
Indicates function, crust
color, amount of time left for
completion of program and
temperature.
OPERATION light will
be on to show unit is in
operation.
COMPLETE operation
light will flash
continually when
program is complete.
When door is opened
the light will turn off.
BAKE
Press to select PREHEAT
BAKE and BAKE programs.
BROIL
Press to select the BROIL
program.
WARM
Press to select the WARM
program.
START
After selecting the function,
temperature (if required)
and time (if required), press
to start the program.
TOAST
Press to select 4 or 2
slices toast programs.
TEMPERATURE
Press to display
temperature for
PREHEAT BAKE,
BAKE or BROIL.
TIME
Press to select time
before using arrow
keys to adjust. Must
be set to BAKE and
BROIL.
ARROWS
Press to adjust
temperature for
PREHEAT BAKE or
BAKE. Or, press to
select toast color.
STOP
Press for more than
2 seconds during use
to cancel a program.
When a Toaster Oven Broiler is packaged for shipment, a clear plastic
film is placed over the control panel as protection. This film may
either be removed or left on. You may choose to leave it on, but it will
come off with use.
PROGRAM
CANCEL
4.
If you want to cancel the selected program, press the
STOP pad and hold it down for more than 2 seconds
at any time during the program.
Toaster Oven Broiler Use and Care Guide
389U_IB_25-5-02
25/5/02
10:45
Page 5
Parts and Accessories
The illustrations in this use and care guide are for information
purposes only. You may find your toaster oven broiler and parts look
different, however, the steps for operation are the same.
CONTROL
PANEL
DOOR
RELEASE
PUSH TO
OPEN
Accessories
Crumb Tray
Bake/Broil Pan
Wire Rack
5.
389U_IB_25-5-02
25/5/02
10:45
Page 6
Bake/Broil Pan and Wire Rack
For best results use bake pan to bake, defrost, top brown, keep warm
and to minimize clean up due to spills.
When toasting, place bread directly on wire rack. Place into oven
position #3. The crumb tray must be used.
When baking, you may either use the bake pan or wire rack and your
own pan. Place into oven position #2 unless more height is required
and then place into position #1.
When broiling, both the broil pan and the wire rack must be used.
Place into oven position #3 or #2 depending on thickness of food.
When roasting, both the broil pan and the wire rack must be used.
Place into oven position #1.
When warming, you may either use the bake pan or wire rack and
your own pan. Place into position #2 unless more height is required
and then place into position #1.
POSITION 3
POSITION 2
POSITION 1
CRUMB TRAY
CAUTION: APPLIANCE SURFACES ARE HOT DURING AND AFTER USE.
CAUTION: Always wear protective, insulated oven mitts on hands when
touching hot oven or hot dishes and food, or when inserting or
removing rack, bake/broil pan, baking dishes, or crumb tray.
6.
Toaster Oven Broiler Use and Care Guide
389U_IB_25-5-02
25/5/02
10:45
Page 7
Oven Broiler Functions
The BAKE and BROIL programs of your new toaster oven broiler
have the versatility to bake, broil, defrost and keep foods warm. The
toaster oven broiler has an adjustable thermostat with temperatures
ranging from 100°F/37°C up to 500°F/260°C. This allows you to
prepare your favorite recipes according to package or recipe
directions. The bake program has a 4 hour timer and the broil
program a 1 hour timer. The OPERATION light on the control panel
will be on while the unit is operating. The OPERATION light will
flash continually when program is COMPLETE and when the door is
opened it will turn off.
Ovenware manufacturers do not recommend using see-through glass
containers or lids in this oven. Opaque glass-ceramic baking
containers may be used. Do not use oven roasting bags in this oven, as
they may come in contact with the heating elements.
Programming Preheat Bake,
Bake and Broil
1. Plug unit into a 120 V ~ 60 Hz outlet. Close the door.
2. Press BAKE button to select a BAKE program. If pressed once, the
PREHEAT BAKE program is selected. If pressed twice, the BAKE
program is selected. Press BROIL to select broil program.
3. When any oven program is chosen, the clock will appear in the
window first. Set the time by pressing the UP ARROW to move to
the desired time. To move the time along more quickly, hold the
arrow and it will advance in 10 minute intervals. If you go past the
desired time, you may push the down arrow to reduce the total time.
When using the PREHEAT BAKE program, the time will not begin
to count down until the oven goes into the BAKE program. If you
prefer, you may program your time after the PREHEAT BAKE is
complete and when you place your food into the oven.
7.
389U_IB_25-5-02
25/5/02
10:45
Page 8
4. Press the TEMPERATURE button. The default temperature for the
PREHEAT BAKE and BAKE functions is 300°F/148°C (this will show
in the display window). To change the temperature for PREHEAT
BAKE and BAKE, press the UP or DOWN ARROW to move to
the desired temperature. The temperature will go up or down by 5°F
at a time. The preset temperature for the BROIL function is
500°F/260°C (this cannot be adjusted). Preheating the oven is not
necessary for BROIL.
5. If you are using the PREHEAT BAKE program, when the desired
temperature has been chosen, press START. The OPERATION light
will be on. Once the oven has reached its pre-selected temperature,
it will beep and the temperature will flash in the display window.
6. Open the door and place your food in the oven. PREHEAT BAKE
will change to BAKE. Press START. The OPERATION light will come
on and the time counter will begin to count down. The oven will
beep if the START button is pressed and no time has been set. Press
the UP or DOWN arrows to move to the desired time then press
START. The colons in the time counter will flash. If you don’t open
the door and place your food in the oven right away, it will continue
to maintain the preheat temperature for up to 30 minutes. If you
have not opened the door within this time, the oven will turn off
automatically.
7. The unit will beep and the OPERATION light will flash continually to
indicate the program is COMPLETE. When the door is opened, the
light will turn off. Use oven mitts to remove hot pan, rack and food.
8. Unplug and allow to cool completely before cleaning.
Hints For Bake And Broil
◆ If no time is selected and the START button is pressed, the unit will
beep to indicate that no time has been selected. Unit will not bake
or broil unless a time is selected.
◆ The time can be changed at any time during the BAKE or BROIL
programs. Press the UP ARROW to increase the time. Press the
DOWN ARROW to decrease the time. The temperature can be
changed at any time during the BAKE program only.
◆ Press the STOP button at any time to stop the unit.
◆ The oven will pause for up to 10 minutes when the door is opened.
If the door is open longer than 10 minutes, the oven will turn off.
8.
Toaster Oven Broiler Use and Care Guide
389U_IB_25-5-02
25/5/02
10:45
Page 9
Programming Defrost
DO NOT USE THIS METHOD FOR MEAT, POULTRY OR FISH.
To defrost using your Toaster Oven Broiler, follow the BAKE
instructions setting the thermostat at 150°F/65°C. Defrost will take
approximately 1/3 of the time recommended on the package for
defrosting at room temperature. Once completed, serve or bake
according to directions.
Hints For Defrost
◆ Do not cover food.
◆ Brush frozen dough with oil to prevent drying out during DEFROST,
remove and preheat oven before baking.
◆ Remove all food from packaging before placing in oven to defrost.
Programming Warm
To keep food warm using your Oven Broiler, press the WARM button.
The temperature is preset at 150°F and cannot be changed. The default
time is 30 minutes. Press the TIME button and the UP ARROW or
DOWN ARROW to adjust the time. The maximum time is 1 hour.
Hints For Keep Warm
◆ Use for short periods of time after food is cooked.
◆ To heat frozen foods, see instructions for defrost.
Toast Function
The toaster function has programs to toast 4 or 2 slices. The TOAST
function may also be used to top brown foods.
9.
389U_IB_25-5-02
25/5/02
10:45
Page 10
Programming Toast
COLOR BARS
1. Plug into a 120 V ~ 60 Hz outlet.
2. Press the TOAST button once, the 4 SLICES program will be
displayed. If pressed again, the 2 SLICES program will be selected.
3. The medium color default setting is in the display window. To
change the toast color, press the UP ARROW for a darker setting
or the DOWN ARROW for a lighter setting.
4. Place bread on wire rack and put into top shelf position (#3) of
oven. Close door.
5. Press the START button. The OPERATION light will come on and
the oven will begin the toasting process. Three dashes and a flashing
colon will appear in the display window. Once the oven determines the
time necessary to toast the bread to the selected level, the dashes will
change to minutes and/or seconds and begin to count down.
6. Condensation may build up on the inside of the glass door, but will
evaporate during toasting. The average first program times will
range from 4 - 7 minutes depending on the color chosen. Because
the oven cavity is already heated, additional toasting times will range
from 2 - 5 minutes depending on the color chosen.
7. The unit will beep and the OPERATION light will flash continually
when the TOAST function is COMPLETE. When door is opened,
the operation light will turn off.
8. Using oven mitts, carefully remove wire rack with toast.
10.
Toaster Oven Broiler Use and Care Guide
389U_IB_25-5-02
25/5/02
10:45
Page 11
Programming Toast (cont.)
9. Unplug and allow to cool completely before cleaning.
NOTE: If you wish to toast again immediately after the first program,
the second and all additional programs will take less time since the
oven cavity is heated. No adjustment of the color control is necessary
to toast the same color. Color adjustment is only necessary if you
would like the toast to be a lighter or darker shade.
Hints For Toast
◆ Use the 4 SLICES setting to toast 3 or 4 slices of bread. Use the
2 SLICES setting to toast 1 or 2 slices of bread.
◆ Follow toaster food directions.
◆ Frozen and heavy breads require a darker setting (i.e. bagels and
English muffins).
◆ Remove crumbs after each use.
Programming Top Brown
To top brown foods, follow the toasting instructions above but place the
food on the bake pan.
Hint For Top Brown
◆ Top brown may be used to top brown bagels, English muffins or to
melt cheese on sandwiches or casseroles.
11.
389U_IB_25-5-02
25/5/02
10:45
Page 12
Broil Chart
Always use bake/broil pan with wire rack. Place meat on top of rack. For
meat 1 inch thick or less, place broil pan and wire rack assembly in oven
position #3. For thicker meat, place broil pan and wire rack assembly in
oven position #2. Broil food according to recommended time or until
desired doneness, turning halfway through cooking time.
FOOD
12.
AMOUNT
TIME
DIRECTIONS
bacon
chicken
frankfurters
to fit tray
to fit tray
to fit tray
8-10 minutes
20-40 minutes
10-20 minutes
fish fillet,
1/2 inch thick
hamburgers
(4 oz each)
to fit tray
5-9 minutes
broil until done
broil until done
turn frequently for
even browning
broil until done
to fit tray
10-20 minutes
minimum time for
medium until
center is no longer
pink
broil until done
pork chops,
1 inch thick
sausage, fresh
to fit tray
20-40 minutes
to fit tray
20-30 minutes
if sausage links:
pierce skin with
fork, turn frequently
steak,
1 inch thick
to fit tray
15-25 minutes
minimum time for
medium
Toaster Oven Broiler Use and Care Guide
389U_IB_25-5-02
25/5/02
10:45
Page 13
Marinades For Broiling
Marinate meat for added flavor and tenderizing. A marinade must
include an acidic ingredient like lemon juice, vinegar, wine or salsa to
tenderize. To prepare, blend all ingredients together. Marinate in
refrigerator at least 30 minutes turning to coat meat completely. Pat
dry before broiling.
RED WINE
1/4 cup red wine vinegar
2 TBL vegetable oil
1 TBL Dijon mustard
1 clove garlic, minced
1/2 tsp dried Italian seasoning
1/8 tsp pepper, coarsely ground
CURRY YOGURT
1/3 cup plain yogurt
2 TBL lemon juice
1 TBL vegetable oil
2 cloves garlic, minced
1/2 tsp curry powder
1/8 tsp red pepper, crushed
LEMON ORIENTAL
1/4 cup lemon juice
1 TBL soy sauce
1 TBL vegetable oil
2 TBL onion, chopped
1/4 tsp ground ginger
1/8 tsp red pepper, crushed
MEXICALI
1/2 cup prepared salsa
2 TBL lime juice
1 TBL vegetable oil
2 TBL cilantro, chopped
SZUECHUAN
1/4 cup soy sauce
3 TBL dry sherry
1 TBL sesame oil
2 TBL sugar
2 TBL cornstarch
SPICY HERB
1/2 cup dry wine
1/2 cup vegetable oil
2 TBL lemon juice
1/2 tsp Tabasco® pepper sauce
1/4 cup onions, chopped
1 clove garlic, minced
1/4 tsp salt
1/4 tsp dried basil leaves
1/8 tsp dried tarragon leaves
1/8 tsp dry mustard
13.
389U_IB_25-5-02
25/5/02
10:45
Page 14
Bake/Roasting Chart
1. Place meat, fat side up, on the wire rack and bake pan in a
preheated oven.
2. Season meat before or after cooking.
3. Insert meat thermometer into thickest part of meat, not touching
bone or fat.
4. Do not add water. Do not cover.
5. Roast to 5-10 degrees below desired doneness, (internal temperature).
6. Allow meat to stand 15-20 minutes before serving. Temperature will
continue to rise to desired doneness. Meat will also be easier to carve.
CUT
WEIGHT INTERNAL
AMOUNT TEMPERATURE
TIME
HOURS
BEEF
350°-425°F/177°-218°C
Boneless top
sirloin roast
(tri-tip)
425°F/218°C
1 1/2-2
Ribeye roast,
small end
350°F/177°C
4-6
Tenderloin roast
425°F/218°C
Rib roast
350°F/177°C
14.
2-3
4-5
Toaster Oven Broiler Use and Care Guide
medium rare
135°F/57°C
medium
150°F/66°C
medium rare
135°F/57°C
medium
150°F/66°C
medium rare
135°F/57°C
medium
150°F/66°C
medium rare
135°F/57°C
medium
150°F/66°C
30-40 minutes
40-45 minutes
1 3/4 - 2
2 - 2 1/2
30-40 minutes
40-50 minutes
1 3/4 - 3
2 1/2 - 3 3/4
389U_IB_25-5-02
25/5/02
10:45
CUT
Page 15
WEIGHT
AMOUNT
INTERNAL
TEMPERATURE
TIME
HOURS
BEEF (cont)
350°-425°F/177°-218°C
Round sirloin
tip roast
325°F/170°C
3-4
medium rare
135°F/57°C
medium
150°F/66°C
1 3/4 - 2
2 1/4 - 2 1/2
PORK 325°F/170°C
Boneless
loin roast
Loin back ribs
(spareribs)
Country-style ribs
Sirloin roast
Tenderloin
2-4
2-4
2-4
3-4
2-3
well
160°-170°F/71°-77°C
1 - 1 1/4
well
160°-170°F/71°-77°C
1 1/4 - 1 3/4
well
160°-170°F/71°-77°C
1 1/2 - 1 3/4
well
160°-170°F/71°-77°C
2 - 3 1/2
well
160°-170°F/71°-77°C
1 1/2 - 2
HAM (fully cooked) 325°F/170°C
Boneless
5-6
140°F/60°C
1 1/4 - 2 1/2
Bone-in
5-7
140°F/60°C
2-4
15.
389U_IB_25-5-02
25/5/02
10:45
CUT
Page 16
WEIGHT
AMOUNT
INTERNAL
TEMPERATURE
TIME
HOURS
2-4 fillets
until fish flakes
easily with a fork
4 - 6 minutes
Per 1/2 inch
thickness
FISH 450°F/232°C
Fillets
POULTRY 325°-375°F/170°-190°C
16.
Cornish hens
375°F/190°C
1-2 hens
185°F/85°C
1 - 1 1/2
Turkey breast
boneless
325°F/170°C
2 1/2-3
170°F/77°C
1 1/2 - 2 1/4
Turkey breast
325°F/170°C
4-6
6-8
170°F/77°C
170°F/77°C
1 1/2 - 2 1/4
2 1/2 - 3 1/2
Chicken,
fryer whole
375°F/190°C
2 1/2-4
185°F/85°C
1 - 1 3/4
Chicken,
roaster whole
325°F/170°C
4-6
185°F/85°C
1 3/4 - 3 1/2
Toaster Oven Broiler Use and Care Guide
389U_IB_25-5-02
25/5/02
10:45
Page 17
Bake Recipes
FIESTA CORN BREAD
1/4 cup Sugar
1/4 tsp Salt
1 cup All-purpose flour
1/2 cup Corn meal
1 1/2 tsp Baking powder
1 Egg, beaten
3/4 cup Milk
3 TBL Oil
4 oz Green chilies, diced — drained
2 oz Pimento, diced — drained
Method
1. Combine dry ingredients and
set aside.
2. Combine wet ingredients and
stir into dry ingredients until
moist.
3. Pour batter into a greased 8” x 8”
baking pan and bake at
425°F/218°C for 25 minutes or
until done.
Makes 6 servings.
HASHBROWN CASSEROLE
16 oz hashbrowns, frozen
1/4 cup onions, chopped
10 3/4 oz cream of chicken soup
1/4 cup sour cream
1/2 cup cheddar cheese
salt and pepper to taste
HASHBROWN CASSEROLE
(CONT.)
Method
1. Mix together ingredients from
first section and add to a
greased 8 x 8 inch pan.
2. Sprinkle with cornflakes and
drizzle with butter.
3. Bake at 350°F/177°C for
45 minutes or until done.
Makes 4 servings.
CURRY BEEF FRIED RICE
2 cups Beef broth
1/2 cup Onion, chopped
2 tsp Curry powder
1 cup Instant rice, uncooked
Salt and pepper to taste
Topping:
1 lb Raw ground turkey or lean beef
Method
1. Mix together first five
ingredients and add to a greased
8 x 8 inch baking pan.
2. Crumble meat on top of rice
mixture and bake at
350°F/177°C for 1 hour or until
done.
Makes 4 servings.
Topping:
1/2 cup cornflakes, crushed
1/4 cup butter, melted
17.
389U_IB_25-5-02
25/5/02
10:45
Page 18
CORN AND MACARONI BAKE
15 oz Can creamed corn
15 oz can whole kernel corn,
undrained
1 cup Macaroni, dry
1 cup Pasteurized processed
cheese product, cubed
1/4 cup Onion, chopped
1/4 cup Green pepper, chopped
Salt and pepper to taste
Method
1. Mix all ingredients together and
add to a greased 8 x 8 inch
baking pan.
2. Bake at 350°F/177°C for 1 hour
or until done. Stir halfway
through bake program.
Makes 6 servings.
SCALLOPED TUNA
10 3/4 oz Cream of mushroom
soup
1/2 cup Water
2 cups Cracker crumbs
6 1/2 oz Tuna, drained
1 cup Celery, diced
3/4 cup Cashews
2 TBL Onion, minced
Topping:
1/2 cup Cracker crumbs
2 TBL Butter, melted
18.
Toaster Oven Broiler Use and Care Guide
SCALLOPED TUNA
(CONT.)
Method
1. Mix together all ingredients
from first section and place in a
greased 2 quart baking
container.
2. Mix together cracker crumbs
and butter and sprinkle over
tuna mixture.
3. Bake at 425°F/218°C for
35 minutes or until done.
Makes 6 servings.
NOODLE BURGER BAKE
1 1/2 lbs Ground beef, browned —
drained
1 cup Onion, chopped — cooked
4 oz Noodles, cooked — drained
10 3/4 oz Cream of chicken soup
10 3/4 oz Cream of mushroom
soup
1 cup Sour cream
1/4 cup Pimentos, chopped
3/4 tsp Salt
1/4 tsp Pepper
Topping:
1 cup Bread crumbs — soft
2 TBL Butter, melted
389U_IB_25-5-02
25/5/02
10:45
Page 19
NOODLE BURGER BAKE
(CONT.)
Method
1 Mix together all ingredients in
first section and place in a
greased 2 1/2 quart baking
container.
2. Mix together topping
ingredients and sprinkle on
top.
3. Bake at 425°F/218°C for
30 minutes or until done.
Makes 6 servings.
PORK CANTONESE CASSEROLE
4 Pork chops
1 cup Celery, chopped
1 cup Green pepper, chopped
1 cup Onion, chopped
TOFFEE BARS
Layer 1:
1 pkg Yellow cake mix, one layer like Jiffy®
1 Egg
3 TBL Butter, melted
Method
1. Place pork and vegetables in a
greased 2 1/2 quart baking
container.
2. Mix together topping
ingredients and pour over
meat and vegetables.
2. Bake at 425°F/218°C for
45 minutes or until done.
Makes 4 servings.
Layer 2:
1/2 can Evaporated milk
1 Egg
1 tsp Vanilla extract
Layer 3:
1/2 Cup Nuts
5 oz Toffee chips
Method
1. Beat cake mix, egg and butter
with an electric mixer for 2
minutes. Spread into a greased
8 x 8 inch baking pan.
2. Mix together milk, egg and
vanilla, pour over 1st layer.
3. Mix together nuts and toffee
chips and sprinkle over top.
4. Bake at 350°F/177°C for
30 minutes or until done.
Makes 6 servings.
Topping:
3 TBL Brown sugar
1/4 cup Soy sauce
1 1/2 TBL Vinegar
1 TBL Worcestershire sauce
2 TBL Teriyaki sauce
2 TBL Flour
CORNISH HENS AND RICE
Stuffing:
1/2 cup Regular rice, uncooked
10 oz can Chicken broth
1/4 cup Celery, chopped
1/2 cup Carrots, chopped
1/4 cup Onions, chopped
Cornish hens:
2 Cornish hens
2 TBL Butter, melted
Salt and pepper to taste
19.
389U_IB_25-5-02
25/5/02
10:45
Page 20
CORNISH HENS AND RICE
(CONT.)
Method
1. Combine stuffing ingredients in
a sauce pan and boil for
20 minutes.
2. Stuff hens lightly with rice
mixture and place on baking
pan.
3. Brush with melted butter and
set remaining butter aside.
4. Bake at 375°F/190°C for 1-11⁄2
hours or until done, carefully
basting hens 3 or 4 times with
melted butter during the
baking process.
Makes 2 servings.
POTATO WEDGES
4 Potatoes, medium
1 oz pkg Italian dressing mix*, dry
Butter flavored spray
* Any flavor may be used
Method
1. Cut each potato lengthwise
into 8 wedges.
2. Coat wedges with butter spray
and lightly coat with Italian
dressing mix.
3. Bake on a greased baking pan
at 450°F/232°C for 35 minutes
or until done.
Makes 4 servings.
20.
Toaster Oven Broiler Use and Care Guide
PAPRIKA CHICKEN
4 Chicken breast, halves
1/2 cup Onion, chopped
1 1/2 cups Mushrooms,
fresh — sliced
1 tsp Paprika
10 3/4 oz Cream of chicken soup
Salt and pepper to taste
Method
1. Cut chicken into cubes and mix
with remaining ingredients.
2. Place in a greased
8” x 8” baking container.
3. Bake at 350°F/177°C for
1 hour or until done.
Serve over rice.
Makes 4 servings.
RICE & MUSHROOMS
1 cup Regular rice, uncooked
1 can Consomme beef soup
1 can French onion soup
1 sm can Sliced mushrooms,
drained
1/4 cup Butter, melted
Method
1. Mix all ingredients together and
place in an 8 x 8 inch greased
baking pan.
1. Bake at 350°F/177°C
for 1 hour or until done.
Makes 6 servings.
389U_IB_25-5-02
25/5/02
10:45
Page 21
BREAKFAST CASSEROLE
1/2 lb Sausage, cooked
3 slices Bread, cubed
3 Eggs, beaten
3/4 cup Cheddar cheese, shredded
1 cup Milk
1/4 tsp Salt
1 tsp Prepared mustard
1/8 tsp Cayenne pepper
Method
1. Place sausage and bread cubes
into greased 8” x 8” baking pan.
2. Mix remaining ingredients
together and pour over sausage
mixture.
3. Bake at 425°F/218°C for
20 minutes or until done.
Makes 6 servings.
MEXICAN CHICKEN
4 Chicken breast halves
1 cup Salsa
16 oz Can tomatoes, chopped
1/4 cup Onion, chopped
Salt and pepper to taste
Method
1. Mix all ingredients together and
pour into an 8” x 8” greased
baking pan.
2. Bake at 350°F/177°C for
1 hour and 15 minutes or until
done.
Makes 4 servings.
EASY APPLE PIE
3 cups Apples, peeled,
sliced 1/4 inch
1 tsp Cinnamon
Batter:
1/3 cup Milk
1 1/2 TBL Butter, melted
2 Eggs, lightly beaten
2/3 cup Sugar
1/3 cup Biscuit mix, like Bisquick®
Topping:
2 TBL Butter, melted
1 cup Biscuit mix
1/2 cup Brown sugar
Method
1. Place apple slices in a greased
8” x 8” baking pan and sprinkle
with cinnamon.
2. Blend batter ingredients
together until smooth. Pour
batter over apples.
3. Blend topping ingredients
together and sprinkle over the
top; pat down evenly.
4. Bake at 350°F/177°C for
30 minutes or until done.
Makes 6 servings.
21.
389U_IB_25-5-02
25/5/02
10:45
Page 22
User Maintenance Instructions
This appliance requires little maintenance. It contains no user
serviceable parts. Do not try to repair it yourself. Refer it to a
qualified appliance repair technician if servicing is needed.
Cleaning And Storing
ALWAYS UNPLUG THE UNIT AND ALLOW TO COOL
COMPLETELY BEFORE CLEANING.
Clean-Up Of The Interior
1. Unplug and allow to cool before cleaning.
2. Remove all accessories from inside the oven cavity: crumb tray,
bake/broil pan and wire rack.
3. Clean interior with a mild or non-abrasive cleaner and plastic
scouring pad after each use to avoid buildup. Do not rub too hard
as the non-stick surface on the walls of the oven may be scratched.
4. Rinse and dry thoroughly before closing door.
Clean-Up Of Oven Door
And Exterior
1. Unplug and allow to cool before cleaning
2. Wipe exterior with a damp cloth after each use.
3. To clean the glass in the door, use a glass cleaner or mild detergent
and a damp cloth or plastic scouring pad. Do not use an abrasive
cleaner or pad as they might scratch the finish.
4. Rinse and dry thoroughly with a clean cloth. Allow to dry before
closing door.
22.
Toaster Oven Broiler Use and Care Guide
389U_IB_25-5-02
25/5/02
10:45
Page 23
Clean-Up Of Accessories
Bake/Broil Pan, Wire Rack,
and Crumb Tray
1. Allow to cool before cleaning.
2. Hand wash with soap and water or a mild abrasive cleaner (bake
pan only) and plastic scouring pad or wash in the dishwasher.
3. Rinse and dry thoroughly.
Storing
◆ Be sure that the Toaster Oven Broiler is completely cooled before
storing.
◆ All removable parts should be thoroughly cleaned and dried.
◆ Store with door closed.
Specifications
Power supply
Power
Consumption
Dimension
(WxDxH)
Weight
120 V ~ 60 Hz
Heater
1500 Watts
16 1/2 inches x 10 1/2 inches x 9 1/2 inches
24 Pounds
23.
389U_IB_25-5-02
25/5/02
10:45
Page 24
Recipe Index
BAKE
Breakfast Casserole . . . . . . . . . . . . . . . . . . . . . . . . . . . . . . . . . . . . . . .23
Corn and Macaroni Bake . . . . . . . . . . . . . . . . . . . . . . . . . . . . . . . . . . 20
Cornish Hens and Rice . . . . . . . . . . . . . . . . . . . . . . . . . . . . . . . . . . . . 21
Curry Beef Fried Rice . . . . . . . . . . . . . . . . . . . . . . . . . . . . . . . . . . . . . 19
Easy Apple Pie . . . . . . . . . . . . . . . . . . . . . . . . . . . . . . . . . . . . . . . . . . 23
Fiesta Corn Bread . . . . . . . . . . . . . . . . . . . . . . . . . . . . . . . . . . . . . . . . 19
Hashbrown Casserole . . . . . . . . . . . . . . . . . . . . . . . . . . . . . . . . . . . . . 19
Mexican Chicken . . . . . . . . . . . . . . . . . . . . . . . . . . . . . . . . . . . . . . . . 23
Noodle Burger Bake . . . . . . . . . . . . . . . . . . . . . . . . . . . . . . . . . . . . . . 20
Paprika Chicken . . . . . . . . . . . . . . . . . . . . . . . . . . . . . . . . . . . . . . . . . 22
Pork Cantonese Casserole . . . . . . . . . . . . . . . . . . . . . . . . . . . . . . . . . 21
Potato Wedges . . . . . . . . . . . . . . . . . . . . . . . . . . . . . . . . . . . . . . . . . . 22
Rice and Mushrooms . . . . . . . . . . . . . . . . . . . . . . . . . . . . . . . . . . . . . 22
Scalloped Tuna . . . . . . . . . . . . . . . . . . . . . . . . . . . . . . . . . . . . . . . . . . 20
Toffee Bars . . . . . . . . . . . . . . . . . . . . . . . . . . . . . . . . . . . . . . . . . . . . . 21
BAKE/ROASTING CHART . . . . . . . . . . . . . . . . . . . . . . . . . . . . . . . . 16
BROIL CHART . . . . . . . . . . . . . . . . . . . . . . . . . . . . . . . . . . . . . . . . . 14
MARINADE
Curry Yogurt . . . . . . . . . . . . . . . . . . . . . . . . . . . . . . . . . . . . . . . . . . . . 15
Lemon Oriental . . . . . . . . . . . . . . . . . . . . . . . . . . . . . . . . . . . . . . . . . 15
Mexicali . . . . . . . . . . . . . . . . . . . . . . . . . . . . . . . . . . . . . . . . . . . . . . . 15
Red Wine . . . . . . . . . . . . . . . . . . . . . . . . . . . . . . . . . . . . . . . . . . . . . . 15
Spicy Herb . . . . . . . . . . . . . . . . . . . . . . . . . . . . . . . . . . . . . . . . . . . . . 15
Szuechuan . . . . . . . . . . . . . . . . . . . . . . . . . . . . . . . . . . . . . . . . . . . . . . 15
24.
Toaster Oven Broiler Use and Care Guide
389U_IB_25-5-02
25/5/02
10:45
Page 25
LIMITED ONE YEAR WARRANTY
Warranty: This Toastmaster® product is warranted to be free from defects in materials or workmanship for a period of
(1) year from the original purchase date. This product warranty covers only the original consumer purchaser of the
product.
Warranty Coverage: This warranty is void if the product has been damaged by accident in shipment, unreasonable
use, misuse, neglect, improper service, commercial use, repairs by unauthorized personnel, normal wear and tear,
improper assembly, installation or maintenance abuse or other causes not arising out of defects in materials or
workmanship. This warranty is effective only if the product is purchased and operated in the USA, and does not extend
to any units which have been used in violation of written instructions furnished with the product or to units which have
been altered or modified or to damage to products or parts thereof which have had the serial number removed,
altered, defaced or rendered illegible.
Implied Warranties: ANY IMPLIED WARRANTIES WHICH THE PURCHASER MAY HAVE ARE LIMITED IN DURATION
TO ONE (1) YEAR FROM THE DATE OF PURCHASE. Some states do not allow limitations on how long an implied
warranty lasts, so the above limitation may not apply to you.
Warranty Performance: During the above one-year warranty period, a product with a defect will be either repaired or
replaced with a reconditioned comparable model (at our option) when the product is returned to the Repair Center, or
the purchase price refunded. The repaired or replacement product will be in warranty for the balance of the one-year
warranty period and an additional one-month period. No charge will be made for such repair or replacement.
Service and Repair: Should the appliance malfunction, you should first call toll-free 1 (800) 947-3744 between the hours
of 9:00 am and 5:00 pm Central Standard Time and ask for CONSUMER SERVICE stating that you are a consumer with
a problem. Please refer to model number 389U when you call.
In-Warranty Service (USA): For an appliance covered under the warranty period, no charge is made for service or
postage. Call for return authorization (1 800 947-3744).
Out-of Warranty Service: A flat rate charge by model is made for out-of-warranty service. Include $ 15.00 (U.S.) for
return shipping and handling. We will notify you by mail of the amount of the charge for service and require you to pay
in advance for the repair or replacement.
For Products Purchased in the USA, but Used in Canada: You may return the product insured, packaged with
sufficient protection, and postage and insurance prepaid to the USA address listed below. Please note that all customs
duty / brokerage fees, if any, must be paid by you and we will require you to pay the cost of customs duty /
brokerage fees to us in advance of our performing any service.
Risk During Shipment: We cannot assume responsibility for loss or damage during incoming shipment. For your
protection, carefully package the product for shipment and insure it with the carrier. Be sure to enclose the following
items with your appliance: any accessories related to your problem, your full return address and daytime phone
number, a note describing the problem you experienced, a copy of your sales receipt or other proof of purchase to
determine warranty status. C.O.D. shipments cannot be accepted.
To return the appliance, ship to:
Attn: Repair Center
Toastmaster Inc.
708 South Missouri Street
Macon, MO 63552
Email: [email protected]
www.toastmaster.com
To contact us, please write to or call:
Toastmaster Inc.
P.O. Box 6916
Columbia, MO 65205-6916
1 (800) 947-3744
Limitation of Remedies: No representative or person is authorized to assume for us any other liability in connection
with the sale of our products. There shall be no claims for defects or failure of performance or product failure under
any theory of tort, contract or commercial law including, but not limited to negligence, gross negligence, strict liability,
breach of warranty and breach of contract. Repair, replacement or refund shall be the sole remedy of the purchaser
under this warranty, and in no event shall we be liable for any incidental or consequential damages, losses or
expenses. Some states do not allow the exclusion or limitation of incidental or consequential damages, so the above
limitation or exclusion may not apply to you.
Legal Rights: This warranty gives you specific legal rights, and you may also have other rights which vary from state
to state.
© 2002 Toastmaster Inc.
All Rights Reserved
P/N 32789P01Rev.05/02
Printed in China
25.
389U_IB_25-5-02
25/5/02
10:45
Page 26
Keep Dated Sales Receipts for Warranty Service.
Keep this booklet. Record the following for reference:
Date purchased _______________________________________________
Model number _______________________________________________
Date code (stamped on bottom)________________________________
EVERYBODY EATS. It’s a fact of life.
But sometimes preparing
meals can become a chore.
That’s why TOASTMASTER has been invited
into millions of kitchens just like yours
so we can HELP YOU MASTER your
mixing, baking, grilling, toasting,
brewing, heating and serving
tasks WITH EASE AND STYLE.
The TOASTMASTER name stands for a
CELEBRATION of INNOVATION designed
to serve your life and keep you
COOKIN’ IN STYLE.
26.
Toaster Oven Broiler Use and Care Guide
389U Cover_IB_25-5-02
25/5/02
10:46
Page 1
Toaster Oven
Broiler
USE AND CARE GUIDE
AND RECIPE BOOK
MODEL 389U
• 10
0
and °-500°
F
4
•T
oas -hour adjus
ts u
•B
tab
dig
r
l
• In oils st p to f ital tim e ther
o
e
mo
c
u
er
r
• T lude aks,
stat
s en sea slices
hre
e ra
am food of b
e
ck
pos l bake and c read
itio
hic
ken
ns pan
?
389U
Questions
Call toll free 1-800-947-3744
Monday – Friday, 8:00 a.m. - 5:30 p.m. CST
www.toastmaster.com