1
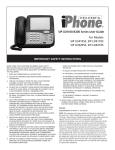
SIP LD4100/4200 Series User Guide
For Models
SIP LD4105S, SIP LD4110S
SIP LD4205S, SIP LD4210S
IMPORTANT SAFETY INSTRUCTIONS
WHEN USING YOUR TELEPHONE EQUIPMENT, BASIC SAFETY
PRECAUTIONS SHOULD ALWAYS BE FOLLOWED TO REDUCE THE
RISK OF FIRE, ELECTRIC SHOCK AND INJURY TO PERSONS, INCLUDING
THE FOLLOWING:
– WHEN THE POWER SUPPLY CORD OR PLUG IS DAMAGED
OR FRAYED.
– IF LIQUID HAS BEEN SPILLED INTO THE PRODUCT.
1. READ AND UNDERSTAND ALL INSTRUCTIONS.
–IF THE PRODUCT HAS BEEN EXPOSED TO RAIN OR WATER.
2. FOLLOW ALL WARNINGS AND INSTRUCTIONS MARKED ON
THE PRODUCT.
– IF THE PRODUCT DOES NOT OPERATE NORMALLY BY
FOLLOWING THE OPERATING INSTRUCTIONS. ADJUST ONLY THOSE CONTROLS THAT ARE COVERED BY THE OPERATING
INSTRUCTIONS, AS IMPROPER ADJUSTMENT OF OTHER
CONTROLS MAY RESULT IN DAMAGE AND WILL OFTEN
REQUIRE EXTENSIVE WORK BY A QUALIFIED TECHNICIAN
TO RESTORE THE PRODUCT TO NORMAL OPERATION.
3. UNPLUG THE PRODUCT FROM THE WALL OUTLET BEFORE
CLEANING. DO NOT USE LIQUID CLEANER OR
AEROSOLCLEANERS. USE A DAMP CLOTH FOR CLEANING.
4. DO NOT USE THIS PRODUCT NEAR WATER; FOR EXAMPLE NEAR
A BATHTUB, WASH BOWL, KITCHEN SINK OR LAUNDRY TUB, IN
A WET BASEMENT, OR NEAR A SWIMMING POOL.
5. DO NOT PLACE THIS PRODUCT ON AN UNSTABLE CART, STAND
OR TABLE. THE PRODUCT MAY FALL, CAUSING SERIOUS DAMAGE TO THE PRODUCT.
6.
SLOTS AND OPENINGS IN THE CABINET AND THE BOTTOM ARE
PROVIDED FOR VENTILATION, TO PROTECT IT FROM
OVERHEATING. THESE OPENINGS MUST NOT BE BLOCKED OR COVERED. THE OPENINGS SHOULD NEVER BE BLOCKED BY
PLACING THE PRODUCT ON A BED, SOFA, RUG OR ANY OTHER
SIMILAR SURFACE. THIS PRODUCT SHOULD NEVER BE PLACED NEAR OR OVER A RADIATOR OR HEAT REGISTER. THIS
PRODUCT SHOULD NOT BE PLACED IN A BUILT-IN INSTALLATION UNLESS PROPER VENTILATION IS PROVIDED.
7.
8.
NEVER PUSH OBJECTS OF ANY KIND INTO THIS PRODUCT THROUGH CABINET SLOTS AS THEY MAY TOUCH DANGEROUS
VOLTAGE POINTS OR SHORT OUT PARTS THAT COULD RESULT IN A RISK OF FIRE OR ELECTRIC SHOCK. NEVER SPILL LIQUID OF ANY
KIND ON THE PRODUCT.
TO REDUCE THE RISK OF ELECTRIC SHOCK, DO NOT DISASSEMBLE THIS PRODUCT, BUT TAKE IT TO QUALIFIED SERVICE PERSONNEL WHEN SOME SERVICE OR REPAIR WORK IS REQUIRED. OPENING
OR REMOVING COVERS MAY EXPOSE YOU TO DANGEROUS
VOLTAGES OR OTHER RISKS. INCORRECT REASSEMBLY CAN CAUSE ELECTRIC SHOCK WHEN THE APPLIANCE IS SUBSEQUENTLY USED.
9. UNPLUG THIS PRODUCT FROM THE WALL OUTLET AND REFER
SERVICING TO QUALIFIED SERVICE PERSONNEL UNDER THE
FOLLOWING CONDITIONS:
– IF THE PRODUCT HAS BEEN DROPPED OR THE CABINET HAS BEEN DAMAGED.
– IF THE PRODUCT EXHIBITS A DISTINCT CHANGE IN
PERFORMANCE.
10.AVOID USING A TELEPHONE (OTHER THAN A CORDLESS TYPE) DURING AN ELECTRICAL STORM. THERE MAY BE A RISK OF
ELECTRIC SHOCK FROM LIGHTNING.
NOTICES
REQUIREMENTS OF PART 15 - FCC RULES
NOTE: This equipment has been tested and found to comply with
the limits for a Class A digital device, pursuant to Part 15 of the
FCC Rules. These limits are designed to provide reasonable protection
against harmful interference in a residential installation. This
equipment generates, uses, and can radiate radio frequency energy
and, if not installed and used in accordance with the instructions,
may cause harmful interference to radio communications. However,
there is no guarantee that interference will not occur in a particular
installation. If this equipment does cause harmful interference to
radio or television reception, which can be determined by turning
the equipment off and on, the user is encouraged to try to correct
the interference by one or more of the following measures: a) move
the telephone away from the receiver; b) consult the dealer or an
experienced radio/TV technician for help. Any changes made by the
user not approved by the manufacturer can void the user’s authority
to operate the telephone.
Table of Contents
1. Introduction to the Teledex iPhone SIP LD Series
IP Phone
4.1.2 Using the speakerphone
3
4.1.3 Switching between handset and speakerphone 7
1.1 Definitions, acronyms and abbreviations
3
4.1.4 Adjust the ringer volume
7
1.2 The SIP LD Series works like a telephone
3
4.1.5 Adjust the speaker volume
7
1.3 Two lines
3
4.1.6 Adjust the handset volume
1.4 The network
3
4.2 Placing a phone call
7
1.5 The IP-PBX
3
4.3 Receiving a phone call
7
1.6 The network system administrator
3
4.4 Using Mute
7
2. Installing the SIP LD Series IP phone
3
4.5 Using Hold
7
2.1 A Matter of Safety
3
4.6 Using the second line
7
2.2 Versions of the SIP LD Series
3
4.7 Transferring a call
8
2.3 Unpacking the SIP LD Series
3
4.8 Redialing the last number
8
2.4 Connecting the handset
4
4.9 Pre-dialing a phone number
8
2.5 Connecting the SIP LD Series to the network
4
4.10DTMF Signaling
8
2.5.1 Version 1 (local power): Connect
network with the inline power adapter
5. Advanced Features of the SIP LD Series
8
4
5.1 Using call forwarding
8
2.5.2 Version 2 (PoE)
4
5.2 Using call waiting
8
2.5.3 Version 3 (Dual power)
4
5.3 Speed dialing
8
5.3.1 Programming the Memory Dialing Keys
through “concealed” STORE key
8
2.6
Connecting a PC to the SIP LD Series
4
2.7
Arranging the SIP LD Series on the desk
4
2.8
Mounting the SIP LD Series on a wall
4
3. Configuring the SIP LD Series
4
3.1 Starting up
4
3.2 Online configuration
4
(Fig.2)
4
3.2.1 Visit the configuration portal
3.2.2 Change network configurations (Fig.3)
5
3.2.3 Set Line 1 & Line 2 information (Fig. 4)
5
3.2.4 Configure the auto dial keys (Fig. 5)
5
3.2.5 Configure the call features (Fig. 6)
6
3.2.6 Enable or disable multiple line appearances (Fig.7)6
3.2.7 Upgrade the phones firmware (Fig.8)
6
3.2.8 Reset the iPhone (Fig.9)
6
3.2.9 Restore to factory configuration
7
7
7
5.3.2 Configure the timed pause for the speed dial
8
5.3.3 Using the Speed Dialing Keys
8
5.4
9
5.4.1 Three-way conference with one line
Three-Way Conference Calls
9
5.4.2 Three-way conference with 2 lines
9
5.5
Using voice mail
9
5.5.1 Message waiting
9
5.5.2 Retrieving messages
9
6. Care and Troubleshooting
9
6.1 Cleaning the SIP LD Series
9
6.2 In case of trouble
9
9
6.2.1 Disconnect from the network
6.2.2 Disconnect the PC
9
6.2.3 Check the cords and cables
9
7
7. Appendix A – European Requirements
9
4.1 Using the handset and speakerphone
7
8. Appendix B – SIP LD Series Product Specifications
9
7
9. Appendix C – Product Support
4. Using the SIP LD Series IP Phone
4.1.1 Using the Handset
10
1. Introduction to the Teledex iPhone SIP LD Series
IP Phone
The Teledex iPhone SIP LD series IP phone is a
SIP-compliant network terminal. Instead of using standard
analog or digital telephone lines, it connects to the network
in the same manner as computers and printers do. The voice
and control signals to and from the SIP LD series phones are
entirely digital data that is transmitted over the data
network, rather than phone lines.
1.1 Definitions, Acronyms and Abbreviations
2.1 A Matter of Safety
WARNINGS mean danger to persons and possibly, damage to
equipment. Whenever you see this symbol, be careful to study
the steps that you will perform, and be sure that you understand the nature of the hazards before beginning the task.
CAUTION mean risk of damage to equipment. Whenever you
see this symbol, be aware of the steps that you will perform
and be sure that you avoid the conditions that may damage
the equipment.
IP-PBX: IP-based Private Branch Exchange
NOTES point out exceptions or additions to the information
presented in a particular section. You may want to highlight
some information that you will need to remember
periodically in the operation or installation of this device.
PSTN: Public Switched Telephone Network
2.2 Versions of the SIP LD Series
PoE: Power over Ethernet
VoIP: Voice over IP
SIP: Session Initiation Protocol
TFTP: Trivial File Transfer Protocol
DTMF: Dual Tone Multiple Frequency
1.2 The SIP LD Series Woks Like a Telephone
The SIP LD series phone functions in a manner very similar to
analog or digital telephone instruments that are connected to
a PABX (private automatic branch exchange.)
1.3 Two Lines
The SIP LD series can handle one or two calls
simultaneously, much like a standard “two-line” analog
or digital telephone. However, there is only one line
(or cable) connecting the SIP LD series to the network.
1.4 The Network
Instead of telephone lines, the SIP LD series connects
to other IP telephones via an Ethernet network.
1.5 The IP-PBX
NOTE: There are has three versions of this phone, depending
on how power is supplied to the telephone.
Version 1: Local power version. This version requires an
approved inline power adapter to provide power.
Version 2: PoE (Power over Ethernet) version. This version is
designed for customers with a PoE compatible network
interface available (e.g. PoE switch, or PoE injectors). The
power for the phone is supplied over the Ethernet network.
Version 3: Dual-power version. The version can work in either
local power or PoE mode, depending on jumper settings
made to the phone. When the phone is working in the local
power mode, an inline power adapter is needed (as for
Version 1). When the phone is working in PoE mode, the
power will be provided through the PoE Ethernet port.
CAUTION: For Version 3, there is risk of damaging the
equipment if the power jumper is not set properly
according to the specification from Teledex.
An IP-PBX is a telephone switching system inside that switches
calls between Voice over IP (VoIP) users on local lines, and lets
all users share a certain number of external telephone lines.
The typical IP-PBX can also switch calls between a VoIP user
and a traditional telephone user, or between two traditional
telephone users much like a conventional PBX does.
2.3 Unpacking the SIP LD series
The IP-PBX controls all of the SIP LD series terminals
on the network, as well as other types of VoIP terminals
that are connected to the network. The SIP LD series works
with various IP-PBX products. For a list of IP-PBX
servers with which the SIP LD series is compliant,
please visit www.teledex.com.
• Two or three network cables for connecting the
phone to the network, or a PC. The SIP LD series has a built-in Ethernet switch, and two Ethernet ports.
1.6 The Network System Administrator
The SIP LD series requires configuration in order to
work properly on the network. This task is performed by
a technical specialist referred to as a network or system
administrator. The network administrator will perform the
configuration steps from a control station at the IP-PBX.
2. Installing the SIP LD Series IP Phone
Installing the SIP LD series in a guest room or at a
workstation is as simple as installing a conventional
office telephone.
The SIP LD series IP phone package contains
several components:
• The main base unit, or keyset (see figure 1, page 10)
• A handset for use during conversations
•
A handset coil cord, to connect the handset to the phone, or base.
•
The package may also contain an optional power adapter (if necessary).
For Version2 (PoE version), no power adapter will be
provided. For the Version 1 (local power version) and
Version 3 (dual-power version), an inline power adapter
may be provided along with the package, depending on
the intended country of use. The inline power adapter
provides two network ports. One is used to connect with
the user’s network interface; another is for connecting
with the SIP LD series.
3
2.4 Connecting the Handset
Plug one end of the coil cord into the RJ-10 receptacle on the
handset, and the other end into the receptacle on the left
side of the base. Place the handset into the cradle of the base.
2.5 Connecting the SIP LD Series to the network
WARNING! Risk of electrical shock! Dangerous voltages may
be present on the terminals of the network patch cable after
it is plugged into the network wall jack. Connect the patch
cable to the base first, then to the network wall jack.
2.5.1 SIP LD Series Version 1 (Local Power)
Connect Network to the Inline Power Adapter.
For this version, the network interface is assumed to NOT
be PoE compatible. For installation within North America,
Teledex provides an inline power adapter, which has two
network ports labeled “PHONE” and “LINE” respectively. (For
installation outside North America, please contact Teledex for
information on obtaining an approved inline power adapter.)
Plug one end of a network patch cable into the RJ-45 jack at
the top of the SIP LD series base. Connect the other end of
this cable to the RJ-45 jack labeled “PHONE” on the power
adapter. With a second network patch cable, plug one end
into the RJ-45 jack labeled “LINE” on the power adapter.
Connect the other end of this cable to the network wall jack
designated by the network administrator. Plug the power
adapter into an unswitched electrical outlet.
2.5.2 SIP LD Series Version 2 (PoE)
For this version, the network interface is assumed to be
PoE compatible, and power present at the Ethernet jack.
Plug one end of a network patch cable into the RJ-45 jack
at the top of the SIP LD series base. Connect the other end of
this cable to the network wall jack designated by
the network administrator.
2.5.3 SIP LD Series Version 3 (Dual power)
This version can work in either local power or PoE mode,
according to the different setup of the power jumpers
underneath the phone. When the phone is set to work in
the local power mode, connect to the network through
the inline power adapter as described in subsection 2.5.1.
When the phone is configured to work in PoE mode,
follow the instructions described in subsection 2.5.2.
CAUTION: Do not connect a standard telephone line cord
to the network RJ-45 jack. A standard telephone cord
connector can fit into the RJ-45 jack; however there is a
risk of damaging the equipment if this is done.
NOTE: The SIP LD series will not function until it has been configured and activated by the network administrator.
2.6 Connecting a PC to the SIP LD Series
If the installation environment has only one active network
jack, and another network device such as a PC must share the
same space, that device should be disconnected from the wall
jack and reconnected to the RJ-45 jack on the right side of the
SIP LD series.
CAUTION: The cable from the network wall jack must be
connected to the jack on the top of the phone, and if there is
4
a PC, it must be connected to the jack on the right side of
the phone. Otherwise the phone will not function.
2.7 Arranging the SIP LD Series on the Desk or Table
Route the network cable toward the rear of the base of
the phone, and attach the desk/wall mounting bracket by
inserting the tabs into the matching holes in the base. Place
the phone in a convenient location on the desk. Place the
handset on the cradle and confirm that the hookswitch is
properly depressed by the weight of the handset.
2.8 Mounting the SIP LD Series on a Wall
The SIP LD series can be mounted on a wall or other
vertical or near-vertical surface surface. To do so, the desk/
wall mounting bracket should be rotated 180 degrees,
compared to the desk mounting position. Use screws
(and anchors, if necessary) to match the hole pattern in
the bracket. The wall mounting clip (just underneath the
hookswitch) should be removed and re-installed after
rotating it 180 degrees.
To remove the clip, push it firmly toward the hookswitch.
The clip will hold the handset firmly in the cradle, and
allow it to depress the hookswitch when the phone is
not in use.
3. Configuring the SIP LD Series
Once the SIP LD series has been unpacked, set up on the
desk (or mounted to a wall), and connected to the network,
the network administrator should be notified that the unit
is ready for network configuration and activation. Once this
process has been completed, it will receive power from the
network and begin to function.
3.1 Starting Up
The SIP LD series will automatically begin to function once it
has been connected to the network, configured and activated
by the network administrator. The network will
detect the presence of the SIP LD series and supply power and
data to it (there is no on/off switch). Once
power has been applied, it takes about ninety (90) seconds
for the SIP LD series to be ready for configuration.
3.2 Online Configuation
The SIP LD series supports web-based online
configuration, and can be configured through another
PC. The default IP address for the phone is 10.10.1.254.
The network administrator should configure the SIP
LD series to another static IP address, or activate
the DHCP function through the online configuration.
3.2.1 Visit the Configuration Portal (Fig.2)
Use the link http://(IP Address):8080 to access the web portal
of the SIP LD series. The default IP address is 10.10.1.254, so
use the link http://10.10.1.254:8080. The username and password will be required to access to the web portal.
The default logins are (case sensitive):
Username: Admin
Password: iPhone06
Figure 2 shows the welcome page of the configuration portal.
The phone can be configured through the main menu
provided by this portal.
same phone number and configuration, and only Line 1 needs
to be configured. To change the line configuration via the
configuration portal, follow these steps:
NOTE: Except for upgrading the software online (decribed in
subsection 3.2.7), the configuration for the SIP LD series will
not be activated until the phone has been reset.
1. Click “Line 1 Info” or “Line 2 Info” on the left side menu.
2.
Input the required line-related information, such as phone
number, password, proxy server registration server,
message waiting number, MWI (Message Waiting
Indicator) server etc.
3. Click “Submit” to save changes.
Fig 2: Teledex iPhone Configuration Portal
3.2.2 Change Network Configurations (Fig.3)
To change network configurations via the configuration
portal, follow these steps:
1. Click “Network Info” on the left side menu.
2. There are two options for the item “Acquire IP Through”.
Select “Use DHCP” if you want to use DHCP to get an IP
address automatically. Otherwise, select “Use Static IP”.
3. Input the phone’s IP address and subnet mask if using static IP address. Input the gateway address, DNS server
address, SMTP server address and time zone.
4. Click “Submit”.
Fig 4: Line Configuration
3.2.4 Configure the Auto Dial Keys (Fig. 5)
To change auto dial configuration follow these steps:
1. Click “AutoDial Keys” on the left side menu.
2. Input the number associated with each auto dial keys.
3. Click “Submit” to save changes.
SMTP
Fig 3: Configuration of the Network
3.2.3 Set Line 1 and Line 2 Information (Fig. 4)
The SIP LD series supports two line appearances. If
the Multiple Line Appearance feature is disabled (refer to
section 3.2.6), then Line 1 and Line 2 should be configured
separately with different phone numbers. If the Multiple Line
Appearance feature is enabled, the two lines will share the
Fig 5: Configuration of Speed Dial Keys
5
3.2.5 Configure the Call Features (Fig. 6)
The configurable call features include Do Not Disturb, Call
Transfer, Call Forward No Answer, Call Forward Busy, Call
Waiting, and Call Forward All. A call forward extension
number can be pre-configured. A description of each
feature is below:
Do Not Disturb: The phone will not ring upon any
incoming call.
Call Transfer: Transfers the incoming call to another
number or extension.
Call Forward No Answer: The incoming call will be
forwarded if there is no answer for 18 (eighteen) seconds.
Call Forward Busy: Incoming calls will be immediately
forwarded if the phone is off hook.
Call Forward All: All incoming calls will be
forwarded automatically.
Call Waiting: Answers one incoming call, while placing
the existing call on hold.
Fig 7: Interop Configuration
3.2.7 Upgrade the Phone’s Firmware (Fig.8)
To update the phone’s firmware through the configuration
portal, click “Online Upgrade” on the left menu.
There are three update options from which to choose:
To enable or disable call features through the
configuration portal, follow these steps:
1. Set TFTP Address Only – Changes the TFTP address on the phone, leaving the rest of the firmware untouched.
1. Click “Call Features” on the left side menu.
2. Upgrade Application – Uploads new firmware from the
TFTP server, and reboots the phone.
2. Check the box of the feature you wish to enable,
or uncheck a box to disable it.
3. Fill in the call forwarding number, if the Call Forward
feature is enabled.
4. Click “Submit”.
3. Upgrade Data – Updates the data file, and reboots
the phone.
Choose one update option. Set the TFTP server address
provided by Teledex. Click “Submit” to upgrade the firmware.
NOTE: For update options 2 and 3, do not reboot the phone
manually. Wait for the phone to reboot itself.
Fig 6: Configuration of Call Features
3.2.6 Enable or Disable Multiple Line Appearances (Fig. 7)
The Multiple Line Appearance feature allows two lines to
share the same phone number and configuration. By default,
this feature is disabled. To enable or disable the Multiple Line
Appearance feature, follow these steps.
1. Click “InterOp Config” on the left menu.
2. Next to “Enable MLA”, select “Enable” or Disable”.
3. Click “Submit” to save your changes.
6
Fig 8: Online Software Upgrade
3.2.8 Reset the iPhone (Fig.9)
Use this configuration page to manually reset the phone.
NOTE: Except when upgrading the software online
(described in section 3.2.7), the phone should be reset
after modifying any configurations.
4.1.6 Adjusting the Handset Volume
Activate the handset by picking it up. With the handset
active, press the up or down arrow key to raise or lower
handset volume to the desired level.
4.2 Placing a Phone Call
There are various ways of initiating a phone call:
1. Lift the handset, listen for dial tone, and dial the phone number, using the keypad.
2. Press one of the LINE buttons (LINE 1 or LINE 2) activating the speakerphone. Dial the desired number.
3. Press the SPEAKER key. An available line will be activated, and you will hear dial tone. Dial the desired number.
Fig 9: Reset the Phone
3.2.9 Restore to Factory Configuration
To restore the phone to the factory (default) configuration
via the configuration portal, follow these steps:
1. Click “Restore to Factory” on the left menu.
2. Click “Restore” to restore factory settings.
4. Using the SIP LD Series IP Phone
After the SIP LD series has been configured and
activated by the network administrator, it is ready to use.
This section describes how to place, receive and manage
phone calls.
As soon as the IP-PBX recognizes a valid phone number, the
call is placed. The LINE 1 (or LINE 2) LED will be illuminated
during the call.
4.3 Receiving a Phone Call
When there is an incoming call, the ringer sounds, and the
LINE 1 LED flashes quickly.
To answer the call, do one of the following:
1. Pick up the handset and begin your conversation.
2. Without removing the handset, press the LINE 1 key, or the SPEAKER key, and speak in the d
irection of the base microphone.
The LINE 1 LED will be illuminated during the call.
4.1 Using the Handset and Speakerphone
To reject the call, simply press the FLASH key.
4.1.1 Using the Handset
To end the phone call, simply hang up the handset, or press
the SPEAKER key (if the speakerphone was used).
If the handset is connected and lifted out of the cradle
(releasing the hookswitch), it will take precedence over the
speaker or a headset (if connected). The speaker or headset
will be muted.
4.1.2 Using the Speakerphone
If the handset is in its cradle with no headset connected,
and the SPEAKER key is pressed, the speakerphone is
engaged, enabling handsfree calls. The SPEAKER LED
will be illuminated when this mode is active.
4.1.3 Switching between Handset and Speakerphone
When a call is in progress using the handset, press the
SPEAKER key, then hang up the handset. The SPEAKER LED
will flash, and the speakerphone will become active. If the
handset is not hung up within twelve (12) seconds, the call
will remain on the handset.
4.1.4 Adjusting the Ringer Volume
When the phone is either idle or ringing, press the up or
down arrow key to raise or lower ringer volume.
4.1.5 Adjusting the Speaker Volume
Activate the speaker through pressing the SPEAKER key. With
the speaker active, press the up or down arrow key to raise or
lower speaker volume to the desired level.
4.4 Using Mute
To prevent the other party on the line from hearing what is
being said on your end of a phone call, you may use the mute
function of the phone. To use Mute:
1. Press the MUTE key; the MUTE LED will illuminate.
2. To disengage Mute, press the MUTE key again.
While in Mute mode, you will be able to hear the other party,
but they will not hear you.
4.5 Using Hold
To place a call on Hold, press the HOLD key. The line will
remain engaged, but neither party will be audible to
each other. The active line’s LED will flash slowly while
Hold is activated.
To disengage Hold, and return to the call, press the LINE 1
(or LINE 2) key.
4.6 Using the Second Line
While engaged in a call on one of the lines, a call may come
in on the other line. To answer the second call, while keeping
the first call, press the HOLD key. The second call will be
connected. The LINE 1 LED will flash. To answer the incoming
call while hanging up the first call, simply press LINE 2.
7
4.7 Transferring a Call
5.2 Using Call Waiting
The SIP LD series can transfer an ongoing call to another
phone on the same network. To transfer a call:
This feature must be enabled and configured through the
configuration portal. If this process has been completed
(as described in subsection 3.2.5) you will hear the call
waiting alert tone during a call. Press FLASH to answer the
second call. The first call will be automatically placed on
hold. To switch between calls, press FLASH again.
1. Press the FLASH key. This will place the call on hold and
activate the second line.
2. Dial the number or extension of the party to whom you wish to transfer the call.
3. When the party answers, explain that the call is
being transferred, then press FLASH again. The call
will be transferred.
NOTE: It is not necessary to wait for the other party to
answer before transferring a call. To make a “blind transfer,”
simply press FLASH while the other party’s phone is ringing.
The other party will pick the call up as with any other
incoming call.
4.8 Redialing the Last Number
Lift the handset (or press LINE 1 or SPEAKER) and press the
REDIAL key. The last number you dialed will be redialed.
4.9 Pre-Dialing a Phone Number
Before lifting the handset from the cradle, or pressing the
LINE 1 or SPEAKER keys to get a dial tone, a phone number
can be pre-dialed. Simply dial the phone number by
pressing the number keys on the keypad, then lift the
handset (or press LINE 1 or SPEAKER) and the number will
be dialed. You will hear DTMF touch tones as audible
confirmation of the number being dialed.
4.10 DTMF Signaling
Telephone systems use DTMF (Dual Tone Multiple Frequency)
signaling for various functions, most prominently as audible
feedback to confirm the dialing process. Tones are
generated when the number keys are pressed. In addition
to dialing a phone number, DTMF signaling can be used
for various purposes when a call is in progress, such as for
entering an extension number, responding to voice prompts
by automated telephone answering systems, entering
passwords, PINs, account numbers, etc.
5. Advanced Features of the SIP LD Series
Advanced features of the SIP LD series include:
• Call Forwarding
• Call Waiting
• Speed Dialing
• Conference Calls
• Voice Mail
This section will explain these features.
5.1 Using Call Forwarding
This feature must be enabled and configured through
the configuration portal. If this process has been
completed (as described in subsection 3.2.5), incoming
calls can be automatically forwarded to the preset
forwarding phone number.
8
5.3 Speed Dialing
Speed dialing is useful for frequently-dialed numbers. Speed
dial keys are loacted above the dial pad. Numbers up to
thirty-two (32) digits in length may be stored.
5.3.1 Programming the Memory Dialing Keys Through
the Concealed STORE Key
The speed dial keys can be programmed not only through
the configuration portal (as described by subsection 3.2.4)
but also through the concealed STORE key.
The STORE key is concealed to deter unauthorized tampering.
With the clear plastic overlay and faceplate removed from the
phone, locate the STORE key as noted in the phone diagram
(Fig. 1). This recessed key is located above number ‘3’ on the
dial keypad. To program an auto-dial key:
1. Press the recessed STORE key and release it.
2. Enter the number or extension to be programmed.
3. Press the auto-dial key where the number is to
be stored.
4. Repeat the procedure as needed for additional
auto dial keys.
5.3.2 Configure the Timed Pause for the Speed Dial
The PAUSE key can be used to provide a timed pause
between dialed digits within a stored auto dial number.
The timing of the pause is programmable, with the factory
default set to one second. To change the pause timing:
1. Press the STORE key (see Fig. 1).
2. Press the PAUSE key (see Fig. 1).
3.
Press a number from 0 to 5 on the dial keypad.
The number selected will be the pause timing in
seconds (for example: pressing the ‘3’ key will insert
a 3 second pause).
4. Press the STORE key. The selected pause time is now
inserted into the dialing string.
5.3.3 Using the Speed Dial Keys
To place a call using the speed dialing feature, lift the
handset out of the cradle, or press the LINE 1 or SPEAKER
key, then press the desired speed dial key. The DTMF dialing
tones will be heard as the call is placed. Alternatively, you
may press the desired speed dial key, then lift the handset
(or press the LINE 1 or SPEAKER key) and the number will
be dialed, as in “pre-dialing.”
5.4 Three-Way Conference Calls
6.2.1 Disconnect From the Network
The SIP LD series supports three-way conference calling. The
CONF or FLASH key allows the user to include two
other parties in a three-way conversation. One three-way
conference could be done using only one line or both lines.
Unplug the network cable from the wall jack. Wait at least
fifteen (15) seconds, then plug the cable back into the same
jack. The phone will attempt to re-establish contact with the
IP-PBX. In many cases, this will restore normal operation.
5.4.1 Initiating a Three-Way Conference Call With One Line
2. Press FLASH.
WARNING: Risk of electrical shock! Dangerous voltages may
be present on the exposed terminals of the network patch
cable after it is plugged into the network wall jack.
3. Dial the third party, and wait for them to answer.
6.2.2 Disconnect the PC
4. Press FLASH again to join all three callers.
If there is a PC or other network device connected to the port
on the side of the phone, disconnect the cable to the PC or
device from the base, then perform the actions from section
6.2.1 (Disconnect From the Network).
1. Place or receive the first call.
5. To disconnect the third party and return to a two-party call, press FLASH again.
5.4.2 Initiating a Three-Way Conference Call With Two Lines
1. Place or receive the first call.
6.2.3 Check the Cords and Cables
4. Press the CONF key to join all three callers.
If the previous two steps do not solve the problem, all of
the cords and cables (including handset cord and headsets)
should be disconnected, inspected for dirt or corrosion,
and reconnected.
Advanced Features
7. Appendix A – European Requirements
5.5 Using Voice Mail
This product complies with the following CE requirements:
2. Place that call on hold by pressing the HOLD key.
3. Press LINE 2, and place or receive the second call.
5.5.1 Message Waiting
If the red message waiting indicator is flashing slowly, voice
mail messages are waiting to be retrieved.
5.5.2 Retrieving Messages
Press the MESSAGE key. The speakerphone will be activated
(unless the handset is off-hook) and the phone calls the
voice mail server. Follow the voice prompts for entering
your password, listening to, saving and deleting messages.
When all unheard messages have been listened to or
deleted, the message waiting light will turn off.
NOTE: Message waiting number must be pre-configured
before using this feature. (Refer to subsection 3.2.3)
6. Care and Troubleshooting
Your Teledex SIP LD series IP phone will provide years of
trouble-free service, particularly if it is maintained in an
indoor environment.
6.1 Cleaning the SIP LD Series
Dust or deposited materials caused by normal handling of
the phone handset or base should be removed occasionally
to ensure optimal performance. Use a soft cloth moistened
with water to wipe the plastic exterior parts.
CAUTION: Do not use solvents, powders or spray
cleansers that may leak into the electronic components
and cause damage.
6.2 In Case of Trouble
If the SIP LD series does not seem to function as
expected, there are several troubleshooting techniques
that may be tried before calling the network administrator.
89/336/EEC EN 55024
EN 55022 EN 60950 (CB SCHEME)
8. Appendix B – SIP LD Series Product Specifications
TELEPHONE TYPE
Two-line, Voice over Internet Protocol network terminal
Call Manager Protocol
SIP (Session Initiation Protocol)
Dial Keypad
12 keys: Numeric 1 – 9, 0, *, #
Capable of DTMF signaling
Speed (Memory) Dialing Keys
SIP LD4105S and SIP LD4205S: 5 keys
SIP LD4110S and SIP LD4210S: 10 keys
Line Keys
Hold, Line 1, Line 2, Conference, Mute, Speaker
Function Keys
Messages, Volume (Up/Down), Soft keys on sccreen
LEDs: Message Waiting, Line 1, Line 2, Conference, Mute,
Speaker
Network Connection
Ethernet 10/100BaseT, RJ-45 connector, 2 ports
(One supporting PoE)
Uplink to network and switch
Pass-through, switched, for local PC
Audio Input/Output
Handset (included), RJ-10 connector
Microphone (built-in)
Speaker (built-in)
9
Power
Power supplied from network switch (PoE), or from
approved local power adapter
9. Appendix C – Product Support
If you need technical assistance with this product,
please contact Teledex via one of the following methods:
Telephone
408.363.3100
Dimensions & Weight
W: 9.0” (22.86 cm)
D: 8.5” (21.59 cm)
H: 6.47” (16.43 cm) full upright position
3.97” (10.08 cm) full flat position
Email
[email protected]
Internet
www.teledex.com
Wt: 2.80 lb. (1.27 Kg)
If you feel that the information contained herein does not
represent the way your product is operating, check our
website (www.teledex.com) for the latest version
of this documentation.
Fig 1: SIP LD Series Diagram
10/100 Port
(LAN In)
10/100 Port
(For PC)
USB Port
Color Touch
Display
Branding Badge
Speed Dial Keys
Headset Jack
Microphone
Hold
Volume Up/Down
10
Line 2
Line 1
Mute
Messages
Conference Speaker &
Headset
One year warranty for Teledex SIP Telephones and Hybrid Display telephones
Hardware Warranty: Subject to the terms and conditions of this Warranty, Teledex LLC
warrants that, as long as the initial registered end user owns it, the hardware of this
telephone product will perform according to Teledex LLC’s published specifications. If this
telephone fails to perform to our specifications at any time during the warranty period, we
will, at our option, repair or replace this telephone at no additional charge, except as set
forth below. Repair parts or replacement telephones may be either new or reconditioned. All
replaced parts and replaced telephones become our property. Teledex LLC reserves the
right to replace a telephone with a compatible later model with at least equivalent
performance or refund a sum not to exceed Teledex LLC National Account Pricing enforced
at time of original purchase.
WARRANTY PERIOD:
One Year From Date of Shipment from Teledex
WARRANTY EXCLUSIONS
This warranty does not cover, or may be voided by, the following:
• Any special costs or special requirements of jurisdictions other than the United States
• Any damage resulting from abuse or misuse (i.e. liquid spills, abuse, or customer
modification - warranty label broken) of the telephone
• Any damage caused by failure to follow operating or installation instructions provided with
the telephone
• New faceplates or damage to the faceplate or discoloration of the telephone
• Any damage resulting from improper connection of the telephone to other equipment
• A telephone used in a harsh or corrosive environment
• Incompatibility with anything other than the IP-PBX for which the telephone was
purchased
• Cords, connectors and replaceable batteries
• Force majeure
• Damages in transit
• Any damage resulting from unauthorized modification or repair of the telephone
Copyright 2008 Teledex LLC. All Rights Reserved. Information and specifications subject to change
without notice.
• Costs incurred in removing the telephone; shipping the telephone to TELEDEX LLC for
repair or replacement, including without limitation customs duties or other import or export
charges; costs of reinstallation of the telephone; excess shipping costs incurred by TELEDEX
LLC if the customer requests express shipping of a repaired telephone, replacement
telephone or repair parts.
• Unauthorized modification of telephones covered under this warranty will void the terms
of this warranty, including replacement of handsets with handsets not manufactured by
Teledex.
• This warranty includes the telephone hardware only and does not include any hardware
or software, or any devices properly connected to, and not part of the telephone.
NON-TRANSFERABILITY
This limited warranty is directed solely to the initial registered end user and is transferable
by the initial purchaser only with the prior written consent of TELEDEX LLC
TELEDEX LLC EXPRESSLY DISCLAIMS ALL WARRANTIES TO THE BUYER EXCEPT THE
LIMITED WARRANTY SET FORTH HEREIN, INCLUDING, WITHOUT LIMITATION, ANY AND ALL
IMPLIED WARRANTIES OF MERCHANTABILITY AND FITNESS FOR A PARTICULAR
PURPOSE.IF THIS TELEPHONE DOES NOT PERFORM ACCORDING TO SPECIFICATIONS AS
WARRANTED ABOVE, THE BUYER’S SOLE REMEDY SHALL BE REPAIR OR REPLACEMENT AS
PROVIDED ABOVE. IN NO EVENT WILL TELEDEX LLC BE LIABLE TO BUYER OR ANY OTHER
PARTY FOR ANY DAMAGES, INCLUDING LOST PROFITS, LOST REVENUE, LOSS OF USE OR
COST OF SUBSTITUTE EQUIPMENT ARISING OUT OF THE USE OR INABILITY TO USE THIS
TELEPHONE, EVEN IF THE BUYER HAS ADVISED TELEDEX LLC OF THE POSSIBILITY OF
SUCH DAMAGES.IN NO EVENT SHALL ANY LIABILITY OF TELEDEX LLC TO THE BUYER OR
ANY OTHER PARTY IN CONNECTION WITH THE TELEPHONE EXCEED THE PURCHASE PRICE
OF THE TELEPHONE. THIS LIMITED WARRANTY GIVES THE BUYER SPECIFIC LEGAL
RIGHTS. THE BUYER MAY ALSO HAVE OTHER RIGHTS WHICH VARY FROM JURISDICTION
TO JURISDICTION. TELEDEX RESERVES THE RIGHT TO TERMINATE OR MODIFY THIS
WARRANTY PROGRAM AS TO PRODUCTS SOLD AFTER SUCH TERMINATION OR
MODIFICATION.
Software Warranty: The Teledex iPhone End User License Agreement sets forth the terms
and conditions of warranty for the software on the Teledex iPhone SIP telephone and the
Teledex iPhone Hybrid Display telephones.
Copyright 2008 Teledex LLC. All Rights Reserved. Information and specifications subject to change
without notice.
TELEDEX iPhone END-USER LICENSE AGREEMENT
IMPORTANT: READ CAREFULLY. This End User License Agreement is a legal
agreement between you (either an individual or a single entity) and Teledex, LLC for the
TELEDEX iPhone SOFTWARE.
“TELEDEX” includes Teledex, LLC and its divisions, subsidiaries, successors, parent
companies and their employees, partners, principals, agents and representatives, and
any third-party providers or sources of information or data.
“EULA” means this End User License Agreement.
“SOFTWARE” means any APIs, device drivers, software or firmware embedded in or
loaded onto the PRODUCTS and may include associated media, printed materials,
"online" or electronic documentation, and Internet-based services. SOFTWARE also
includes any updates, upgrades, modified versions and/or additions.
“PRODUCTS” means TELEDEX-provided products, or any separate computer software
developed by TELEDEX or its suppliers and any associated media, printed materials,
online or electronic documentation.
“HARDWARE” means TELEDEX-provided products on or in which the SOFTWARE will
reside, run or operate.
By installing, copying or otherwise using the PRODUCTS in your facility, you agree to be
bound by the terms of this EULA. If you do not agree to the terms of this EULA, you may
not use the SOFTWARE.
1. SOFTWARE LICENSE. The SOFTWARE is licensed, not sold. This EULA grants you
the following non-exclusive rights: You may use the SOFTWARE in object code form
only, in accordance with the applicable user documentation provided, and solely in
conjunction with the HARDWARE it was purchased with. Any references to “sales” or
“purchase'' of the SOFTWARE refers merely to the HARDWARE upon which the
SOFTWARE resides, and not to the SOFTWARE itself, which is only licensed under this
Agreement.
2. REPRODUCTION PROHIBITED. You may not reproduce copies of the SOFTWARE.
3. OWNERSHIP. As between the parties, TELEDEX retains title to and ownership of
and all proprietary rights with respect to the SOFTWARE and all copies and portions of
the SOFTWARE whether or not incorporated into or with other software. The
SOFTWARE is protected by copyright and other intellectual property laws and treaties.
TELEDEX and its suppliers own the title, copyright, and other intellectual property rights
in the SOFTWARE.
4. DESCRIPTION OF OTHER RIGHTS AND LIMITATIONS. You may not, and you
shall not allow third parties to, reverse engineer, decompile, or disassemble the
SOFTWARE or attempt to reconstruct or discover any source code or underlying ideas
Copyright 2008 Teledex LLC. All Rights Reserved. Information and specifications subject to change without notice.
or algorithms. You may not, and you shall not allow third parties to, modify the
SOFTWARE or incorporate the SOFTWARE into, or with, any other software or create
derivative works of any part of the SOFTWARE. The SOFTWARE is licensed as a single
product to be used in conjunction with the HARDWARE. The SOFTWARE'S component
parts may not be separated for use apart from the HARDWARE. You may not, and you
shall not allow third parties to, remove any identification, copyright or other notices.
The SOFTWARE may contain components that enable or facilitate the use of certain
Internet-based services. You acknowledge and agree that TELEDEX may automatically
check the version of the SOFTWARE and/or its components that you are using and may
provide updates or upgrades to the SOFTWARE that will be automatically downloaded
to the PRODUCTS. TELEDEX is not responsible for the links to or content of any third
party Internet sites accessed by the PRODUCTS.
You may permanently transfer all of your rights under these rules provided the recipient
agrees to the terms of this EULA.
5. IMPROPER USE. The SOFTWARE is not designed, manufactured or intended for
use in hazardous environments requiring fail-safe performance (such as, without
limitation, the operation of nuclear facilities, aircraft navigation or communication
systems, air traffic control, medical device and life support machines, or weapons
systems) in which the failure of the SOFTWARE could lead to death, personal injury or
severe physical and environmental damage (“Improper Use Activities''). You agree not to
use the SOFTWARE in connection with Improper Use Activities.
6. COPYRIGHT. The SOFTWARE is protected by copyright laws as well as other
intellectual property laws and treaties. All title, copyrights and all other intellectual
property rights in and to the SOFTWARE (including but not limited to any images,
incorporated into the SOFTWARE), any accompanying printed materials and any copies
of the SOFTWARE are owned by TELEDEX, or its suppliers. The SOFTWARE is
protected by copyright laws and international treaty provisions. You must treat the
SOFTWARE like any other copyrighted material.
7. TRADEMARKS. Teledex, the Teledex logo, Teledex iPhone, and the Teledex iPhone
logo, are trademarks of TELEDEX, in the United States and/or other countries. All rights
are reserved. All other trademarks in the SOFTWARE not owned by TELEDEX are the
property of their respective owners.
8. EXPORT REGULATIONS. The SOFTWARE is subject to the export laws of the
United States of America. By using the SOFTWARE you agree to comply with those
laws.
9. DISCLAIMER OF WARRANTY AND LIMITATION OF LIABILITY.
EXCEPT FOR ANY WARRANTIES OFFERED TO YOU WITH THE PURCHASE OF
THE HARDWARE IN WHICH THE SOFTWARE IS EMBEDDED, TELEDEX PROVIDES
THE SOFTWARE “AS IS” WITHOUT WARRANTY OF ANY KIND, AND TELEDEX
EXPRESSLY DISCLAIMS ALL OTHER WARRANTIES FOR THE SOFTWARE, EITHER
EXPRESS OR IMPLIED INCLUDING, WITHOUT LIMITATION THE IMPLIED
WARRANTIES OF MERCHANTABILITY, FITNESS FOR A PARTICULAR PURPOSE
OR NONINFRINGEMENT. THE ENTIRE RISK ARISING OUT OF USE OR
PERFORMANCE OF THE SOFTWARE REMAINS WITH YOU. Some jurisdictions do
Copyright 2008 Teledex LLC. All Rights Reserved. Information and specifications subject to change without notice.
not allow the exclusion of implied warranties so the above exclusion may not apply to
you. You may have other rights that vary from jurisdiction to jurisdiction.
THE ENTIRE RISK AS TO THE RESULTS AND PERFORMANCE OF THE
SOFTWARE IS ASSUMED BY YOU. TELEDEX SHALL NOT HAVE ANY LIABILITY TO
YOU OR ANY OTHER PERSON OR ENTITY FOR ANY INDIRECT, INCIDENTAL,
SPECIAL OR CONSEQUENTIAL DAMAGES WHATSOEVER INCLUDING BUT NOT
LIMITED TO LOSS OF REVENUE, PROFIT OR OPPORTUNITY, LOST OR DAMAGED
DATA OR OTHER COMMERCIAL OR ECONOMIC LOSS EVEN IF YOU HAS BEEN
ADVISED OF THE POSSIBILITY OF SUCH DAMAGE. OUR MAXIMUM AGGREGATE
LIABILITY TO YOU FOR DIRECT DAMAGES SHALL NOT EXCEED THE AMOUNT
PAID BY YOU FOR THE SOFTWARE. Because some states/jurisdictions do not allow
the exclusion or limitation of liability for consequential or incidental damages, the above
limitation may not apply to you.
10. TERM. This EULA is effective until terminated. You may terminate the EULA at any
time by returning or destroying all copies of the SOFTWARE and related documentation.
Your rights under this EULA will terminate automatically if you fail to comply with any
term or condition of the EULA. You agree that upon such termination, you will return or
destroy all copies of the SOFTWARE and related documentation. The provisions of this
EULA shall survive termination.
11. GENERAL.
A) Governing Law. You agree that this EULA is governed by the laws of the State of
California, without reference to conflicts of law principles or the United Nations
Convention on Contracts for the international Sale of Goods. The sole jurisdiction and
venue for actions related to the subject matter of this Agreement shall be California. Both
parties consent to the jurisdiction of such courts and agree that process may be served
in the manner provided in this Agreement for giving notices or otherwise as allowed by
California state or U.S federal law. In any action to enforce this Agreement, the
prevailing party shall be entitled to costs and attorneys' fees.
B) Severability. If any provision of this EULA is held to be invalid, illegal or
unenforceable, it shall be severed and the remaining provisions shall continue in full
force and effect.
C) Inspection. TELEDEX shall have the right, at its own expense and upon reasonable
written notice to you, to periodically inspect your premises and such documents as
TELEDEX may reasonably require, for the exclusive purpose of verifying your
compliance with your obligations under this EULA.
D) Confidentiality. Except as expressly allowed by this EULA, you will not use or
disclose any SOFTWARE or related technology, idea, algorithm or information except to
the extent you can document that it is generally available for use and disclosure by the
public without charge or license. You recognize and agree that there is no adequate
remedy at law for a breach of this section, that such a breach would irreparably harm
TELEDEX and that TELEDEX is entitled to equitable relief (without need to post a bond)
with respect to any such breach or potential breach in addition to any other remedies.
E) Information gathering. You agree that from time to time, TELEDEX may gather
Copyright 2008 Teledex LLC. All Rights Reserved. Information and specifications subject to change without notice.
non-personally identifiable information from your use of the HARDWARE including, but
not limited to, your Internet protocol addresses, serial numbers, the configuration of the
HARDWARE, usage statistics, etc. TELEDEX shall solely use the information internally,
and may give access to such information to its third party service providers solely for
such third party service providers to provide services for TELEDEX.
F) Entire Agreement and Waiver. The EULA is the entire agreement regarding your
use of the SOFTWARE, superseding any other agreement or discussions oral or written.
At no time shall a failure or delay in enforcing any provisions exercising any option or
requiring performance be construed to be a waiver.
Copyright 2008 Teledex LLC. All Rights Reserved. Information and specifications subject to change without notice.