1
1
ET
ER
M
AL
TI
H
AT
C
W
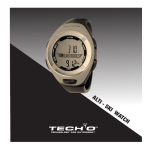
Tech4o Altimeter Watch
1.0 Introduction/Features
Owner's Manual
Content
1.0 Introduction/Features
1.1 Button Functions
1.2 Major Function Modes
2.1 Time / Date Mode - Setting
3.0 Daily Alarm Mode - Display
3.1 Daily Alarm Mode - Setting
4.0 Countdown Timer Mode Display
4.1 Countdown Timer Mode Setting
4.2 Countdown Timer Mode Using the Countdown Timer
5.0 Stopwatch Mode - Display
5.1 Stopwatch Mode - Setting
5.2 Stopwatch Mode Using the Stopwatch
6.0 Stopwatch History Mode Display
6.1
7.0
7.1
8.0
8.1
8.2
9.0
9.1
9.2
10.0
10.1
10.2
11.0
Stopwatch History Mode Navigating Saved Data
Alternate Time Zone Mode Display
Alternate Time Zone Mode Setting
Altimeter Mode - Display
Altimeter Mode - Setting
Altimeter Mode Reading the Altimeter Data
Barometer Mode - Display
Barometer Mode - Setting
Barometer Mode Reading the Barometer Data
Temperature Mode - Display
Temperature Mode - Setting
Temperature Mode Reading the Temperature Data
Limited Warranty
2
• Altimeter
• Barometer
• Temperature
• Current time / date
• Daily alarm
• 5 Stopwatches
• Stopwatch history log
• Countdown timer
• Second time zone setting
To make the most of your purchase, be sure to carefully read this
manual and follow the included flow chart. Keep them safe for
future reference. Please take the following precautions in using
and caring for your new Tech4o Altimeter Watch:
• Avoid exposing the watch to extreme conditions
• Avoid rough use and/or severe impacts
• Occasionally clean the watch with a soft and moistened cloth
• Store the watch in a clean, dry place when not in use for
an extended period of time.
3
1.1 Button Functions
1.2 Major Function Modes
Mode Button: [M]
Selects among the main modes of
the watch.
Press any button to wake the watch from sleep mode. Press the
[M] button to toggle among the main function mode.
Set/+ Button: [s/+]
Accesses setting mode and
increase/change digits during
setting display. Also sets
intermediate/lap times in
stopwatch mode.
On/Off Button: [o/o]
Confirms selections, start/stop the
stopwatch, and lock/unlock altitude.
2 Time / Date Mode - Display
• To view time mode, press the [m] button
until the mode indicator displays the
clock symbol.
• When Time / Date mode is selected, the
watch will display the day of the week
and current time on the top row and
the current date or temperature on the
bottom row.
Option/- Button: [o/-]
Decreases/changes digits during setting display and browse
through sub-modes
Light Button: [L]
Illuminates the watch face for use during low light conditions.
4
5
2.1 Time / Date Mode - Setting
3.0 Daily Alarm Mode - Display
• In Time / Date mode press and hold the Set/+ button [s/+] for
two seconds.
• The 12 H / 24 H indicator will flash. Press [o/-] button to select
between a 12 or 24 hour clock feature. Press the [o/o] button
to confirm.
• The hours indicator will flash. Press [s/+] and [o/-] buttons to
select the correct hour. Press the [o/o] button to confirm.
• The minutes indicator will flash. Press [s/+] and [o/-] buttons to
select the correct minutes. Press the [o/o] button to confirm .
• The month indicator will flash.Press [s/+] and [o/-] buttons to
select the correct month. Press the [o/o] button to confirm.
• The days indicator will flash. Press [s/+] and [o/-] buttons to
select the correct day. Press the [o/o] button to confirm .
• The year indicator will flash. Press [s/+] and [o/-] buttons to
select the correct year. Press the [o/o] button to confirm.
• Date / Time Mode quick set is now complete.
6
This watch includes a daily alarm. When the
daily alarm is ON, the alarm will sound for
30 seconds at the alarm time every day.
• To view the daily alarm display, press the
[o/-] button once while in time/date mode.
• When the daily alarm is turned on, the
watch will display alarm on the main
screen.
3.1 Daily Alarm Mode - Setting
• To set the daily alarm, press and hold the [s/+] button for 2
seconds. When in the alarm sub-mode the hour will flash. Press
[s/+] and [o/-] buttons to adjust the hours. Press the [o/o]
button to confirm.
• At this time, the minutes will flash. Press [s/+] and [o/-] buttons
to adjust the minutes. Press the [o/o] button to confirm.
• Press the [o/o] button again to turn the alarm on or off.
7
4.0 Countdown Timer Mode - Display
This watch includes a countdown timer.
• To view the countdown timer, press [o/-]
button twice while in time/date mode.
• When the countdown timer is selected,
the watch will display TIMER and the
countdown time in the top row and the
current time in the bottom row.
4.1 Countdown Timer Mode - Setting
• To set the countdown timer, press and hold the [s/+] button for
2 seconds. The hours will flash.
• Press [s/+] and [o/-] buttons to adjust the hour. Press the [o/o]
button to confirm .
• At this time, the minutes will flash.
• Press [s/+] and [o/-] buttons to adjust the minutes. Press the
[o/o] button to confirm .
• Press [s/+] and [o/-] buttons to adjust the seconds. Press the
[o/o] button to confirm .
The countdown timer is now set.
8
4.2 Countdown Timer Mode - Using the Countdown Timer
• When in countdown timer mode, press [o/o] to start the
countdown.
• Press the [o/o] button again to stop the countdown.
• Press the [o/o] button again to resume the countdown.
• When the countdown timer expires the alarm will sound for 30
seconds and timer will reset to the last countdown timer setting.
5.0 Stopwatch Mode - Display
This watch features 5 individual stopwatch counters.
• To view the stopwatch, press the [o/-]
button three times while in time/date
mode.
• When the stopwatch is selected, the
watch will display StP 1 in the top row
and 0:00 in the bottom row.
• The measuring unit of the stopwatch is
1/100 seconds for the first 59 minutes,
59.99 seconds. After reaching 1 hour of cumulative time, the
continues
9
measuring unit changes to 1 second and the measuring range is
99 hours, 59 minutes, 59 seconds.
5.1 Stopwatch Mode - Setting
• In stopwatch mode, press and hold the [s/+] button for two
seconds.
• The LAP/INT indicator will flash.
• Both LAP and intermediate settings will record time the same
way, but the way the information is displayed will vary. The
LAP setting will show the just the last lap time when the [s/+]
or [o/o] buttons are pushed and in the stopwatch history. The
Intermediate setting will show the cumulative intermediate times
when the [s/+] or [o/o] buttons are pushed while in stopwatch
history mode.
• Press the [o/-] button to select between Lap and int settings.
Press the [o/o] button to confirm.
5.2 Stopwatch Mode - Using the Stopwatch
How toPress Stopwatch:
• When in stopwatch mode, press the [o/o] button to start the
10
stopwatch. The top row will now display ------------- and the
bottom row will display the current stopwatch time.
• Press the [o/o] button again to stop the stopwatch. The top and
bottom rows will now display current stopwatch time.
• Press the [o/o] button again to resume the stopwatch. The top
row will now display ------------- and the bottom row will
display the current stopwatch time.
• While the stopwatch is running, users may enter lap/int times
by pressing the [s/+] button. The top row will now display
first lap/int time and the bottom row will display the cumulative
stopwatch time.
• After each successive lap/int time is entered, the top row will
display:
* the cumulative time of all the entered intermediate times if the
int setting was selected or;
* the last lap time if the lap setting was selected.
• The bottom row will display the cumulative stopwatch time.
• When the stopwatch is stopped, press the [o/-] button to
proceed to the stopwatch history mode or press [s/+] to
continues
11
proceed to the next available stopwatch to begin recording
another set of times following the steps above. [ Note that there
are 5 available stopwatches]. More stopwatch information can
be recorded by clearing stopwatch data in the stopwatch history
mode or by recording over stopwatch #5.
6.0 Stopwatch History Mode - Display
The Stopwatch History mode allows you to
access and view data at the end of an event.
• To access the stopwatch history mode,
press the [o/-] button 4 times while in time/
date mode.
• When the stopwatch history mode is
selected the watch will display St HSt on
the top row and either the current home
time, or temperature depending on your selection .
• To view saved stopwatch information, press the [o/o] button
in stopwatch history mode to view the desired history log
[St1, St2…].
• Press the [o/-] button to confirm and view the desired data.
• Continue pressing the [o/-] button to scroll through the
different lap/int times for that stopwatch log.
• Press the [o/o] button any time to view a different stopwatch
log.
• To clear all saved stopwatch data, press and hold the [s/+]
button while selecting a stopwatch log to view.
7.0 Alternate Time Zone Mode - Display
• To view the alternate time zone
display, press the [o/-] button 5 times
while in time/date mode.
• When the alternate time zone mode
is selected the watch will display the
alternate time zone time in the top row
and the home time in the bottom row.
6.1 Stopwatch History Mode - Navigating Saved Data
How to retrieve saved stopwatch information:
12
13
the current home time or temperature in the bottom row. For
more on interpreting the barometric TREND graph, please refer
to section 9: Barometer Mode.
7.1 Alternate Time Zone Mode - Setting
• In the alternate time zone mode, press and hold the Set/+
button [s/+] for two seconds.
• The hours will flash. Press [s/+] and [o/-] buttons to select the
correct hour, making sure to account for a.m. A, or p.m. P. Press
the [o/o] button to confirm.
• The minutes will flash. Press [s/+] and [o/-] buttons to select
the correct minutes. Press the [o/o] button to confirm.
• The alternate time zone is now set.
8.0 Altimeter Mode - Display
Altimeter mode provides information and trends based on the
user’s altitude relative to sea level.
• To view the altimeter, press the mode
[m] button until the mode indicator
displays A.
• In altimeter mode, the watch will display
both a 24h & 2h barometric TREND and
the current altitude on the top row, and
14
8.1 Altimeter Mode - Setting
• Proper calibration is important to ensure accurate altimeter
readings.
• To set a reference, press and hold the [s/+] button for 2
seconds. [Note: Reference altitude is a know value that the
watch can use as a baseline.]
• Press [s/+] and [o/-] buttons to adjust the reference altitude
to your current altitude. Refer to a local topographical map
to determine your current altitude. Press the [o/o] button to
confirm.
• The unit of measure will now flash. Press [o/-] button to switch
between feet and meters. Press the [o/o] button to confirm.
• Altimeter mode also has an optional lock feature.
• Press the [o/o] button to lock altimeter mode and prevent any
accidental recordings of changes in altitude.
15
8.2 Altimeter Mode - Reading the Altimeter Data
• Current Altitude
* Current altitude is the default display in altitude mode. This is
the first feature displayed when selecting altitude mode.
• Maximum Altitude [1st sub-mode]:
* In altitude mode, press the [o/-] button once to view the
maximum altitude reached since the maximum altitude reading
was last reset.
* The word MAX is displayed to the right of the trend graph.
* Press and hold the [s/+] button for 2 seconds to reset the
maximum altitude.
* Proceed to the Daily Ascent feature by pressing the [o/-]
button.
• Daily Ascent [2nd sub-mode]:
* This feature displays the user’s total ascent for the day. The
daily ascent feature will automatically reset at midnight.
* In the daily ascent mode, the word DAY will be displayed to
the left of the trend graph and the up arrow will be displayed
in the mode indicator.
16
* Proceed to the Daily Descent feature by pressing the [o/-]
button.
• Daily Descent [3rd sub-mode]:
* This feature displays the user’s total descent for the day. The
daily descent feature will automatically reset at midnight.
* In the daily descent mode, the word DAY will be displayed to
the left of the trend graph and the down arrow will be displayed
in the mode indicator.
* Press the [o/-] button to return to the current altitude feature.
* Press the [m] button to exit altitude mode and select
barometer.
9.0 Barometer Mode - Display
Barometer mode provides information
based on changing barometric
pressure.
• To view barometer mode, press the
[m] button until the mode indicator
shows B.
• In barometer mode the watch display
17
continues
shows TREND, 24h, 2h, and the current barometric pressure
on the top half of the display and the current time on the bottom
row.
9.1 Barometer Mode - Setting
• In barometer mode, press and hold [s/+] button for 2 seconds.
• The current barometric pressure will flash.
• We recommend that you do NOT change the sea level pressure SE.
• Press the [o/o] button to confirm .
• The unit of measure will flash. Press [o/-] button to select
between inHg and mbar. Press the [o/o] button to confirm .
9.2 Barometer Mode - Reading the Barometer Data
The barometer trend graph is divided into two
segments, 24h and 2h. The dashed lines
display changes in barometric pressure in 24
and 2 hour intervals. See the example:
This example shows how the barometric pressure
was on the rise between 24 - 12 hours ago,
and has leveled off in the last 12 hours. The graph also shows
18
that in the last two hours, the pressure was relatively flat for the
first hour and has begun to rise again in the last hour.
Barometer mode displays several useful features:
• Current Barometric Pressure [The default display in barometer
mode]:
* This feature displays the actual current barometric pressure.
* Press the [o/-] button to advance to the 24h Barometric
Difference feature.
• 24h Barometric Difference:
* This feature displays the change in barometric pressure over
the last 24 hours. [24 will blink]
* To reset this feature, press and hold the [s/+] button for 2 sec.
* Press the [o/-] button to advance to the Maximum Daily
Barometric Pressure feature.
• Maximum Daily Barometric Pressure:
* This feature displays the maximum barometric pressure for
the current day.
* This feature will automatically reset at midnight.
* Press the [o/-] button to advance to the Minimum Daily
Barometric Pressure feature.
continues
19
• Minimum Daily Barometric Pressure:
* This feature displays the minimum barometric pressure for the
current day.
* This feature will automatically reset at midnight.
10.0 Temperature Mode - Display
Temperature mode records and displays
critical information about changing
temperature conditions.
• To view temperature mode, press the
[m] button until the mode indicator
displays T.
• In temperature mode, the watch will
display barometric TREND and the
current temperature on the top rows,
and the current home time or temperature in the bottom row.
20
10.1 Temperature Mode - Setting
• In temperature mode, press and hold the [s/+] button for 2
seconds.
• The unit of measure will flash.
•Press [o/-] button to select between ˚F and ˚C.
• Press the [o/o] button to confirm .
• The time in the bottom row will flash.
• Use [o/-] button to select between displaying current time, or
current temperature along the bottom of the watch in all other
modes.
10.2 Temperature Mode - Reading the Temperature Data
• The temperature mode displays several useful features.
• Current Temperature: [The default display for temperature
mode.]
* This feature displays the current temperature of the user’s
surroundings.
* Surrounding temperatures are generally 10 - 15˚F / 5 - 8˚C
cooler than watch readings due to the effects of the user’s
body temperature.
continues
21
* For more accurate readings, remove the watch from your
wrist and allow 5-10 minutes for sensors to adjust.
* Press [o/-] to proceed to the 24h Daily Temperature Difference
feature.
• 24h Daily Temperature Difference:
* This feature displays the change in temperature over the
last 24 hours.
* To reset this feature, press and hold the [s/+] button for
2 seconds.
* Press the [o/-] button to advance to the Maximum Daily
Temperature feature.
• Maximum Daily Temperature:
* Displays the maximum temperature for the current day.
* This feature is automatically reset at midnight.
* Press the [o/-] button to advance to the Minimum Daily
Temperature feature.
• Minimum Daily Temperature:
* This feature displays the minimum temperature for the
current day.
* This feature is automatically reset at midnight.
22
11.0 Limited Warranty:
What is covered? Johnson Outdoors Inc. warrants your Tech4o Watch to be free from
defects in materials or workmanship, and to perform accurately, for one (1) year
provided it has not been damaged by the causes described in the next paragraph.
What is not covered? Normal wear, and damage due to the abrasion, melting, misuse,
alteration, and abuse (including any disassembly) are not covered by this warranty.
Digital Watches are water resistant, they are not waterproof. Damage resulting
from excessive exposure to water, heat or cold is not covered under this warranty.
Additionally, the battery is not covered under the warranty. Always have the battery
replaced by an authorized repair center or jewler. Should you do the work yourself, you
will void this warranty.
How to obtain warranty service or repair of your watch: Should a defect covered by
this warranty appear in your watch, call our Consumer Service Department toll-free
at 1.800.572.8822 for return authorization and instructions. (You must pay the
cost of returning the unit to us). If the product is found to be defective in material or
workmanship, we shall, at our option, either repair or replace it without charge, and will
pay the cost of return shipment to you. If repairs are required to correct any problem
not covered by this warranty, we will contact you for approval to proceed and to charge
you for the components repaired or replaced, plus a nominal charge for labor.
THERE ARE NO EXPRESS WARRANTIES ON YOUR WATCH THAT ARE NOT CONTAINED
IN THIS DOCUMENT. IN NO EVENT SHALL WE BE LIABLE FOR INCIDENTAL OR
CONSEQUENTIAL DAMAGES ARISING FROM USING OR LOSS OF USE OF YOUR
WATCH.
Some states do not allow exclusion or limitation of incidental or consequential damages,
so the above exclusion may not apply to you.
This warranty gives you specific legal rights, and you may have other rights which vary
from state to state.
23
www.tech40.com
U.S.A.: Johnson Outdoors Inc.
625 Conklin Road, PO Box 966
Binghamton, NY 13902
Phone: 607.779.2222
Toll Free 1.800.572.8822
Fax:
607.779.2293
Canada: Johnson Outdoors Canada Inc.
4180 Harvester Road Burlington,
Ontario, Canada L7L 6B6
Phone: 905.634.0023
Toll Free: 1.800.263.6390
Fax:
1.800.661.1170
24
REV. A 10.06