1
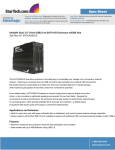
InfoSafe Mobile Drive Enclosure
SAT2510U2
SAT2510BU2
IDE2510U2
FCC Compliance Statement
This equipment has been tested and found to comply with the limits for a Class B digital
device, pursuant to part 15 of the FCC Rules. These limits are designed to provide reasonable
protection against harmful interference in a residential installation. This equipment generates,
uses and can radiate radio frequency energy and, if not installed and used in accordance with
the instructions, may cause harmful interference to radio communications. However, there is
no guarantee that interference will not occur in a particular installation. If this equipment does
cause harmful interference to radio or television reception, which can be determined by turning the equipment off and on, the user is encouraged to try to correct the interference by one
or more of the following measures:
• Reorient or relocate the receiving antenna.
• Increase the separation between the equipment and receiver.
• Connect the equipment into an outlet on a circuit different from that to which the receiver
is connected.
• Consult the dealer or an experienced radio/TV technician for help.
Use of Trademarks, Registered Trademarks, and other Protected Names and Symbols
This manual may make reference to trademarks, registered trademarks, and other protected
names and/or symbols of third-party companies not related in any way to StarTech.com.
Where they occur these references are for illustrative purposes only and do not represent an
endorsement of a product or service by StarTech.com, or an endorsement of the product(s)
to which this manual applies by the third-party company in question. Regardless of any direct
acknowledgement elsewhere in the body of this document, StarTech.com hereby acknowledges that all trademarks, registered trademarks, service marks, and other protected names
and/or symbols contained in this manual and related documents are the property of their
respective holders.
Instruction Manual
Table of Contents
Introduction ................................................................................... 1
Features.......................................................................................1
System Requirements..................................................................1
Package contents.........................................................................1
Installation and Usage................................................................... 2
Installing a hard drive in the Enclosure.........................................2
Installing Drivers (Windows 98SE)...............................................4
Connecting the Hard Drive...........................................................4
Powering the Drive Enclosure..................................................5
LED Indicator............................................................................5
Disconnecting the Hard Drive.......................................................5
Windows 98SE.........................................................................5
Windows ME/2000/XP..............................................................5
Mac OS 8+...............................................................................6
Specifications................................................................................. 7
Technical Support.........................................................................8
Warranty Information....................................................................8
i
Instruction Manual
Introduction
Thank you for purchasing a StarTech.com InfoSafe external hard drive
enclosure. This product allows you to turn virtually any standard 2.5”
notebook computer hard drive into a portable storage solution. The
perfect solution for storing multimedia, digital imaging, audio, and other
demanding applications, this product can be installed easily to suit virtually any storage necessity.
Features
• USB 2.0 compatible
• Backward compatible with USB 1.1
• Requires no external power source
• LED indicates Activity and Power status
System Requirements
An IBM-compatible PC, or Mac with an available USB port with one of the
following operating systems installed:
Windows® 98SE/ME/2000/XP/2003 Server/Vista™, Mac OS 8 or higher
Package contents
This package should contain:
• 1 x InfoSafe Mobile Drive Enclosure
• 1 x USB 2.0 (Male) to USB Mini B (Male) / Y cable
• 1 x Installation CD
• 1 x Protective pouch
• 1 x Instruction Manual
• 1 x Screw kit
1
Instruction Manual
Installation and Usage
LED
Indicator
Mini USB
Connector
Bottom Panel
Top Panel
Installing a hard drive in the Enclosure
CAUTION:Use caution when installing a hard drive in the enclosure.
Excessive shock or force could damage the drive and/or the enclosure,
resulting in data loss.
Always ensure that you are properly grounded when handling a hard
drive or the enclosure tray, since electronic components can be damaged
by static electricity. If an anti-static mat or similar product is not available,
ground yourself by touching a computer case or other metal surface for
several seconds before handling any components.
1. Set the hard drive to function in Master mode by adjusting the
necessary jumpers, according to the drive manufacturer’s instruction.
2. Using the included screwdriver, remove the screws fastening the top
panel to the enclosure.
2
Instruction Manual
3. Attach the 2.5” hard drive to the interface connector (located on inverse
of top panel), ensuring a snug connection. Do not use excessive force,
to avoid damaging the drive and the the enclosure.
4. Insert the top panel and attached hard drive into the bottom panel.
5. Re-fasten the screws that were removed in step 2.
3
Instruction Manual
Installing Drivers (Windows 98SE)
Note: Windows ME/2000/XP/2003 Server and supported versions of Mac
OS all support removable hard drives without additional software. As
such, please ensure you have the most current updates installed. Computers running Windows 98SE need to install support for USB removable
mass storage devices prior to using the enclosure:
1. Insert the installation CD into your computer’s CD-ROM or compatible
optical drive.
2. Double click the My Computer icon on the desktop. Double click the
icon for the computer’s CD-ROM drive.
3. For SATA drives: Open the x:\STORAGE\USB 2.0\ST2026SP folder,
where x:\ denotes the drive letter assigned to the CD/DVD-ROM drive. Double-click on the SPIF215_98_Installer icon to launch installation.
For IDE drives: Open the x:\STORAGE\USB 2.0\GL811E folder,
where x:\ denotes the drive letter assigned to the CD/DVD-ROM drive.
Double-click on the Setup.exe file, to launch installation.
Follow all prompts to complete installation.
4. Once the software installation has completed, connect the enclosure
to the host computer, using the included USB 2.0 (Male) to USB Mini B
(Male) cable. Windows will notify you that new hardware has been
found and installed.
Connecting the Hard Drive
Once the enclosure has been attached to a computer, and the necessary
software has been installed, the drive will be accessible as though it were
installed within the system.
Prior to using the drive, it will need to be formatted according to your operating system requirements. To format your newly attached hard drive,
or create partitions, please consult the documentation that accompanied
your operating system at the time of purchase.
4
Instruction Manual
Powering the Drive Enclosure
The hard drive enclosure requires no external power supply, as it is capable of receiving enough power (5V/500mA) from the USB Bus to which
it is connected. Please ensure that both USB type A connectors are
inserted into available ports on the host computer.
LED Indicator
The hard drive enclosure offers an LED indicator, to enable you to monitor drive activity. When the enclosure is powered, the LED will illuminate
and remain green. While the hard drive is being accessed, however, the
LED will change from green to red. Do not remove the enclosure from
the host computer while the LED is red, as it could damage the drive or
the enclosure, resulting in data loss.
Disconnecting the Hard Drive
Windows 98SE
The hard drive enclosure can be removed when the activity LED is
green. To do so, simply unplug the USB cable connecting the enclosure
to the host computer.
Windows ME/2000/XP
1. Right click on the removable storage icon, located in the task bar.
2. Windows XP: When the Safely Remove Hardware message
appears, click on it with the left mouse button.
Windows ME/2000: When the Unplug or eject hardware message
appears, click on it with the left mouse button.
3. You will be asked to select the device you wish to disconnect. Please
highlight the drive listing, and click on OK
4. On the screen that follows, click on Stop.
5. Wait for the message indicating that it is now safe to remove the
device. Please note:
5
Instruction Manual
Removing the connected drive prior to receiving notification that it is safe
to do so, could result in losing or corrupting data stored on the drive.
Once the Safe to Remove Hardware message appears, please disconnect the enclosure from the computer by removing the USB connection.
Mac OS 8+
To safely disconnect the attached drive from the host computer, close any
windows listing the contents of the removable drive. Once all windows
are closed, click on the USB storage icon on the desktop, and drag it to
the Trash Can icon on the desktop. Allow 5 seconds before physically
removing the enclosure/drive from the computer.
6
Instruction Manual
Specifications
Hard Drive support
IDE2510U2: 2.5” IDE (ATA 100)
SAT2510U2: 2.5” SATA / SATA II
SAT2510BU2: 2.5” SATA / SATA II
Connectors
USB mini B Female
Drive Capacity support
120GB, 5400 RPM
Maximum Data Transfer Rate
480Mb/s
Chipset
IDE: Genesis GL-811E
SATA: Sunplus SPIF-215A
Operating System support
Windows® 98SE/ME/2000/XP/Vista™
Mac OS 8 or Higher
Dimensions
120 x 75 x 10 mm (4.72 x 2.95 x 0.39”)
Weight
62.1g (2.19 oz.)
Regulatory Certifications
FCC, CE, ROHS
7
Instruction Manual
Technical Support
StarTech.com’s lifetime technical support is an integral part of our commitment to provide industry-leading solutions. If you ever need help with your
product, visit www.startech.com/support and access our comprehensive
selection of online tools, documentation, and downloads.
Warranty Information
This product is backed by a one-year warranty. In addition, StarTech.com
warrants its products against defects in materials and workmanship for the
periods noted, following the initial date of purchase. During this period,
the products may be returned for repair, or replacement with equivalent
products at our discretion. The warranty covers parts and labor costs only.
StarTech.com does not warrant its products from defects or damages arising from misuse, abuse, alteration, or normal wear and tear.
Limitation of Liability
In no event shall the liability of StarTech.com Ltd. and StarTech.com USA
LLP (or their officers, directors, employees or agents) for any damages
(whether direct or indirect, special, punitive, incidental, consequential, or
otherwise), loss of profits, loss of business, or any pecuniary loss, arising
out of or related to the use of the product exceed the actual price paid
for the product. Some states do not allow the exclusion or limitation of
incidental or consequential damages. If such laws apply, the limitations or
exclusions contained in this statement may not apply to you.
8
StarTech.com has been making “hard-to-find easy” since 1985,
providing high quality solutions to a diverse IT and A/V customer
base that spans many channels, including government, education
and industrial facilities to name just a few. We offer an unmatched
selection of computer parts, cables, A/V products, KVM and Server Management solutions, serving a worldwide market through our
locations in the United States, Canada, the United Kingdom and
Taiwan.
Visit www.startech.com today for complete information about all
our products and to access exclusive interactive tools such as the
Cable Finder, Parts Finder and the KVM Reference Guide. StarTech.com makes it easy to complete almost any IT or A/V solution.
Find out for yourself why our products lead the industry in performance, support, and value.