1
VGN-C1xx Series Optical Disk Drive
Replacement Instructions
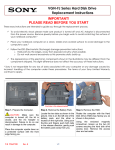
Step 4. Using the enclosed
magnetic screwdriver, loosen up one
(1) screw securing the ODD Bay.
Step 5. To initiate the removal of the
ODD Bay, pull slightly the ODD door
as shown in the picture.
Step 6. With even force, slide out
the ODD as shown. Some force
may be required to unlock the ODD
from the connector.
Step 7. Hold the new ODD Bay by
the edges and align it with the
opening. IMPORTANT! Install the
new ODD in the correct position.
Step 8. With an even force slide in
the new ODD Bay.
Step 9. Make sure the new ODD
Bay is seated flush on the edge of
the computer.
Step 11. Reinstall the battery pack
and return the old ODD to Sony
following the included shipping
instructions.
Step 10. Reinstall the one (1) screw
previously removed.
P/N 994643900
Rev. C
2/2