1
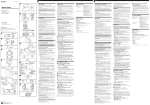
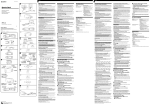
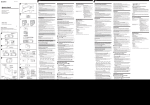
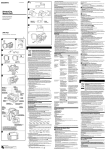
4-131-599-11(1) Waterproof Case English Sports Pack Main Feature Boîtier étanche This sports pack SPK-WB (referred to below as “this unit”) is exclusively for use with the Sony Digital Still Camera (referred to below as “camera”) DSC-W290/ W275/W270. (Not all cameras are available in all countries or regions.) The jacket case alone protects the camera from scratches. This unit takes photos in rainy weather, in water (to a depth of 3m (10 feet)) or in poor-weather conditions such as in snow or rain, if the tight-fitting hard case is mounted after the jacket case is used. Useable at a depth of up to 3 m (10 feet) underwater. Caisson Sport Operating Instructions Mode d’emploi Manual de instrucciones Gebruiksaanwijzing ON/OFF button Touche ON/OFF Before use Shutter button Déclencheur Smile Shutter Détection de sourire Before using the camera in this unit, check that the camera is operating properly and that the case is not leaking. Before using the camera underwater, check around the jacket case opening (-) that there is no dirt, sand, hair, dust, salt, thread, cracks, skewing, or scratches. Do not scratch the jacket case opening when you store the jacket case. In the unlikely event that a malfunction of this unit causes damage due to water leakage, Sony does not guarantee against damages to the equipment contained in it (camera, battery pack, etc.) and the recorded contents, nor will bear any expenses relating to the captured photographs. Mode dial Sélecteur de mode Using/Setting various functions You can use the various functions of the camera installed in this unit. Selecting the mode The mode is switched in the following order by turning the Mode dial of this unit. Select the mode by looking display on the LCD screen. To record still images all REC Mode except for (Movie Mode) To record movies (Movie Mode) * Sound cannot be recorded while recording moving images. When you set REC mode to (Scene Selection) or (Movie Mode), you can select submode in that mode. Press the MENU button on the camera and select the desired mode with the (Macro) or (Flash) button. *We recommend that you use (Underwater) in mode for underwater still image recording. Set to (Underwater) in mode for underwater movie recording. Selecting the underwater white balance Adjusts the color tone in (Underwater) mode under or in (Underwater) mode under (Movie Mode). (Auto) (Underwater 1) (Underwater 2) 1 Precautions Do not subject the front glass to strong shocks, as it may crack. Avoid opening this unit at the beach or in the water. Preparation such as installing the camera and changing the “Memory Stick Duo” media should be done where the humidity is low and there is no salt in the air. Do not throw this unit into the water. Avoid using this unit where the waves are strong. Avoid using this unit under the following situations: in a very hot or humid place. in water hotter than 40˚C (104˚F). at temperatures lower than 0˚C (32˚F). In these situations condensation or water leakages may occur which will damage the camera. Use this unit for no longer than 30 minutes at a time in temperatures above 35˚C (95 ˚F). Be careful not to let the camera fall when removing it from or putting it in this unit. Do not leave this unit exposed to direct sunlight or in a humid place for an extended period of time. If you cannot avoid leaving this unit exposed to the sun, be sure to cover the pack with a towel or other similar protection. The camera heats up if it is used inside this unit for a long time. Before removing the camera from this unit, leave this unit in the shade or other cool place to allow it to cool. When the camera overheats, it may automatically turn off or recording may malfunction. To use the camera again, leave it in the cool place for a while to cool down. Do not use the case in depths below 3 m (10 feet). SPK-WB © 2009 Sony Corporation Printed in Japan 2 Owner’s Record The model and serial numbers are located inside of the unit. Record the serial number in the space provided below. Refer to them whenever you call upon your Sony dealer regarding this product. Model No. SPK-WB Serial No. Zoom button Touche de zoom Mode dial Sélecteur de mode (Playback) button Touche (Lecture) Smile Shutter Détection de sourire Shutter button Déclencheur Hook for hand strap Crochet de dragonne ON/OFF button Touche ON/OFF Buckle Boucle If sun oil is on this unit, be sure to wash it off thoroughly using lukewarm water. If this unit is left with sun oil on its surface, this unit may discolor or become damaged (such as cracks forming in the surface). MENU button Touche MENU Water leakage Front protector Protection avant If water happens to leak in, take it out of the water immediately. If the camera gets wet, take it to the nearest Sony dealer immediately. Repair costs will be the responsibility of the owner. (Delete) button Touche (Suppression) Front glass Vitre avant Anti-fogging lens solution Control button/Touche de commande MENU ON Buckle Boucle Coat the surface of the glass with the supplied anti-fogging lens solution. This is effective in preventing from fogging. How to use the anti-fogging lens solution Apply 2 or 3 drops of the liquid to the front glass and wipe evenly to spread the liquid out by using the swabs, a soft cloth or tissue paper. Anti-fogging lens solution You can obtain the anti-fogging lens solution at the nearest Sony dealer. Anti-fogging lens solution (model No. 3-072-039-0 ) Maintenance MENU OFF Diffuser Diffuseur After recording in a location with a sea breeze, wash this unit thoroughly in fresh water with the buckles fastened to remove salt and sand, then wipe with a soft dry cloth. It is recommended that you submerge this unit in fresh water for about 30 minutes. If it is left with salt on it, metal portions may be damaged or rust may form and cause water leakage. If sun oil is on this unit, be sure to wash it off thoroughly using lukewarm water. Clean the inside of this unit with a soft dry cloth. Do not wash the inside of this unit. Avoid storing the case in a cold, very hot or humid place, or together with naphthalene or camphor, as these conditions might damage the unit. DISP (Display) button Touche DISP (Affichage) (Flash) button Touche (Flash) (Macro) button Touche (Macro) (Self-timer) button Touche (Retardateur) Mode dial Sélecteur de mode 2 Jacket case (Soft case) Étui pochette (Étui souple) Lens/LCD cover (Hard case) Cache de l’objectif/de l’écran LCD (Boîtier rigide) 2 Be sure to perform the above maintenance each time you use this unit. Do not use any type of solvent such as alcohol, benzine or thinner for cleaning, as this might damage the surface finish of this unit. Preparation 3 Install the camera in a low-humidity room or a similar environment. Opening or closing this unit in hot or humid locations may result in fogging of the hard case’s front glass. 2 5 Set the AF illuminator to “OFF.” This disables use of the AF illuminator. 6 Check the camera’s lens and LCD screen for any dirt. 1 Press the ON/OFF (Power) button to turn off the camera. 2 Install the camera from the jacket case opening, and fit it with the jacket case. (-2) Check that the camera is placed correctly. Check that the hard case fits correctly into the hook for hand strap. 4 Close the hard case and fasten the top and bottom buckle. (-4) 4 Secure body of this unit, and fasten the buckles until the latches catch. Notes Check the jacket case opening that is not any dirt, sand, hair, when you close the hard case. A water leak may develop if the parts are not tightly fit. If you install the camera DSC-W290, you cannot see verge of the LCD screen. Because the LCD screen of camera DSC-W290 is large more than the jacket case opening. Attaching the accessories Attaching the hand strap We recommend attaching the hand strap (supplied) before using this unit. Notes The float attached to the hand strap is for preventing loss of the case underwater. If you use as the sports pack, use the hand strap with the float attached. Attaching the diffuser Press on the W side of the zoom button for wide-angle. (Subject appears farther away.) Press on the T side of the zoom button for telephoto. (Subject appears closer.) Notes When using the flash with this unit attached, the shooting distance may decrease or the left side of the screen may darken. If you do not attach the diffuser that the screen may darken, when using the flash with this unit attached. Reflected glare may occur depending on the shooting condition. If this happens, change the condition. If you do not operate the camera with the power on for a certain time, the camera turns off automatically to prevent the battery pack from wearing down. To use the camera again, turn on the power again. For details, refer to the operating instructions supplied with the camera. Playing back with the control button You can play back images on the LCD screen using the control button. You cannot hear the sound. 1 Turn on the power. 2 Press the (playback) button. (-2) 3 Select the desired image with the control button. (-3) -3 To previous image -3 To next image Removing the digital still camera Always be sure to turn off the power when installing or removing the camera. The lens may be damaged if the power is on. Be careful not to drop the camera when removing it. Align the diffuser with the front protector and press it firmly as illustrated. * If you attach the diffuser, you can underwater record using flash. Using the Sports Pack The jacket case protects the camera from scratches when you attach the jacket case only to the camera. You can use the sports pack what if you use both the hard case and jacket case, at a depth of up to 3 m (10 feet) underwater. The following steps are explanation of using the sports pack. The buttons in the illustration are not printed on the jacket case. Operate the camera buttons over the jacket case. Recording 1 Press the ON/OFF button to turn on the camera. (-1) Check that the Mode dial operates normally. (-1) * Press the Mode dial while you turn it. 2 Press the shutter button. (-2) Caractéristiques principales Utilisable sous l’eau jusqu’à une profondeur de 3 mètres (10 pieds). Le caisson sport SPK-WB (appelé ci-dessous « ce boîtier ») est destiné à être utilisé exclusivement avec les appareils photo numériques Sony (appelés ci-dessous « l’appareil photo ») DSC-W290/W275/W270. (Tous ces appareils photos numériques ne sont pas disponibles dans tous les pays ou toutes les régions.) L’étui pochette protège l’appareil photo numérique des éraflures seulement. Vous pourrez prendre des photos sous la pluie, sous l’eau (jusqu’à 3 m de profondeur) ou en cas de mauvais temps, neige ou pluie, si vous utilisez votre appareil photo avec l’étui pochette et le boîtier rigide. Avis Avant d’utiliser l’appareil photo numérique avec ce boîtier, assurez-vous qu’il fonctionne correctement et que ce boîtier ne présente pas de fuite. Avant d’utiliser l’appareil photo sous l’eau, assurez-vous qu’il n’y a pas de poussière, sable, cheveux, poussière, grains de sel, fils, craquelures, déformations ou éraflures tout autour de l’ouverture de l’étui pochette (). Ne rayez pas l’ouverture de l’étui pochette lorsque vous rangez l’étui pochette. Si une défectuosité du boîtier devait provoquer des dégâts dus à une infiltration d’eau, Sony ne garantira pas les dégâts causés à l’appareil qu’il contient (appareil photo numérique, batterie, etc.) ni le contenu de la prise de vue et ne remboursera pas les frais liés aux photos prises. Précautions Ne soumettez pas la vitre avant à des chocs trop forts, car elle pourrait se briser. Evitez d’ouvrir ce boîtier sur la plage ou dans l’eau. Les préparatifs, tels que la mise en place et le remplacement du « Memory Stick Duo » doivent être effectués à l’abri de l’humidité et de l’air salin. Ne pas jeter ce boîtier dans l’eau. Ne pas utiliser ce boîtier en cas de mer houleuse. Ne pas utiliser ce boîtier dans les situations suivantes : à un endroit très chaud ou humide ; dans une eau à plus de 40 ˚C (104 ˚F) ; à des températures inférieures à 0 ˚C (32 ˚F). Dans de telles situations, le matériel peut être endommagé par la condensation d’humidité ou les infiltrations d’eau. Ne pas utiliser ce boîtier pendant plus de 30 minutes à des températures supérieures à 35 ˚C (95 ˚F). Attention de ne pas laisser tomber l’appareil photo lorsque vous le retirez ou le mettez dans ce boîtier. Ne pas laisser ce boîtier en plein soleil ou à un endroit humide pendant longtemps. Si ce boîtier doit rester longtemps exposé au soleil, veillez à le recouvrir d’une serviette ou d’un tissu quelconque. L’appareil photo devient chaud s’il est utilisé pendant un certain temps avec ce boîtier. Avant de retirer l’appareil photo de ce boîtier, laissez ce boîtier un moment à l’ombre ou à un endroit frais pour qu’il refroidisse. Lorsque l’appareil photo est trop chaud, il peut s’éteindre ou l’enregistrement peut ne pas s’effectuer normalement. Laissez l’appareil photo un moment à un endroit frais avant de le réutiliser. Ne pas utiliser ce boîtier à plus de 3 m (10 pieds) de profondeur. Si de l’huile solaire devait tomber sur ce boîtier, prenez soin de l’enlever avec de l’eau tiède. Si vous laissez ce boîtier avec des taches d’huile au soleil, sa surface risque de se décolorer ou d’être endommagée (elle peut se craqueler). Infiltration d’eau 1 Turn off the power. 2 Firmly hold the body of this unit in the direction of the arrow and release the buckle in the following sequence: , . (-2) Si de l’eau devait pénétrer dans ce boîtier, retirez-le immédiatement de l’eau. Si l’appareil photo devait être mouillé, portez-le immédiatement au revendeur Sony le plus proche. Les frais de réparation sont à la charge du client. 3 Turn the front of the hard case upwards before opening the rear of the hard case. (-3) Solution anti-buée Do not directly press the front glass of this unit. If you open the hard case with the front facing down, drops of water may get onto the LCD screen of the camera. 4 Turn this unit downward with the rear of the hard case open, and remove the camera together with the jacket case. (-4) 5 Remove the camera from the jacket case. (-5) When the camera has been used for a long time, the camera heats up. Turn off the power and allow it to cool before removing the camera from this unit. 6 Cancel the mode if you may set (Underwater) in mode for underwater still image or (Underwater) in mode for underwater movie recording. 7 Set AF Illuminator to Auto. Notes Before opening this unit, rinse it with tap water or fresh water and then wipe the water off with a soft cloth. When opening it, be careful not to let any water from your body or hair onto the camera. Troubleshooting Symptom Cause/Corrective Actions There are drops of water that inside the front glass of this unit or that on the LCD screen of the camera. The hard case is not placed correctly. Correctly mount again the hard case, after check that the jacket case opening is fitted correctly to the hard case opening. There is dirt have formed in the hard case or the jacket case. Check carefully for the above. If found, wipe off with a soft cloth or tissue paper. The recording function does not work. 3 Press the ON/OFF (Power) button to turn on the camera. 4 Set the Mode dial to the desired mode. 3 Engage the hard case on the camera what fitting the jacket case. ( -3) 5 Using the zoom function Be sure to use a fully charged battery pack. Be sure that the “Memory Stick Duo” media has enough space to record images. Always be sure to turn off the power when installing or removing the camera. The lens may be damaged if the power is on. 3 Notes (Flash) in [UNDERWATER WHITE BALANCE] is not available. [UNDERWATER WHITE BALANCE] is not available when the flash is set to [Flash On]. For details, refer to the operating instructions supplied with the camera. 1 Remove the strap from the camera. 2 Insert the battery pack and “Memory Stick Duo” media. Installing the digital still camera inside the sports pack 4 Adjusts for underwater conditions where green is strong. For details, refer to the operating instructions supplied with the camera. When you are shooting underwater images, we recommend that you use the (Underwater) in the (Scene Selection). When you are shooting underwater movies, set the (Movie Mode), then press the MENU button to display the mode selection screen and select (Underwater) on the LCD screen. 3 The camera automatically adjusts color tones underwater so they appear natural. Adjusts for underwater conditions where blue is strong. Preparing the digital still camera (Scene Selection) Français The battery pack has run out. Charge the battery pack fully. The “Memory Stick Duo” media is full. Insert another “Memory Stick Duo” media or erase unneeded data from the “Memory Stick Duo” media. The write-protect tab on the “Memory Stick Duo” media is set to LOCK. Set the tab to the recording position or insert a new “Memory Stick Duo” media. The camera heats up. Leave the camera in the cool place for a while to cool down. Specifications Material Silicone, Plastic (PC, ABS), glass Water-resistance Silicone rubber, buckle Pressure-resistance To a depth of up to 3 m (10 feet) underwater Switches that can be externally operated ON/OFF(Power), Mode, Shutter, Smile Shutter, Zoom(W/T), Control, MENU, Delete, Playback Dimensions Approx. 107 × 84 × 70 mm (4 1/4 × 3 3/8 × 2 7/8 in.) (w/h/d) (excluding the projecting parts) Mass Approx. 165 g (5.9 oz.) (sports pack only) Included items Jacket case (1) Lens/LCD cover (1) Hand strap (1) Anti-fogging lens solution (1) Diffuser (1) Float (1) Set of printed documentation Design and specifications are subject to change without notice. Recouvrez la surface de la vitre avant d’un peu de la solution anti-buée fournie. Cette solution empêche bien la formation de buée. Utilisation de la solution anti-buée Appliquez 2 ou 3 gouttes du liquide sur la vitre avant et étalez uniformément le liquide à l’aide d’un disque de coton, d’un chiffon doux ou d’un mouchoir en papier. Solution anti-buée Vous pouvez vous procurer de la solution anti-buée auprès du revendeur Sony le plus proche. Solution anti-buée (référence : 3-072-039-0 ) ENTRETIEN Après une prise de vue à un endroit exposé à la brise marine, lavez soigneusement ce boîtier à l’eau douce, en laissant les boucles bien verrouillées, pour enlever le sel et le sable, puis essuyez-le avec un chiffon doux et sec. Il est conseillé de laisser ce boîtier dans de l’eau douce pendant 30 minutes environ. Si le caisson n’est pas bien nettoyé, le sel restant pourrait attaquer les parties métalliques et causer de la corrosion, et par la suite une infiltration d’eau. Si de l’huile solaire devait tomber sur ce boîtier, prenez soin de l’enlever avec de l’eau tiède. Nettoyez l’intérieur de ce boîtier avec un chiffon doux et sec. Ne lavez pas l’intérieur de ce boîtier. Evitez de ranger ce boîtier à un endroit froid, très chaud ou humide, ou à proximité de naphtaline ou de camphre. Cela pourrait l’endommager. Effectuez toutes les opérations mentionnées ci-dessus chaque fois que vous utilisez ce boîtier. N’utilisez pas de solvant, comme de l’alcool, de la benzine ou du diluant pour le nettoyage, car ces substances peuvent attaquer la finition de ce boîtier. Préparatifs Préparation de l’appareil photo numérique Mettez l’appareil photo numérique dans ce boîtier dans une pièce non humide ou dans un lieu similaire. La vitre avant du boîtier rigide se couvrira de buée si vous ouvrez ou fermez ce boîtier dans un lieu chaud ou humide. Pour plus d’informations, reportez-vous au mode d’emploi fourni avec l’appareil photo. 1 Détachez la dragonne de l’appareil photo. 2 Insérez la batterie et un « Memory Stick Duo ». La batterie doit être pleine. Le « Memory Stick Duo » doit disposer de suffisamment d’espace pour les photos ou le film que vous voulez prendre. 3 Appuyez sur la touche ON/OFF (Alimentation) pour mettre l’appareil photo sous tension. 4 Choisissez le mode souhaité avec le sélecteur de mode. Utilisation du caisson sport L’étui pochette protège l’appareil photo des éraflures lorsque vous le mettez sur l’appareil photo. Vous pouvez utiliser l’appareil photo sous l’eau jusqu’à une profondeur de 3 m (10 pieds) si vous le mettez dans l’étui pochette et le boîtier rigide. Le caisson sport s’utilise de la façon suivante. Les touches indiquées sur l’illustration ne sont pas imprimées sur l’étui pochette. Appuyez sur les touches de l’appareil photo à travers l’étui pochette. Enregistrement 1 Appuyez sur la touche ON/OFF pour mettre l’appareil photo sous tension. (-1) Assurez-vous que le sélecteur de mode fonctionne normalement. (-1) * Tournez le sélecteur de mode en appuyant dessus. 2 Appuyez sur le déclencheur. (-2) Utilisation et réglage des diverses fonctions Vous pouvez utiliser les diverses fonctions de l’appareil photo quand il est dans ce boîtier. Sélection du mode Le mode change dans l’ordre suivant lorsque vous tournez le sélecteur de mode de ce boîtier. Sélectionnez le mode en vous référant à l’affichage sur l’écran LCD. Pour prendre des photos Tous les modes REC sauf (Mode Film) Pour filmer (Mode Film) * Le son ne peut pas être enregistré pendant l’enregistrement d’un film. Lorsque vous réglez le mode REC sur (Sélection scène) ou sur (Mode Film), vous avez le choix entre différents modes secondaires. Appuyez sur la touche MENU de l’appareil photo et sélectionnez le mode souhaité avec la touche (Macro) ou (Flash). *Il est conseillé d’utiliser (Sous l’eau) dans le mode pour prendre des photos sous l’eau. Pour filmer sous l’eau, spécifiez (Sous l’eau) dans le mode . Sélection de la balance des blancs sous l’eau Permet de régler les teintes des couleurs dans le mode (Sous l’eau) de (Sélection scène) ou dans le mode (Sous l’eau) de (Mode Film). L’appareil photo ajuste automatiquement les teintes des couleurs pour qu’elles paraissent plus naturelles. (Sous l’eau 1) Ajuste la balance des blancs lorsque le bleu prédomine. (Sous l’eau 2) Ajuste la balance des blancs lorsque le vert prédomine. (Auto) Remarques (Flash) dans [Balance blanc sous l’eau] n’est pas disponible. [Balance blanc sous l’eau] n’est pas disponible lorsque le flash est réglé sur [Flash activé]. Pour plus d’informations, reportez-vous au mode d’emploi fourni avec l’appareil photo. Utilisation du zoom Appuyez sur le côté W de la touche de zoom pour faire un zoom arrière. (Le sujet semble s’éloigner.) Appuyez sur le côté T de la touche de zoom pour faire un zoom avant. (Le sujet semble se rapprocher.) Remarques La distance de prise de vue peut être plus faible ou le bord gauche de l’écran peut s’assombrir si vous utilisez le flash quand l’appareil photo est dans ce boîtier. Si vous ne fixez pas le diffuseur, l’écran peut être plus sombre si vous utilisez le flash lorsque l’appareil photo est dans ce boîtier. Selon les conditions de prise de vue, un reflet peut apparaître. Dans ce cas, changez de position. Si vous n’utilisez pas l’appareil photo pendant un certain temps quand il est sous tension, il se met automatiquement hors tension pour éviter d’user la batterie. Pour utiliser de nouveau l’appareil photo, remettez-le sous tension. Pour plus d’informations, reportez-vous au mode d’emploi fourni avec l’appareil photo. Lecture avec la touche de commande Vous pouvez voir les images sur l’écran LCD à l’aide de la touche de commande. Le son par contre n’est pas audible. 1 Mettez l’appareil photo sous tension. 2 Appuyez sur la touche (lecture). (-2) 3 Sélectionnez l’image souhaitée avec la touche de commande. (-3) -3 Pour afficher l’image précédente -3 Pour afficher l’image suivante Retrait de l’appareil photo numérique Veillez à mettre l’appareil photo hors tension avant de l’installer ou de le sortir du boîtier. Sinon l’objectif pourrait être endommagé. Faites attention à ne pas laisser tomber l’appareil photo lorsque vous le retirez. 1 Mettez l’appareil photo hors tension. 2 Tenez fermement ce boîtier dans le sens de la flèche et relâchez la boucle en procédant de la façon suivante : , . (-2) N’appuyez pas directement sur la vitre avant de ce boîtier. 3 Tournez l’avant du boîtier rigide vers le haut avant d’ouvrir l’arrière du boîtier rigide. (-3) Si vous ouvrez le boîtier rigide en orientant sa face avant vers le bas, des gouttes d’eau peuvent tomber sur l’écran LCD de l’appareil photo. 4 Tournez ce boîtier vers le bas avec l’arrière du boîtier rigide ouvert et retirez l’appareil photo avec l’étui pochette. (-4) 5 Retirez l’appareil photo de l’étui pochette. (-5) L’appareil photo devient chaud si vous l’utilisez longtemps. Mettez l’appareil photo hors tension et laissez-le refroidir avant de le retirer de ce boîtier. 6 Si vous avez spécifié (Sous l’eau) en mode pour prendre des photos sous l’eau ou sur (Sous l’eau) en mode pour filmer sous l’eau, annulez le mode. 7 Réglez Illuminat. AF sur Auto. Remarques Avant d’ouvrir ce boîtier, rincez-le à l’eau du robinet ou à l’eau fraîche et séchez-le avec un chiffon doux. Avant d’ouvrir l’appareil photo, veillez à vous sécher le corps ou les cheveux pour ne pas le mouiller. Résolution de problèmes Symptôme Cause/Mesures à prendre Il y a des gouttelettes d’eau sur la vitre avant de ce boîtier ou sur l’écran LCD de l’appareil photo. Le boîtier rigide n’est pas installé correctement sur l’appareil photo. Remettez correctement le boîtier rigide après avoir vérifié que l’ouverture de l’étui pochette était emboîtée correctement. Il y a de la saleté sur le boîtier rigide ou sur l’étui pochette. Vérifiez soigneusement les points précédents. Si nécessaire, essuyez le boîtier et l’étui avec un chiffon doux ou un mouchoir en papier. La prise de vue n’est pas possible. La batterie est épuisée. Rechargez complètement la batterie. Le « Memory Stick Duo » est plein. Insérez un autre « Memory Stick Duo » ou effacez les données inutiles du « Memory Stick Duo ». L’onglet de protection du « Memory Stick Duo » est en position LOCK. Mettez l’onglet en position d’enregistrement ou insérez un nouveau « Memory Stick Duo ». L’appareil photo est chaud. Laissez l’appareil photo refroidir en le mettant un instant à un endroit frais. Pour les prises de vue sous l’eau, il est conseillé d’utiliser l’option (Sous l’eau) dans (Sélection scène). Lorsque vous filmez sous l’eau, spécifiez (Mode Film), puis appuyez sur la touche MENU pour afficher l’écran de sélection de mode et sélectionnez (Sous l’eau) sur l’écran LCD. 5 Réglez Illuminat. AF sur « OFF ». Illuminat. AF restera ainsi hors service. 6 Vérifiez si l’objectif de l’appareil photo et l’écran LCD sont propres. Mise en place de l’appareil photo numérique dans le caisson sport Veillez à mettre l’appareil photo hors tension avant de l’installer ou de le sortir du boîtier. Sinon l’objectif pourrait être endommagé. 1 Appuyez sur la touche ON/OFF (Alimentation) pour mettre l’appareil photo hors tension. 2 Installez l’appareil photo dans l’étui pochette en l’insérant par l’ouverture. (-2) Assurez-vous que l’appareil photo est bien en place. 3 Mettez le boîtier rigide sur l’appareil photo se trouvant à l’intérieur de l’étui pochette. (-3) Assurez-vous que le crochet de la dragonne s’emboîte bien dans le boîtier rigide. 4 Fermez le boîtier rigide puis les boucles supérieure et inférieur. ( -4) Le boîtier n’est bien fermé que si les boucles sont encliquetées. Remarques Assurez-vous qu’il n’y a pas de saleté, sable ou cheveux sur l’ouverture de l’étui pochette lorsque vous fermez le boîtier rigide. Si les deux parties ne sont pas bien jointes, de l’eau peut s’infiltrer à l’intérieur. Si vous installez l’appareil photo DSC-W290, vous ne pourrez pas voir le bord de l’écran LCD, parce que l’écran LCD de cet appareil est plus grand que l’ouverture de l’étui pochette. Fixation des accessoires Fixation de la dragonne Il est conseillé de fixer la dragonne (fournie) avant d’utiliser ce boîtier. Remarques Le flotteur rattaché à la dragonne empêche de perdre le boîtier sous l’eau. Lorsque vous utilisez ce boîtier sous l’eau, rattachez le flotteur à la dragonne. Fixation du diffuseur Alignez le diffuseur sur le protecteur avant et appuyez fermement dessus de la façon illustrée. * Si vous attachez le diffuseur, vous pourrez faire des prises de vue avec le flash. Spécifications Matériau Silicone, plastique (PC, ABS), verre Étanchéité Caoutchouc en silicone, boucles Résistance à la pression Jusqu’à 3 mètres (10 pieds) de profondeur d’eau. Commutateurs pouvant être actionnés de l’extérieur ON/OFF (Alimentation), Mode, Déclencheur, Détection de sourire, Zoom (W/T), Commande, MENU, Suppression, Lecture Dimensions Environ 107 × 84 × 70 mm (4 1/4 × 3 3/8 × 2 7/8 po.) (l/h/p) (parties saillantes non comprises) Poids Environ 165 g (5,9 oz) (caisson sport seulement) Articles inclus Étui pochette (1) Cache de l’objectif/de l’écran LCD (1) Dragonne (1) Solution anti-buée (1) Diffuseur (1) Flotteur (1) Jeu de documents imprimés La conception et les spécifications peuvent être modifiées sans préavis. Español Botón del zoom Zoomknop Características principales Dial de modo Opnamemodus Protector frontal Beschermer voor de voorkant Botón del disparador Sluitertoets Este portacámara deportivo SPK-WB (en adelante “esta unidad”) es para utilizarse exclusivamente con la cámara fotográfica digital (en adelante “cámara”) DSC-W290/W275/W270 Sony. (No todas las cámaras están disponibles en todos los países o regiones.) El estuche de funda por sí solo protege la cámara contra rasguños. Con este unidad se pueden tomar fotos con tiempo lluvioso, en el agua (a una profundidad de 3 metros), o en condiciones de mal tiempo, como nieve o lluvia, si después de utilizar el estuche de funda se monta la funda rígida de adaptación hermética. Botón (reproducción) (Weergave)-toets Botón ON/OFF ON/OFF-toets Hebilla Sluitklem Captador de sonrisas Lach-sluiter Utilizable hasta una profundidad de 3 metros bajo el agua. Botón MENU MENU-toets Gancho para la correa de mano Haak voor polsriem Antes de la utilización Botón (borrado) (Wis)-toets Vidrio frontal Glas aan de voorkant Antes de utilizar la cámara en esta unidad, compruebe que la cámara funcione adecuadamente y que esta unidad no infiltre agua. Antes de utilizar la unidad bajo el agua, compruebe que alrededor de la abertura (-) del estuche de funda no haya suciedad, arena, pelos, polvo, sal, trozos de hilos, sesgos, ni rayazos. No raye la abertura del estuche de funda cuando lo guarde. En el caso improbable de que un mal funcionamiento de esta unidad cause daños debido a la infiltración de agua, Sony no se responsabilizará de los daños ocasionados en el equipo que contenga (cámara, batería, etc.) o en el contenido grabado, ni de los gastos relacionados con las fotografías tomadas. Cotón de control/Bedieningstoets MENU ON Hebilla Sluitklem Difusor Verstrooier Precauciones MENU OFF Botón DISP (visualización) DISP (Aanduidings)-toets Botón (flash) (Filtser)-toets Botón (macro) (Macro)toets Botón (autodisparador) (Zelfontspanner)-toets Dial de modo Opnamemodus Estuche de funda (Funda blanda) Behuizing (zachte omsluiting) Funda del objetivo y la pantalla de cristal líquido (Funda rígida) Lens/LCD-klep (harde omsluiting) 2 2 3 No someta el vidrio frontal a golpes fuertes, ya que podría rajarse. Evite abrir esta unidad en la playa o en el agua del agua. Los preparativos, tales como la instalación de la cámara y el cambio de medio “Memory Stick Duo” deberán realizarse donde la humedad sea baja y no haya sal en el aire. No arroje esta unidad al agua. Evite utilizar esta unidad en lugares con mucho oleaje. Evite utilizar esta unidad en las situaciones siguientes: en un lugar muy cálido o húmedo. en agua con temperatura superior a 40 °C a temperaturas inferiores a 0˚C En estas situaciones podría condensarse humedad o infiltrarse agua, lo que dañaría la cámara. Utilice esta unidad durante no más de 30 minutos cada vez a temperaturas superiores a 35˚C Tenga cuidado de no dejar caer la cámara cuando la extraiga de esta unidad o la instale en ella. No deje esta unidad expuesta la luz solar directa ni en un lugar húmedo durante mucho tiempo. Si no puede evitar dejar esta unidad expuestas a la luz solar directa, cerciórese de cubrirla con una toalla u otro tipo de material protector. La cámara se calentará cuando se utilice durante mucho tiempo dentro de esta unidad. Antes de extraer la cámara de esta unidad, deje esta unidad a la sombra o en otro lugar fresco durante cierto tiempo para permitir que se enfríe. Cuando la cámara se recaliente, puede apagarse automáticamente o la grabación puede funcionar mal. Para volver a utilizar la cámara, déjela en un lugar fresco durante cierto tiempo para que se enfríe. No utilice esta unidad a profundidades superiores a 3 m Si esta unidad entra en contacto con aceite bronceador, lávela bien con agua cálida. Si dejase la unidad con aceite bronceador en su superficie, podría decolorar o dañarse (como, por ejemplo, rajas en la superficie). Infiltración de agua Si se infiltra agua, extraiga inmediatamente la unidad del agua. Si la cámara se moja, llévela inmediatamente a su proveedor Sony más próximo. El coste de las reparaciones tendrá que abonarlo el usuario. 2 3 Solución antiempañante para el objetivo Recubra la superficie del vidrio con la solución antiempañante para el objetivo suministrada. Esto será muy efectivo para evitar que se empañe el vidrio. Forma de utilizar la solución antiempañante para el objetivo Aplique 2 o 3 gotas de la solución al vidrio frontal y espárzalas uniformemente utilizando palillos de cabeza de algodón, un paño suave, o un pañuelo de papel. Solución antiempañante para el objetivo 3 4 Usted podrá adquirir solución antiempañante para el objetivos en el distribuidor Sony más próximo. Solución antiempañante para el objetivo (Núm. de modelo 3-072-039-0 ) MANTENIMIENTO 4 5 Después de haber grabado en un lugar con brisa del mar, lave bien esta unidad con agua dulce, con las hebillas abrochadas para eliminar la sal y la arena, y después frótela con un paño suave y seco. Se le recomienda que sumerja esta unidad en agua dulce durante unos 30 minutos. Si la dejase con sal, las partes metálicas podrían dañar u oxidarse y provocar la infiltración de agua. Si esta unidad entra en contacto con aceite bronceador, lávela bien con agua cálida. Limpie el interior de esta unidad con un paño suave y seco. No lave el interior de esta unidad. Evite almacenar esta unidad en un lugar frío, muy cálido o húmedo, o junto con naftalina o alcanfor, ya que en estas condiciones podría dañarse la unidad. Cerciórese de realizar el mantenimiento indicado arriba cada vez que utilice esta unidad. No utilice ningún tipo de disolvente, como alcohol, bencina, ni diluyente de pintura para la limpieza, ya que podría dañar el acabado de la superficie de esta unidad. Preparación Preparación de la cámara fotográfica digital Instale la cámara en una sala o en un entorno similar con poca humedad. Si abriese o cerrase esta unidad en lugares cálidos o húmedos, se podría empañar el vidrio frontal de la funda rígida. Con respecto a los detalles, consulte el manual de instrucciones suministrado con la cámara. 1 Quite la correa de la cámara. 2 Inserte la batería y el medio “Memory Stick Duo”. Cerciórese de utilizar una batería completamente cargada. Cerciórese de que el medio “Memory Stick Duo” disponga de espacio suficiente para grabar imágenes. 3 Pulse el botón ON/OFF (alimentación) para encender la cámara. 4 Ajuste el dial de modo al modo deseado. Para tomar imágenes bajo el agua, le recomendamos que utilice (Submarino) en (Selección escena). Para grabar películas bajo el agua, ajuste (Modo película), y después pulse el botón MENU para hacer que se visualice la pantalla de selección de modo y seleccione (Submarino) en la pantalla de cristal líquido. 5 Ajuste el iluminador de AF a “Desactivado”. Los pasos siguientes son la explicación para la utilización del portacámara deportivo. Los botones de la ilustración no están impresos en el estuche de funda. Accione los botones de la cámara sobre el estuche de funda. Grabación 1 Pulse el botón ON/OFF (alimentación) para encender la cámara. ( -1) Compruebe que el dial de modo funcione normalmente. (-1) * Pulse el dial de modo mientras lo gire. 2 Pulse el botón del disparador. (-2) Utilización/ajuste de varias funciones Usted podrá utilizar varias funciones de la cámara instalada en esta unidad. Selección del modo El modo se cambia en el orden siguiente girando el dial de modo de esta unidad. Seleccione el modo observando la visualización de la pantalla de cristal líquido. Para imágenes fijas todos los modos de REC excepto para Para grabar películas (Modo película) * Durante la grabación de películas no podrá grabarse sonido. Botón ON/OFF ON/OFF-toets Dial de modo Opnamemodus Instalación de la cámara fotográfica digital en el portacámara deportivo Cerciórese de desconectar siempre la alimentación antes de instalar o extraer la cámara. El objetivo podría dañarse si la alimentación estuviese conectada. 1 Pulse el botón ON/OFF (alimentación) para apagar la cámara. 2 Instale la cámara desde la abertura del estuche de funda, y fíjele el estuche de funda. (-2) Compruebe que la cámara haya quedado correctamente colocada. 3 Enganche la funda rígida en la cámara que se adapta al estuche de funda.(-3) Compruebe que la funda rígida se haya adaptado correctamente en el gancho para la correa de mano. 4 Cierre la funda rígida y abroche las hebillas superior e inferior. ( -4). Asegure el cuerpo de esta unidad, y abroche las hebillas hasta que los seguros superior e inferior queden trabados. Notas Compruebe que la abertura del estuche de funda no esté sucia, con arena, ni pelo cuando cierre la funda rígida. Si las partes no estuviesen herméticamente encajadas podría producirse infiltración de agua. Si instala la cámara DSC-W290, no podrá ver la orilla de la pantalla de cristal líquido. Esto se debe a que la pantalla de cristal líquido de la cámara DSC-W290 es mayor que la abertura del estuche de funda. Colocación de los accesorios Colocación de la correa de mano Se recomienda colocar la correa de mano (suministrada) antes de utilizar esta unidad. Notas La suspensión fijada a la correa de mano es para evitar la pérdida de esta unidad bajo el agua. Cuando utilice el portacámara deportivo, use la correa de mano con la suspensión instalada. Colocación del difusor Alinee el difusor con el protector frontal y presiónelo firmemente como se muestra en la ilustración. * Si instala el difusor, podrá grabar bajo el agua utilizando el flash. (Modo película) Cuando ajuste el modo de REC a (Selección escena) o (Modo película), podrá seleccionar un modo secundario de tal modo. Pulse el botón MENU de la cámara y seleccione el modo deseado con el botón (Macro) o (Flash). *Le recomendamos que utilice (Submarino) en el modo para grabación de imágenes bajo el agua. Ajuste a (Submarino) en el modo para grabación de películas bajo el agua. Selección del balance blanco submarino Ajusta el tono de color en el modo (Submarino) bajo (Selección escena) o en el modo (Submarino) bajo (Modo película). La cámara ajusta automáticamente los tonos de color bajo el (Auto) agua de forma que aparezcan naturales. (Submarino 1) Ajusta para las condiciones bajo el agua donde el azul sea intenso. (Submarino 2) Ajusta para las condiciones bajo el agua donde el verde sea intenso. Notas (Flash) en [Balance blanco submarino] no está disponible. [Balance blanco submarino] no estará disponible cuando el flash esté ajustado a [Flash activado]. Con respecto a los detalles, consulte el manual de instrucciones suministrado con la cámara. Utilización del zoom Pulse el lado W del botón del zoom para gran angular. (El motivo aparecerá más alejado.) Pulse el lado T del botón del zoom para telefoto. (El motivo aparecerá más cerca.) Notas Cuando utilice el flash con esta unidad instalada, la distancia de toma puede acortarse o el borde izquierdo de la pantalla puede oscurecerse. Si no instala el difusor, la pantalla puede oscurecerse cuando utilice el flash con esta unidad instalada. Dependiendo de la condición de fotografiado, es posible que se produzcan reflejos. Cuando suceda esto, cambie la condición. Si no utiliza la cámara con la alimentación conectada durante cierto tiempo, la cámara se apagará automáticamente para evitar que se agote la batería. Para volver a utilizar la cámara, conecte de nuevo la alimentación. Con respecto a los detalles, consulte el manual de instrucciones suministrado con la cámara. Reproducción con el botón de control Usted podrá reproducir imágenes en la pantalla de cristal líquido utilizando el botón de control. No podrá oír el sonido. 1 Conecte la alimentación. 2 Pulse el botón (reproducción). (-2) 3 Seleccione la imagen deseada con el botón de control. (-3) -3 Para la imagen anterior -3 Para la imagen siguiente Extracción de la cámara fotográfica digital Cerciórese de desconectar siempre la alimentación antes de instalar o extraer la cámara. El objetivo podría dañarse si la alimentación estuviese conectada. Tenga cuidado de no dejar caer la cámara cuando la extraiga. 1 Desconecte la alimentación. 2 Sujete firmemente el cuerpo de esta unidad en el sentido de la flecha y abra la hebilla en la secuencia siguiente: , . (-2) No presione directamente el vidrio frontal de esta unidad. 3 Gire la parte frontal de la funda rígida antes de abrir la parte posterior de la funda rígida. (-3) Si abriese la funda rígida con la parte frontal encarada hacia abajo, es posible que entrasen gotas de agua en la pantalla LCD de la cámara. 4 Gire esta unidad hacia abajo con la parte posterior de la funda rígida abierta, y extraiga la cámara junto con el estuche de funda. (-4) 5 Retire la cámara del estuhe de funda. (-5) La cámara se calentará cuando se utilice durante mucho tiempo. Desconecte la alimentación y deje que la cámara se enfríe antes de extraerla de esta unidad. 6 Cancele el modo si ha ajustado (Submarino) en el modo para imágenes fijas bajo el agua, o (Submarino) en el modo para grabación de películas bajo el agua. 7 Ajuste el iluminador de AF a Auto. Notas Antes de abrir esta unidad, lávela con agua corriente y seque el agua con un paño suave. Cuando la abra, tenga cuidado para no permitir que entre agua de su cuerpo ni pelo en la cámara. Solución de problemas Síntoma Causa/Soluciones Hay gotas de agua en el interior del vidrio frontal de esta unidad o en la pantalla de cristal líquido de la cámara. La funda rígida no está correctamente colocada. Monte de nuevo la funda rígida después de comprobar que la abertura del estuche de funda esté correctamente adaptada a la abertura de la funda rígida. Se ha acumulado suciedad en la funda rígida o en el estuche de funda. Compruebe cuidadosamente lo indicado arriba. Si encuentra algo, limpie con un paño suave o un pañuelo de papel. 6 Compruebe que no haya suciedad en el objetivo ni en la pantalla de cristal líquido de la cámara. Botón del disparador Sluitertoets Captador de sonrisas Lach-sluiter 2 El estuche de funda protege la cámara contra rasguños cuando a la cámara solamente se le coloca el estuche de funda. Usted podrá utilizar el portacámara deportivo si usa tanto la funda rígida como el estuche de funda bajo el agua hasta una profundidad de 3 metros. Esto inhabilitará la utilización del iluminador de AF. 1 Utilización del portacámara deportivo La función de grabación no trabaja. La batería está agotada. Cargue completamente la batería. El medio “Memory Stick Duo” está lleno. Inserte otro medio “Memory Stick Duo” o borre datos innecesarios del medio “Memory Stick Duo.” La lengüeta de protección contra escritura del medio “Memory Stick Duo” está puesta en LOCK. Ponga la lengüeta en la posición para grabación o inserte un nuevo medio “Memory Stick Duo.” La cámara se ha calentado. Deje la cámara en un lugar fresco durante cierto tiempo para que se enfríe. Especificaciones Material Silicona, plástico (PC, ABS), vidrio Resistencia al agua Caucho de silicona, hebillas Resistencia a la presión Hasta una profundidad de 3 metros bajo el agua Controles que pueden operarse externamente ON/OFF (Alimentación), Modo, Disparador, Captador de sonrisas, Zoom (W/T), Control, MENU, Borrado, Reproducción Dimensiones Aprox. 107 × 84 × 70 mm (an/al/prf) (excluyendo las partes salientes) Peso Aprox. 165 g (portacámara deportivo solamente) Elementos incluidos Estuche de funda (1) Funda del objetivo y la pantalla de cristal líquido (1) Correa de mano (1) Solución antiempañante para el objetivo (1) Difusor (1) Suspensión (1) Juego de documentación impresa El diseño y las especificaciones están sujetos a cambios sin previo aviso. Nederlands Hoofdkenmerk Bruikbaar tot een diepte van 3 m onder water. Deze sportbehuizing SPK-WB (hierna "sportbehuizing" genoemd) is uitsluitend bedoeld voor gebruik met de digitale fotocamera (hierna"camera"genoemd) DSC-W290/W275/W270 van Sony. (Niet alle camera’s zijn verkrijgbaar in alle landen of regio’s.) De behuizing alleen beschermt de camera tegen krassen. Deze sportbehuizing maakt foto’s in regenachtig weer, in water (tot een diepte van 3 meter) in slechte weersomstandigheden zoals sneeuw of regen, de goedpassende harde omsluiting wordt gemonteerd nadat de behuizing is gebruikt. Voor gebruik Controleer of de digitale fotocamera correct werkt en of de sportbehuizing niet lekt voordat u de digitale fotocamera gaat gebruiken in de omsluiting. Voordat u de camera onderwater gebruikt, controleert u de behuizingsopening (-) dat er geen vuil, zand, haar, stof , zout, draden, scheuren, vervorming of krassen op zitten. Kras de behuizingsopening niet als u de behuizing opbergt. In het onwaarschijnlijke geval dat er bij een defect aan de behuizing schade wordt veroorzaakt door waterlekkage, aanvaardt Sony geen aansprakelijkheid voor beschadiging van de apparatuur in de behuizing (digitale fotocamera, batterij, enzovoort) en de gemaakte opnamen en draagt evenmin de kosten die verbonden zijn aan de gemaakte opnamen. Voorzorgsmaatregelen Stel het glas aan de voorkant niet bloot aan sterke trillingen. Het glas kan hierdoor barsten. Vermijd het openen van de sportbehuizing op het strand of in het water. Voorbereiding zoals het installeren van de camera en het wisselen van de "Memory Stick Duo" moeten worden uitgevoerd op een plek waar er weinig vochtigheid is en er geen zout in de lucht is. Gooi de sportbehuizing niet in het water. Vermijd het gebruik van de sportbehuizing bij sterke golven. Gebruik de sportebehuizing niet onder de volgende omstandigheden: op zeer warme of vochtige plaatsen. in water met een temperatuur boven de 40 ˚C. bij temperaturen beneden de 0 ˚C. Onder deze omstandigheden kan vochtcondensatie of waterlekkage optreden en kan de camera worden beschadigd. Bij temperaturen boven de 35 ˚C mag u de sportbehuizing niet langer dan 30 minuten gebruiken. Laat de camera niet vallen als u deze in de sportbehuizing plaatst of eruit verwijdert. Laat de sportbehuizing niet langere tijd in direct zonlicht, of op een zeer vochtige plaats. Als u de sportbehuizing toch in direct zonlicht laat liggen, dan moet u de behuizing bedekken met een handdoek of een andere bescherming. De camera wordt warm als deze langere tijd in de sportbehuizing wordt gebruikt. Voordat u de camera uit deze sportbehuizing haalt, dient u de sportbehuizing in de schaduw of op een koele plaats te houden tot deze is afgekoeld. Als de camera oververhit raakt, kan deze automatisch uitschakelen of kunnen uw opnamen mislukken. Om de camera weer te gebruiken dient u deze even op een koele plaats te houden om af te laten koelen. Gebruik de sportbehuizing niet op een diepte van meer dan 3 m. Als er zonnebrandolie op de sportbehuizing komt, moet u de behuizing goed reinigen met lauw water. Als er zonnebrandolie achterblijft op de sportbehuizing, dan kan de deze verkleuren of beschadigen (zoals scheurtjes in het oppervlak). Waterlekkage Als er waterlekkage optreedt moet u de sportbehuizing direct uit het water halen. Als de camera nat wordt, brengt u deze direct naar de dichtstbijzijnde dealer van Sony. Reparatiekosten zijn de verantwoordelijkheid van de eigenaar. Vloeistof tegen het beslaan van de lens Breng een laagje vloeistof tegen het beslaan van de lens aan op het oppervlak van het glas aan de voorkant. U voorkomt zo dat het glas beslaat. De vloeistof tegen het beslaan van de lens gebruiken Breng 2 of 3 druppels vloeistof aan op het glas aan de voorkant en verdeel de vloeistof gelijkmatig met een wattenstaafje, een zachte doek of een papieren zakdoekje. Vloeistof tegen het beslaan van de lens De vloeistof tegen het beslaan van de lens is verkrijgbaar bij de dichtstbijzijnde Sony-handelaar. Vloeistof tegen het beslaan van de lens (model Nr. 3-072-039-0 ) Onderhoud Wanneer u opnamen hebt gemaakt in een omgeving met zeewind, moet u de sportbehuizing goed uitwassen met zoet water om zout en zand te verwijderen. Hierbij moeten de sluitklemmen gesloten zijn. Veeg de behuizing af met een zachte, droge doek. U kunt het beste de sportbehuizing ongeveer 30 minuten onderdompelen in zoet water. Als er zout op de sportbehuizing achterblijft, kunnen metalen delen worden beschadigd of kan er roest ontstaan waardoor de behuizing kan gaan lekken. Als er zonnebrandolie op de sportbehuizing komt, moet u de behuizing goed reinigen met lauw water. Reinig de binnenkant van de sportbehuizing met een zachte, droge doek. Maak de binnenkant van de sportbehuizing niet nat. Bewaar de sportbehuizing niet op een koude, zeer hete of vochtige plaats of samen met naftaleen of kamfer. Hierdoor kan de sportbehuizing worden beschadigd. Voer het bovenstaande onderhoud altijd uit als u de sportbehuizing gebruikt. Gebruik geen oplosmiddelen, zoals alcohol, benzine of thinner, omdat deze het oppervlak van de sportbehuizing kunnen beschadigen. Voorbereiding De digitale camera voorbereiden Plaats de digitale fotocamera in een ruimte met een lage luchtvochtigheid of een vergelijkbare omgeving. Als u de sportbehuizing in een zeer warme of vochtige omgeving opent of sluit, kan het glas aan de voorkant beslaan. Voor meer informatie raadpleegt u de gebruiksaanwijzing die bij uw camera is geleverd. 1 Verwijder de polsriem van de camera. 2 Plaats de batterij en de "Memory Stick Duo." Zorg ervoor dat u altijd een volledig opgeladen batterij gebruikt. Zorg dat er op de "Memory Stick Duo" genoeg vrije ruimte beschikbaar is om beelden op te nemen. 3 Druk op de ON/OFF (POWER)-toets om de camera in te schakelen. 4 Stel de gewenste opnamemodus in. Wanneer u onderwaterbeelden wilt opnemen, kunt u het beste de optie (Onderwater) bij (Scènekeuze) selecteren. Wanneer u onderwaterfilms wilt opnemen, stelt u de (Bewegende beeldn) in, en drukt u daarna op de MENU-toets om het modusselectiescherm weer te geven en (Onderwater) op het LCD-scherm te selecteren. 5 Stel de AF-verlichting in op "Uit". Hierdoor wordt het gebruik van de AF-verlichting uitgeschakeld. 6 Controleer of de lens van de digitale fotocamera en het LCD-scherm vuil zijn. De digitale fotocamera in de sportbehuizing installeren Zorg dat de camera altijd is uitgeschakeld als u de camera installeert of verwijdert. De lens kan beschadigd raken als het toestel aan staat. 1 Druk op de ON/OFF (POWER)-toets om de camera uit te schakelen. 2 Installeer de camera via de behuizingsopening en plaats het met de behuizing.(-2) Controleer of de camera goed is geplaatst. 3 Bevestig de harde omsluiting op de camera dat past om de behuizing.(-3) Controleer of de harde omsluiting goed past in de haak voor de polsriem. 4 Sluit de harde omsluiting en maak de bovenste en onderste gesp vast.(-4) Bevestig de romp van het toestel en maak de gespen vast tot de vergrendelingen zijn gesloten. Opmerkingen Controleer of de behuizingsopening niet vuil is met zand, haren als u de harde omsluiting sluit. Er kan een waterlekkage ontwikkelen als de delen niet goed sluiten. Indien u camera DSC-W290 installeert, dan kunt u de rand van het LCD-scherm niet zien. Dit komt doordat het LCD-scherm van camera DSC-W290 groter is dan de behuizingsopening. De accessoires bevestigen De polsriem bevestigen U kunt het beste de polsriem (bijgeleverd) bevestigen voordat u de sportbehuizing gebruikt. Opmerkingen De drijver die is bevestigd aan de polsriem voorkomt het verliezen van de sportbehuizing onderwater. Als u gebruikmaakt van de sportbehuizing gebruik dan de polsriem met de daaraan bevestigde drijver. de verstrooier gebruiken Lijn de verstrooier uit met de beschermer van de voorkant en druk het stevig aan zoals staat aangegeven. * Als u de verstrooier bevestigt, dan kunt u onderwateropnamen maken met de flitser. De sportbehuizing gebruiken De behuizing beschermt de camera tegen krassen als u alleen de behuizing op de camera bevestigt. U kunt de sportbehuizing gebruiken en daarbij zowel de harde omsluiting als de behuizing gebruiken op een diepte tot 3 meter onder water. De volgende stappen worden uitgelegd bij het gebruik van de sportbehuizing. De toetsen in de illustratie zijn niet gedrukt op de behuizing. Bedien de cameratoetsen over de behuizing. Opnemen 1 Druk op de ON/OFF-toets om de camera in te schakelen. (-1) Controleer of de opnamemodus normaal werkt. (-1) * Druk op de opnamemodus als u het draait. 2 Druk op de sluitertoets. (-2) Diverse functies gebruiken/instellen U kunt diverse functies die op de camera zijn geïnstalleerd bij deze sportbehuizing gebruiken. De modus selecteren De modus wordt op de volgende wijze ingesteld door te draaien aan de opnamemodus van de sportbehuizing. Selecteer de modus door te kijken op het display van het LCD-scherm. Het opnemen van stilstaande beelden alle REC-standen behalve (Bewegende beeldn) Films opnemen (Bewegende beeldn) * Geluid kan bij het opnemen van bewegende beelden niet worden opgenomen. Als u de REC-stand instelt op (Scènekeuze) of (Bewegende beeldn), dan kunt u in die modus een submodus selecteren. Druk op de MENU-toets op de camera en selecteer de gewenste stand met de (Macro) of (Flitser)-toets. *We raden u aan om (Onderwater) of modus te gebruiken bij onderwaterbeeldopnamen. Stel in op (Onderwater) in modus bij onderwaterfilmopnamen. Selecteren van de wit balans onderwater Past de kleurtoon aan in (Onderwater) modus onder (Scènekeuze) of in (Onderwater) modus onder (Bewegende beeldn). De camera past automatisch de kleurtonen onderwater aan zodat deze natuurlijk lijken. (Onderwater 1) Past de onderwateromstandigheden aan bij veel blauw. (Onderwater 2) Past de onderwateromstandigheden aan bij veel groen. (Autom.) Opmerkingen (Flitser) in [Witbalans onderwater] is niet beschikbaar. [Witbalans onderwater] is niet beschikbaar als de flitser is ingesteld op [Flitser aan]. Voor meer informatie raadpleegt u de gebruiksaanwijzing die bij uw camera is geleverd. De zoomfunctie gebruiken Druk op de W-kant van de zoomknop voor groothoekopnamen. (Het onderwerp lijkt verder weg.) Druk op de T-kant van de zoomknop voor teleopnamen. (Het onderwerp lijkt dichterbij.) Opmerkingen Bij het gebruiken van de flitser die aan de behuizing is bevestigd, kan de opnameafstand afnemen of de linkerhoek van het scherm donkerder worden. Indien u de verstrooier niet bevestigt kan het scherm donkerder worden bij gebruik van de flitser als de sportbehuizing is bevestigd. Reflectieverblinding kan optreden afhankelijk van de opnameconditie. Als dit optreedt, moet u de conditie wijzigen. Indien u de camera langere tijd niet gebruikt terwijl deze aan staat, gaat de camera automatisch uit om stroom te besparen voor de accu. Als u de digitale fotocamera opnieuw wilt gebruiken, schakelt u deze weer in. Voor meer informatie raadpleegt u de gebruiksaanwijzing die bij uw camera is geleverd. Weergeven met de bedieningstoets U kunt beelden afspelen op het LCD-scherm met gebruik van de bedieningstoets. U hoort hierbij geen geluid. 1 Schakel het toestel in. 2 Druk op de (Weergave)-toets. (-2) 3 Selecteer het gewenste beeld met de bedieningstoets. (-3) -3 Het voorgaande beeld -3 Het volgende beeld De digitale fotocamera verwijderen Zorg dat de camera altijd is uitgeschakeld als u de camera installeert of verwijdert. De lens kan beschadigd raken als het toestel aan staat. Laat de digitale fotocamera niet vallen wanneer u deze verwijdert. 1 Schakel het toestel uit. 2 Houd de body van dit toestel in de richting van de pijl en maak de sluitklem los in de volgende volgorde: , . (-2) Druk niet direct op het glas aan de voorkant van de sportbehuizing. 3 Draai de voorkant van de harde omsluiting naar boven voordat u de achterkant van de harde omsluiting opent. (-3) Als u de harde omsluiting opent met de voorkant naar beneden gericht, kunnen er druppels water op het LCD-scherm van de camera komen. 4 Draai de sportbehuizing om met de harde omsluiting open, en haal de camera en de behuizing eruit. (-4) 5 Verwijder de camera uit de behuizing. (-5) Als u de digitale fotocamera lange tijd hebt gebruikt, wordt deze warm. Schakel de stroom uit en laat de camera enige tijd afkoelen voordat u de digitale fotocamera uit de sportbehuizing verwijdert. 6 We raden u aan om (Onderwater) te gebruiken in modus voor het opnemen van onderwaterfoto’s, of (Onderwater) in mode voor het opnemen van films onder water. 7 Stel de AF-verlichting in op Auto. Opmerkingen Voordat u de sportbehuizing opent, dient u deze af te spoelen met kraanwater of zoetwater en daarna het water af te vegen met een zachte doek. Als u de sportbehuizing opent, wees dan voorzichtig en laat geen water of haren op de romp van de camera komen. Problemen oplossen Probleem Oplossing/correctieve maatregel Er bevinden zich druppels water op het glas aan de voorkant van de sportbehuizing of op het LCD-scherm van de camera. De harde omsluiting is niet juist aangebracht. Monteer de harde omsluiting opnieuw goed, nadat u heeft gecontroleerd dat de opening van de behuizing goed past op de harde omsluiting. Er heeft zich vuil gevormd in de harde omsluiting of in de behuizing. Controleer zorgvuldig op het bovenstaande. Is dit het geval dan moet u het vuil verwijderen met een zachte doek of een papieren zakdoekje. De opnamefunctie werkt niet. De accu is leeg. Laad de accu volledig op. De "Memory Stick Duo" is vol. Plaats een andere "Memory Stick Duo" in de camera of verwijder ongewenste gegevens van de "Memory Stick Duo". Het schrijfbeschermingslipje op de "Memory Stick Duo" is ingesteld op LOCK. Zet het lipje in de opnamepositie of plaats een nieuwe "Memory Stick Duo". De camera wordt warm. Om de camera te gebruiken dient u deze even op een koele plaats te houden om af te laten koelen. Technische gegevens Materiaal Siliconen, Plastic (PC, ABS), glas Waterbestendig Siliconenrubber, gesp Drukbestendig Bruikbaar tot een diepte van 3 m onder water. Schakelaars die extern kunnen worden bediend. ON/OFF (Power), Modus, Sluiter, Lach-sluiter, Zoom (W/T), Bediening, MENU, Wissen, Weergeven Afmetingen Ongeveer 107 × 84 × 70 mm (b/h/d) (exclusief uitstekende delen) Gewicht Ongeveer 165 g (alleen sportbehuizing) Bijgeleverde toebehoren Behuizing (1) Lens/LCD-klep (1) Polsriem (1) Vloeistof tegen het beslaan van de lens (1) Verstrooier (1) Drijver (1) Handleiding en documentatie Wijzigingen in ontwerp en technische gegevens voorbehouden, zonder kennisgeving.