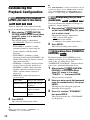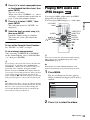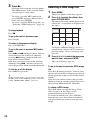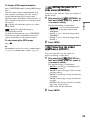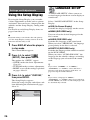
1
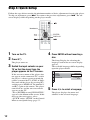
6 Press ENTER.
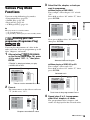
The Setup Display for selecting the
aspect ratio of the TV to be connected
appears.
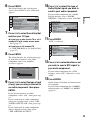
7 Press X/x to select the setting that
matches your TV type.
◆ If you have a wide-screen TV or a 4:3
standard TV with a wide-screen mode
• 16:9 (page 27)
◆ If you have a 4:3 standard TV
• 4:3 LETTER BOX or 4:3 PAN SCAN
(page 27)
8 Press ENTER.
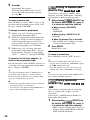
The Setup Display for selecting the type
of jack used to connect your audio
component such as an amplifier
(receiver) appears.
Is this player connected to an amplifier
(receiver) ? Select the type of jack you
are using.
YES
AUDIO OUTPUT L/R
DIGITAL OUTPUT
NO
9 Press X/x to select the type of jack
(if any) you are using to connect to
an audio component, then press
ENTER.
Dolby Digital signal you wish to
send to your audio component.
If your audio component has a Dolby
Digital decoder, select “DOLBY
DIGITAL.” Otherwise, select “D-PCM.”
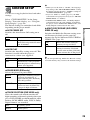
AUDIO SETUP
AUDIO DRC:
STANDARD
DOWNMIX:
DOLBY SURROUND
DIGITAL OUT:
ON
DOLBY DIGITAL
DOLBY DIGITAL:
DOLBY DIGITAL
MPEG:
D-PCM
DTS:
48kHz/16bit
48kHz/96kHz PCM:
Hookups
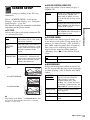
SCREEN SETUP
16:9
TV TYPE:
16:9
COLOR SYSTEM (VIDEO CD):
4:3 LETTER BOX
SCREEN SAVER:
4:3 PAN SCAN
BACKGROUND:
ON
BLACK LEVEL:
OFF
BLACK LEVEL (COMPONENT OUT):
PROGRESSIVE (COMPONENT OUT ONLY): OFF
AUTO
MODE (PROGRESSIVE):
FULL
4:3 OUTPUT:
10 Press X/x to select the type of
11 Press ENTER.
“DTS” is selected.
AUDIO SETUP
AUDIO DRC:
STANDARD
DOWNMIX:
DOLBY SURROUND
DIGITAL OUT:
ON
DOLBY DIGITAL
DOLBY DIGITAL:
MPEG:
PCM
DTS:
OFF
48kHz/96kHz PCM:
OFF
ON
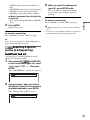
12 Press X/x to select whether or not
you wish to send a DTS signal to
your audio component.
If your audio component has a DTS
decoder, select “ON.” Otherwise, select
“OFF.”
13 Press ENTER.
Quick Setup is finished and connections
are complete.
If your audio component has an MPEG
audio decoder, set “MPEG” to “MPEG”
(page 31).
If you did not connect an audio
component, select “NO,” then go to step
13.
If you connected an audio component
using just an audio cable, select “YES:
AUDIO OUTPUT L/R,” then go to step
13.
If you connected an audio component
using a digital coaxial cable, select
“YES: DIGITAL OUTPUT.”
13