1
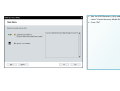
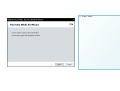
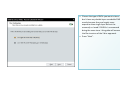
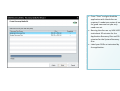
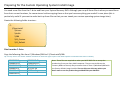
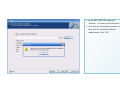
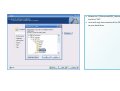
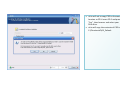
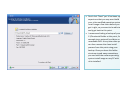
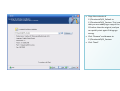
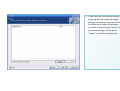
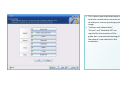
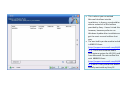
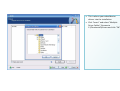
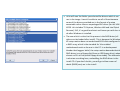
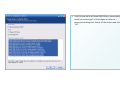
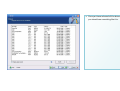
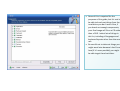
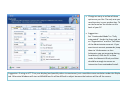
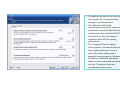
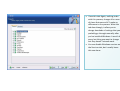
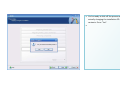
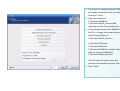
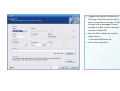
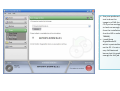
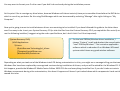
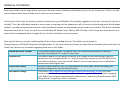
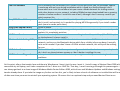
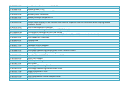
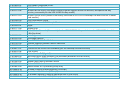
Sony VAIO VGX-XL201
Media Center PC
Clean Install Guide
Version 1.0
Author: William Warby
Introduction
When I purchased my VGX-XL201 Media Center PC, I fully expected it to arrive preloaded with a myriad of freeware, trialware and Sonybranded software products and I wasn’t wrong. Such is the trend when you buy almost any PC these days, and I don’t doubt that many
consumers are very grateful for it. I am not one of those consumers. I know what software I want for any particular job, and invariably it
isn’t the software provided by Sony. Also, due to the pace of software development, by the time you receive your PC, most of the
freeware software will be out of date, and Sony, like most PC manufacturers these days have a tendency to give you old versions of retail
applications like Adobe Photoshop Elements or WinDVD.
In their efforts to make life easier for novice PC users, Sony inadvertently make the process of escaping from the factory installed image
difficult, even for competent PC users. They create a hidden partition on the hard disk that contains the factory installed image and
provide software to back up that partition to a pair of recordable DVDs. This makes it possible to dispense with the hidden partition and
recover the disk space, and also provides the means by which you can extract the essential drivers and utilities that make a clean install
possible. What Sony don’t do is give you an OEM operating system CD or any means to install an operating system other than by reimaging the PC back to it’s factory default settings.
This guide is intended for anyone who, like me, wishes to install the operating system of their choice without the software baggage that
comes with the factory installed image. It goes into enough detail that a novice user should be able to follow it, but it is really intended
for intermediate to advanced PC users. If you don’t know what you’re doing, you could get yourself into a terrible mess by following this
guide and of course it goes without saying that I accept absolutely no responsibility for any damage or inconvenience whatsoever
resulting from the use of this guide. It is provided in the hope that it will be useful, but it’s use is entirely at your own risk. The guide will
deal specifically with installing the Windows XP Media Center Edition 2005 operating system on a Sony VAIO VGX-XL201 Media Center PC.
However, the concepts described in this guide are likely to be largely relevant to similar operating systems like Windows XP Professional,
and media center PCs like the Sony VAIO VGX-XL202. When Windows Vista ships in January 2007 I will probably create a new version of
this guide dealing specifically with that operating system for the VGX-XL201.
Product Keys
This guide was written with the assumption that methods described in Club VAIO forum threads for using the Windows product key from
the sticker on the back of your PC would work in this slightly different scenario. My experience has been that following the instructions in
this guide to the letter, I was unable to activate Windows after installation using the product key on my PC, although it happily let me
install Windows. The Media Center CDs I used came from my MSDN Professional subscription, and I can confirm that the method
described in this document works perfectly with the product key from that source. Because this works for me, I may or may not
undertake further investigations into why the product key that came with my VAIO didn’t work – it could be the process I used to create
the CD, it could be my product key itself, the CDs I used to make the custom operating system install image or it could be something else I
haven’t thought of.
If you can shed any light on whether the methods described in this guide work for you using the product key on your PC and why that
might be, please tell me via the Club VAIO forums so that I can update this document.
Creating the Recovery DVDs
When you first power on your PC, you will have to go through the motions of finalising your installation of Windows. This involves pairing
the wireless keyboard to the PC, choosing regional settings and time zone, accepting Microsoft’s EULAs, enabling automatic updates,
naming your computer, setting and Administrator password, registering with Microsoft (or not) and setting up your first user account. It
doesn’t matter at all what you do with any of these settings for the purposes of this guide.
When you have booted into the operating system, you might see a balloon message in the system tray appear reminding you to create
your recovery DVDs. It will belong to a tray icon that that is vaguely recognisable as a CD and a pen. Double click this icon (or select “VAIO
Recovery Utility” from the “VAIO Recovery Tool” program group in the Start Menu) to activate the recovery application.
• Run the VAIO Recovery Utility and
select “Create Recovery Media Kit”.
• Press “OK”.
• Press “Next”.
• Choose the type of DVDs you want to burn. I
don’t have any double layer recordable DVDs
mostly because they are hugely more
expensive than single layer discs at the
moment) so I used 2 DVD-Rs. I recommend
doing the same since I this guide will assume
the file structure of the 2 disc approach.
• Press “Next”.
• Press “Start” and give feed the
application with blank discs as
required. I made two copies of each
for good measure but you only
need one set.
• Burning the discs on my VGX-XL201
took about 20 minutes for the
Application Recovery Disc and 30
minutes for the System Recovery
Disc.
• Label your DVDs as instructed by
the application.
Returning to the Factory Installed Image
Should you ever feel the need, you can restore your system to it’s factory default image at any time using these discs by booting from the
System Recovery Disc. When the System Recovery disc boots, you will have some options to choose from:
You can recover just the C: drive, leaving your D: drive in-tact. Useful if you want to get back to the factory default image without
affecting your D: drive which probably has all your personal files on. Alternatively you can recover both the C: and D: drives. In either
case, you have the option to adjust the sizes of the partitions for C: and D: although this adjustment is fairly restrictive; you can’t set the
C: drive smaller than 60GB (!) and you can’t create additional partitions (although you could adjust your partitions later with a third party
tool like Symantec’s Partition Magic). You also have the option to remove the hidden recovery partition at this point.
Your other option is to do a complete factory reset which restores the hidden recovery partition from the DVDs recreates and restores
both the C: and D: drives to their factory default sizes and content. This works from the recovery DVDs even if you have completely
erased and the recovery partition and/or changed the partition table in other ways. I used this method to get back to the factor image for
the purpose of creating this guide.
Preparing for the Custom Operating System Install Image
You need some files from the C: drive and from your System Recovery DVD. Although you can pull these files in when you need them
from their current locations, for convenience I advise copying them so that you have everything you need all in one place (this is
particularly useful if you want to make back up these files so that you can tweak your custom operating system image later).
Create the following folder structure:
C:
\CleanInstall
\Drivers
\Hotfix
\I386
\OS_Custom
\OS_Default
Files from the C: Drive
Copy the following files from C:\Windows\I368 to C:\CleanInstall\I386:
Tip: You may want to turn off the “Hide file extensions for known file types” option under Folder Options to make these files easier to identify.
OEMBIOS.BI_
OEMBIOS.CA_
OEMBIOS.DA_
OEMBIOS.SI_
OEMCOA.JP_
OEMIG50.EX_
OEMIGLIB.DL_
OEMLOGO.GI_
PIDGEN.DLL
SETUPP.INI
DPCDLL.DL_
Note: These files are required to make your MCE 2005 CDs to accept the
product key from your Sony VAIO computer. They are not visible on the
recovery DVDs so the only way to extract them is from C:\Windows\I386 with
the factory default image installed. Do not skip over this step unless you
don’t want to use the product key provided with your VAIO PC.
Files from the System Recovery DVD
Copy the contents of [System Recovery DVD]\VAIO Applications\Drivers to C:\CleanInstall\Drivers
Tip: These files can also be found at C:\Drivers, and can also be downloaded from the VAIO Link website
Copy the contents of [System Recovery DVD]\VAIO Applications\Hotfix to C:\CleanInstall\Hotfix
Tip: All of these hotfixes can be downloaded from Microsoft’s website, but not all of them will get installed automatically by running Microsoft Update.
Optional:
Copy the contents of [System Recovery DVD]\VAIO Applications\Applications to a new folder C:\CleanInstall\SonyUtilities.
The above step isn’t necessary for the clean install process as you only make use of these files after the custom operation system install
image has been loaded. However, if you do it now, you can copy these files to the custom install CD and you no longer need the System
Recovery DVD for any part of the imaging process should you want to do it again later.
You are now ready to create your custom operating install image.
Creating the Custom Operating System Install Image
Sony do not provide you with an installable operating system CD, so you need to obtain one somehow. Windows XP Media Center Edition
2005, the operating system we will be using in this guide comes on two CDs. I don’t know whether it is possible to obtain these CDs from
Sony, because I am a Microsoft Developer Network subscriber, and my subscription grants me access to all of Microsoft’s operating
systems so I needed to look no further. It is possible to obtain the CDs from Internet sources like torrent sites. I don’t know whether doing
so is legal or whether CDs obtained from such sources would work reliably, but my feeling would be that it is the product key you use for
the installation that determines the legality of your installation, and you will be using the legitimate product key on the sticker at the back
of your PC. Obtaining a working copy of the MCE 2005 CDs is beyond the scope of this guide and I will assume from this point on that you
have legally obtained copies of these CDs.
Now that you have your two MCE 2005 CDs, you need to download and install a brilliant little free application called nLite. This utility
allows you to take a copy of your Windows operating system CDs, make changes such as embedding drivers, hotfixes, product keys and
settings, then burn the image back to a bootable CD or DVD. It can be downloaded here: http://www.nliteos.com. This guide was written
using version 1.2.1 of nLite.
Note: Unless you have done it already, the nLite installer will make you download and install the .NET Framework 2.0. It will take you to
the Microsoft URL to do this, and after you have installed the framework you will have to restart the nLite installer.
• Run nLite and press “Next”.
• Insert MCE 2005 CD1 and press
“Browse…” to select your DVD drive.
• nLite will ask you where you want to
save the CD installation files for
modification. Click “OK”.
• Browse to C:\CleanInstall\OS_Default
and click “OK”.
• nLite will copy the contents of the CD
to your hard drive.
• nLite will ask to copy CD2 to the same
location as CD1. Insert CD 2 and press
“Yes”, then browse and select your
DVD drive.
• nLite will copy the contents of CD2 to
C:\CleanInstall\OS_Default.
• Don’t click “Next” yet. It has been my
experience that you may want build
your nLite modified operation system
install image a few times before you
get it right, so you want to be able to
easily get back to this point.
• I recommend taking a backup of your
C:\CleanInstall folder at this point, for
example to an external hard drive or
recordable DVD. At any later date you
can then resume the clean install
process from this point using your
backup. Once you have this folder
structure stored away somewhere,
you can build the custom operating
system install image on any PC with
nLite installed.
• Copy the contents of
C:\CleanInstall\OS_Default to
C:\CleanInstall\OS_Custom. This is so
that you are modifying a copy of the
OS rather than the original, and you
can quickly start again if things go
wrong.
• Click “Browse” and browse to
C:\CleanInstall\OS_Custom.
• Click “Next”.
• If you have run nLite before and you
are going back to tweak the image,
settings you used on previous runs will
be shown here. Select the occasion
you want to use and press “Load”, or if
you saved settings to a file, press
“Import” to load the settings now.
• This is where you select how much or
how little customisation you want to
do with your custom operating system
image.
• “Hotfixes and Update Packs”,
“Drivers” and “Bootable ISO” are
required for the purposes of this
guide, but I recommend selecting all
the options I have selected in this
screenshot.
• This is where you can embed
Microsoft hotfixes into the
installation. In theory, you should be
able to embed all of the hotfixes
provided by Sony. I haven’t tried this
however, because prefer to run
Windows Update after installation and
get the most current hotfixes that
way.
• The one hotfix you do need to include
is KB835211.exe
(http://support.microsoft.com/kb/835
221). This is the Universal Audio
Architecture system for HD (5.1) audio
from Microsoft. Do not confuse this
with KB888111.exe
(http://support.microsoft.com/kb/888
111) which is very similar but doesn’t
actually work with my Sony PC.
• This is where you embed device
drivers into the installation.
• Click “Insert” and select “Multiple
Driver Folder”. Browse to
C:\CleanInstall\Drivers and click “OK”.
• nLite will scan the folder you selected for drivers which it can
use in the image. It won’t be able to use all of them because
some of the drivers provided are in the format of a setup
executable rather than an unpackaged INF driver (for the VGXXL201 this includes TV Capture, Wireless LAN and Intel Quick
Resume). Still, it’s a good head start and leaves you with less to
do after Windows is installed.
• The one which is critical to this process is the RAID driver (all
others can be loaded after install). This is because the Windows
XP setup routine does not understand SATA disks configured in
a RAID array, which is the standard for Viiv-enabled
motherboards such as the one in this PC. In a development
blunder that beggars belief, the setup routine demands that the
RAID driver is on a floppy disk (from an IDE floppy drive), when
almost no PCs still ship with floppy drives today. The alternative
is what we are doing here; embedding the RAID driver in the
install CD. If you don’t do this, you will get a blue screen of
death (BSOD) early on in the install.
• I don’t know which of these RAID drivers you actually
need, but selecting all of them does no harm so I
recommend doing that. Select all the drivers and click
“OK”.
• Once you have selected all the drivers,
you should see something like this.
• In order to prevent you from removing stuff you actually want on
the next page, this compatibility list lets you choose what
functionality you actually need from Windows. Just select
everything you might possibly want to use in Windows.
• None of this is required for the
purposes of this guide, but it’s cool to
be able to knock out things from the
installation you don’t want. Also, if
you knock out enough components,
your final image will fit on a CD rather
than a DVD. I select lots of things in
this list, including all languages and
keyboard layouts other than the ones I
use.
• Be careful not to take out things you
might want later because I don’t know
how (if it’s even possible) you might
be able to get them back later.
• Change as many or as few of these
options as you like. The only one you
need to enter is your product key. This
can be found on the sticker on the
back of your PC.
• Suggestion:
Set “Unattended Mode” to “Fully
automated”. Under the Users tab, set
an “Organization” and the “Full Name”
of the Administrator account. If you
want to set account passwords, keep
them to 14 characters or less
(otherwise you get a warning during
installation). Give the PC a name
under the Network ID tab, and that
should be enough to ensure an
interaction-free unattended install.
Suggestion: If using an LCT TV as your display (and possibly other circumstances), set a sensible screen resolution under the Display
tab. Otherwise Windows will start at 640x480 and it will be difficult to adjust because the buttons will be off the screen.
• Again, this page has no impact for the
purposes of this guide. Change the
options as you see fit.
• The patches tab also has no relevance
to this guide, but I recommend the
settings I have selected here.
• The “Maximum unfinished
simultaneous connections” option has
to do with a security fix Microsoft put
in place that limits unfinished TCP/IP
connections to 10. It can however
negatively affect P2P file sharing
performance.
• The “Unsigned Themes Support”
option patches a file that should never
have needed patching in the first
place. Microsoft implemented a
powerful theming engine in Windows
XP and then released a whopping 2
themes to date and locked everybody
else out. This patch allows usercreated themes to be used.
• I love this tab. Again, nothing to do
with this process, change all or none
of these features and it’ll make no
difference to the process. What this
tab does though, is allow you to
change hundreds of settings that you
probably go through manually after
you’ve installed Windows. It won’t do
every last thing you want to change
but they haven’t missed much.
• You can disable Windows services on
the Services tab, but I usually leave
this one alone.
• You’re ready to kick off the process of
actually changing the installation CD
contents. Press “Yes”.
•
• The process is complete (nearly). We
still need to embed the files we copied
from the C: drive.
• Copy the contents of
C:\CleanInstall\I386 to
C:\CleanInstall\OS_Custom\I386,
replacing any files that already exist.
• If you have gone over the 700MB limit
for CDs, I strongly recommend copying
the following folders to
C:\CleanInstall\OS_Custom :
C:\CleanInstall\Drivers
C:\CleanInstall\Hotfix
C:\CleanInstall\I386 (to a folder other
than the existing I386 folder)
C:\CleanInstall\SonyUtilities
This will make life easier when you
need to access these files again later.
• Press “Next”.
• I suggest burning the installer to an
ISO image. That way you can copy it,
back it up and easily recreate it if the
disc gets lost or damaged. Choose
settings as shown in this screenshot
and press “Make ISO”.
• Save the ISO to wherever you like. I
saved mine to
C:\CleanInstall\WinLite.iso.
• You’re done with nLite.
• Use your preferred
tool to burn the
image to a DVD (or a
CD if you’ve managed
to hack out enough
from the installation
that the ISO is under
700MB).
• I used Roxio
DigitalMedia SE
which is preinstalled
on the PC. It’s not a
very full-featured
burner but it’s good
enough for this job.
Installing the Custom Operating System Install Image
OK, by this point you should have an operating system disc completely customised to your requirements with your Windows product key,
device drivers and any other customisations you saw fit to make. The annoying thing is that if this disc doesn’t work for you, depending
on how far you get in the installation before it fails, you may have to reset back to the factory image using the System Recovery DVD in
order to tweak the image again (unless you have another computer on which you can tweak the image, and you had the good sense to
follow my instructions and back up the CleanInstall folder).
I strongly recommend having nothing on your D: drive (or any other partitions you have made on the internal HDD) that you aren’t
prepared to lose. You may decide you want to reformat and repartition the whole disc as part of the install process which will mean you
will lose any data stored on it.
Insert your new disc, which I will now refer to as the “Custom Recovery Disc”, and restart your computer.
Follow the normal procedure for installing Windows from an original CD. Press any key when instructed to boot from the CD, and let it
load the drivers it needs. You don’t need to press F6 to load a RAID driver because it will already be embedded on the CD. If you get a
blue screen of death (BSOD) after the initial bout of file copying, you may not have embedded the RAID drivers using nLite correctly.
The first interaction you should have is deciding on which partition you want to install Windows. If working from a current position of the
factory default image you will see three partitions; the hidden one at 8111MB, and the C: and D: drives. I recommend deleting all three
and creating two new partitions, C: at 50,000MB with all the remaining space going to D:. Of course this is entirely up to you, it’s just a
suggestion. I always format a partition before installing Windows on it with a full NTFS format. Use a quick format if you’re impatient but
it only takes a few extra minutes to do it properly.
After the disk as formatted your computer will restart. If you used nLite to fully automate the installation, the next time you interact with
your computer will be when it has finished installing and Windows has loaded.
During the installation on my PC (presumably after the graphics card driver is loaded) the screen resolution is increased to 720p and the
Windows installer routine which is fixed at 640x480 resolution moves to the top left corner, taking up only half of the screen (the rest of
the screen is a nice shade of blue). This is normal, although if you don’t set a screen resolution under the “Unattended” section of nLite
(on the Display tab), once Windows boots it will be back to 640x480.
The installation takes about 40 minutes after formatting the C: drive.
Post-Installation Cleanup
• For some reason unknown to me, as I ran through the
installation, this worked example Windows created two
entries in boot.ini instead of one. This has the annoying
effect of making you wait 30 seconds or press any key
during start up. I don’t know why it did this, but it’s easy
to correct.
• Press “Start” > “Run” and type “C:\boot.ini” and press
“OK” as shown on the left.
• Delete the last line (starting
“multi(0)disk(0)rdisk(0)partition(2)”) and save the file.
Next time you boot, the problem will be gone.
You may want to format your D: drive now if you didn’t do so already during the installation process.
At this point I like to reassign my drive letters, because Windows will almost certainly have put removable drives before the DVD drive
which is one of my pet hates. Do this using Disk Manager which can be accessed by selecting “Manage” after right clicking on “My
Computer”.
Now you’re going to want to install whatever drivers are remaining to be installed. If you have followed this guide to the letter there
won’t be many to do. Insert your System Recovery CD (or take the files from the Custom Recovery CD if you copied the files onto it) and
run the following installers (I suggest using the order specified here, but I don’t think it’s all that important):
[System Recovery DVD]
\VAIO Applications
\Drivers
\Quick Resume Technology\el_all.exe
\TVcapture\InstallDriver.exe
\WirelessLAN\iProInst.exe
• For the Intel PROSet/Wireless driver installation, I
choose “Custom” install and deselect the second option
“Intel® PROSet/Wireless”. This is wireless application
software which is redundant if on Windows XP-based
systems which have very good wireless software.
Depending on what you took out of the Windows install CD during customisation in nLite, you might see a message telling you that some
Windows files have been replaced by unrecognised versions during installation of drivers, and you will be asked for the Windows CD. If
this happens, provide the Window XP Media Center Edition 2005 CD1 disc and everything should be fine. If you don’t take out certain
Windows components during nLite customisation, this doesn’t happen and I haven’t yet tracked down which components I took out that
caused this issue.
Software Installation
Now you should be at the stage where you have a working, clean installation of Windows, but you’re not finished yet. There is at least
some software which Sony provide that is useful or even necessary.
At this point I like to join my wireless network activate my copy of Windows (it’s probably nagged you to do this a couple of times by now
already). Then I do a Windows Update as many times as required until no updates are left. You may find that during your first Windows
Update, a number of keyboard and mouse related hardware devices are discovered and will need to be installed. The drivers should be
found automatically or if not, they will be on the Window XP Media Center Edition 2005 CD1 disc. I don’t know why these devices are
found since the keyboard works straight off, but I let the installation continue anyway.
Now you will want to consider installing a few of the utilities provided by Sony. The utilities can be found at
[System Recovery DVD]\VAIO Applications\Applications. It’s up to you what you choose to install (hence the whole point of doing a clean
install) but here are my comments regarding each item in this folder:
AverMedia MPEG Encoder
SonyUtils DLL
Sony Shared Library
Intel Matrix Storage
This encoder relates to your TV capture card. I’m not entirely sure what it’s used for –
perhaps recording live TV. I install it every time.
Information about this one online is sketchy, but it seems to have something to do with
special keys on the keyboard (like “Fn” keys), and possibly interaction with the DVD drive’s
eject button (without it, the eject button doesn’t seem to work once you’re in Windows). I
recommend installing this one.
Install this after SonyUtils DLL. It is a prerequisite for other Sony utilities including VAIO
Hardware Diagnostics and VAIO Event Service.
This article: http://www.intel.com/design/chipsets/matrixstorage_sb.htm from Intel
explains what this software is all about. From what I can gather it has to do with managing
your RAID array and gives improvements in data security, and hard disk performance. With
things like this, I figure why not? I installed it.
Intel Viiv Software
Sony MP4 Shared Library
Sony Video Shared Library
VAIO Control Center
VAIO Event Service
Wireless Switch Setting Utility
VAIO Action Setup
VAIO Hardware Diagnostics
You’ll probably find you actually can’t install this one until after you run Windows Update.
It comes up with an error during installation which is fixed by a hotfix although I don’t
know which one. Intel Viiv software lets you create a Media network for sharing content
with other devices on your network, including DRMed content downloaded from a growing
number of online vendors. I install this one as well, although I don’t have any content yet
which requires Viiv.
The first one I don’t bother with. It’s probably used by a bunch of Sony applications that I
don’t install, and certainly isn’t needed for playing MP4 files generally if you install a codec
pack (more on codec packs later).
Same as above.
This application is a joke. It’s a wrapper that provides access to about a dozen control panel
applets. It’s completely pointless.
From what I’ve read, this seems to have something to do with special keys (like “Fn” keys)
on the keyboard. I always install it.
This lets you switch from a 2.5GHz band wireless network to a 5.0GHz band wireless
network, and turn on the Bluetooth device which Sony reliably inform me doesn’t actually
exist on this model. If you don’t have a 5.0GHz wireless network, this utility will do nothing
for you.
This is a little utility which allows you to configure what the silver buttons on your keyboard
do. I don’t use those buttons anyway so I don’t bother installing this one.
I always install this. You never know when you might need it if you start having hardware
problems.
At this point, after a few tweaks here and there to Windows so I have it just the way I want it, I install a copy of Norton Ghost 2003 which
came with my old laptop, and I take a snapshot of the C: drive to a .GHO file. That way, I never have to go through this process again – I
can always get back to a clean image of Windows Media Center Edition 2005, with drivers and Windows Updates and Windows settings
tweaks already done. If you take the image any further on than this, you’re likely to have a bunch of software on installed that will be out
of date next time you want to reinstall your operating system. Of course this is an optional step and you need Norton Ghost or an
equivalent product to do it, but it saves you several steps in the reinstall process and is a nice clean way of getting back to a fresh newly
installed operating system (assuming there are no significant hardware changes in between reinstalls).
Now you need to consider what software applications are missing from your installation that you need. Most of the applications which
come pre-installed are on the Application Recovery CD. Some of them however, are not. I am pretty sure the following are part of the
factory image and not on the Application Recovery CD:
•
•
•
•
•
•
Norton Antivirus (90 day trial)
WinDVD (old version)
Google Earth (old version and free anyway)
A James Bond game of some kind
Google’s Picasa (free)
Google Desktop Search Installer
There is nothing I can do about Norton Antivirus (it’s only a 90 day trial anyway) – I’m opting to use the free 1 year licence for McAfee I
got with Sky Broadband instead. I know of no other way to legally obtain WinDVD, but it’s pretty easy to get the same functionality
legally, and this is described in the next section.
Codecs and Video Playback
You’ll find until you’ve installed WinDVD or equivalent, you can’t complete Media Center setup. When you come to select the number of
speakers you have it will probably tell you that “The video decoder has either malfunctioned or is not installed”. It is not installed. You
don’t need to install a complete product like WinDVD or PowerDVD, but you do need some decoder software. I recommend downloading
K-Lite Codec Pack (I download the “Full” version but there’s a choice depending on how many codecs you want bundled with it) which
gives you a choice of MPEG decoders. You can get it here: http://www.free-codecs.com/download/K_Lite_Codec_Pack.htm.
If you install K-Lite Codec Pack, you’ll need to decide what to install for yourself out of the many options, but these are the options I
choose:
Profile 4: Lots of stuff
…with the following amendments:
On the “Select Components” page, I use the following settings:
•
•
•
•
•
Add Xvid DirectShow video filter
Add InterVideo MPEG-1/MPEG-2 DirectShow video filter (this is the one that makes DVD playback and Media Center work)
Change AC3/DTS/LPCM (DVD audio) DirectShow audio filter from AC3Filter to InterVideo
Add MP1/MP2 (MPEG Audio) DirectShow audio filter and set it to MainConcept
Add AAC DirectShow audio filter and set it to 3ivx Pro
On the “Select Additional Tasks” page, I use the following settings:
• Reset all settings to their defaults
• Make Media Player Classic the default for: Nothing (MPC might be a good, reliable, lightweight media player but it’s just too ugly to
be my preferred media player
• Speaker setup: 5.1 (or higher)
I have found that if I choose slightly different settings, I end up with a jittery signal in Media Center on live TV, and sometimes no sound
on live TV. I’ve also managed to break sound completely on my system once by messing about with different options in K-Lite Codec Pack
and I couldn’t recover from it, so you do need to select the right options. The above profile definitely seems to work – codecs are very
much a dark art to me so once I have them working, I leave them the hell alone.
At this point you should be able to play a DVD in Media Center or Windows Media Player. It’s using the decoder from WinDVD
(InterVideo) but you haven’t actually installed WinDVD. So far as I can tell from reading up on the Internet, what you’ve done is perfectly
legal. Besides, you have a right to use WinDVD anyway – it came with your PC, Sony just decided not to let you get at if you want to go the
clean install route.
Application Recovery DVD
There is a veritable treasure trove of software on your Application Recovery DVD. Most of it you won’t want – in fact, the only application
on there that I want is Roxio DigitalMedia SE, and only that because I don’t have any other software for burning CDs and DVDs nor do I
have the desire to buy or steal any. I’ll describe here how to extract the software from the DVD. Which bits you choose to install are
entirely up to you, but I would suggest very little, if any of it. Most of it is out of date, poor quality or just plain useless.
You can’t just pop the DVD in and install what you want, Sony has an all-or-nothing way of installing the DVD but that’s it. However, there
is a way around this problem. All the installers for the various applications Sony give you are on the CD, they’re just zipped into cabinet
files with the .pac extension. You can extract them, and to do this, you need to download a little command-line utility called KCAP.EXE. It
can be found here: http://www.myplc.com/sony/bin/kcap.zip or here:
http://www.math.utexas.edu/users/rogoyski/work/tr5ap_winxp/kcap.exe.
Incidentally, I found out about this utility through the following URLs: http://www.myplc.com/sony/sony_apps.htm and http://www.clubvaio.sony-europe.com/clubvaio/mvnforum/viewthread?thread=37599.
Temporarily place KCAP.EXE in the root of the C: drive for the sake of convenience. The command to extract a .pac file to a folder is like
so:
C:\KCAP.EXE [source file] [destination folder]
KCAP.EXE is not exactly a user friendly utility and will give you no indication of failure on error. It will fail if [destination folder] does not
exist so you have to create the destination folder first. I decided to extract absolutely everything on the CD and put it all in named folders
so that I could always get to the applications easily, should I ever want to. It took an hour or more, but I’ll never have to rummage
through that CD again looking for any one particular application.
Create yourself a folder where you want to extract the applications to. For now, I’ll assume its C:\SonyApps. Create an MS-DOS batch file
(just create a normal text file with the extension .bat, e.g. ExtractCD.bat and put the following test in the file:
C:\KCAP.EXE E:\APR\SP-006356-08.pac C:\SonyApps
C:\KCAP.EXE E:\APR\SP-009681-01.pac C:\SonyApps
C:\KCAP.EXE E:\APR\SP-010812-01.pac C:\SonyApps
C:\KCAP.EXE
C:\KCAP.EXE
C:\KCAP.EXE
C:\KCAP.EXE
E:\APR2\SP-005054-04.pac
E:\APR2\SP-010923-01.pac
E:\APR2\WS-000087-00.pac
E:\APR2\WS-000089-01.pac
C:\SonyApps
C:\SonyApps
C:\SonyApps
C:\SonyApps
C:\KCAP.EXE
C:\KCAP.EXE
C:\KCAP.EXE
C:\KCAP.EXE
C:\KCAP.EXE
C:\KCAP.EXE
C:\KCAP.EXE
C:\KCAP.EXE
C:\KCAP.EXE
C:\KCAP.EXE
C:\KCAP.EXE
C:\KCAP.EXE
C:\KCAP.EXE
C:\KCAP.EXE
C:\KCAP.EXE
C:\KCAP.EXE
C:\KCAP.EXE
C:\KCAP.EXE
C:\KCAP.EXE
C:\KCAP.EXE
C:\KCAP.EXE
C:\KCAP.EXE
C:\KCAP.EXE
C:\KCAP.EXE
C:\KCAP.EXE
C:\KCAP.EXE
C:\KCAP.EXE
C:\KCAP.EXE
C:\KCAP.EXE
C:\KCAP.EXE
C:\KCAP.EXE
C:\KCAP.EXE
C:\KCAP.EXE
E:\APR3\SP-007028-03.pac
E:\APR3\SP-007630-06.pac
E:\APR3\SP-007741-14.pac
E:\APR3\SP-007842-04.pac
E:\APR3\SP-009079-01.pac
E:\APR3\SP-009458-01.pac
E:\APR3\SP-009464-04.pac
E:\APR3\SP-009777-05.pac
E:\APR3\SP-009803-11.pac
E:\APR3\SP-009883-02.pac
E:\APR3\SP-009920-00.pac
E:\APR3\SP-010222-03.pac
E:\APR3\SP-010394-05.pac
E:\APR3\SP-010505-01.pac
E:\APR3\SP-010672-01.pac
E:\APR3\SP-010677-04.pac
E:\APR3\SP-010678-03.pac
E:\APR3\SP-010717-04.pac
E:\APR3\SP-010748-01.pac
E:\APR3\SP-010792-00.pac
E:\APR3\SP-010804-03.pac
E:\APR3\SP-010838-02.pac
E:\APR3\SP-010862-03.pac
E:\APR3\SP-011275-08.pac
E:\APR3\SP-011275-10.pac
E:\APR3\SP-011460-00.pac
E:\APR3\SP-011463-00.pac
E:\APR3\SP-011650-01.pac
E:\APR3\SP-011777-00.pac
E:\APR3\SP-011844-03.pac
E:\APR3\SP-011969-00.pac
E:\APR3\SP-012255-00.pac
E:\APR3\SP-012283-00.pac
C:\SonyApps
C:\SonyApps
C:\SonyApps
C:\SonyApps
C:\SonyApps
C:\SonyApps
C:\SonyApps
C:\SonyApps
C:\SonyApps
C:\SonyApps
C:\SonyApps
C:\SonyApps
C:\SonyApps
C:\SonyApps
C:\SonyApps
C:\SonyApps
C:\SonyApps
C:\SonyApps
C:\SonyApps
C:\SonyApps
C:\SonyApps
C:\SonyApps
C:\SonyApps
C:\SonyApps
C:\SonyApps
C:\SonyApps
C:\SonyApps
C:\SonyApps
C:\SonyApps
C:\SonyApps
C:\SonyApps
C:\SonyApps
C:\SonyApps
C:\KCAP.EXE E:\APR3\SP-012765-00.pac C:\SonyApps
C:\KCAP.EXE
C:\KCAP.EXE
C:\KCAP.EXE
C:\KCAP.EXE
C:\KCAP.EXE
C:\KCAP.EXE
C:\KCAP.EXE
E:\APR4\SP-008670-01.pac
E:\APR4\SP-009472-02.pac
E:\APR4\SP-009576-06.pac
E:\APR4\SP-009948-00.pac
E:\APR4\SP-010848-00.pac
E:\APR4\SP-011614-00.pac
E:\APR4\SP-012644-00.pac
C:\SonyApps
C:\SonyApps
C:\SonyApps
C:\SonyApps
C:\SonyApps
C:\SonyApps
C:\SonyApps
C:\KCAP.EXE
C:\KCAP.EXE
C:\KCAP.EXE
C:\KCAP.EXE
C:\KCAP.EXE
C:\KCAP.EXE
E:\APR5\SP-007819-02.pac
E:\APR5\SP-010851-00.pac
E:\APR5\WS-000002-01.pac
E:\APR5\WS-000003-02.pac
E:\APR5\WS-000005-07.pac
E:\APR5\WS-000091-00.pac
C:\SonyApps
C:\SonyApps
C:\SonyApps
C:\SonyApps
C:\SonyApps
C:\SonyApps
Before running it, check the list of files matches your DVD. This is a complete list from my Application Recovery DVD, but Sony may
change the list in the future. Adjust as appropriate and double click on the MS-DOS batch file to run it. Note that the files Sony.pac and
Sony2-5.pac don’t contain any applications or useful information. They’re required by the Sony installer that installs everything on the
DVD.
When you run the MS-DOS batch file, all the installers should be extracted to separate folders at C:\SonyApps (or wherever you extracted
them to). The folders will be named after the part numbers. By looking inside, it will be obvious what some of them are but not all of
them. The following table identifies most of them by name – I suggest renaming the folders so you can find the relevant applications
without hunting around. The packages starting in “WS-“ don’t have any actual installer associated with them. They run DOS scripts and/or
VB scripts which make various minor changes to the system. They are used by the Sony installer to assist in the uninterrupted installation
of the whole DVD – they serve no purpose on their own. There is one “SP-“ package that I can’t identify, SP-009458-01. It runs extremely
quickly and makes no obvious changes anywhere. Anyway, here’s the table of what’s what.
SP-006356-08
SP-009681-01
SP-010812-01
SP-005054-04
SP-010923-01
SP-007028-03
SP-007630-06
SP-007741-14
WS-000087-00
WS-000089-01
SP-007842-04
SP-009079-01
SP-009458-01
SP-009464-04
SP-009777-05
SP-009803-11
SP-009883-02
SP-009920-00
SP-010222-03
SP-010394-05
SP-010505-01
SP-010672-01
SP-010677-04
SP-010678-03
SP-010717-04
SP-010748-01
SP-010792-00
SP-010804-03
Java Runtime Environment 1.5.0.06
Adobe Reader 7.0.5
Adobe Photoshop Elements 4.0
Memory Stick Formatter
Adobe Premiere Elements 2.0
Music Server Controller
Installs some crappy HTML content that links to a special offer for discounts when buying Adobe
products. Avoid.
VAIO Entertainment Platform
Environment Settings for Windows XP (VB Script)
Environment Settings for APR (VB Script)
OpenMG Updater (http://www.sony.net/Products/OpenMG/overview/index.html)
VAIO Media AC3 Decoder
Unidentified
AOL 9.0
OpenMG Secure Module
Roxio DigitalMedia SE
SonicStage Mastering Studio Audio Filter Custom Preset
SonicStage Mastering Studio Plugins
LiquidSurf for VAIO TV Entertainment 1.20
Sonic UDF Reader
DSD Playback Plug-in
DSD Direct
SonicStage Mastering Studio
SonicStage Mastering Studio Audio Filter
Image Converter 2 Plus
VAIO Edit Components
VAIO Information FLOW Sample Photo
VAIO Media
SP-010838-02
SP-010862-03
SP-011275-08
SP-011275-10
SP-011460-00
SP-011463-00
SP-011650-01
SP-011777-00
SP-011844-03
SP-011969-00
SP-012255-00
SP-012283-00
SP-012765-00
SP-008670-01
SP-009472-02
SP-009576-06
SP-009948-00
SP-010848-00
SP-011614-00
SP-012644-00
SP-007819-02
SP-010851-00
WS-000002-01
WS-000003-02
WS-000005-07
WS-000091-00
VAIO Media Integrated Server
VAIO Media Redistribution
WinDVD BD for VAIO (This doesn’t seem to be the regular version of WinDVD, but special Blu-Ray
version, presumably for the VGX-XL202 Blu-Ray model)
WinDVD DB for VAIO (Seems to be exactly the same as SP-011275-08 except the data2.cab file is about
5mb smaller)
VAIO Information FLOW
VAIO Information FLOW Sample Music
Skype
DVgate Plus
Ulead BD DiscRecorder (Presumably for the VGX-XL202 Blu-Ray model since the VGX-XL201 doesn’t have
a Blu-Ray drive)
SonicStage
SonicStage Add-on
OpenMG AAC Add-On Module
Internet Explorer Remote Control Extension
Microsoft Works 8
Shortcut to MS Office 2003 Standard (just the Desktop shortcut and icon)
Click to DVD
Adobe Reader 7.0 (Again?)
Microsoft Office 2003 Standard Trial Assistant (Whatever the hell that is)
Microsoft Office 2003 Standard Trial
Adobe Flash Player 8 ActiveX Control
Click to DVD Menu Data
Norton Ghost 10 Try-and-Buy (6 day trial)
Window Cleaning (closes Explorer) (VB Script)
Resets Start Menu order (VB Script)
BL Number Marking (I have no idea what this is) (VB Script)
Environment Delete for APR (VB Script)
Conclusion
That’s it. By this point hopefully you have a clean operating system install on your VGX-XL201 VAIO Media Center, and only the software
you want installed. I hope you found this guide useful.
Respectfully I ask that you don’t contact me for support relating to your Sony VAIO PC or relating to this guide. I am just a PC owner like
you, and I decided to take the time to write this guide as a courtesy to other consumers who have purchased the same product in the
hope that others may not have to go through the same 30+ hours of trial and error that I had to go through to get a clean operating
system installation on my PC. It’s taken me 12 hours just to write this guide and that’s about as much time as I want to give for the cause.
I am not an expert in this field or in Sony products in general, and I do not want to become one.
For support I recommend posting on the Club VAIO forums which helped me to get to the point where I could write this guide. This guide
will be posted on a thread in the Club VAIO forums and if there are parts of the guide which don’t work for you or you feel could be
improved on, please post on that thread in the forums. I may or may not update the guide, but even if I don’t, other users may benefit
from the wisdom of your experience.
Acknowledgements
Thanks to Blencogo, a Club VAIO member who helped me over the initial hurdle of installing the operating system on a PC with a SATA
disk drive and Viiv RAID configuration.
Thanks to Akash84, also a Club VAIO member for his thorough writing up of the process he went through to make a clean operating
system install for his VAIO laptop, found here: http://www.club-vaio.sony-europe.com/clubvaio/mvnforum/viewthread?thread=36891.
This thread helped me to understand how to make your VAIO operating system product key work with a regular operating system install
CD.
Thanks to philfree, another Club VAIO member for his explanation of the KCAP.exe utility for extracting “.pac” files from the Application
Recovery DVD, found here: http://www.club-vaio.sony-europe.com/clubvaio/mvnforum/viewthread?thread=37599.
Thanks to the anonymous author of this article: http://www.myplc.com/sony/sony_apps.htm which offers an alternative explanation to
the above on how to extract application installation packages from the “.pac” files from the Application Recovery DVD, and for providing
a download of the utility which makes this extraction possible.
Finally, a special thanks to Dink Nuhagic, for creating the superb nLite utility, and for making it free ;)