1
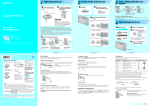
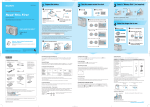
Shoot images easily (Auto adjustment mode)
5
Holding the camera
1
2
Select a mode.
Still image (auto adjustment
mode):
Select
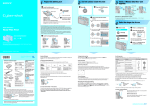
Shoot still images (Scene Selection)
Still image:
Press and hold the
shutter button halfway
down to focus.
.
1
Shoot with the shutter button.
AE/AF lock indicator
Flashing t lit/beeps
Select the desired mode of Scene
Selection ( ,
,
,
,
,
).
Press the shutter button
fully down.
The shutter sounds.
High Sensitivity
6
1
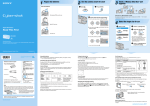
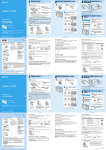
View/delete images
2
Press
(Playback).
VGA
3/ 9
• If you press
button
when the camera is
powered off, the camera
is turned on in the
playback mode.
101-0003
/
Select
.
/
lever
lever
Movie:
To play back a movie, press z.
2
STD
Shoot with the shutter button.
640
Position the subject in the center of the focus
frame.
Zoom lever
Press the shutter button
fully down.
101_0010
STOP
REC
Control button
Control button
To stop recording, press the shutter button fully down again.
Darker
down.
On Function Guide
Using the zoom
The operational instructions displayed on the Function Guide are automatically turned off in a
few seconds.
When you want to cancel the Function Guide, press the Shutter Button half way down.
You can set the Function Guide not to be displayed on the
(Setup) screen. t “User’s Guide/
Troubleshooting” (page 50)
Zoom lever
96
Shooting close-up
(Macro)
VGA
96
Using the
self-timer
• Change the position of the mode dial.
To delete images
1 Display the image you want to delete and press
(Delete).
2 Select [Delete] with v, then press z.
S AF
Brighter
(Playback) again.
• Press and hold the shutter button halfway
S AF
VGA
• Movies with the image size [160] are displayed a size
smaller.
To return to the shooting mode
• Press
Image Brightness(EV)
VOLUME
Mode dial
Using the control button
Using the flash for
still images
Playback bar
2006 1 1 10:30PM
REV/CUE
Rewind/Fast forward: b/B
(Return to normal playback: z)
Volume: v/V
Stop playback: z
button
(Screen display
switch) button
Changing Image
Brightness (EV)
(Adjusting
exposure)
B
10/10
00:00:03
Movie:
Finder
96
is displayed
• For details on modes, see below.
AF range finder frame
VGA
VOLUME
Still image: the image size is displayed
Movie:
Function Guide
2006 1 1 10:30PM
BACK/NEXT
Shoot without flash
in low-light
reducing blur
Movie:
Select an image with b/B.
• When the zoom scale exceeds 3×, the camera uses the Digital Zoom function.
For details on the [Digital Zoom] settings and the image quality t “User’s Guide/Troubleshooting”
(page 49)
• You cannot change the zoom scale while shooting a movie.
To cancel the Scene Selection
Set the mode dial to other than the mode of Scene Selection.
To cancel the deletion
Select [Exit], then press z.
S AF
Delete
Exit
BACK/NEXT
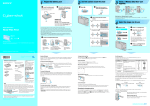
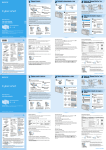
Changing Image Brightness (EV) (Adjusting exposure)
Before Step 2, press b (
) on the control button.
Adjust the image brightness with v (Brighter) / V (Darker).
Using the self-timer
Before Step 2, press V (
No indicator
) on the control button repeatedly until the desired mode is selected.
Darker
Brighter
Image Brightness(EV)
Darker
Image Brightness(EV)
Brighter
Darker
Toward –
To view an enlarged image (playback zoom)
The following modes are predetermined to match the scene conditions.
Slide / lever to the
side while displaying a still image.
To undo the zoom, slide / lever to the
side.
Adjust the portion: v/V/b/B
High sensitivity
Not using the self-timer
To delete the displayed scale bar, press b again.
Image Brightness(EV)
Scene Selection modes
Shoot without flash in low-light
reducing blur
Setting the 10-second delay self-timer
• The compensation value can be set in 1/3EV increments.
• If a subject is being shot in extremely bright or dark conditions, or the flash is used, the exposure adjustment
may not be effective.
• For details on the exposure t “User’s Guide/Troubleshooting” (page 14)
Setting the 2-second delay self-timer
Press the shutter button, the self-timer lamp
flashes, and a beep sounds until the shutter
operates.
Shoot landscapes with distant
focus
Self-timer lamp
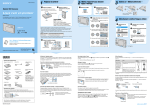
Before step 2, press v ( ) on the control button repeatedly until the desired mode is selected.
Soft snap
Twilight*
Flash Auto
Strobes when there is insufficient light or backlight (default setting)
Flash forced on
SL
Slow synchro (Flash forced on)
The shutter speed is slow in a dark place to clearly shoot the background that is
out of flash light.
• If you use the 2-second delay self-timer, you may
prevent blur.
Flash forced off
• Shooting distance (when [ISO] is set to [Auto])
W side: Approx. 0.2 to 6 m (7 7/8 inches to 19 feet 8 7/8 inches)
T side: Approx. 0.3 to 3.2 m (11 7/8 inches to 10 feet 6 3/8 inches)
• The flash strobes twice. The first time is to adjust the light quantity.
• The shortest shooting distance is 50 cm (19 3/4 inches). Shoot in the close-up (Macro) mode (left) when
shooting a subject closer than the shortest shooting distance.
• When the camera cannot focus on the subject automatically, the AE/AF lock indicator changes to flashing
slowly and the beep does not sound. Recompose the shot and focus again.
Before step 2, press B (
– Moving fast
– Reflective light or with a lustrous finish
– Flashing
– Backlit
To brighten up the display
If you view images in bright outside light, adjust the brightness of the LCD backlight up.
If you press
(Screen display switch) button longer (above), the backlight brightens. If you
press again, the backlight is cancelled.
) on the control button.
To cancel, press B again.
To identify items on the screen
• Setting the zoom all the way to the W side is recommended.
• The in-focus range becomes narrow, and the complete subject may not entirely be in focus.
• The Auto Focus speed drops.
t “User’s Guide/Troubleshooting” (page 20)
Shortest shooting distance from the lens surface
Press
(Screen display switch) button (above) repeatedly. Use the finder (above) for saving
battery power, or shooting images when it is difficult to confirm using the LCD screen.
Setting all the way to the W side: Approx. 6 cm (2 3/8 inches)
Setting all the way to the T side: Approx. 30 cm (11 7/8 inches)
side and select an image with v/V/b/B.
VGA
3/9
• SINGLE DISPLAY
101-0003
• SINGLE DISPLAY
Shoot portraits in low light with
flash
1 While an index screen is displayed, press
control button, then press z.
BACK/NEXT
2006 1 1 10:30PM
VOLUME
To turn off the LCD screen
(Delete) and select [Select] with v/V on the
2 Select the image you want to delete with v/V/b/B, then press z to display the
indicator on the selected image.
(Delete)
* The shutter speed becomes slower, so using a tripod is recommended.
Green selection frame
To use the functions set by the control button with Scene Selection
Subjects difficult to focus on are:
However, the battery power may decrease faster under such condition.
Shooting close-up (Macro)
(Index) lever to the
To return to the single-image screen, press z. To display the next (previous) index screen, press
b/B.
To delete images in index mode
If you shoot a still image of a subject that is difficult to focus on
– Distant from the camera and dark
– The contrast between the subject and its
background is poor.
– Seen through glass
Slide
Shoot subject with soft
background
Twilight portrait*
No indicator
Viewing an index screen
Shoot low light scene without
flash
To cancel, press V again.
Selecting a flash mode for still images
Cancel playback zoom: z
To store enlarged images: [Trimming] t “User’s Guide/Troubleshooting” (page 47)
Landscape
Brighter
Toward +
Beach
Shoot waterside scene with rich
blue color
To cancel a selection
Before shooting in step 2, select the settings with the control button. Some functions are not
available, depending on the Scene Selection mode. When you press the button to select functions
that cannot be combined with Scene Selection, a beep sounds. t “User’s Guide/
Troubleshooting” (page 30)
Select an image you have previously selected for deletion, then press z
to delete the
indicator from the image.
SELECT
3 Press
TO NEXT
(Delete).
4 Select [OK] with B, then press z.
• To delete all the images in the folder, select [All In This Folder] with v/V in step 1 instead of [Select], then
press z.