1
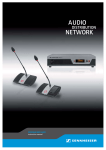
Audio
Distribution
Network
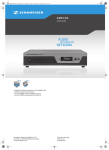
ADN CU1
Quick guide
KA_ADN-CU1_546415_0911_SP13.book Seite 1 Donnerstag, 1. September 2011 11:00 11
Contents
Contents
Information on this quick guide ................................................................................ 2
The ADN CU1 central unit ............................................................................................ 2
Delivery includes .......................................................................................................... 3
Components required for operation ........................................................................... 3
Product overview ADN CU1 central unit ................................................................... 4
Overview of the ADN CU1 display panel .................................................................... 5
Structuring and controlling the conference system ............................................... 6
Preparing the ADN CU1 central unit for use ............................................................. 9
Setting up the conference system ........................................................................... 10
Using the ADN CU1 central unit ............................................................................... 14
Switching the conference system on/off ................................................................ 14
Deactivating the lock mode of the central unit ...................................................... 14
Functions of the keys .................................................................................................. 14
Configuring the conference system ........................................................................ 15
Overview of the operating menu .............................................................................. 15
Working with the operating menu ........................................................................... 19
Setting the volume of the conference units’ built-in loudspeakers ................... 21
Cleaning and maintaining the conference system ................................................ 21
Specifications ADN CU1 ............................................................................................. 22
ADN CU1 | 1
KA_ADN-CU1_546415_0911_SP13.book Seite 2 Donnerstag, 1. September 2011 11:00 11
Information on this quick guide
Information on this quick guide
Please make sure to read the “Safety information” supplement included separately
with the product. This supplement contains important information on the safe
operation of the product as well as the manufacturer’s declaration and warranty
notes.
A detailed instruction manual for the overall ADN conference system can be found
www
Manual
•
on the Internet at www.sennheiser.com or
•
on the DVD-ROM supplied with the ADN CU1 central unit.
The ADN CU1 central unit
The ADN CU1 central unit is part of the Sennheiser ADN conference system.
The central unit controls the operation of the entire conference system. Up to max.
40 ADN D1 delegate units and ADN C1 chairperson units can be directly connected
to the central unit. For larger conference systems with up to max. 400 conference
units, the central unit can also manage up to 15 ADN PS power supplies.
For configuring the conference system, you can either use the central unit’s operating menu or the “Conference Manager” software.
ADN CU1
• REC
Conferences
with up to a max. of
40 participants
“Conference Manager”
software
Conferences with up to a max. of 400 participants
ADN PS
ADN PS
max. 15 ADN PS
max. 400 ADN D1/
ADN C1
max. 40
ADN D1/ADN C1
2 | ADN CU1
per ADN PS with
standard cabling a
max.of 70 ADN D1/ADN C1
per ADN PS with
redundant ring cabling a
max. of 40 ADN D1/ADN C1
KA_ADN-CU1_546415_0911_SP13.book Seite 3 Donnerstag, 1. September 2011 11:00 11
Delivery includes
Delivery includes
1
1
1
1
1
ADN CU1 central unit
mains cable (EU, UK or US version), length 1.8 m
quick guide
“Safety information” supplement
including, among other things, the “Conference Manager” software, the
“ADN Cable Calculator” software and the instruction manual for the overall
conference system as PDF
Components required for operation
Central unit/
Power supplies
Number
Description
Cat. No. Function
1
ADN CU1-EU central unit,
EU version
505553 Controls the conference and
supplies power to max. of
505554 40 conference units
ADN CU1-UK central unit,
UK version
ADN CU1-US central unit,
US version
Conference units
System cables
505555
1 – 15
(optional)
ADN PS-EU power supply, 505546 Supplies power to conference
EU version
units connected in simple
strings or in redundant ring
ADN PS-UK power supply, 505547
topology,
UK version
for conferences with up to
ADN PS-US power supply, 505548 400 conference units
US version
Number
Description
Cat. No. Function
Max. 400
ADN D1 delegate unit
502758 Allows to make contributions
to the conference
1 – 10
(optional)
ADN C1 chairperson unit
502759 Allows to manage the
conference
The system cables are black and have two shielded RJ45 modular plugs.
Number
Description, length
Cat. No. Function
Divers
SDC CBL RJ45-2, 2 m
SDC CBL RJ45-5, 5 m
009842 Allow to interconnect
components and conference
009843
units
009844
SDC CBL RJ45-10, 10 m
009845
SDC CBL RJ45-20, 20 m
009846
SDC CBL RJ45-50, 50 m
009847
SDC CBL RJ45-3, 3 m
Additional accessories for the ADN conference system can be found at
www.sennheiser.com.
ADN CU1 | 3
KA_ADN-CU1_546415_0911_SP13.book Seite 4 Donnerstag, 1. September 2011 11:00 11
Product overview ADN CU1 central unit
Product overview
ADN CU1 central unit
1
2
3
4 5
ESC
IN –– AUDIO –– OUT
6
7
PORT II
PORT I
2x 52.8V
1.75A
8 9
100-240V~
50/60Hz 240W
@
A
B
E
C
D
F
15
A Front view
B Rear view
1 On/off switch
6 IN audio input
2 Standard display key
7 OUT audio output
3 Display panel
8 PORT II socket (RJ 45) for connection
of conference units
4 Jog dial
5 ESC key (Escape)
9 PORT I socket (RJ 45) for connection
of conference units
0 VGA monitor output
A USB socket
(2x)
B Network socket (RJ 45)
C Fans
D Mains socket
E Hazard warnings
F Type plate
4 | ADN CU1
KA_ADN-CU1_546415_0911_SP13.book Seite 5 Donnerstag, 1. September 2011 11:00 11
Product overview ADN CU1 central unit
Overview of the ADN CU1 display panel
After switch-on, the central unit’s display shows progress bars (for the booting
routine “Booting” and the self test “Selftest”) and then the standard display:
I
H
G
Direct Access
30 Units
22
P
O
N
M
L
K
J
Text/icon
Possible display/function
G Conference mode
Current conference mode: “Direct Access”, “Override”,
“Push To Talk”, “Request”
H Floor channel volume
Current volume setting for the conference units’ builtin loudspeakers
I Number of
conference units
Number of conference units connected to the
conference system
J Connection status
The central unit is not connected to the
“Conference Manager” software and/or a media
control unit.
The central unit is connected to the “Conference
Manager” software and/or a media control unit.
K Structural change icon Icon appears when, since the last initialization, a
malfunction/change has occurred in the cabling of the
conference units.
L Cable fault icon
Icon appears when a conference unit is not correctly
connected to the ADN CU1 central unit.
M Short-circuit icon
Icon appears when there is a short circuit in the
cabling of the conference units. The display panel
lights up red.
N Warning triangle
Icon appears when there is a malfunction/change. The
display panel lights up red or orange.
O Audio recording
Icon appears when audio recording of the
conference is activated.
Icon flashes when storage space is low.
Icon appears when, after finishing the audio
recording, data is still written to the mass storage
device.
Icon appears when the audio recording failed. The
display panel lights up red.
P Lock mode icon
(see page 14)
Lock mode of the central unit is deactivated
Lock mode of the central unit is activated
For information on troubleshooting when error icons K to N are displayed, refer to
the detailed instruction manual “ADN Conference System”.
ADN CU1 | 5
KA_ADN-CU1_546415_0911_SP13.book Seite 6 Donnerstag, 1. September 2011 11:00 11
Structuring and controlling the conference system
Structuring and controlling the
conference system
Structuring the conference system
The ADN conference system is suitable for conferences with up to 400 conference
units. For safe operation of the conference system, make sure that all conference
units are supplied with a voltage of at least 35 V! The voltage supplied depends on
the number of connected conference units and on the cable lengths. The standard
cable length between the central unit or power supply and the first conference unit
is 80 m max. and the standard cable length between the individual conference
units is 2 to 5 m.
If these cable lengths are observed, safe operation of conference systems with the
following number of conference units is ensured:
•
small conference systems comprising only an ADN CU1 central unit
– 30-40 conference units connected in simple strings
•
large conference systems comprising an ADN CU1 central unit and a max. of
15 ADN PS power supplies
– max. 400 conference units connected in simple strings or in ring topology
per ADN PS power supply
– 60-70 conference units connected in simple strings
– 30-40 conference units connected in ring topology
If cable lengths are shorter, it might be that more conference units can be used.
ADN D1 delegate units and ADN C1 chairperson units can be combined in an arbitrary order. The number of chairperson units, however, is limited to 10 max. per
conference system. All components of the conference system are interconnected
using SDC CBL RJ-45 system cables.
Small conference system with simple cabling
For small conference systems with approx. 30-40 conference units, you require one
ADN CU1 central unit for controlling the conference. The conference units are interconnected in two cable strings which are directly connected to the central unit.
ADN CU1
RT
PO
II
PO
RT
I
max. 40
ADN D1/ADN C1
ADN CU1
1
max. 80 m
52.8 V
6 | ADN CU1
2
3
...
20
approx.. 2-5 m approx.. 2-5 m
>35 V
KA_ADN-CU1_546415_0911_SP13.book Seite 7 Donnerstag, 1. September 2011 11:00 11
Structuring and controlling the conference system
Large conference system with simple cabling
For setting up a large conference system with the maximum number of conference
units (i.e. up to 400), you require one ADN CU1 central unit for controlling the conference and additional ADN PS power supplies for powering the conference units.
The conference units are interconnected in cable strings and up to four cable
strings can be connected to each ADN PS power supply.
PORT I/II
ADN CU1
RT
PORT
PO
II 2
RT
PO
II 1
PORT
I1
I2
ADN PS (max. 15)
max. 70
ADN D1/ADN C1
ADN CU1
ADN PS
1
max. 80 m
max. 80 m
52.8 V
2
3
... 20
approx. 2-5 m approx. 2-5 m
>35 V
ADN CU1 | 7
KA_ADN-CU1_546415_0911_SP13.book Seite 8 Donnerstag, 1. September 2011 11:00 11
Structuring and controlling the conference system
Large conference system with redundant ring topology
The redundant ring topology ensures that, should one conference unit or system
cable fail or be manipulated, all other conference units of the cable ring will
continue to function reliably.
For setting up a large conference system with redundant ring topology, you require
one ADN CU1 central unit for controlling the conference and additional ADN PS
power supplies for powering the conference units. The conference units are interconnected in rings and two rings can be connected to each ADN PS power supply.
PORT I/II
ADN CU1
PO
II 2
RT
PO
1
PORT II
RT
I1
PORT I 2
ADN PS (max. 15)
max. 40
ADN D1/ADN C1
ADN CU1
ADN PS
1
max. 80 m
max. 80 m
52.8 V
2
... 20
3
approx. 2-5 m approx. 2-5 m
>35 V
Calculating the voltage supply of the conference units
The “ADN Cable Calculator” software allows you to calculate the voltage supply on
the individual sections of a cable string or cable ring and to plan the structure of
the conference system. The software is available from your Sennheiser partner or
from the “Product Downloads” area on the product page at www.sennheiser.com.
For further information on the installation and use of the “ADN Cable Calculator”
software, refer to the help section of the “ADN Cable Calculator” software and to
the detailed instruction manual “ADN Conference System”.
Configuring and controlling the conference system
For configuring the conference system, you can either use the operating menu of
the central unit or the “Conference Manager” software. The software also allows
you to control conferences via a graphical interface.
8 | ADN CU1
KA_ADN-CU1_546415_0911_SP13.book Seite 9 Donnerstag, 1. September 2011 11:00 11
Preparing the ADN CU1 central unit for use
The “Conference Manager” software can be run in two different ways:
1. As a program on the central unit’s built-in PC.
You have to connect a screen, keyboard, and mouse to the central unit (see
page 13).
ADN CU1
Conference Manager software
2
1
2. As a program on a Windows PC.
You have to install the “Conference Manager” software on the PC and integrate
the PC together with the central unit in a network (see page 13).
Input and output of audio signals
Via XLR sockets, you can feed audio signals to the floor channel or output the floor
channel.
For recording a conference on a USB mass storage device, you can use the recording
function of the ADN CU1 central unit, which saves the floor channel and all channels
of the conference units as audio files in wav format.
Integration into a media control system
The ADN conference system can be completely integrated into a media control system. You can monitor and control all functions of the conference system via the
programmable commands of your media control system. For information on the
integration into a media control system, refer to the detailed instruction manual
“ADN Conference System”).
Preparing the ADN CU1 central unit
for use
Setting up the central unit on a flat surface
왘 Make sure that the air vents are not covered or blocked.
왘 Place the central unit on a flat surface as shown.
For information on how to mount the central unit into a 19” rack, refer to
the detailed instruction manual “ADN Conference System”.
Connecting the central unit to the mains
CAUTION
Product damage due to unsuitable mains cables or power outlets!
An unsuitable power supply can damage the product.
왘 Only use the mains cable (supplied) for connecting the product to the mains.
왘 Only use multi-outlet power strips or extension cables with protective ground
contacts.
왘 Only use mains cables with a 3-pin connector.
왘 First connect the mains cable (supplied) to the mains socket D.
왘 Connect the mains cable to the mains power supply.
The ADN CU1 central unit is now ready for operation.
100-240V~
50/60Hz 240W
D
ADN CU1 | 9
KA_ADN-CU1_546415_0911_SP13.book Seite 10 Donnerstag, 1. September 2011 11:00 11
Setting up the conference system
Setting up the conference system
CAUTION
Product damage due to an unsuitable power supply!
If you connect standard network devices with RJ 45 plugs (e.g. switches or network
cards) to the connection sockets PORT I and PORT II, the network devices can be
damaged due to an unsuitable power supply.
왘 Only connect ADN C1 and ADN D1 conference units to the connection sockets
PORT I and PORT II.
Basic information on the set-up of the conference system
Regardless of the number of conference units and the room size, we recommend
the following procedure for setting up the conference system:
왘 Plan the number of conference units required for your conference system.
A total of 400 conference units can be used in a conference system (the number of ADN C1 chairperson units is limited to 10 max.). Always take the largest
possible number of participants as a starting point.
왘 Plan if simple cabling is sufficient or if you require a redundant ring topology
(see page 6).
왘 If necessary, calculate the number of ADN PS power supplies required (a max.
of 15 ADN PS power supplies can be used in a conference system).
왘 If necessary, calculate the maximum length of the cabling in order to ensure
that all conference units connected are supplied with sufficient voltage (see
page 8).
왘 Place the ADN CU1 central unit and, if necessary, the ADN PS power supplies in
the electrical equipment room.
왘 Place the conference units at the corresponding seats.
왘 Put out a sufficient number of SDC CBL RJ45 system cables in the required
lengths.
10 | ADN CU1
KA_ADN-CU1_546415_0911_SP13.book Seite 11 Donnerstag, 1. September 2011 11:00 11
Setting up the conference system
Setting up a small conference system with only the central unit
For a small conference system, you do not require ADN PS power supplies.
Connecting conference units
connected in a cable string to the
ADN CU1 central unit
The following describes how to connect one cable string to the ADN CU1 central
unit. If necessary, repeat these steps for a second cable string.
왘 Use a system cable to connect the PORT II socket 8 or PORT I socket 9 of the
ADN CU1 central unit to the IN socket 쐅 of the first conference unit.
왘 Use a system cable to connect the OUT socket 쐈 of the first conference unit to
the IN socket 쐅 of the second conference unit.
왘 Repeat these steps for additional conference units.
왘 If necessary, repeat all steps for a second cable string.
ADN CU1
ADN D1/ADN C1
IN –– AUDIO –– OUT
PORT II
PORT I
2x 52.8V
1.75A
8
100-240V~
50/60Hz 240W
쐅
9
PORT II
IN OUT
IN OUT
IN OUT
PORT I
쐈
ADN CU1
PORT II
PORT I
IN
OUT
IN
1
IN
OUT
1
OUT
IN
IN
OUT
2
OUT
... 20
2
IN
OUT
... 20
Please note that there is a limited number of approx. 15-20 conference
units per cable string due to the voltage drop on the cable string (see
page 6).
You can use optional cable holders for guiding the system cables. For further information, refer to the detailed instruction manual “ADN Conference
System”.
ADN CU1 | 11
KA_ADN-CU1_546415_0911_SP13.book Seite 12 Donnerstag, 1. September 2011 11:00 11
Setting up the conference system
Connecting ADN PS power supplies to the ADN CU1 central unit
For conference systems comprising more than 40 conference units or when the
conference units are connected in a redundant ring topology, you require ADN PS
power supplies. A max. of 15 ADN PS power supplies can be used in a conference
system.
왘 Use a system cable to connect the PORT II socket 8 or PORT I socket 9 of the
ADN CU1 central unit to the DATA CU/PS input socket < of the first ADN PS
power supply (shorter cables increase the operational reliability, the maximum
length allowed is 80 m).
왘 Use a system cable to connect the DATA PS output socket A of the first ADN PS
power supply to the DATA CU/PS input socket < of the second ADN PS power
supply.
왘 Repeat these steps for the remaining ADN PS power supplies.
ADN CU1
ADN PS
PORT I
IN –– AUDIO –– OUT
PORT II
PORT I
2x 52.8V
1.75A
PORT II
DATA
CU/PS
1
2
1
PS
2
100-240V~
50/60Hz 240W
100 - 240V
50/60Hz 385W
PORT I & PORT II: max. 5.25A sum
8
9
PORT II
<
DATA
CU/PS PS
PORT I
A
DATA
CU/PS PS
DATA
CU/PS PS
왘 Connect the conference units to the ADN PS power supply (refer to the quick
guide of the ADN PS power supply or to the detailed instruction manual “ADN
Conference System”).
Connecting external audio devices to the central unit
To output the floor channel via an external audio device:
IN –– AUDIO –– OUT
IN –– AUDIO –– OUT
PORT II
PORT I
PORT II
PORT I
2x 52.8V
1.75A
2x 52.8V
1.75A
7
6
왘 Use an XLR cable to connect the OUT audio output 7 of the central unit to an
external audio device.
To connect an external audio source and to feed its signals to the floor channel:
왘 Use an XLR cable to connect the external audio source to the IN audio input 6
of the central unit.
Connecting a USB mass storage device for audio recordings to the central unit
In order to be able to use the audio recording function of the ADN CU1 central unit,
you require a USB mass storage device with the following characteristics:
12 | ADN CU1
USB mass storage device
Requirements
Recommended memory
size
> 500 GB
File system
NTFS, FAT32
Partition
1
Connection
USB type A plug
Interface
USB 2.0
Power supply
via USB socket (approx. 500 mA) or separate mains
unit
KA_ADN-CU1_546415_0911_SP13.book Seite 13 Donnerstag, 1. September 2011 11:00 11
Setting up the conference system
왘 Connect the USB mass storage device to one of the two USB sockets
A.
왘 If necessary, connect the mains unit of the USB mass storage device.
HDD
IN –– AUDIO –– OUT
PORT II
PORT I
2x 52.8V
1.75A
100-240V~
50/60Hz 240W
A
Preparing to use the “Conference Manager” software
Running the software installed
on the central unit
To use the “Conference Manager” software installed on the central unit, you require
the following devices:
Device
Requirements
Screen
Connection:
15-pin Sub-D VGA
Resolution:
800 x 600 pixels or higher
IN –– AUDIO –– OUT
PORT II
PORT I
2x 52.8V
1.75A
100-240V~
50/60Hz 240W
1024 x 768 or 1280 x 1024 pixels recommended
0
Mouse
Standard USB for Windows PCs
Keyboard
Standard USB for Windows PCs
Supported language layouts: e.g. English, German, French,
Spanish, Italian, Dutch, Russian, Chinese, Japanese (for the
complete list, refer to the detailed instruction manual “ADN
Conference System”)
IN –– AUDIO –– OUT
PORT II
PORT I
2x 52.8V
1.75A
100-240V~
50/60Hz 240W
A
왘 Use a Sub-D VGA cable to connect a screen to the VGA monitor output
왘 Connect the keyboard and the mouse to the two USB sockets
0.
A.
왘 Configure the screen, the keyboard and the mouse using the “Conference
Manager” software (refer to the detailed instruction manual “ADN Conference
System”).
Your conference system is now ready for operation.
Running the software on a
separate Windows PC
IN –– AUDIO –– OUT
PORT II
PORT I
2x 52.8V
1.75A
To run the “Conference Manager” software on a separate Windows PC, the PC must
meet the following system requirements:
Component
Requirement
Processor
Intel Pentium 4 or AMD Athlon XP, 2 GHz or more
RAM
Min. 1 GB, depending on your operating system
Hard disk
Min. 150 MB free hard disk memory
Drives
DVD-ROM
Interfaces/network
Ethernet 100 MBit/s
TCP/IP internet protocol
Internet Protocol version 4 (IPv4)
Screen
Minimum resolution: 800 x 600 pixels
Recommended: 1024 x 768 pixels
Operating system
Microsoft Windows XP Professional with SP 3
Microsoft Windows Vista with SP 2
Microsoft Windows 7
100-240V~
50/60Hz 240W
B
왘 Use a network cable (Cat5) to connect the Ethernet socket B of the central unit
to the network interface of your PC.
You can also connect the PC and the central unit using a switch or similar.
왘 Install the “Conference Manager” software supplied on the DVD-ROM on your
connected PC and configure the network (for further information on the software, refer to the detailed instruction manual “ADN Conference System”).
ADN CU1 | 13
KA_ADN-CU1_546415_0911_SP13.book Seite 14 Donnerstag, 1. September 2011 11:00 11
Using the ADN CU1 central unit
Using the ADN CU1 central unit
Switching the conference system on/off
To switch the conference system on:
ADN CU1
ESC
1
왘 On the ADN CU1 central unit and the ADN PS power supplies, set the on/off
switch 1 to position “I”.
The central unit switches on and its display panel lights up. The power supplies
switch on and their status LEDs light up.
To switch the conference system off:
왘 Set the on/off switch 1 of the ADN CU1 central unit to position “0”.
The central unit is switched off and the display panel goes off. All ADN PS power
supplies connected to the central unit and switched on are switched off and the
status LEDs go off.
To completely switch the ADN CU1 central unit or the ADN PS power supply off:
왘 Disconnect the mains connector of the ADN CU1 central unit or the mains connector of the ADN PS power supply from the mains power supply.
Deactivating the lock mode of the central unit
If the lock mode is activated (see page 19), you have to deactivate it in order to be
able to operate the central unit:
왘 Press the jog dial or any other key.
“Lock” appears on the display panel.
왘 Turn the jog dial.
The “OFF” setting is selected.
왘 Press the jog dial.
The lock mode is deactivated.
Functions of the keys
Action
Press the ESC key
• Cancels the entry and returns to the next higher
menu level or to the standard display
Press the jog dial
• Changes from the standard display to the
operating menu
• Calls up a menu item
• Enters a submenu
• Stores the settings and returns to the operating
menu
Turn the jog dial
• Increases or reduces the floor channel volume
(when the standard display is shown)
• Changes to the next/previous menu item
• Changes the setting of a menu item
Press the standard
display key
14 | ADN CU1
Functions
• Returns to the standard display
KA_ADN-CU1_546415_0911_SP13.book Seite 15 Donnerstag, 1. September 2011 11:00 11
Configuring the conference system
Configuring the conference system
Overview of the operating menu
“Conference Menu”
submenu
“XLR Out”
submenu
Conference Mode
Microphone Limit
Request Limit
Talk Time Status
Talk Time Limit
Premonition Time Limit
Reaction on Talktime Exceed
Blink on Request
Re-Init
Clear Request List on Cancel
XLR Out Status
XLR Out Volume
XLR Out Equalizer
“Main Menu”
Conference Menu
Audio Menu
System Menu
*Languages
Settings
“XLR In”
submenu
XLR In Status
XLR In Sensitivity
XLR In Equalizer
“Floor/Loudspeakers”
submenu
“Audio Menu”
submenu
XLR Out
XLR In
Floor/Loudspeakers
Audio Gain Reduction
Feedback Suppression
XLR Mix Minus
Mic Loudspeaker Mute
Conference Recording
Floor/Loudspeaker Volume
Floor/Loudspeaker Equalizer
“Feedback Suppression”
submenu
Loudspeaker
XLR Out
“Conference Recording”
submenu
“System Menu”
submenu
Record
Recording status
Units
Topology
Diagnostics
Versions
“Diagnostics”
submenu
“Settings”
submenu
“Versions”
submenu
Network
Contrast
Lock
Restore Factory Defaults
Hardware Versions Info
Software Versions Info
System Load
Temperature
Bus Statistics
Start Self-Test
Reset Break Indication
Reset Error Indication
“Network”
submenu
IP Address Mode
IP Address
Subnet Mask
ADN CU1 | 15
KA_ADN-CU1_546415_0911_SP13.book Seite 16 Donnerstag, 1. September 2011 11:00 11
Configuring the conference system
Display
Function of the menu item
Option/display
“Main Menu”
“Conference Menu”
Calls up the “Conference Menu” submenu
–
“Audio Menu”
Calls up the “Audio Menu” submenu
–
“System Menu”
Calls up the “System Menu” submenu
–
“*Languages”
Adjusts the language
“Settings”
Calls up the “Settings” submenu
“Deutsch”, “English”,
“Espanol”...
–
“Conference Menu”
“Conference Mode”
Adjusts the conference mode
“Direct Access”, “Override” and “Push To Talk”: These
conference modes do not require the use of a chairperson
unit. If the maximum number of speakers who can take
the floor simultaneously has not been reached, a further
speaker can take the floor immediately.
“Request”: For this mode to function, a chairman unit is
required. The chairperson receives requests to speak and
grants speaking privileges according to the FIFO principle
(First in – First out), i.e. the participant with the longest
waiting time is granted speaking privileges.
“Direct Access”, “Override”,
“Push To Talk” or “Request”
“Microphone Limit”
Sets the maximum number of speakers who can take the
floor simultaneously for all conference modes
“1” ... “10”
“Request Limit”
Sets the maximum number of requests to speak for
“Request” and “Direct Access” mode
“0” ... “10”
“Talk Time Status”
Activates/deactivates the speaking time limit
“On”/“Off”
“Talk Time Limit”
Sets the speaking time limit
“Premonition Time Limit”
Sets the advance warning time (warns speakers that they
are approaching the end of the individual speaking time)
“Reaction on Talktime Exceed”
Determines the behavior when the individual speaking
time is exceeded
“Continue”: The individual speaking time is continued.
“Cancel”: The individual speaking time is terminated.
“Blink on Request”
Activates/deactivates the flashing of the signal light ring
when a request to speak is made
“On”/“Off”
“Re-Init”
Re-initializes the conference units
If you connect ADN C1 chairperson units to the conference
system during a running conference, you have to reinitialize them. When conference units are re-initialized,
the conference will be interrupted.
“Yes”/“No”
“Clear Request List on Cancel”
Sets the function of the priority key
of the chairperson
unit
“On”: Pressing the priority key deactivates all ADN D1 delegate units. All requests to speak are deleted.
“Off”: Pressing the priority key deactivates all currently
active ADN D1delegate units. All requests to speak are
retained.
“On”/“Off”
16 | ADN CU1
“01” ... “60”
in steps of 1 minute
“00” ... “120”
in steps of 10 seconds
“Continue”/“Cancel”
KA_ADN-CU1_546415_0911_SP13.book Seite 17 Donnerstag, 1. September 2011 11:00 11
Configuring the conference system
Display
Function of the menu item
Option/display
“Audio Menu”
“XLR Out”
Calls up the “XLR Out” submenu
–
“XLR In”
Calls up the “XLR In” submenu
–
“Floor/Loudspeakers”
Calls up the “Floor/Loudspeakers” submenu
–
“Audio Gain Reduction”
The sum signal of all active conference units is output via
the floor channel (“Floor/Loudspeakers”). The “Audio
Gain Reduction” menu item allows you to adjust how the
volume levels of the signals of the individual conference
units are processed.
“Feedback Suppression”
Calls up the “Feedback Suppression” submenu
“XLR Mix Minus”
Activates the filtering of the IN audio input from the OUT
audio output in order to avoid, for example, double audio
signals during teleconferencing
“On”/“Off”
“Mic Loudspeaker Mute”
Deactivates the conference units’ built-in loudspeakers
for contributions coming from the conference units’
microphones
“On”/“Off”
“Conference Recording”
Calls up the “Conference Recording” submenu
“0.0 dB per Mic” ...
“−3.0 dB per Mic”,
“Linear Division”
–
–
“XLR Out” menu
“XLR Out Status”
Activates/deactivates the OUT audio output
“XLR Out Volume”
Adjusts the volume of the XLR output
“On”/“Off”
XLR Out Volume
+ 6 dB
+ 6 dB No
“01” ... “32”
“XLR Out Equalizer”
Adjusts the tone color of the XLR output
XLR Out Equalizer
+02 dB
–03 dB
+05 dB
No
“−12 dB” ... “+12 dB”
“XLR In” menu
“XLR In Status”
Activates/deactivates the IN audio input
“XLR In Sensitivity”
Adjusts the sensitivity of the XLR input
“On”/“Off”
XLR In Sensitivity
+07.5 dBu
+07.5 dBu No
“−18.0 dBu” ... “+18.0 dBu”
“XLR In Equalizer”
Adjusts the tone color of the XLR input
XLR In Equalizer
+02 dB
–03 dB
+05 dB
No
“−12 dB” ... “+12 dB”
ADN CU1 | 17
KA_ADN-CU1_546415_0911_SP13.book Seite 18 Donnerstag, 1. September 2011 11:00 11
Configuring the conference system
Display
Function of the menu item
Option/display
“Floor/Loudspeakers” menu
“Floor/Loudspeakers Volume”
Adjusts the floor channel volume (“Floor/Loudspeakers”)
Floor/Loudspeaker Volume
16
16
No
“00” ... “32”
“Floor/Loudspeakers Equalizer” Adjusts the tone color of the floor channel
Floor/Loudspeaker Equalizer
+02 dB
–03 dB
+05 dB
No
“−12 dB” ... “+12 dB”
“Feedback Suppression” menu
“Loudspeaker”
Changes the volume adjustment of the conference units’
built-in loudspeakers in order to increase the max.
possible volume while the risk of feedback due to the
increased volume is reduced.
“XLR Out”
Changes the volume adjustment of the OUT audio output
in order to increase the max. possible volume while the
risk of feedback due to the increased volume is reduced.
“Off”
low (approx. +2 to +3 dB)
“Low Intensity”
high (approx. +5 to +6 dB)
“High Intensity”
“Conference Recording” menu
“Record”
Starts/stops the audio recording of the conference
channels on a USB mass storage device
“Recording status”
Provides information on the status of the audio recording
and on the available memory space on the USB mass
storage device
“On”/“Off”
Recording Status
Status
: Off
Free Space
: 123456 MB
No
“System Menu”
“Units”
Displays the type and number of the conference units
connected to the connections PORT of the ADN CU1
central unit or ADN PS power supplies
Units
System
CU
PS01
: 216 D1
: 00 D1
: 29 D1
06 C1
04 C1
01 C1
No
“Topology”
Displays the type of topology connected to the ADN PS
power supplies (simple cabling
or redundant ring
topology )
Topology
PS01.I.1 :
PS01.I.2 :
PS01.II :
––
No
“Diagnostics”
Calls up the “Diagnostics” submenu
–
“Versions”
Calls up the “Versions” submenu
–
“Diagnostics” menu
“System Load”
Provides information on the current supply (A), voltage
supply (V) and power (P)
System Load
CU.I :
–– A
PS07.II.1 :
A
PS07 :
P
V
–– V
No
“Temperature”
Provides information on the temperature status
Temperature
CU
: PS07
: PS11
: No
“Bus Statistics”
Provides information on the status of data transmission/
errors
Bus Statistics
Error Indication :
Break Count :
☺
1
No
18 | ADN CU1
KA_ADN-CU1_546415_0911_SP13.book Seite 19 Donnerstag, 1. September 2011 11:00 11
Configuring the conference system
Display
Function of the menu item
Option/display
“Start Self-Test”
Performs a self-test on the conference system
“Yes”/“No“
“Reset Break Indication”
Resets the error counter (“Break Count”) in the “Bus
Statistic” menu item
“Yes”/“No”
“Reset Error Indication”
Resets the display for data bus errors (“Error Indication”)
in the “Bus Statistic” menu item
“Yes”/“No”
“Versions” menu
“Hardware Version Info”
Displays the hardware version
Hardware Version Info
D1/C1:
1
CU1 SB:
1
PS:
1
No
“Software Version Info”
Displays the software version
Software Version Info
D1/C1:
0.1.1.5
CU1 SB:
1.0.0.0
CU1 Main:
1.0.0.0
No
“Settings” menu
“Network”
Calls up the “Network” submenu
–
“Contrast”
Adjusts the contrast of the display panel
“1” ... “15”
“Lock”
Activates/deactivates the lock mode
“On”/“Off”
“Restore Factory Defaults”
Restores the factory default settings
“Yes”/“No”
“IP Address Mode”
Sets the IP address allocation mode
“Static IP”/“Dynamic IP”
“IP Address”
Sets the IP address of the central unit
“xxx . xxx . xxx . xxx”
“Subnet Mask”
Sets the subnet mask of the central unit
“xxx . xxx . xxx . xxx”
“Network” menu
Working with the operating menu
By way of example of the “Microphone Limit” menu item, this section describes
how to use the operating menu.
Changing from the standard display to the operating menu
Direct Access
30 Units
20
Standard display
Main Menu
Conference
Audio
System
„Main Menu“
왘 Press the jog dial.
The standard display is replaced by the “Main Menu”. The last called-up menu
item is highlighted.
ADN CU1 | 19
KA_ADN-CU1_546415_0911_SP13.book Seite 20 Donnerstag, 1. September 2011 11:00 11
Configuring the conference system
Calling up a menu item
Main Menu
Conference
Audio
System
Conference
Conference Mode
Microphone Limit
Request Limit
Microphone Limit
Conf. Mode
Microphones
No. Request
05
Select and call up the
“Microphone Limit”
menu item
Select and call up the
“Conference” submenu
05
05
The “Microphone Limit”
menu item is displayed
왘 Press the jog dial to call up the “Conference” menu item.
The “Conference” submenu appears.
왘 Turn the jog dial to select the “Microphone Limit” menu item.
왘 Press the jog dial to call up the “Microphone Limit” menu item.
Changing and storing settings
Conference
Conference Mode
Microphone Limit
Request Limit
Microphone Limit
Conf. Mode
Microphones
No. Request
5
Select and call up the
“Microphone Limit”
menu item
Microphone Limit
Conf. Mode
Microphones
No. Request
05
05
Select the desired
setting
07
07
Store the setting
왘 Turn the jog dial to adjust settings in the “Microphone Limit” menu item.
왘 Press the jog dial.
Your setting is stored. You are back to the operating menu.
Canceling an entry
왘 Press the ESC key.
The operating menu or the next higher menu level appears.
Or:
왘 Press the standard display key.
The standard display appears.
To subsequently directly return to the last edited menu item:
왘 Press the jog dial repeatedly until the last edited menu item appears.
Exiting the operating menu
왘 Press the standard display key.
The standard display appears.
Or:
왘 Press the ESC key repeatedly until the standard display appears.
20 | ADN CU1
KA_ADN-CU1_546415_0911_SP13.book Seite 21 Donnerstag, 1. September 2011 11:00 11
Cleaning and maintaining the conference system
Setting the volume of the conference units’ built-in
loudspeakers
Direct Access
30 Units
20
You can set the volume of the conference units’ built-in loudspeakers via the jog
dial on the central unit. The standard display displays the current volume
setting H.
CAUTION
H
Danger of hearing damage due to loud hissing!
When the floor channel volume is set to a high level or when several
participants speak simultaneously, feedback (loud hissing noise) can
occur. This can cause hearing damage.
왘 Reduce the floor channel volume (see below).
왘 Activate the “Feedback Suppression” function to be able to
increase the volume before feedback can occur (see page 17).
왘 Make sure that the “Audio Gain Reduction” function is activated
(see page 17). This function reduces the gain per active microphone by the selected level and thus prevents feedback noise.
왘 Increase the distance between the individual conference units to
at least 50 cm.
왘 Turn the jog dial
– to the right to increase the volume or
– to the left to reduce the volume.
Use the “Feedback Suppression” function to be able to increase the floor
channel volume by up to 5 dB without feedback occurring (see page 17).
Cleaning and maintaining the
conference system
CAUTION
Liquids can damage the product!
Liquids entering the product can cause a short-circuit in the electronics or damage
the mechanics.
Solvents or cleansing agents can damage the surfaces of the product.
왘 Keep all liquids away from the product.
왘 Do not use any solvents or cleansing agents.
왘 Switch the conference system off (see page 14).
왘 Before cleaning, disconnect the ADN CU1 central unit and the ADN PS power
supplies from the mains power supply.
왘 Only use a dry and soft cloth to clean the product.
ADN CU1 | 21
KA_ADN-CU1_546415_0911_SP13.book Seite 22 Donnerstag, 1. September 2011 11:00 11
Specifications ADN CU1
To ensure optimum cooling of the ADN CU1 central unit and the ADN PS power
supplies:
왘 Clean the air vents on the front, back and bottom from time to time with a soft
brush or paintbrush in order to avoid dust deposits.
ADN CU1
ADN PS
Specifications ADN CU1
Dimensions
417 x 100 x 345 mm (W x H x D)
Weight
approx. 6.5 kg
Nominal input voltage
100 to 240 V~
Mains frequency
50 to 60 Hz
Power consumption
245 W
Output voltage at
RJ45 EtherCAT
52.8 V
Nominal output current
max. 1.75 A
Temperature range
operation: +5°C to +50°C
storage: −25°C to +70°C
Relative humidity
operation: 10 to 80%
storage: 10 to 90%
XLR IN
Input resistance
RIN > 10 KΩ
Input level
max +18 dBu
min −18 dBu
Nominal level
+7.5 dBu
XLR OUT
22 | ADN CU1
Output resistance
ROUT < 100 Ω
Frequency response
20 Hz to 14.5 kHz; −3 dB
Output level
max. +11 dBu
Nominal level
+6 dBu
DHT (at 1 kHz)
< 0.02% A-weighted at +7.5 dBu
Signal-to-noise ratio
> 80 dB A-weighted at +11 dBu
KA_ADN-CU1_546415_0911_SP13.book Seite 2 Donnerstag, 1. September 2011 11:00 11
Publ. 09/11
546415/A01
Sennheiser electronic GmbH & Co. KG
Am Labor 1, 30900 Wedemark, Germany
www.sennheiser.com