1
FTK-127i130
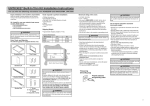
Buitt-in Trim Kit lnstaHtation instructions
For use with the following
microwave
Proper installation is the instailer's responsibility!
Write the model & sedal numbers on the owner's manual,
The model number label is }ocated on the oven front=
UL Listed-For
models
use over electric
oven ACM2160A
Too_s required
(Wail Ovens)
27": ACES2730, AOCS2740,
MEW5527DD, MEW6527DD
30": ACES3030, AOCS3040,
MEW5530DD, MEW6530DD,
AEW3530DD, AEW4530DD,
JJW8130DD, JJW9130DD
Shipping
The following
installation:
Weight
Approximate shipping weight is 16 Ibs=
Cutout
Dimensions
Dimensions
27"
16 3/4"
25 1/2"
23 3/4"
Heiqht
Width
I
Depth (min.)
To avoid risk of electrical shock, personal injury, or
death, disconnect power to wall outlet before beginning
installation.
Parts, Tools,
to perform
Phillips Screwdriver
Saw (Electric or Hand)
Drill with 1/16"and %4" drill bits (Electric or Hand)
Tape Measure
Pencil
Framing Square
Level
heat source
WARNING
and UMC5200AA
30"
16 3/4"
25 1/2"
23 3/4"
and Materials
parts are supptied
with the oven:
ht
Trim Frame (1)
Side Duct (1)
Electric Heat Source Model
u
o IS
I
Bottom Duct (1)
Template (1)
Upper Duct (1)
1" Screws
(4 required, 2 extra)
1/2" Screws
(11 required, 2 extra)
Anti-Tip Bracket (1)
WARNING
To avoid risk of electrical shock, personal injury, or
death:
, Before drilling into the wall, note where electrical
outlets are and where electrical wire might be
concealed behind the wal!, YOU COULD GET AN
ELECTRICAL SHOCK if you contact electrical wire
with the drill bit.
o Locate and disconnect the power to any electrical
circuits that could be affected by installing this oven.
IF YOU DO NOT DISCONNECT THE POWER, YOU
COULD GET AN ELECTRICAL SHOCK.
i
Bottom Bracket (1)
A
AlL
CAUTION
]
To avoid personal injury, wear gloves when handling the
metal parts. Parts are sharp and can cause cuts and
abrasions.
FTK-127!130 Buitt-in Trim Kit installation instructions
For use with the following
Electrical
microwave
oven ACM2160A
rating of this oven:
120 VAC @ 60 Hz
13A/llOOW
You need a DEDICATED 120 VAC, 60 Hz, 20 A,
fused electrical supply (located in the cabinet
with the microwave as close as possible to the
microwave) serving only the microwave.
Check with a qualified electrician if you are not sure
whether the oven is properly grounded or if you do not
completely understand the grounding instructions.
Do not use a fuse in the neutral or grounding circuit.
WARNING
Improper grounding could result in electric shock or
other personal injury.
Save these instructions for the local electrical
inspectoris use=
if there is an electrical short circuit, grounding reduces
the risk of electrical shock by providing an escape wire
for the electric current. This appliance Js equipped with
a cord having a grounding wire with a grounding plug.
Place the plug into a properly installed and grounded
outlet.
Amana does not recommend use of an extension
cord.
Keep the power cord dry and do not pinch or
crush it=
Do not, under any circumstances, remove the power
supply cord grounding prong!
This appliance MUST be grounded!
WARNING
If you do not use the microwave oven as instructed, you
could be exposed to excessive microwave energy.
Do not expose yourseff
microwave
energy!
to excessive
DO NOT try to operate the microwave oven with the
door open.
DO NOT tamper with or defeat the safety interlocks.
DO NOT place objects between the microwave oven
front face and the door.
DO NOT allow soi! or cleaner residue to build up on the
flat surfaces around the microwave oven door.
DO NOT operate the microwave oven if it is damaged.
The microwave oven door must close properly to
operate safely.
DO NOT USE THE MICROWAVE OVEN:
If the door is bent.
If the hinges or latches are broken or loose.
If the door seals, sealing surfaces or glass is broken.
DO NOT ATTEMPT TO ADJUST OR REPAIR THE
OVEN YOURSELF!
, It should be adjusted and repaired by a qualified
technician who can check for microwave leakage
after repairing the oven.
A
WARNING
If you do not mount the oven as instructed, you risk
personal injury and!or property damage.
CAUTION
and grounding outlet.
Properly polarized
and UMC5200AA
I_
Three-prong
(Grounding plug)
Before you begin installing the oven, PLACE A PIECE
OF THE CARTON OR OTHER HEAVY MATERIAL (a
blanket) over the countertop or cooktop to protect it.
Do not use a plastic cover. Failure to protect these
surfaces could result in property damage.
l
FTK-127i130
Buitt-in Trim Kit installation instructions
For use with the following
hetallation
of Bottom
microwave
Bracket
1= Disconnect power from microwave oven before
proceeding with installation=
2= Remove any loose items from inside the microwave
oven,
3.
4.
oven ACM2160A
and UMC5200AA
3= Remove any oil or dirt on the surface of the microwave
oven where ductwork will be secured.
4= Peel off the protected backing on the double sided
tape.
5= Place the existing screw through the ductwork and
start securing the screw DO NOT TIGHTEN. Slowly
push the ductwork towards the microwave keeping
proper alignment of the ductwork= Press down firmly to
secure the ductwork and tighten the screw securely.
Fasten bottom bracket to bottom duct using 1/2"screws
(supplied).
Turn microwave upside down and place on a protected
surface.
Fo
_
oq
Existin_._
screw
Preparing
Fr°nt ____l
_o
\\
for Anti-Tip
Bracket
1= Fold or cut the edges from the template a!ong the
guide lines.
2= Place the template along the front edge of the cutout
floor, centering the template from sideStoSside=
3= Mark the hole positions of the antiStip bracket.
4= Remove the template and drill two holes for antiStip
bracket. Use a drill bit no larger than 7/64tto make
holes=
5= Attach bottom duct to bottom of microwave using
1/2Tscrews (supplied)=
6= Turn microwave oven and bracket right side up, placing
it on a protected surface.
hetaHation
of Vented
Ductwork
1= Remove screw located on left side of microwave below
vent louvers.
2= Secure side duct to upper duct, by inserting metal tabs
on upper duct into slots on side duct and bending tabs
upward as indicated in the following illustration=
Upper
duct
5= Place antiStip bracket onto the cutout floor and secure
using 1/2"screws.
1/2" screws
Tabs
Side
duct
Anti-tip bracket
FTK-127/130 Buitt-in Trim Kit installation instructions
For use with the following
hstaHing
1,
2,
3,
microwave
Unit in Cutout
oven ACM2160A
Mounting
Slide microwave oven into cutout verifying alignment of
unit is correct,
Slide unit out to plug the power cord into the outlet,
Slide unit into cutout centering the microwave oven in
the cutout opening, Verify anti=tip bracket is engaged,
Bottom duct
Trim
and UMC5200AA
Frame
1.
Position trim frame over the microwave oven,
2.
Verify trim frame is level and the microwave oven is
centered within the trim frame.
NOTE: Center the trim frame equally on aH four sides,
3. Mark center positions screw holes (one in each corner)
through the mounting holes of the trim frame.
4. Remove trim frame and drill previously marked pilot
holes using a 1/16;drill bit.
Bottom
bracket
4.
5.
bracket
Ensure the microwave oven is accurately centered
after verifying the anti4ip bracket is engaged.
Using a 7/64;drill bit dri!l pilot holes through the
positioning flange into wood or metal framing and
secure with 1/2"screws in the bottom duct.
/
5.
Attach trim frame to wood or metal frame work using 1"
screws (supplied).
Trim kit is completed
Replace any loose items that were removed from the
inside of the microwave,
Retain installation instructions for future reference.
112" screws
Trim Frame
26-7/8"
<
Dimensions
> Depth of the trim frame is 7is". <
1-7/16"
I
29-3/4"
2-7/8"
19-1/8"
27" - Trim Frame
Part No.8101P555-60
Part No.3828W5U0295
19-1/8"
30" - Trim Frame