1
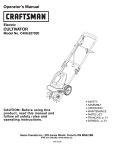
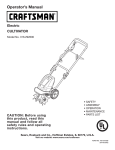
Operator’s Manual
®
Electric
CULTIVATOR
Model No. 316.292600
CAUTION: Before using
this product, read this
manual and follow all
safety rules and operating
instructions.
• SAFETY
• ASSEMBLY
• OPERATION
• MAINTENANCE
• PARTS LIST
Sears, Roebuck and Co., Hoffman Estates, IL 60179, U.S.A.
Visit our website: www.sears.com/craftsman
FORM NO. 769-01643
(03/30/2005)
TABLE OF CONTENTS
Warranty
Page 2
Troubleshooting
Page 13
Safety Rules
Pages 3-7
Specifications
Page 13
Assembly
Pages 8-9
Parts List
Pages 14-15
Starting/Stopping Instructions
Page 10
Repair Protection Agreement
Page 16
Operation
Page 11
Service Numbers
Back Cover
Maintenance and Repair
Pages 12
WARRANTY STATEMENT
TWO YEAR FULL WARRANTY ON CRAFTSMAN ELECTRIC CULTIVATOR
For two years from the date of purchase, when this Cultivator is used and maintained according to
the operator’s manual, Sears will repair any defect in material or workmanship free of charge.
This warranty excludes tines, which are expendable parts that can wear out from normal use in less
than two years.
This warranty is void if this Cultivator is used for commercial or rental purposes.
WARRANTY SERVICE AVAILABLE BY RETURNING THIS CULTIVATOR TO THE NEAREST
SEARS STORE OR SEARS PARTS & REPAIR CENTER IN THE UNITED STATES.
This warranty gives you specific legal rights, and you may also have other rights which vary from
state to state.
Sears, Roebuck and Co., Dept. 817WA, Hoffman Estates, IL 60179
2
RULES FOR SAFE OPERATION
READ ALL INSTRUCTIONS!
Read the Operator’s Manual(s) and follow all
warnings and safety instructions. Failure to do so
can result in serious injury to the operator and/or
bystanders.
DANGER:
Failure to obey a
safety warning will
result in serious injury
to yourself or to others. Always follow the
safety precautions to reduce the risk of fire,
electric shock and personal injury.
The purpose of safety symbols is to attract your
attention to possible dangers. The safety symbols,
and-their explanations, deserve your careful attention
and-understanding. The safety warnings do not by
themselves eliminate any danger. The instructions
or warnings they give are not substitutes for proper
accident prevention measures.
Failure to obey a
safety warning can
result in injury to
yourself and others. Always follow the safety
precautions to reduce the risk of fire, electric
shock and personal injury.
WARNING:
SAFETY ALERT:
to obey a
CAUTION: Failure
safety warning may
Indicates danger, warning or caution.
Attention is required in order to avoid serious
personal injury. May be used in conjunction
with other symbols or pictographs.
result in property
damage or personal injury to yourself or to
others. Always follow the safety precautions
to reduce the risk of fire, electric shock and
personal injury.
NOTE: Advises you of information or instructions vital to
the operation or maintenance of the equipment.
• IMPORTANT SAFETY INSTRUCTIONS •
WARNING: When using electric gardening appliances, basic safety precautions should always be followed to reduce the
risk of fire, electric shock, and personal injury, including the following:
TRAINING
PREPARATION
• Thoroughly inspect the area where the equipment is
to be used. Remove all stones, sticks, wire, and other
foreign objects which could be tripped over and cause
personal injury.
WARNING:
When using the unit,
you must follow the
safety rules. Please
read these instructions before operating
the unit in order to ensure the safety of the
operator and any bystanders. Please keep
these instructions for later use.
WARNING:
To reduce risk of
electric shock use
only UL Listed
extension cord suitable for outdoor use,
such as Type SW-A, SOW-A, STW-A,
STOW-A, SJW-A, SJOW-A, SJTW-A, or
SJTOW-A.
• Read, understand, and follow all instructions on the
machine and in the manual(s) before attempting to
assemble and operate. Be thoroughly familiar with the
controls and the proper use of the cultivator. Keep this
manual in a safe place for future and regular reference
and for ordering replacement parts.
• Extension Cord—Make sure your extension cord
set is in good condition, is heavy enough to carry the
current your cultivator will draw.
• Be familiar with all controls and their proper operation.
Know how to stop the machine and disengage tines
quickly.
MINIMUM WIRE SIZE FOR EXTENSION CORDS
FOR 120 VOLT APPLIANCES USING 6-10 AMPS
• Never allow children under 14 years old to operate
this machine. Children 14 years old and over should
read and understand the operation instructions and
safety rules in this manual and should be trained and
supervised by a parent.
Cord Length (ft.)
25
50
100
150
Wire Size (AWG)
18
16
14
12
If in doubt, use the next heavier gage cord. The
smaller the gage number, the heavier the cord. An
undersized cord will cause a drop in line voltage
resulting in loss of power and overheating. To reduce
the likelihood of disconnection of the extension cord
set from the cultivator, be sure to use the cord restraint
provided.
• Never allow adults to operate this machine without
proper instruction.
• Keep bystanders, helpers, pets, and children at least
50 feet from the machine while it is in operation. Stop
machine if anyone enters the area.
3
RULES FOR SAFE OPERATION
• If extension cord is damaged in any manner while
plugged in, disconnect extension cord from house
receptacle.
WARNING:
• Use only three-wire outdoor extension cords that
have three-prong grounding plugs and grounding
receptacles that accept the cultivator’s plug.
• Keep handle dry, clean, and free from oil and grease.
Do not change the
plug on the
cultivator in any way.
• Fuses—The cultivator should be operated on a 15 or
20 AMP circuit. If difficulty in starting is experienced
with a standard 15 AMP fuse or circuit breaker or
the cultivator’s built-in overload protection switch
frequently trips, contact your nearest authorized
service location. Do not use a higher rated fuse without
consulting your power company.
• Inspect cultivator cord periodically, and if damaged,
have it repaired by an authorized service facility.
Inspect extension cord periodically and replace if
damaged.
• Dress properly. Wear sturdy, rough-soled work shoes
and close-fitting slacks and shirts. Loose fitting
clothes or jewelry can be caught in movable parts.
Never operate this machine in bare feet or sandals.
Use of rubber gloves is recommended when working
outdoors. Wear protective hair covering to contain long
hair.
• Ground Fault Circuit Interrupter (GFCI) protection
should be provided on the circuit(s) or outlet(s) to
be used for the cultivator. Receptacles are available
having built-in GFCI protection and may be used for
this measure of safety.
• Wear safety glasses or goggles when operating this
unit. Wear a face or dust mask if the operation is dusty.
Such protective equipment is available from your
authorized service dealer or retailer.
OPERATION
• Use the right tool. Do not use cultivator for any job
except that for which it is intended.
• Don’t use the cultivator in the rain.
• Grounding Instructions—The cultivator should be
grounded while in use to reduce the risk of electric
shock to the operator. The cultivator is equipped with
a three-conductor cord and a three-prong grounding
plug to fit the proper grounding receptacle. The green
(or green and yellow) wire conductor in the cord is the
grounding wire. Never connect the green (or green
and yellow) wire to a live terminal. Your cultivator has
a plug as illustrated in Fig. A. An adapter, illustrated in
Fig. C, is available for connecting plugs as illustrated
in Fig. B to two-prong receptacles. The green-colored
rigid ear, lug, or the like, must be connected to a
permanent ground, such as a properly grounded outlet
box.
• Avoid unintentional starting. Don’t carry plugged-in
cultivator with your hands/fingers on the motor starting
controls.
• Never attempt to make any adjustments while motor is
running.
• Avoid dangerous environment. Don’t use cultivator in
damp or wet locations.
• Do not operate cultivator on excessively steep slopes.
• Do not abuse cord. Never pull or carry the cultivator
by cord or yank the cord to disconnect it from the
receptacle. Keep cord away from heat, oil, and sharp
edges.
• If extension cord is damaged in any manner while
plugged in, disconnect extension cord from house
receptacle.
• Do not put hands or feet near rotating parts. Contact
with the rotating parts can amputate fingers, hands,
and feet.
Cover of Grounded Outlet Box
• Do not operate machine while under the influence of
alcohol or drugs.
Grounding Pin
• Only operate cultivator in daylight or good artificial
light. Don’t overreach. Keep proper footing and
balance and a firm hold on the handle at all times.
Rigid Ear/
Metal Screw
• Stay alert. Watch what you are doing. Use common
sense. Do not operate cultivator when you are tired.
• Don’t force cultivator. It will do a better job and with
less likelihood of a risk of injury if operated at the rate
for which it was designed
• Keep bystanders, helpers, pets, and children at least
50 feet from the machine while it is in operation. Stop
machine if anyone enters the area.
A
C
B
Adapter
4
RULES FOR SAFE OPERATION
MAINTENANCE AND STORAGE
• Be careful when cultivating in hard ground. The tines
may catch in the ground and propel the cultivator
forward. If this occurs, let go of the handle and do not
restrain the machine.
• Never tamper with safety devices. Check their proper
operation regularly.
• Check bolts and screws for proper tightness at
frequent intervals to keep the machine in safe working
condition. Also, visually inspect machine for any
damage.
• Never operate the machine at high transport speeds
on hard or slippery surfaces.
• Exercise caution to avoid slipping or falling.
• Before leaving the equipment, changing tine width,
cleaning, repairing, making adjustments and the like,
stop the motor, disconnect the power cord to prevent
accidental starting and make certain the tines and all
moving parts have stopped.
• Look down, behind, and use care when pulling
machine towards you.
• Start the motor according to the instructions found in
this manual and keep feet well away from the tines at
all times.
• Do not wash cultivator with a hose. Avoid getting water
on motor and electrical connections
• After striking a foreign object, stop the motor and
disconnect the power cord to prevent accidental
starting. Thoroughly inspect the machine for any
damage. Repair the damage before starting and
operating.
• Maintain or replace safety and instruction labels, as
necessary.
• Follow this manual for safe loading, unloading,
transporting, and storage of this machine.
• Stop the motor, disconnect the power cord to prevent
accidental starting and wait until the tines come to a
complete stop before unclogging the tines, making
any adjustments, or inspections.
• Always refer to the operator’s manual for proper
instructions on off-season storage. When not in use,
cultivator should be stored indoors in a dry, and high or
locked-up place out of the reach of children.
• Use caution when cultivating near fences, buildings
and underground utilities. Rotating tines can cause
property damage or personal injury.
• Maintain cultivator with care. Follow instructions for
lubrication and cleaning.
• Do not overload machine capacity by attempting to
cultivate soil too deep or too fast of a rate.
• Check for damaged parts. Before further use, a guard
or other part that is damaged should be carefully
checked to determine that it will operate properly
and perform its intended function. Check alignment
of moving parts, binding of moving parts, breakage
of parts, mounting, and any other condition that
may affect its operation. A guard or other part that is
damaged should be properly repaired or replaced by
an authorized service center.
• If the machine should start making an unusual noise
or vibration, stop the motor and disconnect the power
cord to prevent accidental starting. Inspect machine
thoroughly for damage. Repair any damage before
starting motor and operating.
• Keep all shields, guards and safety devices in place
and operating properly.
• To avoid an electrical shock hazard, never push or pull
the cultivator over the electrical cord while operating.
WARNING:
Restrict the use of
this power machine
to persons who
read, understand and follow the warnings
and instructions in this manual and on the
machine.
• When picking up the cultivator, use the handle
provided. Don’t grasp the tines when picking up or
holding the cultivator. Never pick up or carry machine
while the motor is running.
• Use only attachments and accessories approved by
the cultivator manufacturer. Failure to do so can result
in personal injury and/or damage to your cultivator.
SAVE THESE INSTRUCTIONS
• If situations occur which are not covered in this
manual, use care and good judgment.
5
RULES FOR SAFE OPERATION
SAFETY AND INTERNATIONAL SYMBOLS
This operator's manual describes safety and international symbols and pictographs that may appear on this product.
Read the operator's manual for complete safety, assembly, operating and maintenance and repair information.
SYMBOL
SYMBOL
MEANING
MEANING
• GARDEN CULTIVATORS–
ROTATING TINES CAN CAUSE
SEVERE INJURY
• SAFETY ALERT SYMBOL
Indicates danger, warning,
or caution. May be used in
conjunction with other symbols or
pictographs.
WARNING: Stop the
motor, unplug the extension cord
and allow tines to stop before
removing tines, or before cleaning or
performing any maintenance. Keep
• READ OPERATOR'S MANUAL
hands and feet away from rotating
tines.
WARNING: Read the
Operator’s Manual(s) and follow all
warnings and safety instructions.
Failure to do so can result in
serious injury to the operator and/or
bystanders.
6
RULES FOR SAFE OPERATION
KNOW YOUR CULTIVATOR
APPLICATIONS
As a cultivator
• Tilling soil in home vegetable gardens, flower
beds and around shrubs
Handlebar
Tine Engage
Control
Starter Button
Overload
Protection Switch
Cord
Retainer
Handlebar Knob
Cord Guide Bar
Front Handle
Cord Oulet
Receptacle
Tine Shield
Wheel Support
Bracket
Wheels
Tines
7
ASSEMBLY INSTRUCTIONS
NOTE: Reference to right or left hand side of the
cultivator is observed from the operating
position.
Removing Unit From Carton
1. Remove staples, break glue on top flaps, or cut tape
at carton end and peel along top flap to open carton.
2. Remove all loose parts that may be included with
unit.
3. Cut along corners, lay carton down flat, remove and
set safely aside any packing material and/or loose
cardboard.
4. Roll or slide unit out of carton and check carton
thoroughly for loose parts.
Loose Parts In Carton
• Operator’s Manual
Tools Needed for Assembly
• None
WARNING:
To prevent serious
personal injury, do
not connect electric
extension cord to unit until fully completing
cultivator assembly
Fig. 1
ASSEMBLING CULTIVATOR
Handle Set-Up
1. Loosen each hand knob found on the inside of the
upper handle (Fig. 1).
2. Gently lift and pivot the upper handle into the
operating position (Fig. 2).
3. Secure the upper handle and lower handle by
tightening the hand knobs (Fig. 2). Each carriage
bolt must be seated properly into the square hole
found in the plastic connector.
2
1
Fig. 2
8
ASSEMBLY INSTRUCTIONS
Using the Cord Retainer
An extension cord retainer is suspended on the cord
guide bar found on the upper handle.
NOTE: Do not plug your extension cord into the power
source receptable (outlet) prior to routing it
through the cord retainer and connecting the
extension cord to the cultivator's cord outlet
receptacle.
To properly route your extension cord through the cord
retainer:
1. Approximately eight inches from its end, crease your
extension cord to form a tight loop.
2. Push the loop through the bottom hole in the cord
retainer (Fig. 3).
3. Position the loop over the clip found on the cord
retainer and pull down until the cord fits snugly into
the clip (Fig. 4).
NOTE: Use a UL-approved extension cord. A 100-foot,
14-gauge cord is recommended. A 50-foot, 16gauge cord is acceptable. Refer to the small chart
found on Page 3.
Fig. 3
The cord retainer and the guide bar work together to
secure your extension cord and safely limit its movement.
The cord retainer (with the extension cord) will slide along
the guide bar as the cultivator is moved to the left or to
the right (Fig. 5).
Fig. 4
Fig. 5
9
STARTING/STOPPING INSTRUCTIONS
STARTING INSTRUCTIONS
Avoid accidental
starting. Make
sure you are in the
operating position behind the cultivator
when using it. To avoid serious injury, the
operator and unit should be in a stable
position while starting.
WARNING:
2
1
Connecting to an Electrical Power Source
NOTE: Connect your extension cord to the cultivator as
instructed on the previous page prior to plugging
your extension cord into an electrical outlet.
Overload
Protection Switch
1. Plug your extension cord into any convenient (indoor
or outdoor) 120-volt, 60-cycle AC grounded outlet or
receptacle. Your cultivator will operate satisfactorily
on a circuit with a 15 ampere breaker.
NOTE: To avoid tripping circuit breakers, select an outlet
on a circuit that is not overloaded. Do NOT select
an outlet that is on a circuit hosting appliances
such as a refrigerator.
2. Stand behind the cultivator, in the operating position.
3. Pivot the cultivator slightly toward the rear, so that
its weight is resting on the wheels and the tines are
NOT in contact with the ground
4. Depress the (red) starter button and hold it in (Fig. 6).
NOTE: Starting the cultivator's motor also starts tilling
action.
Fig. 6
5. While holding the starter button in, pivot the bail
upward against the handle (Fig. 6) to start the motor
and engage the tines.
NOTE: The cultivator's motor will NOT start if you fail to
hold the starter button in while pivoting the bail
upward.
6. Release the (red) starter button and grasp the handle
and bail together with both hands (Fig. 7).
STOPPING INSTRUCTIONS
1. Release the bail.
2. The starter button will pop out, the bail will pivot
downward and the motor will stop.
OVERLOAD PROTECTION SWITCH
This cultivator is equipped with an overload protection
switch to prevent overheating damage to the motor.
If the overload protection switch pops out:
1. Release the bail and do NOT re-start the cultivator
for at least one minute, allowing for the electric motor
time to cool.
Fig. 7
2. Press the overload protection switch inward to reset.
2. Press the overload protection switch inward
to reset (Fig. 6).
If the overload protection switch pops out shortly after
resetting:
1. Release the bail and do NOT re-start the cultivator for
at least 15 minutes to allow the electric motor extra
time to cool.
3. Restart unit.
NOTE: If the overload protection switch pops out
repeatedly during operation or will not remain
in when attempting to reset, contact your Sears
Parts and Repair Center to arrange for repair.
10
OPERATING INSTRUCTIONS
ADJUSTING THE WHEEL SUPPORT
BRACKET
USING YOUR CULTIVATOR
Never pick up
or carry the unit
while the engine is
running. Serious personal injury could result.
WARNING:
Avoid accidental
starting. Stop motor
and disconnect
extension cord prior to adjusting the wheel
support bracket.
WARNING:
1. Move the cultivator to the work area prior to starting
the motor. Transport the cultivator by pushing or
pulling it along on its wheels. Or you may choose to
carry the cultivator by its front handle.
To adjust the wheel support bracket proceed as follows:
1. Remove cotter pin from the clevis pin and slide pin
out of tailpiece bracket (Fig. 8).
2. Start the cultivator following all steps under
STARTING INSTRUCTIONS on the previous page.
3. With both hands on the upper handle, slowly pivot
the cultivator forward until the tines make contact
with the soil.
Avoid risk of injury.
Keep the extension
cord clear of the
tilling path at all times. Do not allow the tines
to contact the extension cord.
WARNING:
4. Once the tines are in the ground, cultivate at a
moderate pace until you are familiar with the controls
and the handling of the cultivator.
NOTE: Be aware of the extension cord's location at
all times. Never allow the cultivator's tines to
come into contact with the extension cord while
operating.
5. To adjust the cultivating depth, adjust the wheel
support bracket. See Adjusting The Wheel Support
Bracket.
NOTE: For cultivation, a two to three inch depth is
desirable. When laying out plant rows, be sure to
allow enough width to permit cultivation between
the rows.
Fig. 8
2. Slide the wheel support bracket up or down in the
tailpiece, aligning the holes to the desired height.
3. Place the clevis pin through the hole and secure with
a cotter pin.
11
MAINTENANCE AND REPAIR INSTRUCTIONS
WARNING:
To prevent serious
injury, never perform
maintenance or
repairs with unit running. Always service and
repair a cool unit.
WARNING:
Do not wash
cultivator with a
hose. Avoid getting
water on motor and electrical connections.
2. Carefully remove each tine assembly from the tine
shafts.
Avoid accidental
starting. Stop motor
and disconnect
extension cord prior to performing any
maintenance or repairs.
WARNING:
3. Wipe each tine shaft clean with a damp cloth and
apply a light coat of oil (i.e. 3-N-One) or silicon-based
lubricant to each shaft. Do NOT use WD-40.
4. Rinse each tine assembly with water and thoroughly
dry each it before placing on tine shaft.
Removing and Replacing Tines
5. Re-insert each click pin to secure the tine assemblies
in place.
Cultivator tines are subject to wear and should be
replaced if any signs of damage are present.
Tines should also be removed and cleaned after each
use.
Tips for Replacing Tines
• Each tine shaft holds one tine assembly stamped "A"
and one tine assembly stamped "B".
WARNING:
Cultivator tines are
sharp. Always wear
leather gloves to
protect your hands when handling tines.
• The bell sides of both tine assemblies (on each shaft)
should face each other (Fig. 9).
• The hub of each tine assembly (Fig. 9) should face
outward (away from the cultivator's gearbox).
To replace the cultivator's tines:
1. Remove the click pin found at the end of each tine
shaft.
NOTE: Each tine assembly is stamped either "A" or "B"
(Fig. 9). Note each tine's location on the shaft for
easier reassembly
Click Pin
Gearbox
Hubs
Bell Side of Tines
Fig. 9
12
TROUBLESHOOTING
MOTOR WILL NOT START
CAUSE
ACTION
1. Unit is unplugged
1. Make sure that extension cord is securely plugged
into cultivator's cord outlet receptacle on one end
and a 110V outlet on the opposite end.
2. Starter button or bail improperly used
2. Press starter button and hold it in while squeezing
bail against the handle.
3. Overload protection switch has popped out
3. Depress overload protection switch. Follow starting
instructions.
NOTE: For repairs beyond the minor adjustments listed above, contact your nearest Sears Parts &
Repair center (1-800-4-MY-HOME®) or other qualified service dealer for an adjustment.
SPECIFICATIONS
MOTOR
Engine Type ..........................................................................................................................................AC 120 Volts Electric
Operating RPM ............................................................................................................................................ up to 8,000 rpm
Ignition Switch ................................................................................................................................. Bail Lock Safety Button
Amperage ...............................................................................................................................................................6.5 Amps
Overload Protection ............................................................................................................................ 120 V 5 amp Breaker
CULTIVATOR*
Drive Shaft Tube ................................................................................................................................................... Steel Tube
Handle .................................................................................................................................................................. Steel Tube
Cultivating Path Width (Maximum) .........................................................................................................9 inches (22.86 cm)
Cultivating Depth (Maximum) .................................................................................................................6 inches (15.24 cm)
Approximate Weight .................................................................................................................................... 27 lb. (12.25 kg)
*All specifications are based on the latest product information available at the time of printing. We reserve the right to
make changes at any time without notice.
13
PARTS LIST
MODEL 316-29260
ELECTRIC CULTIVATOR
2
39
1
38
5
32
13
40
11
34
37
14
8
30
36
42
34
36
41
15
9
35
3
10
17
4
33
7
12
29
16
20
25
46
19
6
27
48
26
27
31
47
45
43
23
44
24
50
18
22
21
28
14
49
PARTS LIST
MODEL 316-29260
ELECTRIC CULTIVATOR
Item
1
2
3
4
5
6
7
8
9
10
11
12
13
14
15
16
17
18
19
20
21
22
23
24
25
26
27
28
29
30
31
32
33
34
35
36
37
38
39
40
41
42
43
44
45
46
47
48
49
50
Part No.
Description
625-04027
710-04213
710-0572
710-0805
712-0324
712-04063
720-04052
726-0368
731-05178
731-05186
731-1820
736-0451
747-04375
747-04376A
749-04210
749-1295A
10055-20
11A6798
4150
4278
686-0176
686-0177
686-0178
686-0179
710-0597
4543
712-04064
714-0220
750-04441
731-04321
786-04000
1625
1A2679
1948
50004
50545
624-04008
1926
731-05207
731-05208
748-04085
786-04268
686-0181
686-0182A
710-04468
711-0993
711-1017
714-0104
726-0299
734-1988
Switch Assembly
Screw, T27, 1/4-20, 1.75”
Bolt, Carriage, 5/16-18, 2.50, Gr1
Hex Screw, 5/16-18, 1.50, Gr5
Nut, Hex Lock, 1/4-20, Gr8, Nylon
Nut, Flange Lock, 5/16-18, GrF, Nylon
Knob, Nut, 5/16-18
Cord Retainer
Insulator, Upper Handle
Insulator, Lower Handle
Guide Cable
Washer, Saddle, 320 x .93 x .060
Control Bail
Guide Rod
Handle, Upper
Handle, Lower
Flex Shaft, 4.5”
Gearbox
Washer, Flat
Sleeve
Tine Assembly, Outer
Tine Assembly, Inner
Tine Assembly, Outer
Tine Assembly, Inner
Hex Screw, 1/4-20, 1.00, Gr5
Bolt, Hex Washer 1/4-20 x .50
Nut, Flange Lock, 1/4-20, GrF, Nylon
Lynch Pin, .1875
Tube, .922 x 1.0 x 3.0
Bushing, Cord
Tine Shield
Washer, Lock, #10
Tube w/ Spacers
Screw, .750
Fan
Motor Pad, 1”
Motor Assembly, 120 V
Screw, #8-32 x .312
Motor Cover, Front
Motor Cover, Rear
Motor Hub
Motor Strap
Bracket Assembly, Tail Piece
Support Bracket Assembly, Wheel
Hex Flange Screw, 1/4-20, .50, Gr5
Belt Guard Pin 1/4 Dia. x 1.43
Clevis Pin, .250 x 1.53
Cotter Pin, .072 Dia. x 1.13
Push Cap, 1/2”
Wheel, 7 x 1.8 Spoke Bar Gray
15
Repair Protection Agreements
Congratulations on making a smart purchase.
Your new Craftsman® product is designed and
manufactured for years of dependable operation. But like all products, it may require repair
from time to time. That’s when having a Repair
Protection Agreement can save you money and
aggravation.
Purchase a Repair Protection Agreement now
and protect yourself from unexpected hassle
and expense.
Here’s what’s included in the Agreement:
� Expert service by our 12,000 professional
repair specialists
� Unlimited service and no charge for parts
and labor on all covered repairs
� Product replacement if your covered product can’t be fixed
� Discount of 10% from regular price of
service and service-related parts not covered by the agreement; also, 10% off regular
price of preventive maintenance check
� Fast help by phone – phone support from a
Sears technician on products requiring in-home
repair, plus convenient repair scheduling
Once you purchase the Agreement, a simple
phone call is all that it takes for you to schedule
service. You can call anytime day or night, or
schedule a service appointment online.
Sears has over 12,000 professional repair specialists, who have access to over 4.5 million
quality parts and accessories. That’s the kind of
professionalism you can count on to help prolong the life of your new purchase for years to
come. Purchase your Repair Protection Agreement today!
Some limitations and exclusions apply.
For prices and additional information call
1-800-827-6655.
Sears Installation Service
For Sears professional installation of home
appliances, garage door openers, water heaters,
and other major home items, in the U.S.A. call
1-800-4-MY-HOME®
16
17
18
19
Get it fixed, at your home or ours!
Your Home
For repair – in your home – of all major brand appliances,
lawn and garden equipment, or heating and cooling systems,
no matter who made it, no matter who sold it!
For the replacement parts, accessories and
owner’s manuals that you need to do-it-yourself.
For Sears professional installation of home appliances
and items like garage door openers and water heaters.
1-800-4-MY-HOME®
(1-800-469-4663)
Call anytime, day or night (U.S.A. and Canada)
www.sears.com
www.sears.ca
Our Home
For repair of carry-in items like vacuums, lawn equipment,
and electronics, call or go on-line for the location of your nearest
Sears Parts & Repair Center.
1-800-488-1222
Call anytime, day or night (U.S.A. only)
www.sears.com
To purchase a protection agreement (U.S.A.)
or maintenance agreement (Canada) on a product serviced by Sears:
1-800-827-6655 (U.S.A.)
Para pedir servicio de reparación
a domicilio, y para ordenar piezas:
1-888-SU-HOGAR
SM
(1-888-784-6427)
1-800-361-6665 (Canada)
Au Canada pour service en français:
1-800-LE-FOYERMC
(1-800-533-6937)
www.sears.ca
® Registered Trademark / TM Trademark / SM Service Mark of Sears, Roebuck and Co.
® Marca Registrada / TM Marca de Fábrica / SM Marca de Servicio de Sears, Roebuck and Co.
MC
Marque de commerce / MD Marque déposée de Sears, Roebuck and Co.
© Sears, Roebuck and Co.